manuals.online logo
Brands
  1. Home
  2. •
  3. Brands
  4. •
  5. Bristan
  6. •
  7. Plumbing Product
  8. •
  9. Bristan Prism Eco Click User manual

Bristan Prism Eco Click User manual

AFTERCARE INSTRUCTIONS
Your fitting has a high quality finish and should be treated with care to preserve
the visible surfaces. All surface finishes will wear if not cleaned correctly, the
only safe way to clean your mixer is to wipe with a soft damp cloth. Stains can
be removed using washing up liquid. All bath cleaning powders and liquids will
damage the surface of your fitting -even non-scratch cleaners.
GUARANTEE
All products are manufactured to the highest standards and a 5 year guarantee
covers any defect in manufacture.
NOTE: The 5-year guarantee on the valves is invalidated if damaged by any
waterborne debris.
In the interests of continuous product development we reserve the right to alter
specification as necessary.
PRODUCT NAME: PM EBAS C
TELEPHONE HELP LINE:0870 4425553
Bristan Group Ltd
Birch Coppice Business Park
Dordon
Tamworth
Staffordshire
B781SG
UK
A Masco company
Web Site: www.bristan.com
Telephone: 0870 4425556
Facsimile: 0808 1611002
Email: [email protected]
(FI PM EBAS) (Rev. D1) (MZ)
Prism Eco Click
Basin Mixer
Fitting Instructions
& Contents List
Please keep these instructions for future reference
and for the request of spare parts.
For latest prices and delivery to your door visit MyTub Ltd 0845 303 8383 www.mytub.co.uk
1
2
3
4
5
6
7
8
9
11
12
13
16
14 15
10
17
19 18
WATER PRESSURE
This mixer is suitable for use at all supply pressures. However for optimum use
both the hot and cold supplies should be reasonably balanced. If the fitting is
installed at low pressure (tank fed), then the minimum distance from the outlet of
the nozzle to the underside of the cold tank should be 2.0metres to ensure
adequate performance.
This mixer should be installed in compliance with Water Regulations. Where the
supplies are unbalanced, i.e. hot water from the cylinder tank /cold from the
mains, approved check valves must be fitted in the supply pipes. For further
details contact your Local Water Authority.
20
Please Note:
In the unlikely event you find a part missing please contact our customer service
helpline on 08704425553 for immediate dispatch of part.
INSTALLATION
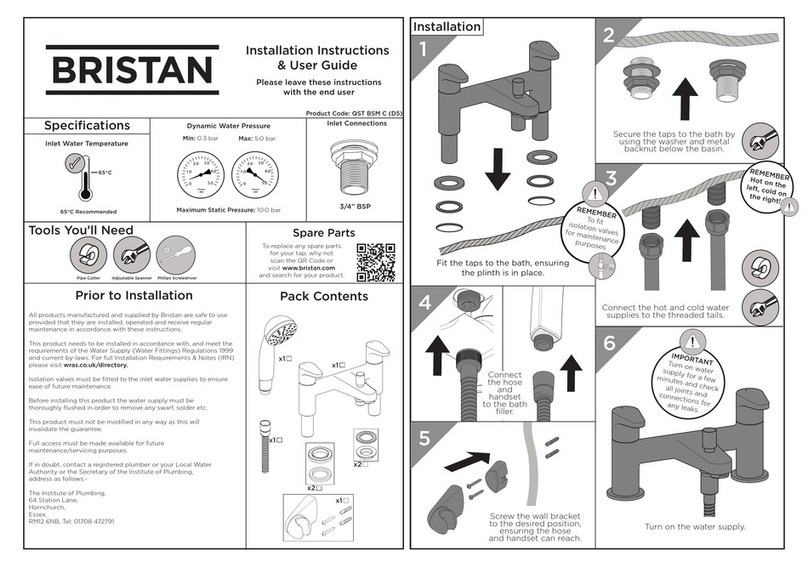
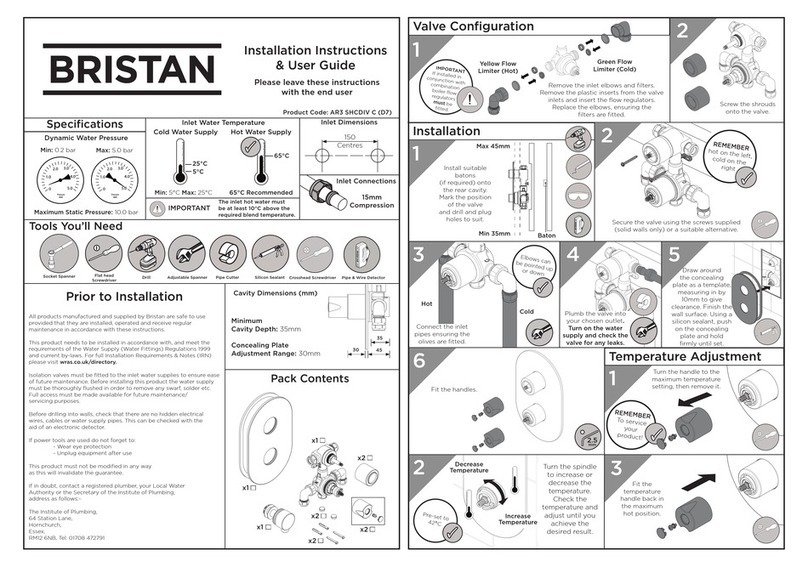
1. Identify all components and check for completeness, particularly before
arranging fitting.
2. Fit the mixer body (4) to the basin/bidet using the 'C' plate fixing kit (6 &16).
The full rubber washer (5) goes between the fitting and the basin, the 'C' shaped
rubber (16) and metal washer (6) on the underside of the basin/bidet. Use the
threaded rods (7) and nuts(14) to secure to basin.
3. Fit the tail pipes (20) to the fitting and connect the hot and cold supplies.
4. Fit the pop up waste, and connect it to the mixer using washer (12) and the
top of the waste (13) above the basin, and washer (11) and bottom of waste (10)
on the underside. It is recommended that silicon sealant be applied to both
sealing faces of washers (11 and 12). The waste can be set by adjusting the
waste rod (9) / operating rod (8) connecting bracket and adjusting screw in the
base of the plug (15).
5. Fully open the mixer in the mid position, letting it run for a few minutes to
check all joints and connections for leaks.
6. See over the page for aftercare instructions.
ECO CLICK An innovative water saving feature that offers a subtle
resistance as it reaches approximately half of its full flow
capability. For increased flow this feature can be overridden.
At full flow the eco click cartridge uses 32% less water than
astandard cartridge and when in eco click mode the
reduction increases to 72%.
If the fitting begins to drip:
1. Turn off the water supply.
2. Unscrew handle lever (18), loosen grub screw (19) with a hexagon key and
pull off head (1).
3. Remove cartridge (17).
4. Clean or replace cartridge, clean and grease seal and refit. Note: There are
locating pins on the bottom of the cartridge that fit in holes inside the tap, to
ensure it is fitted the right way round.
5. Replace cartridge and head and turn on the water supply.
CONTENTS
1. Head (x1)
2. Shroud (x1)
3. Retaining Nut (x1)
4. Mixer Body (x1)
5. Full Rubber Washer(x1)
6. Metal ‘C’ Washer (x1)
7. Threaded Rods (x2)
8. Operating Rod (x1)
9. Waste Rod (x1)
10. Bottom Waste (x1)
11. Washer (x1)
12. Washer (x1)
13. Top Waste (x1)
14. Nuts(x2)
15. Plug (x1)
16. Rubber ‘C’ washer(x1)
17. Cartridge (x1)
18. Lever (x1)
19. Grub Screw (x1)
20. Tail pipes (x2)
For latest prices and delivery to your door visit MyTub Ltd 0845 303 8383 www.mytub.co.uk

Other Bristan Plumbing Product manuals

Bristan IRBS4-CP Mounting instructions

Bristan

Bristan IRBS4-CP Mounting instructions

Bristan W BASIN01 C Wiring diagram

Bristan

Bristan W BASIN01 C Wiring diagram

Bristan SQR KIT01 BLK D2 Wiring diagram

Bristan

Bristan SQR KIT01 BLK D2 Wiring diagram

Bristan Pisa PS2 BAS C Wiring diagram

Bristan

Bristan Pisa PS2 BAS C Wiring diagram

Bristan PS2 BAS C D2 Wiring diagram

Bristan

Bristan PS2 BAS C D2 Wiring diagram

Bristan Descent DSC BAS C Mounting instructions

Bristan

Bristan Descent DSC BAS C Mounting instructions

Bristan Z2 DUS 1/2 C Wiring diagram

Bristan

Bristan Z2 DUS 1/2 C Wiring diagram

Bristan W BASIN13 C Wiring diagram

Bristan

Bristan W BASIN13 C Wiring diagram

Bristan Quadrato Tap Range Wiring diagram

Bristan

Bristan Quadrato Tap Range Wiring diagram

Bristan ALP Series Wiring diagram

Bristan

Bristan ALP Series Wiring diagram

Bristan Quest Deck Sink Mixer Wiring diagram

Bristan

Bristan Quest Deck Sink Mixer Wiring diagram

Bristan W BASIN14 C Wiring diagram

Bristan

Bristan W BASIN14 C Wiring diagram

Bristan WMNT12 Mounting instructions

Bristan

Bristan WMNT12 Mounting instructions

Bristan PIV BSM C User manual

Bristan

Bristan PIV BSM C User manual

Bristan H64WMT2 Mounting instructions

Bristan

Bristan H64WMT2 Mounting instructions

Bristan Opac Series Mounting instructions

Bristan

Bristan Opac Series Mounting instructions

Bristan AR3 SHCDIV C Wiring diagram

Bristan

Bristan AR3 SHCDIV C Wiring diagram
Bristan K SNKSL EF C User manual

Bristan

Bristan K SNKSL EF C User manual

Bristan AR2 SHXVOFF Wiring diagram

Bristan

Bristan AR2 SHXVOFF Wiring diagram

Bristan SOQ2 SHUAR C Mounting instructions

Bristan

Bristan SOQ2 SHUAR C Mounting instructions

Bristan Mios MIO BSM C Wiring diagram

Bristan

Bristan Mios MIO BSM C Wiring diagram

Bristan CR SHXDIVFF C Mounting instructions

Bristan

Bristan CR SHXDIVFF C Mounting instructions

Bristan Body Jet JET2 C User manual

Bristan

Bristan Body Jet JET2 C User manual

Bristan Pear Wiring diagram

Bristan

Bristan Pear Wiring diagram

Popular Plumbing Product manuals by other brands

Hansa POLO 5140 2373 Mounting and operating instructions

Hansa

Hansa POLO 5140 2373 Mounting and operating instructions

Dallmer CeraWall Select N manual

Dallmer

Dallmer CeraWall Select N manual

Danze D226058 manual

Danze

Danze D226058 manual

Thetford SmartTote owner's manual

Thetford

Thetford SmartTote owner's manual

Gessi MIMI 31232 manual

Gessi

Gessi MIMI 31232 manual

agape MEMORY MIX EMIX436D Assembly instructions

agape

agape MEMORY MIX EMIX436D Assembly instructions

KWC FIT-AIR Z.504.020.000 Specification sheet

KWC

KWC FIT-AIR Z.504.020.000 Specification sheet

BENKISER 880 Installation and service

BENKISER

BENKISER 880 Installation and service

American Standard Twin Ell 8888.120 Specification sheet

American Standard

American Standard Twin Ell 8888.120 Specification sheet

Karibu 330 Assembly instructions

Karibu

Karibu 330 Assembly instructions

BELLOSTA b-uno 7901/A Installation instruction

BELLOSTA

BELLOSTA b-uno 7901/A Installation instruction

Helvex RM-24 2-08-0902-5050 RM-26 2-08-0904-5050 installation guide

Helvex

Helvex RM-24 2-08-0902-5050 RM-26 2-08-0904-5050 installation guide

Hans Grohe Logis E 71403000 Assembly instructions

Hans Grohe

Hans Grohe Logis E 71403000 Assembly instructions

Pfister Privé F-534-7PV Quick installation guide

Pfister

Pfister Privé F-534-7PV Quick installation guide

Bradley EXPRESS MG-EXT installation instructions

Bradley

Bradley EXPRESS MG-EXT installation instructions

Tramontina Angolare Export 94520/022 Guide

Tramontina

Tramontina Angolare Export 94520/022 Guide

Hans Grohe M415-H160 Series Instructions for use/assembly instructions

Hans Grohe

Hans Grohe M415-H160 Series Instructions for use/assembly instructions

Omnires Y1233GR Installation and Maintenance

Omnires

Omnires Y1233GR Installation and Maintenance

manuals.online logo
manuals.online logoBrands
  • About & Mission
  • Contact us
  • Privacy Policy
  • Terms and Conditions

Copyright 2025 Manuals.Online. All Rights Reserved.