manuals.online logo
Brands
  1. Home
  2. •
  3. Brands
  4. •
  5. Bticino
  6. •
  7. Intercom System
  8. •
  9. Bticino 342981 User manual

Bticino 342981 User manual

PART. U0998C 02/09-01 PC
1
342981
342982
342991
342992
32
5
6
7
Istruzioni d’uso
Gebrauchsanweisungen
Notice d’emploi
Instruction sheet
Instrucciones de uso
Gebruiksaanwijzing
Instruções para o uso
Odhgìez Xrçshz
Инструкции по
эксплуатации
Kullanim bilgileri
Instrukcja obsługi
cm
160 ÷ 165
35
185
106
35
185
106
max 5mm
4
°
°
°
°
45
2
1
3
Retrouvez tous les produits du fabricant Bticino sur notre site internet www.confort-electrique.fr
Téléchargé sur www.confort-electrique.fr
8
9
*
- Prima dell’installazione assicurarsi che la vite sia completamente avvitata.
- Vor der Installation sicherstellen, dass die Schraube richtig festgeschraubt ist.
- Avant l’installation, s’assurer que la vis soit complètement vissée.
- Before installing make sure that the screw is completely tightened.
- Antes de la instalación, compruebe que el tornillo esté completamente
enroscado.
- Vóór de installatie controleren of de schroef volledig vastgedraaid is.
- Antes da instalação verificar se o parafuso está completamente atarraxado.
- Πριν την εγκατάσταση βεβαιωθείτε ότι η βίδα έχει βιδωθεί εντελώς.
- Перед установкой убедиться в полной затяжке винта
- Montajdan önce vidanın tamamen sıkıştırılmış olduğundan emin olun.
- Przed zainstalowaniem upewnić się, czy śruba jest całkowicie dokręcona.
- Premere con forza
- Fest drücken
- Appuyer avec force
- Press hard
- Presione con fuerza
- Met kracht duwen
- Carregar com força
- Πιέστε με δύναμη
- Сильно нажать
- Kuvvetle bastırın
- Mocno docisnąć
6
5÷10mm
3
1
2
4
5
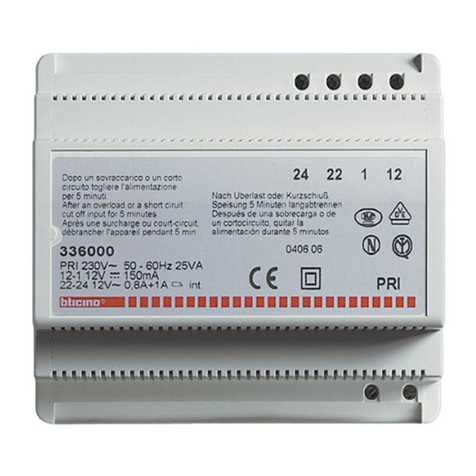
S+S- = 18V - 4A impulsivi - 250mA mantenimento (30Ω max)
S+S- = 18V - 4A impulsstrom - 250mA Haltestrom (30Ω max)
S+S- = 18V - 4A impulsifs - 250mA entretien (30Ω max)
S+S- = 18V - 4A impulsive - 250mA holding current (30Ω max)
S+S- = 18V - 4A impulsivos - 250mA mantenimiento (30Ω max)
S+S- = 18V - 4A impulsief - 250mA onderhoud (30Ω max)
S+S- = 18V - 4A instantâneos - 250mA continuos (30W max)
S+S- = 18V - 4A παλμικά - 250mA διατήρησης (30Ω max)
S+S- = 18В – 4А импульсные – 250мА поддержание (30Ω макс.)
S+S- = 18V - 4A empülsiyonlu - 250mA muhafaza (30Ω max)
S+S- = 18V - 4A pulsacyjnie - 250mA podtrzymanie (30Ω maks.)
10
BUS SCS
PL
S+
S- A
PNTS
- Pulsante apertura serratura
- Schalter Türöffner
- Poussoir d’ouverture serrure
- Door lock pushbutton
- Pulsador apertura cerradura
- Drukknop opening
- Botão para abertura do trinco
- Πλήκτρο ανοίγματος κλειδαριάς
- Кнопка открытия замка
- Kilit açma butonu
- Przycisk otwarcia zamka
A=
-.
-
-
S+S-=18–4–250-)30Ω(
Retrouvez tous les produits du fabricant Bticino sur notre site internet www.confort-electrique.fr
Téléchargé sur www.confort-electrique.fr
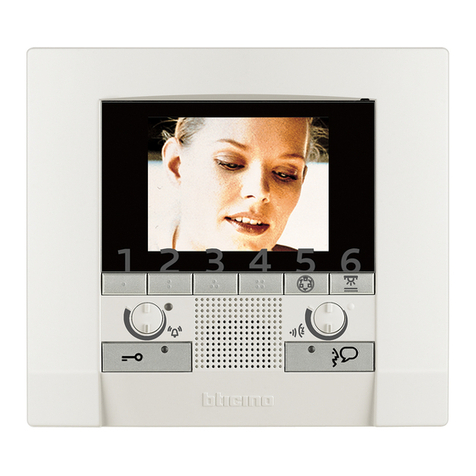
1 - Regolazione volume altoparlante
2 - Regolazione sensibilità microfono
3 - Abilitazione/disabilitazione tono
conferma apertura serratura
4 - Led lampeggiante Verde:
chiamata inoltrata
Led lampeggiante Rosso:
sistema occupato
5 - Led verde: comunicazione attiva
6 - Led verde: indicazione porta aperta
IT
ON OFF
1
2
6
5
4
3
1 - Lautstärkenregelung für Lautsprecher
2 - Empfindlichkeitsregelung für Mikrophon
3 - Aktivierung/Deaktivierung des
Bestätigungssignals nach erfolgter
Türöffnung
4 - Grüne blinkende Led: Ruf gesendet
Rote blinkende Led: System belegt
5 - Grüne Led: Kommunikation aktiv
6 - Grüne Led: Meldet offene Tür
DE 1 - Réglage volume haut-parleur
2 - Réglage sensibilité micro
3 - Activation/désactivation tonalité de
confirmation ouverture serrure
4 - Témoin clignotant vert - appel passé
Témoin clignotant rouge: système
occupé
5 - Diode verte: communication active
6 - Diode verte: indication porte ouverte
FR
1 - Hoparlör ses ayarı
2 - Mikrofon hassasiyet ayarı
3 - Kilit açma onay tonu etkin/etkisiz kılma
4 - Yeşil yanıp sönen led: Arama yapılıyor
Kırmızı yanıp sönen led: Sistem meşgul
5 - Yeşil led: İletişim etkin
6 - Yeşil led: Açık kapı sinyali
TR 1 - Regulacja głośności głośnika
2 - Regulacja czułości mikrofonu
3 - Aktywacja/dezaktywacja tonu potwierdzenia
otwarcia drzwi
4 - Zielona dioda led migająca: wywołanie
przekazane
Czerwona dioda led migająca: system zajęty
5 - Dioda LED zielona: komunikacja aktywna
6 - Dioda LED zielona: wskazanie otwartych
drzwi
PL
PT 1 - Ρύθμιση έντασης μεγαφώνου
2 - Ρύθμιση ευαισθησίας μικροφώνου
3 - Ενεργοποίηση/απενεργοποίηση τόνου
επιβεβαίωσης ανοίγματος κλειδαριάς
4 - Πράσινο led που αναβοσβήνει:
μεταγωγή κλήσης
Κόκκινο led που αναβοσβήνει: σύστημα
κατειλημμένο
5 - Πράσινο led: επικοινωνία ενεργή
6 - Πράσινο led: ένδειξη ανοιχτής πόρτας
EL
1 -
Регулирование громкости громкоговорителя
2 - Регулирование чувствительности икрофона
3 - Включение/отключение тона
подтверждения открытия замка
4 - Мигание зеленого светодиода: звонок
отправлен
Мигание красного светодиода: система
занята
5 - Зеленый светодиод: связь включена
6 - Зеленый светодиод: индикация открытой
двери
RU
1 - Loudspeaker volume adjustment
2 - Microphone sensitivity adjustment
3 - Enabling/disabling of door lock
opening confirmation tone
4 - Green flashing LED; call forwarded
Red flashing LED: system busy
5 - Green LED: communication active
6 - Green LED: door open indication
UK 1 - Ajuste volumen altavoz
2 - Ajuste sensibilidad micrófono
3 - Habilitación/deshabilitación del tono de
confirmación de apertura de la cerradura
4 - Led parpadenate Verde: llamada enviada
Led parpadenate Rojo: sistema ocupado
5 - Led verde: comunicación activada
6 - Led verde: indicación puerta abierta
ES 1 - Volumeregeling luidspreker
2 - Gevoeligheidsregeling microfoon
3 - Activering/desactivering toon bevestiging
opening slot
4 -
Groene knipperende led: oproep doorgestuurd
Rode knipperende led: systeem bezet
5 - Groene led: communicatie actief
6 - Groene led: aanduiding open deur
NL
1 - Regulação do volume alto-falante
2 - Regulação da sensibilidade do microfone
3 - Activação/desactivação do sinal de
confirmação da abertura da fechadura
4 - Indicador luminoso lampejante Verde:
chamada enviada
Indicador luminoso lampejante Vermelho:
sistema ocupado
5 - Indicadores luminosos verde: comunicação
activa
6 - Indicadores luminosos verde: indicação de
porta aberta
11
/
:
:
:
:
- 1
- 2
- 3
- 4
- 5
- 6
Retrouvez tous les produits du fabricant Bticino sur notre site internet www.confort-electrique.fr
Téléchargé sur www.confort-electrique.fr
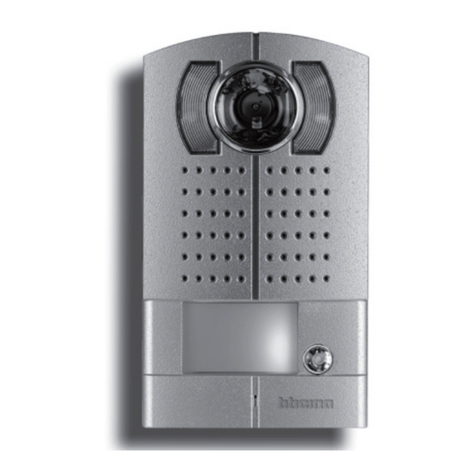
- La telecamera non deve essere installata di fronte a grandi sorgenti luminose, oppure in luoghi dove il soggetto ripreso rimanga molto in controluce. Per
risolvere i problemi precedentemente descritti si consiglia di variare l’altezza di installazione della telecamera, solitamente 160-165 cm, ad un’altezza di
180 cm e di orientare l’obiettivo verso il basso in modo da migliorare la qualità delle riprese.
- Nota: Le telecamere con sensore CMOS a colori presentano, in condizioni di scarsa luminosità, una sensibilità inferiore rispetto alle telecamere in bianco/
nero. Si consiglia pertanto, in ambienti poco illuminati di prevedere una fonte di illuminazione aggiuntiva.
IT
- Die Kamera darf nicht vor starken Lichtquellen oder an Orten installiert werden, wo das Subjekt sich im Gegenlicht befindet. Um die zuvor erwähnten
Probleme zu lösen, empfehlen wir die Installationshöhe der Kamera zu ändern, d.h. sie anstatt auf 160-165 cm Höhe, auf 180 cm Höhe zu installieren
und das Objektiv nach unten zu orientieren, um die Aufnahmequalität zu verbessern.
- Bemerkung: Farbkameras mit CMOS-Aufnahmeelement besitzen bei schlechter Beleuchtung eine geringere Empfindlichkeit als Schwarz/Weiß Kameras.
Wir empfehlen daher eine zusätzliche Beleuchtungsquelle vorzusehen.
DE
- La télécaméra ne doit pas être installée en face de fortes sources lumineuses, ou bien dans des endroits où le sujet pris reste très à contre-jour. Pour
résoudre les problèmes précédemment décrits, il est conseillé de porter la hauteur d’installation de la télécaméra, normalement 160-165 cm, à une
hauteur de 180 cm et d’orienter l’objectif vers le bas de façon à améliorer la qualité des prises de vue.
- Nota: les télécaméras avec capteur CMOS couleurs présentent, dans des conditions de faible luminosité, une sensibilité inférieure aux télécaméras noir/
blanc. Il est donc conseillé, dans des milieux peu éclairés, de prévoir une source de lumière supplémentaire.
FR
- The camera must not be installed in front of large light sources, or in places where the subject viewed remains in deep shadow. To solve the problems
described above change the height at which the camera is installed, normally 160 to 165 cm, to a height of 180 cm, and face the lens downwards to
improve the quality of the views.
- Note: in poor lighting conditions cameras with colour CMOS detector are less sensitive than black/white cameras. An extra lighting source should be
added in poorly lit rooms.
UK
- La telecámara no debe ser instalada delante de fuentes luminosas grande en lugares en donde el individuo filmado se encuentre demasiado en contraluz.
Para solucionar los problemas descritos antes, es aconsejable modificar la altura de instalación de la telecamera, de 160-165 cm a 180 cm y enfocar el
objetivo hacia abajo para optimizar la calidad de la filmación.
- Nota: las telecámaras con sensor CMOS en colores presentan, en condiciones de escasa luminosidad, una sensibilidad inferior respecto a las telecámaras
en blanco/negro. Por lo tanto es aconsejable en ambientes escasamente iluminados prever una fuente de iluminación extra.
ES
- Installeer de camera niet tegenover grote lichtbronnen of op plaatsen waar de opname van het onderwerp door sterk tegenlicht wordt gestoord.
Voorgaande problemen zijn op te lossen door de camera op een hoogte van 180 cm te installeren (in plaats van 160-165 cm) en het objectief omlaag
te richten zodat de kwaliteit van de opnames beter zal zijn.
- Opmerking: camera’s met kleuren-CMOS-sensor zijn bij een zwakke verlichting minder gevoelig dan zwart-wit camera’s. Daarom is het raadzaam om
zwak verlichte omgevingen van extra verlichting te voorzien.
NL
- A câmara não deve ser montada diante de fortes fontes de luz, ou então em lugares onde o elemento que deve ser filmado fique muito em contraluz.
Para resolver os problemas supramencionados recomenda-se variar a altura da instalação da câmara, que habitualmente é de 160-165 cm, para uma
altura de 180 cm e orientar a objectiva para baixo a fim de melhorar a qualidade das filmagens.
- Nota: as câmaras com sensor CMOS em cores apresentam, quando há pouca luminosidade, uma sensibilidade inferior em relação às câmaras em branco
e preto. Portanto, recomenda-se, quando os ambientes forem pouco iluminados providenciar uma fonte de iluminação adicional.
PT
- Η κάμερα δεν πρέπει να εγκαθίσταται απέναντι από μεγάλες φωτεινές πηγές, ή σε χώρους όπου η λήψη του καλούντος γίνεται κόντρα στο φως.
Για την επίλυση των προηγούμενα αναφερθέντων προβλημάτων συνιστάται να μεταβάλλεται το ύψος εγκατάστασης της κάμερας, συνήθως 160-165 εκ,
σε ένα ύψος180 εκ και να προσανατολίζεται ο φακός προς τα κάτω έτσι ώστε να βελτιώνεται η ποιότητα της λήψης.
- Σημείωση: Οι κάμερες με έγχρωμο αισθητήρα CMOS παρουσιάζουν, σε συνθήκες ελλιπούς φωτεινότητας, μία χαμηλότερη ευαισθησία σε σχέση με τις
σπρόμαυρες κάμερες. Κατ’επέκταση συνιστάται, σε λίγο φωτισμένους χώρους να προβλέπεται πρόσθετη πηγή φωτισμού.
EL
-Телекамера не должна устанавливаться напротив больших источников света или в местах, где снимаемый объект находится против света.
Для решения описанных выше проблем рекомендуется изменить высоту установки телекамеры, которая, как правило, составляет 160-165 см,
на значение 180 см, и направить объектив вниз для улучшения качества съемки.
-Примечание: В условиях недостаточной освещенности цветные телекамеры с датчиком CMOS обладают более низкой чувствительностью по
сравнению с черно-белыми телекамерами. В связи с этим в слабо освещенных местах рекомендуется использовать дополнительные источники
света.
RU
-Kamera, büyük ışık kaynaklarının önüne veya kaydedilen kişinin aşırı ışığa karşı durduğu yerlere monte edilmemelidir.
Yukarıda belirtilen problemleri çözmek için kameranın genelde 160-165 cm olan montaj yüksekliğini 180 cm’lik bir yükseklik ile değiştirmeniz ve kayıt
kalitesini iyileştirecek şekilde objektifi aşağı doğru yönlendirmeniz tavsiye edilir.
-Not: CMOS sensörlü renkli kameralar, düşük ışık şartlarında siyah/beyaz kameralara göre daha az hassasiyet sunarlar. Bu nedenle, az aydınlık ortamlarda
ek bir ışık kaynağının öngörülmesi tavsiye edilir.
TR
- Kamera nie może być instalowana naprzeciwko silnych źródeł światła lub w miejscach, gdzie obserwowany obiekt pozostaje w głębokim cieniu (lub
„pod światło”). Aby temu zapobiec, można zmienić wysokość zainstalowania kamery (na przykład 180 cm zamiast zalecanych 160-165 cm) i skierować
obiektyw w dół, aby uzyskać lepszą jakość obrazu.
- Uwaga: w warunkach słabego oświetlenia kolorowe kamery CMOS są mniej czułe niż kamery czarno-białe. W miejscach i pomieszczeniach słabo
oświetlonych zalecane jest zamontowanie dodatkowego oświetlenia.
PL
-
.
160
165
180
.
-
:
CMOS
/.
.
Retrouvez tous les produits du fabricant Bticino sur notre site internet www.confort-electrique.fr
Téléchargé sur www.confort-electrique.fr

This manual suits for next models

3

Other Bticino Intercom System manuals

Bticino Axolute 349311 User manual

Bticino

Bticino Axolute 349311 User manual

Bticino 323004 User manual

Bticino

Bticino 323004 User manual

Bticino 344272 User manual

Bticino

Bticino 344272 User manual

Bticino 374006 User manual

Bticino

Bticino 374006 User manual

Bticino 323001 User manual

Bticino

Bticino 323001 User manual

Bticino Terraneo 332801 User manual

Bticino

Bticino Terraneo 332801 User manual

Bticino 344642 User manual

Bticino

Bticino 344642 User manual

Bticino 315211 Operating manual

Bticino

Bticino 315211 Operating manual

Bticino Classe 300 EOS KIT Operating manual

Bticino

Bticino Classe 300 EOS KIT Operating manual

Bticino Video Kit Operating manual

Bticino

Bticino Video Kit Operating manual

Bticino TI 369711 User manual

Bticino

Bticino TI 369711 User manual

Bticino Classe100 V16B User manual

Bticino

Bticino Classe100 V16B User manual

Bticino TERRANEO 312124 User manual

Bticino

Bticino TERRANEO 312124 User manual

Bticino 318012 User manual

Bticino

Bticino 318012 User manual

Bticino Video Kit User manual

Bticino

Bticino Video Kit User manual

Bticino IP DES 375000 Operating manual

Bticino

Bticino IP DES 375000 Operating manual

Bticino 374000 User manual

Bticino

Bticino 374000 User manual

Bticino 343081 User manual

Bticino

Bticino 343081 User manual

Bticino U1073D User manual

Bticino

Bticino U1073D User manual

Bticino Video-Kit 2 368911 User manual

Bticino

Bticino Video-Kit 2 368911 User manual

Bticino 363910 User manual

Bticino

Bticino 363910 User manual

Bticino Terraneo 344122 User manual

Bticino

Bticino Terraneo 344122 User manual

Bticino Terraneo 342620 User manual

Bticino

Bticino Terraneo 342620 User manual

Bticino 323004 User manual

Bticino

Bticino 323004 User manual

Popular Intercom System manuals by other brands

SCS Sentinel AudioKit 3208D Installation and user manual

SCS Sentinel

SCS Sentinel AudioKit 3208D Installation and user manual

Aiphone JF-DA installation manual

Aiphone

Aiphone JF-DA installation manual

Audio Authority Series 1500 Installer's reference guide

Audio Authority

Audio Authority Series 1500 Installer's reference guide

SSS Siedle BAA 650-0 Product information

SSS Siedle

SSS Siedle BAA 650-0 Product information

Aiphone IX-DVF-PR installation guide

Aiphone

Aiphone IX-DVF-PR installation guide

Aiphone NE-DA instructions

Aiphone

Aiphone NE-DA instructions

iVision wireless video Door Intercom instruction manual

iVision

iVision wireless video Door Intercom instruction manual

urmet domus 1717 manual

urmet domus

urmet domus 1717 manual

Dahua D-VTO3312Q-P quick start guide

Dahua

Dahua D-VTO3312Q-P quick start guide

Mircom RAM-216 Wiring & installation manual

Mircom

Mircom RAM-216 Wiring & installation manual

Comelit Visto ViP WiFi Technical manual

Comelit

Comelit Visto ViP WiFi Technical manual

Maple Armor FW6308-CLA1 Operating/Programming/Installation Manual

Maple Armor

Maple Armor FW6308-CLA1 Operating/Programming/Installation Manual

ASL INTERCOM PRO Series user manual

ASL INTERCOM

ASL INTERCOM PRO Series user manual

LEGRAND 369210 manual

LEGRAND

LEGRAND 369210 manual

PS Engineering PMA7000B Series System installation and operation manual

PS Engineering

PS Engineering PMA7000B Series System installation and operation manual

RTS SSA-424 User instructions

RTS

RTS SSA-424 User instructions

On-Q/Legrand IC5004 Series Instruction/installation sheet

On-Q/Legrand

On-Q/Legrand IC5004 Series Instruction/installation sheet

Alcad 980 Series manual

Alcad

Alcad 980 Series manual

manuals.online logo
manuals.online logoBrands
  • About & Mission
  • Contact us
  • Privacy Policy
  • Terms and Conditions

Copyright 2025 Manuals.Online. All Rights Reserved.