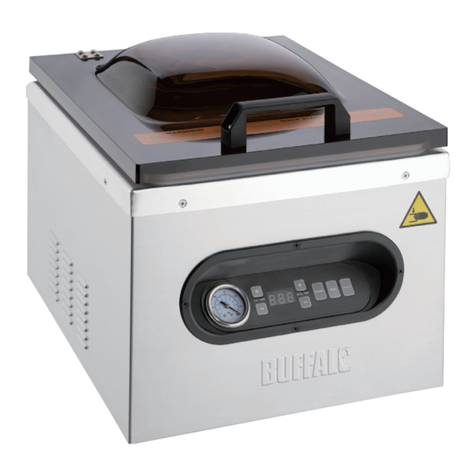
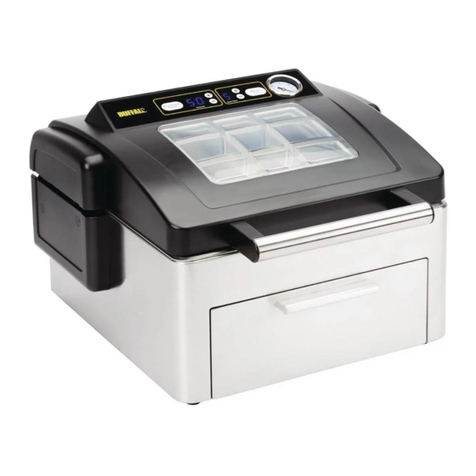
Buffalo CN514 User manual

Model • Modèle • Modell • Modello • Modelo • Malli:
CN514
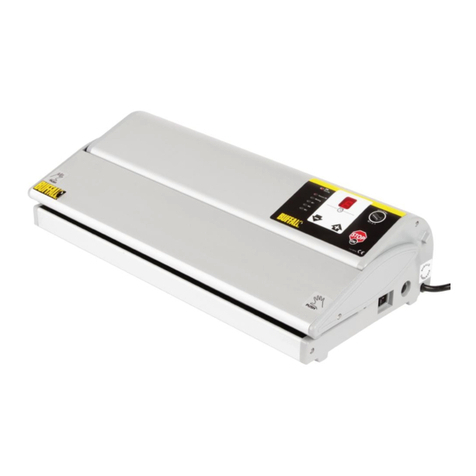
Vacuum Sealer
Instruction manual
NL Vacumeermachine
Handleiding
9IT Confezionatrice
sottovuoto
Manuale di istruzioni
30
FR
Machine à emballer
sous vide
Mode d'emploi
17 ES Envasado al vacío
Manual de instrucciones
37
DE Vakuumverpackungs-
maschine
Bedienungsanleitung
23 PT Máquina de embalagem a
vácuo
Manual de instruções
44
CN514_ML_A5_v6_20190513.indb 1 2019/5/13 17:45

2
UK
Safety Tips
• Position on a flat, stable surface.
• A service agent/qualified technician should carry out
installation and any repairs if required. Do not remove any
components on this product.
• Consult Local and National Standards to comply with the
following:
- Health and Safety at Work Legislation
- BS EN Codes of Practice
- Fire Precautions
- IEE Wiring Regulations
- Building Regulations
• DO NOT immerse the appliance in water.
• The sealing bar becomes hot during use. DO NOT touch the
sealing bar during or immediately after operation.
• Do not turn Off at the plug to halt operation; always use the
Cancel button.
• Do not use the appliance for anything other than its intended
use.
• Only use bags recommended by the supplier/manufacturer
with the appliance.
• Always switch off and disconnect the power supply to the
appliance when not in use.
• Not suitable for outdoor use.
• Keep all packaging away from children. Dispose of the
packaging in accordance to the regulations of local authorities.
• If the power cord is damaged, it must be replaced by an
BUFFALO agent or a recommended qualified technician in
order to avoid a hazard.
• Buffalo recommend that this appliance is PAT tested on an
annual basis to ensure the product remains safe.
CN514_ML_A5_v6_20190513.indb 2 2019/5/13 17:45

3
UK
• This appliance is not intended for use by persons (including
children) with reduced physical, sensory or mental capabilities,
or lack of experience or knowledge, unless they have been
given supervision or instruction concerning the use of the
appliance by a person responsible for their safety.
• Children should be supervised to ensure that they do not play
with the appliance.
Introduction
Please take a few moments to carefully read through this manual. Correct maintenance and operation of
this machine will provide the best possible performance from your BUFFALO product.
Pack Contents
The following is included:
• BUFFALO Vacuum Pack Machine • Instruction manual
BUFFALO prides itself on quality and service, ensuring that at the time of packaging the contents are
supplied fully functional and free of damage.
Should you find any damage as a result of transit, please contact your BUFFALO dealer immediately.
Location of Controls
CN514_ML_A5_v6_20190513.indb 3 2019/5/13 17:45

4
UK
Controls / Features
1. Vacuum & Seal
Starts the automatic operation of vacuuming the bag and then automatically seals the bag when
vacuum is complete.
2. Pulse vacuum
Press this button, and the device starts vacuuming; release the button and it will stop. This process
can be repeated. Then press “manual seal” when desired vacuum has been reached to seal.
Different vacuum pressure according to different types of foods can be chosen.
3. Sealing time
Three settings for choosing the best sealing time:
• Normal button : for dry bags and items without moisture, short sealing time (uses single sealing
bar).
• Middle button: for wet bags or items with a little moisture, extended sealing time (uses single
sealing bar).
• Extended button: for wet bags or items with high moisture, extended sealing time (uses double
sealing bar).
• Default setting is Normal setting for dry bags and shorter sealing time.
4. Pressure
Two buttons for choice of different vacuum pressure:
• Normal button: for goods to be packed under normal vacuum pressure ;
• Gentle button: for soft & crushable items where less vacuum pressure is desired.
• Default setting is normal vacuum pressure.
CN514_ML_A5_v6_20190513.indb 4 2019/5/13 17:45

5
UK
5. Canister
For vacuuming canisters, jar lids, wine stoppers or other accessories through a hose.
6. Manual Seal
This button provides two functions:
• To seal the open end of a bag without vacuuming, i.e. to make a bag from a bag roll
• When the automatic “Vacuum & seal” function is in operation, this button stops the motor pump
and immediately starts to seal the bag so vacuum pressure inside the bag can be controlled by
the operator, to avoid the crushing of delicate items.
7. Hose port
Insert hose for external accessories such as canister and wine stopper.
8. Cancel
Stops the machine when in working mode.
9. Ready Indicators
Shows that the device is on and the lid is closed. If the LED blinks, wait for blinking to stop before
you start next operation.
10. Air intake
Air intake connects with vacuum chamber and pump. Do not cover the intake when placing bag for
vacuum & Seal operation.
11. Vacuum chamber
Position the open end of the bag inside the chamber. Air is drawn out of the bag.
12. Sealing strip
Place the bag to be sealed over this strip. Clean and dry or replace when dirty, distorted or broken.
13. Lower gasket
Clean and dry or replace when dirty, distorted or broken.
14. Upper gasket
Clean and dry or replace when dirty, distorted or broken.
15. Sealing element
Teflon-coated heating element which heats and seals the bag
16. Bag Cutter
17. Front handle
Press down to lock the cover. Pull up to open the cover.
18. LED Indicator
Indicates the status of vacuum or sealing process, and the status of the machine settings.
19. Pressure gauge
Displays vacuum pressure
Operation
The Vacuum Sealer automatically comes on when plugged in.
The Vacuum Sealer is now ready for use.
CN514_ML_A5_v6_20190513.indb 5 2019/5/13 17:45

6
UK
Vacuum Packing Food (Automatic Vacuum and Seal)
1. Place the food inside in the bag and remove any excess liquid or food residue.
2. Allow minimum of 25mm-50mm of space at the top of bag to ensure a good seal.
3. Place the open end of the bag across the Sealing Strip, keeping opening within the chamber ring and
close lid. Press down handle, Ready light will illuminate.
4. Select sealing time depending on moisture content of food, select pressure of vacuum depending on
items to be packed
5. For Automatic function press “Vacuum & Seal” button. Indicator light will illuminate.
6. Vacuum pump will engage until required vacuum level is achieved. Machine will automatically go into
seal mode.
7. Manual Seal indicator light will flash as the machine starts to seal.
8. When sealing is complete Vacuum & Seal and manual Seal indicators will switch off. Unlock bag using
handle.
9. Remove bag and inspect bag and seal.
(Note: A good seal will look clear upon inspection. If the seal is spotty, incomplete,
wrinkled, white or milky, remove sealed portion and run vacuum and seal process again.)
10. To abort process, press “Cancel” button. Machine will stop.
Vacuum Packing Food (Using Pulse Function)
1. Place the food inside in the bag and remove any excess liquid or food residue.
2. Allow minimum of 25mm-50mm of space at the top of bag to ensure a good seal.
3. Place the open end of the bag across the Sealing Strip, keeping opening within the chamber ring and
close lid. Press down handle, Ready light will illuminate.
4. Press the Pulse button, vacuuming will start. Release button to stop vacuuming. Repeat until desired
level of Vacuum is achieved.
5. Press Manual Seal button to seal bag
6. Remove bag and inspect bag and seal.
(Note: A good seal will look clear upon inspection. If the seal is spotty, incomplete,
wrinkled, white or milky, remove sealed portion and run vacuum and seal process again.)
7. To abort process, press “Cancel” button. Machine will stop.
Using the “Seal Only” Function
1. Place the open end of the bag across the Sealing Strip, keeping opening within the chamber ring and
close lid. Press down handle, ready light will illuminate.
2. Press the Manual Seal button.
3. Manual Seal Indicator light will illuminate as the machine starts to seal
4. When sealing is complete Manual Seal indicator will switch off. Unlock bag using handle.
5. Remove bag and inspect bag and seal.
(Note: A good seal will look clear upon inspection. If the seal is spotty, incomplete,
wrinkled, white or milky, remove sealed portion and run vacuum and seal process again.)
CN514_ML_A5_v6_20190513.indb 6 2019/5/13 17:45
7
UK
Cleaning, Care & Maintenance
Switch off and disconnect from the power supply before cleaning.
Always allow to cool before cleaning.
WARNING: Do not allow any water to spill into the appliance when cleaning.
• Use warm, soapy water and a damp cloth to clean the appliance.
• Dry thoroughly after cleaning.
• A BUFFALO dealer or qualified technician should carry out repairs if required.
Troubleshooting
Fault Probable Cause Solution
The appliance is
not working The unit is not switched on Check the unit is plugged in correctly and
switched on
Plug and lead are damaged Call BUFFALO agent or qualified Technician
Fuse in the plug has blown Replace the plug fuse
Power supply Check power supply
Internal wiring fault Call BUFFALO agent or qualified technician
Appliance does
not remove all
the air from the
bag
Open end of bag not completely
inserted Open lid and reposition bag
Gaskets dirty Clean gaskets
Open end of bag is dirty Clean bag
Bag may be punctured Replace bag
Incorrect bags used Call Vacuum Pack machine supplier
Suction nozzle blocked Clear suction nozzle
Lid is not locked into position
correctly Ensure lid is locked in position correctly
Bags are not
sealing correctly Moisture in bag under the sealing
bar Ensure inside of the bag is dry and free from
moisture where it is to be sealed
Incorrect bags used Call Vacuum Pack machine supplier
End of bag not placed above sealing
bar Move end of bag over sealing bar
Technical Specifications
Model Voltage Power Current Vacuum Pressure
(approx.) Dimensions
h x w x d mm Weight
(kg)
CN514 220-240V
50Hz 130W 0.6A -0.90Bar 125 x 400 x 265 3.5
CN514_ML_A5_v6_20190513.indb 7 2019/5/13 17:45

8
UK
Electrical Wiring
This appliance is supplied with a 3 pin, BS1363 plug and lead, with a 3 amp fuse as standard.
The plug is to be connected to a suitable mains socket.
This appliance is wired as follows:
• Live wire (coloured brown) to terminal marked L
• Neutral wire (coloured blue) to terminal marked N
If in doubt consult a qualified electrician.
Electrical isolation points must be kept clear of any obstructions. In the event of any emergency
disconnection being required they must be readily accessible.
Compliance
The WEEE logo on this product or its documentation indicates that the product must
not be disposed of as household waste. To help prevent possible harm to human
health and/or the environment, the product must be disposed of in an approved and
environmentally safe recycling process. For further information on how to dispose of
this product correctly, contact the product supplier, or the local authority responsible for
waste disposal in your area.
BUFFALO parts have undergone strict product testing in order to comply with regulatory
standards and specifications set by international, independent, and federal authorities.
BUFFALO products have been approved to carry the following symbol:
All rights reserved. No part of these instructions may be produced or transmitted in any form or by any means, electronic,
mechanical, photocopying, recording or otherwise, without the prior written permission of BUFFALO.
Every effort is made to ensure all details are correct at the time of going to press, however, BUFFALO reserve the right to
change specifications without notice.
CN514_ML_A5_v6_20190513.indb 8 2019/5/13 17:45

9
NL
Veiligheidstips
• Plaatsen op een vlakke en stabiele ondergrond.
• De installatie en eventuele reparaties dienen door een
servicetechnicus/vaktechnicus uitgevoerd te worden. Verwijder
geen componenten van dit product.
• Raadpleeg en volg de plaatselijke en nationale regelgeving op
m.b.t. het volgende:
- Wetgeving voor gezondheid en veiligheid op de werkplaats
- Werkregels BS EN
- Brandpreventie
- IEE bekabelingsnormen
- Bouwverordeningen
• Dit apparaat NIET in water dompelen.
• De sealbalk wordt tijdens gebruik warm. Tijdens of direct na
gebruik sealbalk NIET aanraken.
• Gebruik niet de stekker om de machine uit te schakelen,
gebruik altijd de knop Cancel (annuleren).
• Gebruik dit apparaat uitsluitend voor het bestemde gebruik.
• Gebruik uitsluitend de zakken die door de leverancier/fabrikant
voor het apparaat worden aanbevolen.
• Schakel het apparaat altijd uit en haal de stekker uit het
stopcontact wanneer u het apparaat niet gebruikt.
• Niet geschikt voor gebruik buitenshuis.
• Laat verpakkingsmateriaal niet binnen handbereik van
kinderen komen. Verpakkingsmateriaal in overeenstemming
met de regelgeving van de plaatselijke overheden als afval
laten verwerken.
• Indien de stroomkabel beschadigd raakt, dient men deze door
een BUFFALO technicus of aanbevolen vaktechnicus te laten
vervangen om gevaarlijke situaties te voorkomen.
• BUFFALO beveelt aan dat dit apparaat jaarlijks PAT getest
wordt om ervoor te zorgen het product veilig blijft.
CN514_ML_A5_v6_20190513.indb 9 2019/5/13 17:45

10
NL
• Dit apparaat is niet bedoeld voor gebruik door personen
(inclusief kinderen) met lichamelijke, zintuiglijke of mentale
beperkingen of door personen met gebrek aan ervaring
of kennis, tenzij zij hierin worden begeleid of zijn opgeleid
in het gebruik van het apparaat door een persoon, die
verantwoordelijk is voor hun veiligheid.
• Men dient er toezicht op te houden dat kinderen niet met het
apparaat spelen.
Inleiding
Neem de tijd en lees deze handleiding aandachtig door. Een correct gebruik en onderhoud van deze
machine waarborgt de beste prestatie van uw Buffalo product.
Verpakkingsinhoud
De verpakking bevat het volgende:
• BUFFALO Vacuümverpakkingsmachine • Handleiding
BUFFALO is trots op de haar productkwaliteit en dienstverlening en controleer de inhoud van de
verpakkingen, tijdens de verpakkingsfase, op functionaliteit en schade.
Mocht u product door transport zijn beschadigd, neem dan onmiddellijk contact op met uw BUFFALO
dealer.
Locatie van bedieningselementen
CN514_ML_A5_v6_20190513.indb 10 2019/5/13 17:45

11
NL
Bediening / Functies
1. Vacuum & Seal (Vacumeren & verzegelen)
Start het automatische proces van het vacumeren van de zak en verzegelt de zak automatisch
wanneer het vacumeren is voltooid.
2. Pulse vacuum (Pulserend vacumeren)
Druk op deze knop om het vacumeren te beginnen, laat de knop los om dit te stoppen. Dit proces
kan worden herhaald. Wanneer het gewenste vacuüm is bereikt, drukt u vervolgens op “Manual
Seal” om te verzegelen. Er kunnen een verschillende soorten vacuümdruk voor verschillende soorten
eten worden gekozen.
3. Verzegelingstijd
Drie instellingen voor het kiezen van de beste verzegelingstijd:
• ”Dry”: voor droge zakken en producten zonder vocht, korte verzegelingstijd (maakt gebruik van
de enkele sealbalk)
• ”Moist”: voor natte zakken of producten met een laag vochtgehalte, verlengde verzegelingstijd
(maakt gebruik van de enkele sealbalk)
• ”Double”: voor natte zakken of producten met een hoog vochtgehalte, verlengde
verzegelingstijd (maakt gebruik van de dubbele sealbalk)
• “Dry” is de standaardinstelling, voor droge zakken en een kortere verzegelingstijd.
4. Druk
Twee knoppen voor verschillende vacuümdruk:
• Normaal (“Normal”): voor producten die onder normale vacuümdruk worden verpakt
• Licht (“Gentle”): voor zachte, gemakkelijk plat te drukken producten waarbij minder vacuümdruk
is gewenst.
• De standaardinstelling is de normale vacuümdruk.
CN514_ML_A5_v6_20190513.indb 11 2019/5/13 17:45

12
NL
5. Canisters (Dozen, potten en flessen)
Voor het vacumeren van voorraaddozen, potten met deksel, flessen en andere accessoires door
middel van een slang.
6. Manual Seal (Handmatig verzegelen)
Deze knop is voorzien van twee functies:
• Om het open einde van een zak te verzegelen zonder te vacumeren. Bijv. om uit een zak rol een
zak te maken
• Wanneer het automatische ‘’Vacuum & Seal’’ functie aan de gang is, stopt deze knop de
motorpomp en begint onmiddellijk met het verzegelen van de zak zodat de vacuümdruk in de
zak kan worden gecontroleerd door de gebruiker, om te voorkomen dat delicate producten
platgedrukt worden.
7. Slangaansluiting
Sluit een slang aan voor externe accessoires zoals voorraaddozen en flessen.
8. Cancel
Stopt de machine als deze in werking is.
9. Statuslampje
Laat zien dat het apparaat aan staat en dat de deksel dicht is. Als de LED-indicator knippert, wacht
dan tot het knipperen stopt voordat u met het volgende proces begint.
10. Luchtinlaat
De luchtinlaat is verbonden met de vacuümkamer- en pomp. Bedek de inlaat niet wanneer u de zak
plaatst om te vacumeren en te verzegelen.
11. Vacuümkamer
Positioneer de opening van de zak zodanig dat deze in de kamer zit. De lucht wordt onttrokken aan de zak.
12. Sealstrip
Plaats de zak die verzegeld moet worden over de strip. Schoonmaken en afdrogen of vervangen als
deze vuil, vervormd of kapot is.
13. Onderste pakking
Schoonmaken en afdrogen of vervangen als deze vuil, vervormd of kapot is.
14. Bovenste pakking
Schoonmaken en afdrogen of vervangen als deze vuil, vervormd of kapot is.
15. Verzegelingselement
Verwarmingselement voorzien van een teflon laag die de zak verwarmt en verzegelt.
16. Zaksnijder
17. Handvat
Omlaag drukken om te sluiten, omhoog trekken om te openen.
18. LED-indicator
Geeft de status weer van het vacumeerproces, het verzegelingsproces en de status van de
instellingen van de machine.
19. Druk meter
Geeft de vacuümdruk weer.
Bediening
De machine gaat automatisch aan wanneer deze wordt aangesloten. De machine is nu klaar voor gebruik.
CN514_ML_A5_v6_20190513.indb 12 2019/5/13 17:45

13
NL
Eten vacuüm verpakken (automatisch vacumeren en verzegelen)
1. Plaats het eten in de zak en verwijder eventuele overtollige vloeistof of voedselresidu.
2. Laat bovenaan de zak een ruimte over van minimaal 25-50mm voor een goede verzegeling
3. Plaats de opening van de zak in de kamer, over de sealstrip en sluit de deksel. Duw het handvat
omlaag, het statuslampje zal gaan branden.
4. Kies de verzegelingstijd aan de hand van het vochtgehalte van het eten, kies de vacuümdruk aan de
hand van de producten die moeten worden verpakt.
5. Druk op de ‘’Vacuum & Seal’’ knop voor de automatische functie. De indicator lampje zal gaan
branden.
6. De vacuümpomp gaat door tot het vereiste vacuümniveau is bereikt. De machine gaat automatisch
over naar de verzegelingsmodus.
7. De “Vacuum Seal” indicator zal knipperen als de machine begint met de verzegeling.
8. De “Vacuum & Seal” en “Manual Seal” indicators zullen uitgaan wanneer de verzegeling is voltooid.
Ontsluit de zak door gebruik te maken van het handvat.
9. Haal de zak uit de machine, controleer de zak en de verzegeling.
(Let op: Een goede verzegeling ziet er helder uit bij het controleren. Verwijder het
verzegelde gedeelte als de verzegeling er gevlekt, incompleet, wit of melkachtig uitziet
en start het vacumeer- en verzegelproces opnieuw.)
10. Druk op de ‘’Cancel’’ knop om het proces af te breken, de machine zal stoppen.
Eten vacuüm verpakken (met de pulseerfunctie)
1. Plaats het eten in de zak en verwijder eventuele overtollige vloeistof of voedselresidu.
2. Laat bovenaan de zak een ruimte over van minimaal 25-50mm voor een goede verzegeling.
3. Plaats de opening van de zak in de kamer, over de sealstrip en sluit de deksel. Duw het handvat
omlaag, het statuslampje zal gaan branden.
4. Druk op de ‘’Pulse’’-knop en het vacumeren zal beginnen, laat de knop los om het vacumeren te
stoppen. Herhaal dit totdat het gewenste vacuümniveau is bereikt.
5. Druk op de ‘’Manual Seal’’-knop om de zak te verzegelen.
6. Haal de zak uit de machine, controleer de zak en de verzegeling.
(Let op: Een goede verzegeling ziet er helder uit bij het controleren. Verwijder het
verzegelde gedeelte als de verzegeling er gevlekt, incompleet, wit of melkachtig uitziet
en start het vacumeer- en verzegelproces opnieuw.)
7. Druk op de ‘’Cancel’’ knop om het proces af te breken, de machine zal stoppen.
De ‘’Seal Only’’ Functie Gebruiken
1. Plaats de opening van de zak in de kamer, over de sealstrip en sluit de deksel. Duw het handvat
omlaag, het statuslampje zal gaan branden.
2. Druk op de ‘’Manual Seal’’’-knop.
3. De “Manual Seal” indicator zal branden als de machine begint met het verzegelen.
4. De “Manual Seal” indicator zal uitgaan wanneer de verzegeling is voltooid. Ontsluit de zak door
gebruik te maken van het handvat.
5. Haal de zak uit de machine, controleer de zak en de verzegeling.
(Let op: Een goede verzegeling ziet er helder uit bij het controleren. Verwijder het
verzegelde gedeelte als de verzegeling er gevlekt, incompleet, wit of melkachtig uitziet
en start het vacumeer- en verzegelproces opnieuw.)
CN514_ML_A5_v6_20190513.indb 13 2019/5/13 17:45

14
NL
Reiniging, zorg & onderhoud
Alvorens het apparaat te reinigen dient men de stroomvoorziening uit te schakelen.
Laat het apparaat altijd afkoelen voordat u met het schoonmaken begint.
WAARSCHUWING: voorkom dat er tijdens reiniging water in het apparaat
binnendringt.
• Gebruik voor de reiniging van het apparaat warm zeepwater en een vochtige doek.
• Na reiniging goed drogen.
• Eventuele reparaties moeten door een BUFFALO-vertegenwoordiger of een gekwalificeerde vakman
worden uitgevoerd.
Oplossen van problemen
Probleem Mogelijke oorzaak Handeling
Het apparaat
werkt niet Het apparaat is niet ingeschakeld Controleer of de stroomkabel van het product is
aangesloten en of het product is ingeschakeld
Stekker en kabel zijn beschadigd Laat een BUFFALO-monteur of een vakman
komen
De zekering in de stekker is gesprongen
Vervang de zekering in de stekker
Stroomvoorziening Controleer de stroomvoorziening
Storing interne bedrading Laat een BUFFALO-monteur of een vakman
komen
De lucht in
de zak wordt
niet volledig
weggezogen
Open einde van de zak niet volledig
ingebracht Open de deksel en verplaats de zak
Pakkingen zijn vuil Maak de pakkingen schoon
Open einde van de zak is vuil Maak de zak schoon
De zak heeft mogelijk gaten Vervang de zak
Verkeerde zakken gebruikt Neem contact op met de leverancier van de
vacumeermachine
Zuigmondstuk bedekt Open het zuigmondstuk
Deksel vergrendeld niet op de juiste plek
Zorg dat het deksel op de juiste plek vergrendeld
Zakken worden
niet correct
gedicht
Vochtigheid in de zak onder de
sealbalk Controleer of de binnenkant van de zak droog
is en of het te dichten uiteinde niet vochtig is
Er worden zakken gebruikt die niet
geschikt zijn Neem contact op met de leverancier van de
vacumeermachine
Het uiteinde van de zak ligt niet op de
sealbalk
Leg het uiteinde van de zak over de sealbalk
Technische specificaties
Model Voltage Vermogen Stroom Vacuümdruk
(ca.) Afmetingen
h x b x d mm Gewicht
(kg)
CN514 220-240V 50Hz 130W 0,6A -0,90Bar 125 x 400 x 265 3,5
CN514_ML_A5_v6_20190513.indb 14 2019/5/13 17:45

15
NL
Elektrische bedrading
Men dient de steker op een geschikt stopcontact aan te sluiten.
De bedrading van dit apparaat is als volgt:
• Stroomkabel (bruin) naar de aansluitklem gemarkeerd met L
• Neutraalkabel (blauw) naar de aansluitklem gemarkeerd met N
Bij twijfels raadpleeg een vakkundige elektricien.
De elektrische isolatiepunten mogen niet worden geblokkeerd. In geval van een nooduitschakeling
moeten de isolatiepunten direct toegankelijk zijn.
Productconformiteit
Het WEEE-logo op dit product of bijbehorende documentatie geeft aan dat het product
niet onder huisvuil valt en als zodanig ook niet mag worden verwerkt. Ter preventie
van mogelijke gevaren voor de gezondheid van personen en/of voor het milieu,
dient men dit product in overeenstemming met het voorgeschreven en milieuveilige
recyclingproces als afval te verwerken. Raadpleeg uw productleverancier of uw plaatselijk
afvalverwerkingsbedrijf voor meer informatie over de juiste afvalverwerking van dit
product.
De onderdelen van BUFFALO producten hebben strenge producttesten ondergaan om te
voldoen aan wettelijke regels en specificaties die door internationale, onafhankelijke en
landelijke overheden worden voorgeschreven.
BUFFALO producten zijn goedgekeurd en voorzien van het volgende symbool:
Alle rechten voorbehouden. Het is verboden om deze handleiding, hetzij volledig of gedeeltelijk, elektronisch of mechanisch
te reproduceren, kopiëren, op opslagmedia op te slaan of op enigerlei wijze over te dragen, zonder voorafgaande
goedkeuring van BUFFALO.
Wij hebben er alles aan gedaan om er zeker van te zijn dat op publicatiedatum van de handleiding alle details correct zijn,
desondanks, behoudt BUFFALO het recht voor om specificaties zonder aankondiging te wijzigen.
CN514_ML_A5_v6_20190513.indb 15 2019/5/13 17:45

16
FR
Conseils de sécurité
• Placez l’appareil sur une surface plane, stable.
• L’installation et les éventuelles réparations doivent être
confiées à un dépanneur / technicien qualifié. Ne retirez aucun
composant ou cache de ce produit.
• Consultez les normes locales et nationales pour vous
conformer aux :
- lois sur l’hygiène et la sécurité au travail ;
- codes de bonnes pratiques BS EN ;
- précautions contre le risque d’incendie ;
- réglementations sur les branchements électriques IEE ;
- règlements sur la construction.
• NE PAS immerger l’appareil dans l’eau.
• La barre de soudure peut chauffer au cours de l’utilisation. NE
PAS toucher la barre de soudure pendant, ou dans les minutes
suivant l’utilisation.
• Ne pas débrancher l’appareil pour interrompre le
fonctionnement ; veiller à toujours utiliser le bouton Annuler.
• Ne pas utiliser l’appareil à d’autres fins que celles auxquelles il
a été conçu.
• Utiliser exclusivement les sacs/sachets recommandés par le
fournisseur/le fabricant de l’appareil.
• Veiller à toujours bien éteindre l’appareil et à couper
l’alimentation électrique lorsqu’il n’est pas en fonctionnement.
• Non adapté à l’usage en extérieur.
• Conserver tous les emballages hors de portée des enfants.
Recycler les emballages d’une manière qui soit compatible
avec la réglementation des autorités locales.
• Si le cordon d’alimentation est abimé, faites-le changer par un
représentant BUFFALO ou par un technicien qualifié agréé afin
d’éviter tout risque.
• BUFFALO recommande que cet appareil soit testé chaque
année pour s’assurer que le produit demeure sécuritaire.
CN514_ML_A5_v6_20190513.indb 16 2019/5/13 17:45

17
FR
• Cet appareil n’a pas été conçu pour être utilisé par des
personnes (enfants inclus) à capacités physiques, sensorielles
ou mentales réduites ou ne disposant pas d’une expérience ou
de connaissances suffisantes, à moins que lesdites personnes
n’aient été formées ou instruites quant à son utilisation, par
une personne responsable de leur sécurité.
• Les enfants doivent être surveillés afin de s’assurer qu’ils ne
jouent pas avec l’appareil.
Introduction
Nous vous invitons à consacrer quelques instants à la lecture attentive de ce manuel. L’entretien et
l’utilisation appropriés de cet appareil vous permettront de tirer le meilleur de votre produit BUFFALO.
Contenu
Le colis contient les éléments suivants :
• Machine d’emballage sous vide BUFFALO • Notice d’utilisation
BUFFALO attache une grande importance à la qualité et au service et veille à fournir des produits en
parfait état opérationnel, parfaitement intacts au moment de l’emballage.
Nous vous prions de contacter votre revendeur BUFFALO immédiatement si vous constatez un dommage
quelconque survenu pendant le transport du produit.
Emplacement des commandes
CN514_ML_A5_v6_20190513.indb 17 2019/5/13 17:45
18
FR
Commandes/Fonctionnalités
1. Aspiration et scellage
Démarre le fonctionnement automatique d’aspiration du sac, puis scelle automatiquement le sac
lorsque l’aspiration est terminée.
2. Vide à impulsion
Appuyez sur ce bouton pour démarrer l’aspiration : relâchez le bouton pour arrêter. Ce processus
peut être répété. Ensuite, appuyez sur « scellage manuel » lorsque le vide souhaité pour le scellage
est atteint. Il est possible de choisir les différentes pressions sous vide selon les différents types
d’aliments.
3. Temps de scellage
Il y a trois options pour choisir le temps de scellage approprié :
• Bouton normal : pour les sacs secs et les articles sans humidité, courte période de scellage
(utilisation d’une seule barre de scellage).
• Bouton moyen : pour les sacs humides ou les articles avec un peu d’humidité, courte période de
scellage (utilisation d’une seule barre de scellage).
• Bouton d’extension : pour les sacs humides ou les articles à haute humidité (utilisation d’une
double barre de scellage).
• Le réglage par défaut est le réglage normal pour les sacs secs et la courte période de scellage.
4. Pression
Il y a deux touches pour choisir les différentes pressions de vide :
• Touche « normal » : pour les aliments à emballer sous une pression normale de vide
• Touche « gentle » : pour les articles fragiles et écrasables où une pression d’aspiration inférieure
est souhaitée.
• Le réglage par défaut est la pression de vide normale.
CN514_ML_A5_v6_20190513.indb 18 2019/5/13 17:45

19
FR
5. Récipients
La fonction Canister permet de mettre sous vide des récipients, bocaux, boîtes ou autres à l’aide d’un
tuyau.
6. Scellage manuel
Ce bouton comporte deux fonctions :
• Pour sceller l’extrémité ouverte d’un sac sans aspirer, par exemple pour faire un sac à partir d’un
rouleau de sac.
• Quand la fonction « Aspiration et scellage » est en cours de marche, ce bouton arrête la pompe du
moteur et commence immédiatement à sceller le sac, ainsi la pression de mise sous vide à l’intérieur
du sac peut être contrôlée par l’opérateur pour éviter d’écraser les articles délicats.
7. Port d’aspiration
Port pour insérer le tuyau d’aspiration pour les récipients extérieurs tels que les bocaux.
8. Annuler
Arrête la machine lorsque celle-ci est en mode de fonctionnement.
9. Témoin lumineux
Indique que l’appareil est allumé et que le couvercle est fermé. Si la LED clignote, attendez que le
clignotement s’arrête avant de commencer l’opération suivante.
10. Admission d’air
L’admission d’air est reliée à la chambre de mise sous vide et à la pompe. Ne couvrez pas l’admission
d’air lorsque vous placez le sac pour effectuer l’opération d’aspiration et de scellage.
11. Chambre de mise sous vide
Placez l’extrémité ouverte du sac dans la chambre. L’air est aspiré hors du sac.
12. Bande de scellage
Posez le sac à sceller sur cette bande. Nettoyez et séchez, ou remplacez la bande, si elle est sale,
déformée ou cassée.
13. Joint inférieur
Nettoyez et séchez, ou remplacez-le, s’il est sale, déformé ou cassé.
14. Joint supérieur
Nettoyez et séchez, ou remplacez-le, s’il est sale, déformé ou cassé.
15. Élément de soudure
Élément chauffant à revêtement téflon qui chauffe et scelle le sac.
16. Coupe-sacs
17. Poignée avant
Appuyez vers le bas pour verrouiller le couvercle. Tirez vers le haut pour ouvrir.
18. Indicateur LED
Indique l’avancement des processus de mise sous vide et de scellage, et la position des réglages de
la machine.
19. Manomètre
Affiche la pression de mise sous vide.
Fonctionnement
• La machine à emballer sous vide s’allume automatiquement lorsqu’elle est branchée.
• La machine à emballer sous vide est alors prête à l’emploi.
CN514_ML_A5_v6_20190513.indb 19 2019/5/13 17:45

20
FR
Mise sous vide alimentaire (mise sous vide et scellage automatiques)
1. Placez l’aliment dans le sac et enlevez tout excès de liquide ou de résidus alimentaires.
2. Laissez un espace minimum de 25 mm à 50 mm au-dessus du sac afin de pouvoir le sceller
parfaitement.
3. Placez l’extrémité ouverte du sac sur la bande de scellage, en gardant l’ouverture dans la chambre de
mise sous vide, et fermez le couvercle. Abaissez la poignée, l’indicateur lumineux s’allume.
4. Sélectionnez le temps de scellage en fonction de la teneur en humidité des aliments, sélectionnez la
pression sous vide en fonction des articles à emballer.
5. Pour le fonctionnement automatique, appuyez sur « Aspiration et scellage ». Le voyant lumineux
s’allumera.
6. La pompe à vide se mettra en marche jusqu’à ce que le niveau de vide requis soit atteint. L’appareil
passera automatiquement en mode scellage.
7. Le voyant lumineux du scellage manuel clignotera au moment où l’appareil commencera le scellage.
8. Les voyants lumineux « Aspiration et scellage » et « Scellage manuel» s’éteindront automatiquement
à la fin du scellage. Détachez le sac à l’aide de la poignée.
9. Retirez le sac, puis vérifiez le sac et la soudure.
(Remarque : Une bonne soudure sera d’apparence claire lors de la vérification. Si la
soudure est irrégulière, incomplète, ridée, blanche ou laiteuse, enlevez la partie scellée,
puis relancez le processus d’aspiration et de scellage.)
10. Pour arrêter le processus, appuyez sur « Annuler ». La machine s’arrête.
Mise sous vide alimentaire (avec la fonction Pulse)
1. Placez l’aliment dans le sac et enlevez tout excès de liquide ou de résidus alimentaires.
2. Laissez un espace minimum de 25 mm à 50 mm au-dessus du sac afin de pouvoir le sceller
parfaitement.
3. Placez l’extrémité ouverte du sac sur la bande de scellage, en gardant l’ouverture dans la chambre de
mise sous vide, et fermez le couvercle. Abaissez la poignée, le voyant lumineux s’allume.
4. Appuyez sur le bouton Pulse pour démarrer la mise sous vide. Relâchez le bouton pour arrêter.
Répétez jusqu’à ce que le niveau de vide souhaité soit atteint.
5. Appuyez sur « Scellage manuel » pour sceller le sac.
6. Retirez le sac, puis vérifiez le sac et le scellement.
(Remarque : Une bonne soudure sera d’apparence claire lors de la vérification. Si la
soudure est irrégulière, incomplète, ridée, blanche ou laiteuse, enlevez la partie scellée,
puis relancez le processus d’aspiration et de scellage).
7. Pour arrêter le processus, appuyez sur « Annuler ». La machine s’arrête.
Utilisation de la fonction « Sceller uniquement »
1. Placez l’extrémité ouverte du sac sur la bande de scellage, en gardant l’ouverture dans la chambre de
mise sous vide, et fermez le couvercle. Abaissez la poignée, le voyant lumineux s’allume.
2. Appuyez sur « Scellage manuel » .
3. Le voyant lumineux de scellage manuel s’allume dès que la machine commence à sceller.
4. Le voyant lumineux «Scellage manuel » s’éteint automatiquement une fois le scellage effectué.
Détachez le sac à l’aide de la poignée.
5. Retirez le sac, puis vérifiez le sac et le scellage.
(Remarque : Une bonne soudure sera d’apparence claire lors de la vérification. Si la
soudure est irrégulière, incomplète, ridée, blanche ou laiteuse, enlevez la partie scellée,
puis relancez le processus d’aspiration et de scellage).
CN514_ML_A5_v6_20190513.indb 20 2019/5/13 17:45
Other manuals for CN514
1
Table of contents
Languages:
Other Buffalo Kitchen Appliance manuals

Buffalo
Buffalo G784 User manual

Buffalo
Buffalo CP868 User manual

Buffalo
Buffalo CH919 User manual

Buffalo
Buffalo CT931 User manual

Buffalo
Buffalo CD400 User manual

Buffalo
Buffalo CC770 User manual

Buffalo
Buffalo DM869 User manual

Buffalo
Buffalo GH489 User manual

Buffalo
Buffalo CD969 User manual

Buffalo
Buffalo DM079 User manual

Buffalo
Buffalo GF439 User manual

Buffalo
Buffalo CC770 User manual

Buffalo
Buffalo APBCD277 User manual

Buffalo
Buffalo CT938 User manual

Buffalo
Buffalo CC729 User manual

Buffalo
Buffalo KW 16 User manual

Buffalo
Buffalo CJ373 User manual

Buffalo
Buffalo GG566 User manual

Buffalo
Buffalo FT691 User manual

Buffalo
Buffalo ce225 User manual