4I English SecuTronic
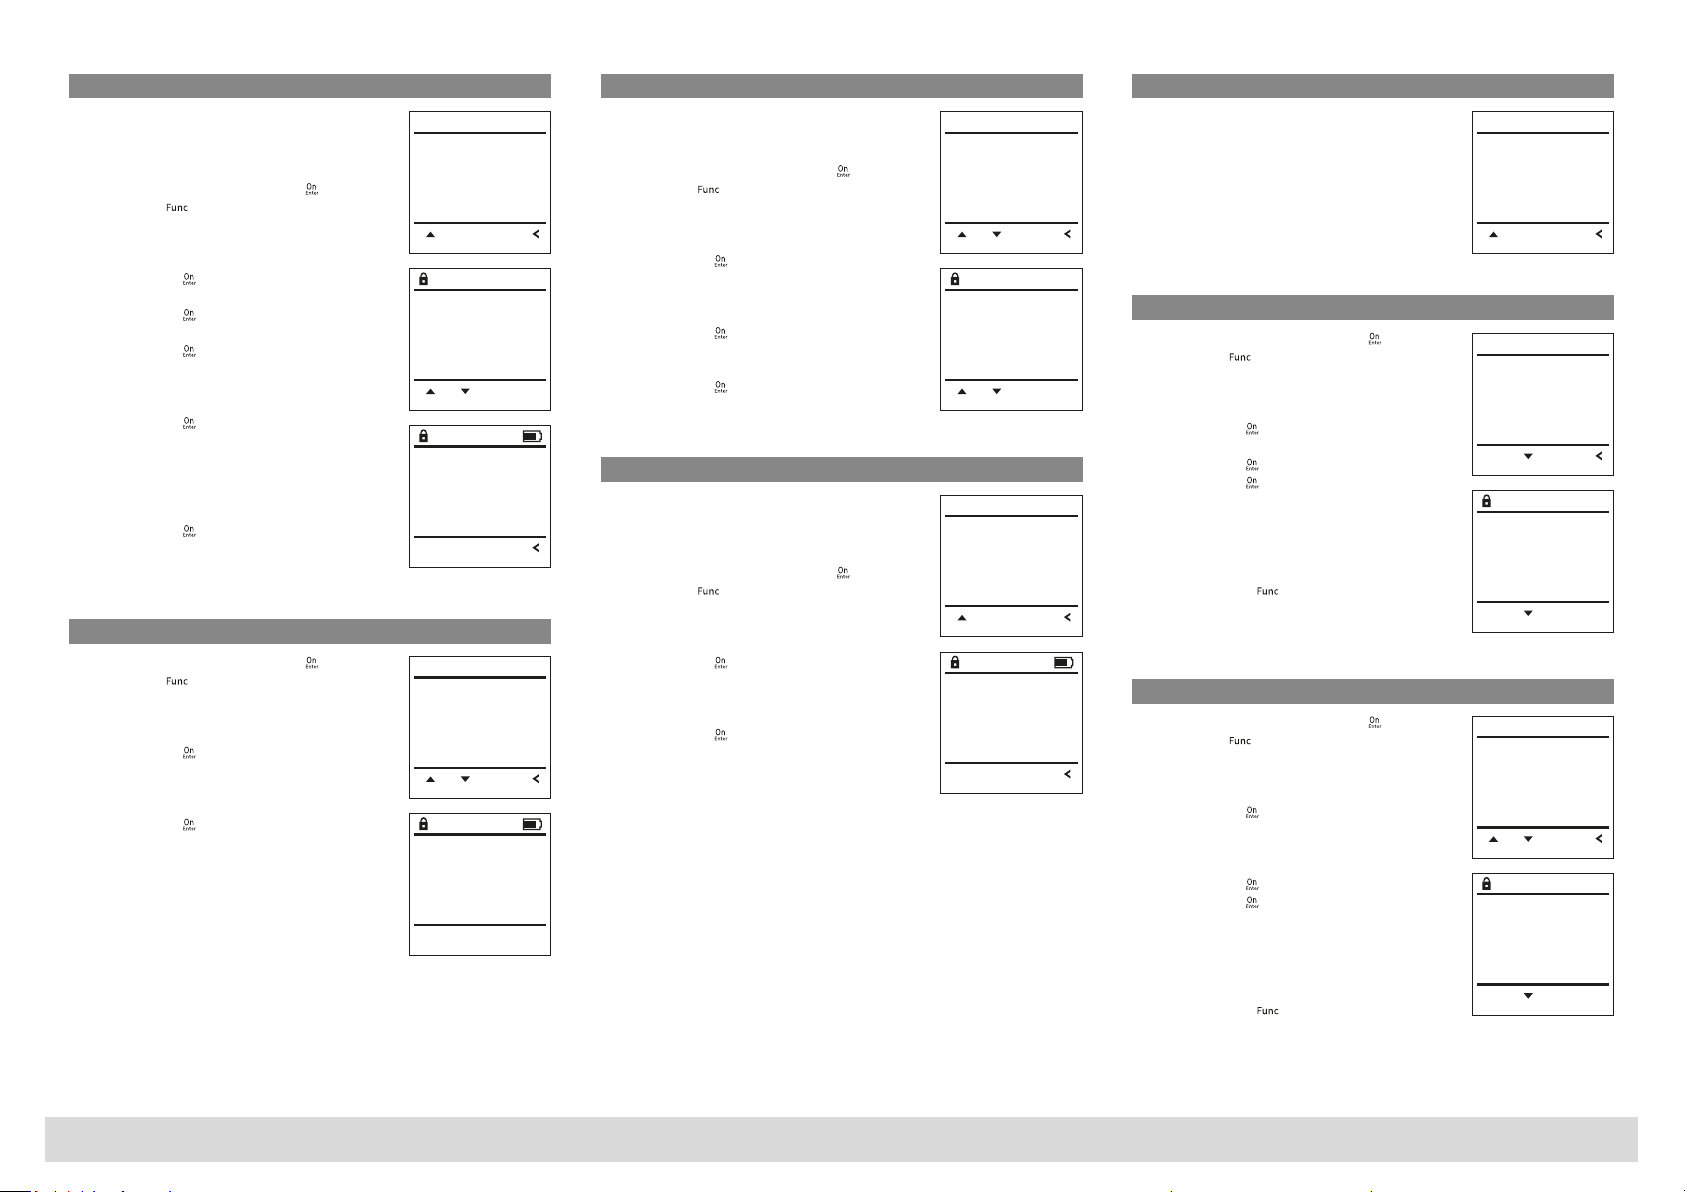
Menu Administrator/User/Delete
Deleted users no longer have access to the safe.
However, these will remain in the history.
Sub-menu Administrator/User/Delete
• Switch on the lock using the key .
• Then press .
• "Main menu"appears.
• Scroll with the 1 or 2 key until the
"Administrator" menu item is highlighted.
• Confirm with .
• "Main menu/Administrator”appears.
• Confirm with .
• "Main menu/Administrator/User”appears.
• Confirm with .
• "Main menu/Administrator/User/Create”appears.
• Scroll with the 1 or 2 key until the "Delete"
menu item is highlighted.
• Confirm with .
• Enter the administrator code to acquire the
authorisation for programming.
• You can use the keys 1 or 2 to scroll until the
user is marked whose code is supposed to be
deleted.
• Confirm with .
• "Data has been deleted”appears.
• Press any key.
Menu Administrator/Reorganise
• Switch on the lock using the key .
• Then press .
• "Main menu”appears.
• Scroll with the 1 or 2 key until the
"Administrator" menu item is highlighted.
• Confirm with .
• "Main menu/Administrator”appears.
• Scroll with the 1 or 2 key until the "Reorganise"
menu item is highlighted.
• Confirm with .
• Enter the administrator code to acquire the
authorisation for programming.
• "Reorganisation is running”appears.
Menu Administrator/Processes
The opening or closing history of the safe can be
shown on the display under Processes.
• Switch on the lock using the key .
• Then press .
• "Main menu” appears.
• Scroll with the 1 or 2 key until the
"Administrator" menu item is highlighted.
• Confirm with .
• "Main menu/Administrator”appears.
• Scroll with the 1 or 2 key until the "Processes"
menu item is highlighted.
• Confirm with .
• Scroll with the 1 or 2 key through the
data records.
• Confirm with .
Menu Administrator/Register
In the event of a complete system failure, the
electronic control panel may have to be registered
again with the locking mechanism.
• Switch on the lock using the key .
• Then press .
• "Main menu” appears.
• Scroll with the 1 or 2 key until the
"Administrator" menu item is highlighted.
• Confirm with .
• “Main menu/Administrator”appears.
• Scroll with the 1 or 2 key until the "Register"
menu item is highlighted.
• Confirm with .
• Enter the administrator code to acquire the
authorisation for programming.
• “Data has been saved!” appears.
• Press any key.
Info menu
In this menu, you can view several system
information reports.
Menu info/System info
• Switch on the lock using the key .
• Then press .
• "Main menu" appears.
• Scroll with the 1 or 2 key until the "Info" menu
item is highlighted.
• Confirm with .
• "Main menu/Info” appears.
• Confirm with .
• Confirm with to get detailed information
about the system after entering the
administrator code with administrator rights.
• The system information is displayed.
• Scroll with button 1 or 2 to view the
information.
• Use the button to return.
Info/system check menu
• Switch on the lock using the key .
• Then press .
• "Main menu”appears.
• Scroll with the 1 or 2 key until the "Info" menu
item is highlighted.
• Confirm with .
• "Main menu/Info”appears.
• Scroll with the 1 or 2 key until the
"System check" menu item is highlighted.
• Confirm with .
• Confirm with to get detailed information
about the system after entering the
administrator code with administrator rights.
• The system check information is displayed.
• Scroll with button 1 or 2 to view the
information.
• Use the button to return.
Dataset has
been deleted!
FUNC:
USER.0001 CD
FUNC: M1: 2:
Create
Delete
1: FUNC:
USER
Restructuring
in progress!
User
Restructure
Processes
Install
FUNC:1: 2:
ADMIN
User
Restructure
Processes
Install
FUNC:1: 2:
ADMIN
Administrator
Code entry
FUNC: M1: 2:
User
Restructure
Processes
Install
FUNC:
ADMIN
1:
Dataset has
been stored
FUNC:
System info
Systemcheck
FUNC:
INFO
2:
System info
Systemcheck
FUNC:
INFO
1: 2:
Info
EE-V1.0
SNE:20.0A.00.00
FUNC: M2:
EE
ADC 5.45V
Flash
Touch con.
FUNC: M2:
Code change
Language/Sprache
Administrator ...
Info
FUNC:1:
MAIN MENU