manuals.online logo
Brands
  1. Home
  2. •
  3. Brands
  4. •
  5. Burtonsafes
  6. •
  7. Lock
  8. •
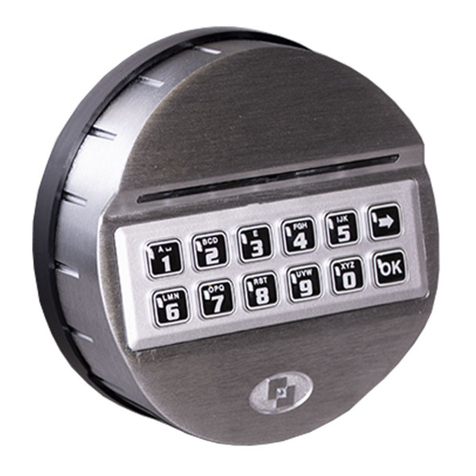
  9. Burtonsafes IGNIS User manual

Burtonsafes IGNIS User manual

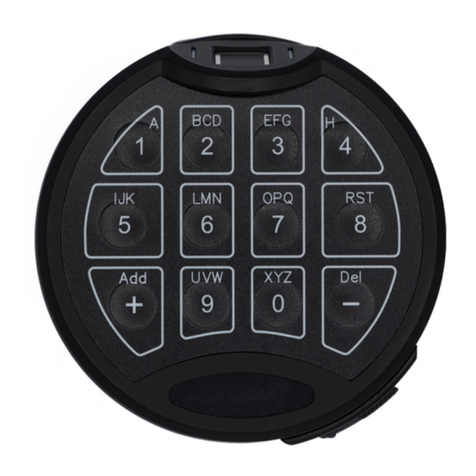
IGNIS
LOCKING INSTRUCTIONS
USER INSTRUCTIONS - IGNIS LOCK
How to open the safe
ABOUT THE LOCK
This lock requires a 6-digit code to open the lock. You can have a master code and up to 9 user
codes. In order to activate the user codes, you will need the master code. The master code can’t
be deleted but you can remove user codes. The lock also
features dual code opening and time delay opening.
• Press the [ON] key
• Enter a valid 6-digit code (the factory default is ‘123456’)
• Press the [ENTER] key
• Within 4 seconds, turn the handle clockwise until the stop position is reached
• Open the safe door
Incorrect Entry
• If an incorrect code has been entered, the red LED will flash
• After 3 incorrect entries, a penalty time of 1 minute will begin. During this time no
other code entries can be made
• When the penalty time is over press the [ON] key
• Enter a valid 6-digit code
NOTE: Everytime an incorrect entry code is entered continuously the penalty time is extended
for 2, 4, 8, up to the maximum of 16 minutes
How to close the safe
• Ensure that the bolts are fully retracted (if necessary rotate the handle clockwise to
retract the bolts)
• Gently push the door shut. Always ensure that there are no objects or people in the
way of the closing door
• Turn the handle anti-clockwise until the stop position is reached
Changing the master code
• Open the lock using a valid 6-digit master code
• Open the safe door
• Press the [ON] key
• Press the [ENTER] key
• Press key [1] followed by the [ENTER] key
• Enter the existing 6-digit master code (the factory default is ‘123456’)
• Press the [ENTER] key
• Enter a new 6-digit code followed by the [ENTER] key
• Re-enter the new 6-digit code, then press the [ENTER] key to confirm
Activating a user code
(using the master code)
There are 9 user codes under the user numbers 1-9. To set up a user code, you need to
input the user number first.
• Press the [ON] key
• Press the [ENTER] key
• Press key [2] followed by the [ENTER] key
• Enter the user number you want to set up, i.e. enter key [1] for user number 1 or key
[2] for user number 2 and so on
• Press the [ENTER] key
• Enter the 6-digit MASTER code followed by the [ENTER] key
• Enter a new 6-digit code for your chosen user code
• Press the [ENTER] key
• Re-enter the new 6-digit user code, then press the [ENTER] key to confirm
• Press the [ON] key
• Press the [ENTER] key
• Press key [0] followed by the [ENTER] key
• Enter the user number for the code you wish to delete, i.e. key [2]
• Press the [ENTER] key
• Enter the existing 6-digit MASTER code followed by the [ENTER] key
Deleting a user code
(using the master code)
• Press the [ON] key
• Press the [ENTER] key
• Press key [3] followed by the [ENTER] key
• Enter the user number for the code you wish to change, i.e. key [2]
• Enter the existing 6-digit user code
• Press the [ENTER] key
• Enter a new 6-digit code followed by the [ENTER] key
• Re-enter the new 6-digit code, then press the [ENTER] key to confirm
Changing a user code
(using a user code)
Turning on the Dual Code function
The Dual Code function means that you will require 2 different codes to open the safe,
the master code and any other user code. Ensure that you have at least one user code
programmed in the lock as well as the master code before you turn on this function.
• Press the [ON] key
• Press the [ENTER] key
• Press key [7] followed by the [ENTER] key
• Enter the 6-digit master code followed by the [ENTER] key
Opening the safe with the Dual Code function
• Press the [ON] key
• Press key [0] followed by the [ENTER] key
• Enter the 6-digit master code followed by the [ENTER] key
• Within 1 minute enter a user number i.e. press key [2], followed by the [ENTER] key
• Enter the 6-digit user code for that user followed by the [ENTER] key
• Within 4 seconds, turn the handle clockwise until the stop position is reached
• Open the safe door
Turning off the Dual Code function
• Press the [ON] key
• Press the [ENTER] key
• Press key [8] followed by the [ENTER] key
• Enter the 6-digit master code followed by the [ENTER] key
Programming the Time Delay
A Time Delay is the time you have to wait in between the entry of your code and the
opening of your safe. An Open Window is the amount of time you have to open your
safe after the time delay. For example, if you wanted a 30 minute Time Delay and a 9
minute Open Window, this would mean that once you have entered a valid 6-digit code,
you have to wait 30 minutes before you can open the safe door. After 30 minutes you
will have 9 minutes to open the safe door. If you wait longer than 9 minutes, you have to
start the process again. In this lock you can program a Time Delay from 1 - 99 minutes
and an Open Window of 1 - 9 minutes.
• Press the [ON] key
• Press the [ENTER] key
• Press key [6] followed by the [ENTER] key
• Enter the 6-digit master code followed by the [ENTER] key
• Enter the 3 digits for your Time Delay and Open Window, i.e. [3][0][9]
(this would be for a 30 minute Time Delay and a 9 minute Open Window)
• Press the [ENTER] key
A series of beeps indicates that the battery is weak and must be replaced.
• Only use 9V ALKALINE batteries with this lock
• Burton Safes recommend the Duracell brand
To change the battery, you will need to open the safe and remove the plate on the back
of the door with a small screwdriver. Press the catch on the top edge of the battery
cover with a screwdriver and lever off the battery lid. Pull the battery out carefully until
the battery clip is visable. Release the battery from
the clip and replace. When the new battery is in
place, re-engage the lid.
Please ensure that the cable is not damaged.
Opening the safe with the Time Delay
• Press the [ON] key
• Enter a valid 6-digit code
• Press the [ENTER] key
• After the Time Delay period, an acoustic signal will sound, i.e. after 30 minutes
• Re-enter the same 6-digit code during the Open Window
• Press the [ENTER] key
How to remove the Time Delay
• Press the [ON] key
• Press the [ENTER] key
• Press key [6] followed by the [ENTER] key
• Enter the 6-digit master code followed by the [ENTER] key
• Enter [0][0][0]
• Press the [ENTER] key
Power supply / Battery change
Emergency power supply
• If the safe has run out of power, remove the plastic
cover at the top of the keypad
• Hold a 9V Duracell battery to the front of
the lock against the + and - connectors
• While keeping contact at all times
with the battery, press the [ON] key
• Enter a valid 6-digit code followed
by the [ENTER] key
• Within 4 seconds, turn the handle
clockwise until the stop position is reached
• Once inside the safe, follow the above instructions
to change the battery
FIXING GUIDE
When fixing your safe, it is important that it is fitted against a solid wall or concrete floor.
To fit your safe, identify the bolt that you have been provided with. Use the table to find
out the size of drill and fixing hole you need to make. For more information and guidence
visit our website.
BOLT
M10
M12
M14
M16
DRILL
DIAMETER
(mm)
10
12
14
16
MINIMUM
DRILL DEPTH
(mm)
170
170
150
100
TORQUE
(Nm)
40
60
80
90
Burton Safes
Brockholes Business Park
Rock Mill Road, Brockholes
Holmrth, HD9 7BN
www.burtonsafes.co.uk
+44 (0) 1484 663388
[email protected]
Version 1
September
2020

Other Burtonsafes Lock manuals

Burtonsafes Keyguard XL Digital User manual

Burtonsafes

Burtonsafes Keyguard XL Digital User manual

Burtonsafes Burton Duo FPC-1808-II VdS User manual

Burtonsafes

Burtonsafes Burton Duo FPC-1808-II VdS User manual

Burtonsafes Keyguard Combi User manual

Burtonsafes

Burtonsafes Keyguard Combi User manual

Burtonsafes BURTON PULSE User manual

Burtonsafes

Burtonsafes BURTON PULSE User manual

Burtonsafes KEYGUARD KEY SAFE 74 User manual

Burtonsafes

Burtonsafes KEYGUARD KEY SAFE 74 User manual

Burtonsafes TORINO User manual

Burtonsafes

Burtonsafes TORINO User manual

Burtonsafes PS310 User manual

Burtonsafes

Burtonsafes PS310 User manual

Burtonsafes KEYGUARD XL DIGITAL User manual

Burtonsafes

Burtonsafes KEYGUARD XL DIGITAL User manual

Burtonsafes KeyGuard digital xl User manual

Burtonsafes

Burtonsafes KeyGuard digital xl User manual

Burtonsafes BURTON DUO DEAD - BOLT User manual

Burtonsafes

Burtonsafes BURTON DUO DEAD - BOLT User manual

Burtonsafes KEYGUARD XL DIGITAL User manual

Burtonsafes

Burtonsafes KEYGUARD XL DIGITAL User manual

Burtonsafes KS User manual

Burtonsafes

Burtonsafes KS User manual

Burtonsafes Keyguard XL Digital User manual

Burtonsafes

Burtonsafes Keyguard XL Digital User manual

Burtonsafes PS610 User manual

Burtonsafes

Burtonsafes PS610 User manual

Burtonsafes FIREBRAND User manual

Burtonsafes

Burtonsafes FIREBRAND User manual

Popular Lock manuals by other brands

PROMIX Promix-SM132 Series operating manual

PROMIX

PROMIX Promix-SM132 Series operating manual

Nexy H31B Series user manual

Nexy

Nexy H31B Series user manual

Assa Abloy HES KS200-640 installation instructions

Assa Abloy

Assa Abloy HES KS200-640 installation instructions

Dorex TECNICA DESIGN 200TS installation instructions

Dorex

Dorex TECNICA DESIGN 200TS installation instructions

Securam SafeLogic Xtreme Installation and operation instruction

Securam

Securam SafeLogic Xtreme Installation and operation instruction

SISO Dave manual

SISO

SISO Dave manual

Olympus Lock ME93LM/DM installation instructions

Olympus Lock

Olympus Lock ME93LM/DM installation instructions

HPE EdgeConnect EC-S-P installation guide

HPE

HPE EdgeConnect EC-S-P installation guide

COMPX C8703 Dimensional drawing

COMPX

COMPX C8703 Dimensional drawing

Rivers Locking Systems 410 quick start guide

Rivers Locking Systems

Rivers Locking Systems 410 quick start guide

Garagedoor Lock Pro 135 A Series Installation and operating guide

Garagedoor Lock

Garagedoor Lock Pro 135 A Series Installation and operating guide

Secu S2700U Mounting instructions

Secu

Secu S2700U Mounting instructions

Resource SDGF-001 Quick operation guide

Resource

Resource SDGF-001 Quick operation guide

BASI HS 1400 Original operating instructions

BASI

BASI HS 1400 Original operating instructions

ILCO Unican 900 installation instructions

ILCO Unican

ILCO Unican 900 installation instructions

CODELOCKS CL2000 Programming and operating instructions

CODELOCKS

CODELOCKS CL2000 Programming and operating instructions

Masterlock 4400EURENT user manual

Masterlock

Masterlock 4400EURENT user manual

Purpleline FullStop Nemesis Plus Installation guide and user's manual

Purpleline

Purpleline FullStop Nemesis Plus Installation guide and user's manual

manuals.online logo
manuals.online logoBrands
  • About & Mission
  • Contact us
  • Privacy Policy
  • Terms and Conditions

Copyright 2025 Manuals.Online. All Rights Reserved.