manuals.online logo
Brands
  1. Home
  2. •
  3. Brands
  4. •
  5. Burtonsafes
  6. •
  7. Lock
  8. •
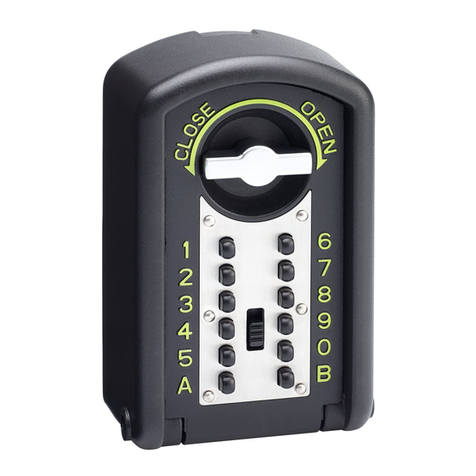
  9. Burtonsafes KEYGUARD XL DIGITAL User manual

Burtonsafes KEYGUARD XL DIGITAL User manual

Instructions
OPENING YOUR KEYGUARD
XL FOR THE FIRST TIME.
• Remove unit from the box and place it
on its back
• Pull the rubber cover open
• Make sure that the dial is in the vertical
position
• Press and slide the ‘clear’ button (the
ridged black button pictured below)
down. Release the clear button.
• Turn the dial clockwise 360 degrees,
until it clicks
• Pull the door open
SETTING YOUR CODE.
• With the door open, turn the dial anti-
clockwise, until it clicks. Make sure the
locking bar is in the locked position
• Stand the Keyguard XL upright,
keeping the door open
• Using a screwdriver, remove the
central screw securing the black plastic
plate
• Choose a personal code which must
be between 3 and 8 digits. NOTE: You
may only use each number/letter once
• Using a flathead screwdriver, rotate
each button in your code 180 degrees,
so that the arrow on each one faces the
SET position
• Re-secure the black plastic plate with
the small screw, make sure you leave the
door open to check your code
CHECKING YOUR CODE.
• With the door still open, make sure
the Keyguard XL is locked by rotating
the dial anti-clockwise 360 degrees, until
it clicks
• Make sure the dial is in the vertical
position
• Press and slide the clear button down
and then release the button
• Use the keypad to input your chosen
code
• Turn the dial clockwise until it clicks
• If it opens, Keyguard XL is ready to use
OPENING YOUR KEYGUARD
NORMALLY.
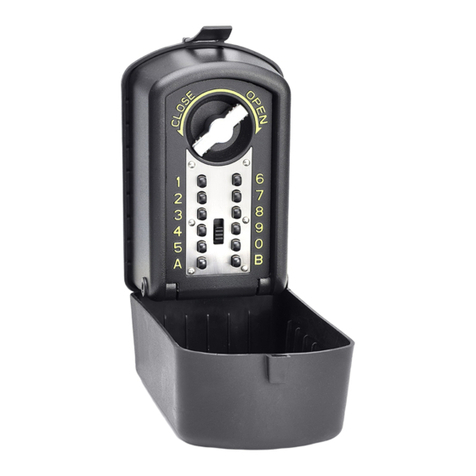
• Ensure that the dial is in the vertical
position (shown in the image below)
• Enter your code
• If you enter your code wrong, press
and slide the clear button down and then
release the button. You can now re-type
your code
• Rotate the dial clockwise 360 degrees,
until it clicks
• Pull the door open
LOCKING YOUR KEYGUARD
NORMALLY.
• Close the door and lock it by turning
the dial anti-clockwaise 360 degrees. It
should click at least once
• Ensure that it has locked properly by
turning the dial clockwise 360 degrees
until it clicks. Try and open the door, if it
does not open your Keyguard XL is now
fully secure
• Close the lid of the rubber cover
CHANGING YOUR CODE.
• Open your Keyguard XL as normal
• Remove the screw securing the black
plastic plate with a small flat-headed
screwdriver
• You will need to turn the disk of each
number in your previous code until the
arrow faces the NOT SET position
• You can now repeat all of the steps in
the section marked ‘SETTING YOUR
CODE’ and ‘CHECKING YOUR CODE’
TROUBLE SHOOTING.
• The dial must be in the vertical
position to use the code buttons
• If your code hasn’t worked, ensure you
press the ‘CLEAR’ button before
entering the code again
• Ensure that the arrow on the dial of
each button is in the SET positon when
setting your code
• Ensure that all numbers not in your
code have their dials facing the NOT SET
positon
• Ensure that the black plastic plate is
properly and securely refastened
• You may find that when you turn the
dial you feel some resistance, do not
worry, this is normal.
26/03/2019 V.1Page 1 of 2
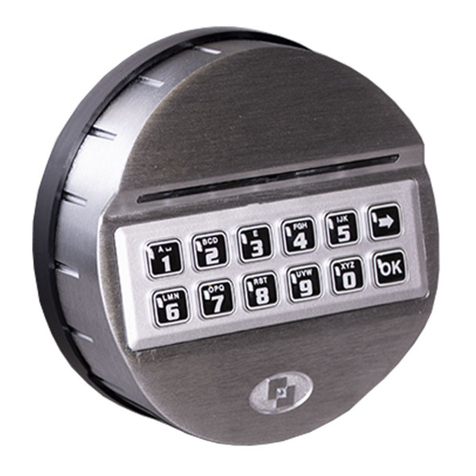
FITTING YOUR KEYGUARD.
To fit your Keyguard XL you will need
the following tools:
• Power Drill
• 5mm Masonry Drill Bit
• Small Socket Driver
• 8mm Socket Head
• Marker Pen
NOTE: Your Keyguard XL should be
fitted to a solid surface. We recommend
brickwork, stone, concrete or
steelwork.
•To start use the rubber cover as your
template to mark the fixing holes on the
wall. Ensure you choose a location that
allows the best possible fixing e.g. the
centre of a brick. N.B. You must never
fix into the mortar.
• Now use the 5mm drill bit to make a
hole 55mm deep in each of the marked
fixing holes
• Place the Keyguard XL inside the
rubber case
•Open the door of your Keyguard XL
and place the whole unit onto the wall
lining up the holes.
• Push the fixing bolts that have been
supplied with your Keyguard XL into
each of the holes
• Tighten each bolt fully using a socket
set
TROUBLESHOOTING.
• Once the fitting is complete if the door
closes but does not lock, test locking it
when the door is in the open positon. If
it works, it is likely that the fixing bolts
are protruding too far into the Keyguard
XL. Try to secure them further into the
wall and close the door again
• If the buttons will not press, ensure
that the dial is in the vertical position
• If your code does not work, press the
‘CLEAR’ button and start again
INSTRUCTION BOOKLET
•50mm concrete screw•
Burton Safes Ltd.
Brockholes
Holmfirth
HD9 7BN
Tel: 01484 663388
In the event of a product malfunction
please contact Burton Safes Ltd
26/03/2019 V.1Page 2 of 2

Other Burtonsafes Lock manuals

Burtonsafes IGNIS User manual

Burtonsafes

Burtonsafes IGNIS User manual

Burtonsafes KEYGUARD XL DIGITAL User manual

Burtonsafes

Burtonsafes KEYGUARD XL DIGITAL User manual

Burtonsafes PS610 User manual

Burtonsafes

Burtonsafes PS610 User manual

Burtonsafes KeyGuard digital xl User manual

Burtonsafes

Burtonsafes KeyGuard digital xl User manual

Burtonsafes KEYGUARD KEY SAFE 74 User manual

Burtonsafes

Burtonsafes KEYGUARD KEY SAFE 74 User manual

Burtonsafes Burton Duo FPC-1808-II VdS User manual

Burtonsafes

Burtonsafes Burton Duo FPC-1808-II VdS User manual

Burtonsafes BURTON DUO DEAD - BOLT User manual

Burtonsafes

Burtonsafes BURTON DUO DEAD - BOLT User manual

Burtonsafes TORINO User manual

Burtonsafes

Burtonsafes TORINO User manual

Burtonsafes FIREBRAND User manual

Burtonsafes

Burtonsafes FIREBRAND User manual

Burtonsafes KS User manual

Burtonsafes

Burtonsafes KS User manual

Burtonsafes PS310 User manual

Burtonsafes

Burtonsafes PS310 User manual

Burtonsafes Keyguard XL Digital User manual

Burtonsafes

Burtonsafes Keyguard XL Digital User manual

Burtonsafes Keyguard Combi User manual

Burtonsafes

Burtonsafes Keyguard Combi User manual

Burtonsafes BURTON PULSE User manual

Burtonsafes

Burtonsafes BURTON PULSE User manual

Burtonsafes Keyguard XL Digital User manual

Burtonsafes

Burtonsafes Keyguard XL Digital User manual

Popular Lock manuals by other brands

Spectrum Brands Kwikset 258SQT 11P SMT installation guide

Spectrum Brands

Spectrum Brands Kwikset 258SQT 11P SMT installation guide

Simpled UF-SP manual

Simpled

Simpled UF-SP manual

Resource SDGF-001 Quick operation guide

Resource

Resource SDGF-001 Quick operation guide

COMPX Stock Locks C8051 Dimensional drawing

COMPX

COMPX Stock Locks C8051 Dimensional drawing

Targus Defcon NSCL user guide

Targus

Targus Defcon NSCL user guide

Purpleline FullStop FLL100 user manual

Purpleline

Purpleline FullStop FLL100 user manual

Borglocks BL2005 Parts List, Installation and General Information

Borglocks

Borglocks BL2005 Parts List, Installation and General Information

SmartLock Q20 user manual

SmartLock

SmartLock Q20 user manual

Borglocks BL4409 manual

Borglocks

Borglocks BL4409 manual

Abus FTS3003 quick start guide

Abus

Abus FTS3003 quick start guide

gebatronic TCS-Cody-Light Assembly instructions

gebatronic

gebatronic TCS-Cody-Light Assembly instructions

HavenLock HAVEN Connect Z user manual

HavenLock

HavenLock HAVEN Connect Z user manual

Tripp Lite SRCOMBO owner's manual

Tripp Lite

Tripp Lite SRCOMBO owner's manual

Keyautomation 580EGS1 Instructions for installation and use

Keyautomation

Keyautomation 580EGS1 Instructions for installation and use

Digitron Easy Lock DPN13AG user guide

Digitron

Digitron Easy Lock DPN13AG user guide

SmartLock S31 user manual

SmartLock

SmartLock S31 user manual

Masterlock 4696D instructions

Masterlock

Masterlock 4696D instructions

BABY DAN KeyGuard instructions

BABY DAN

BABY DAN KeyGuard instructions

manuals.online logo
manuals.online logoBrands
  • About & Mission
  • Contact us
  • Privacy Policy
  • Terms and Conditions

Copyright 2025 Manuals.Online. All Rights Reserved.