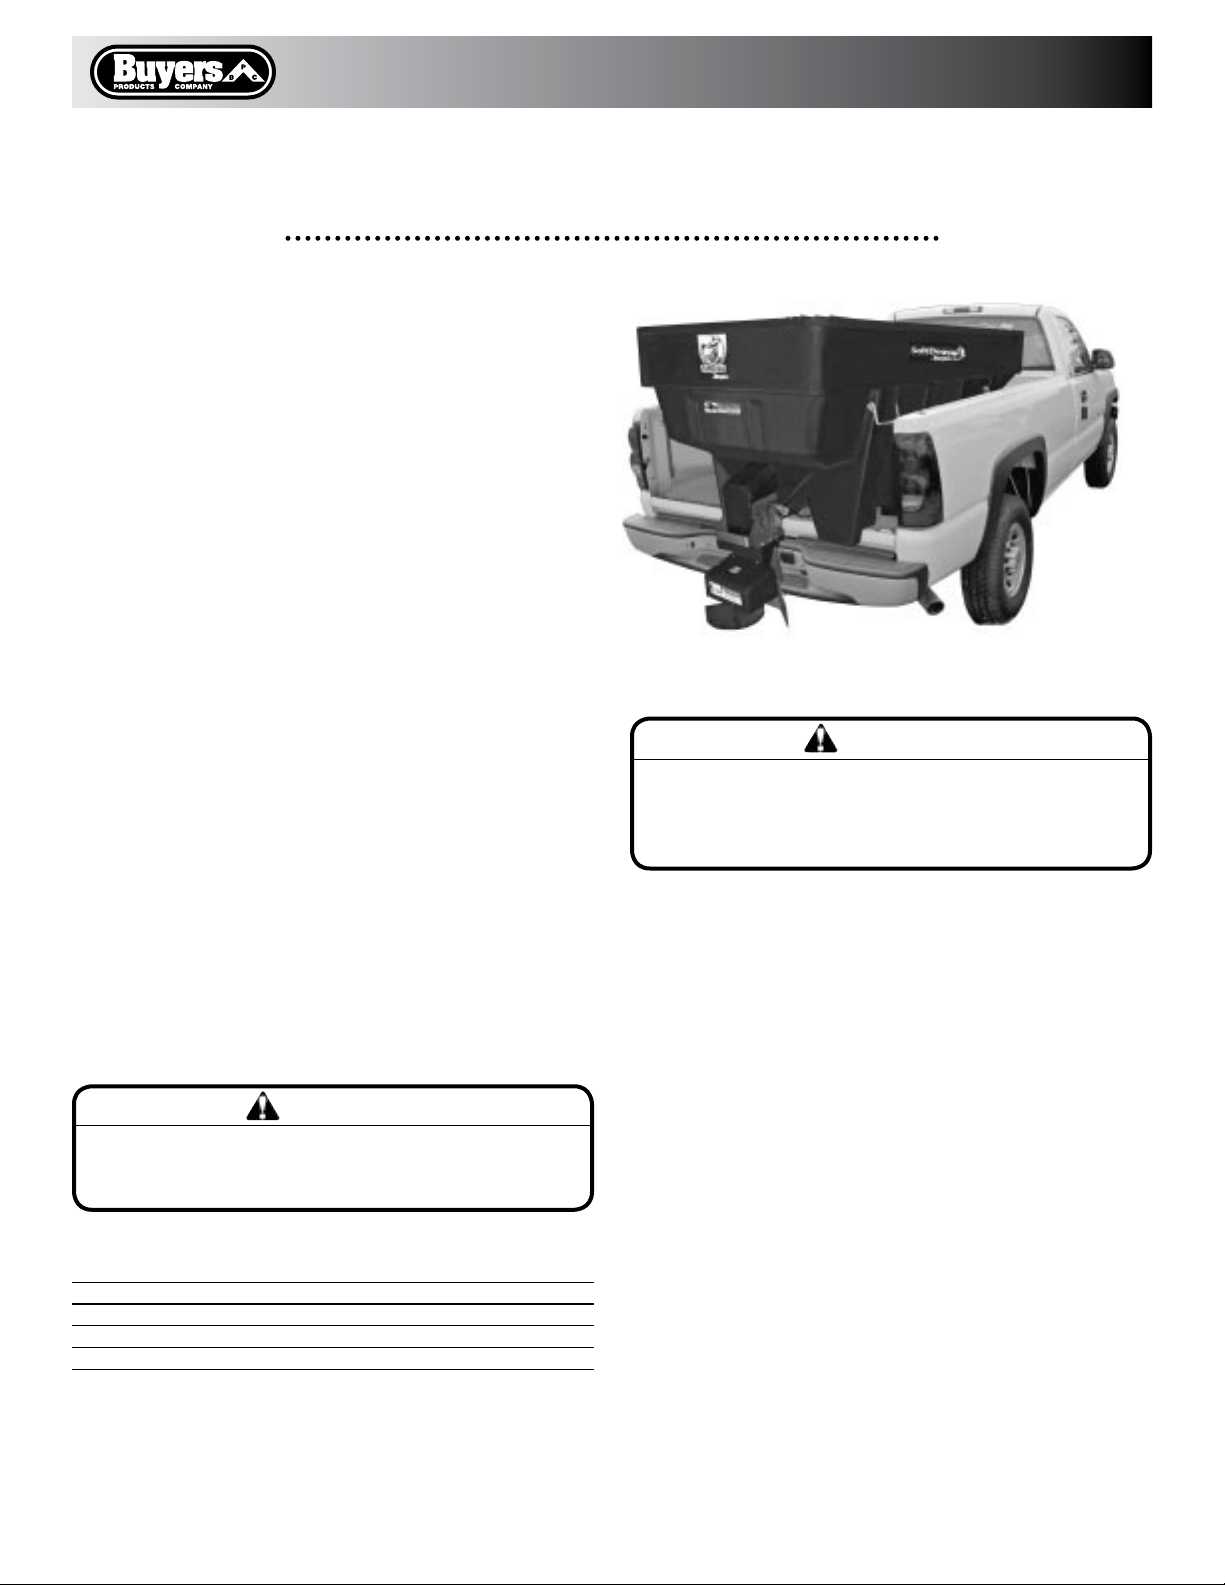
Buyers Salt Dogg SHPE2000 User manual

Table of Contents
General Information .................................................. 1
Safety Precautions ..................................................... 1
Warranty Information ............................................... 2
Installation Instructions ..................................... 2-4
Spreader Operation ................................................... 5
Spreader Maintenance ............................................. 5
Repair Parts & Drawings .....................................6-10
General Information
Spreader models:
SHPE2000- spreader with standard length chute;
SHPE2000X- spreader with extended length chute.
Overall Length: 96 inches
Overall Width: 47-1/2 inches
Overall Height (installed): 40 inches
Empty Weight: 437 lbs (standard chute), 441 lbs
(extended chute)
Capacity Struck: 2.0 cu. yd.
Vehicle Requirements
3/4 or 1 ton pick-up truck above 8500# GVWR.
135 AMP or higher alternator is recommended.
Average Material Weights
Note: To calculate the total spreader weight (including ice
control material), add the empty spreader weight plus the ice
control material and spreader accessories.
Safety Precautions
1. Read this entire Owners Manual before operating
this spreader.
2. Read all safety decals on the spreader before
operating.
3. Check to make sure all safety guards are securely
mounted into place before operating this spreader.
4. Verify that all personnel are clear of the spreader
spray area before starting or operating this spreader.
5. Do not over-load your vehicle beyond payload limits.
If there are any questions, contact the vehicle
manufacturer.
6. Do not adjust, clean, lubricate or unclog material
jambs without first turning off the spreader.
7. Do not climb on or in the spreader during operation.
Do not ride on the spreader while the vehicle is
in motion.
8. Make sure the spreader is securely fastened to the
vehicle in accordance with this manual.
9. Do not operate a spreader that is in need of mainte-
nance or repairs.
10. Always disconnect the battery before removing or
replacing electrical components.
Instruction Manual
Salt Dogg
Spreader Hopper Poly Electrical
2.0 cubic yards
WARNING
Observe the following Safety Precautions before, during and
after operating this spreader. By following these precautions
and common sense, possible injury to persons and potential
damage to this machine may be avoided.
Fine Salt-Dry 2,250
Coarse Salt-Dry 1,431
Sand/Salt 50/50 Mix-Dry 2,700
material weight (pounds per cubic yard)
Quality since 1946
9049 Tyler Blvd. • Mentor, Ohio 44060
Phone (440) 974-8888 • Fax (440) 974-0165
Toll-Free Fax 800-841-8003 • buyersproducts.com
CAUTION
Do not overload vehicle beyond the vehicle’s GVWR or GAWR.
Check vehicle's load rating certification sticker for maximum
vehicle capacity.

Installation Instructions
1. Mounting the Spreader onto the Vehicle:
A. Remove the tailgate from the vehicle.
B. Check truck’s bed for all kinds of sharp debris
or foreign objects. They can cut and seriously dam-
age poly hopper.
C. Lift spreader using tie downs. See (Fig.1)
D. Slide spreader forward in a bed until steps
on spreader’s most rear leg makes contact with
truck’s bed.
SHPE2000 SALT DOGG SPREADER WARRANTY
INFORMATION
This warranty replaces all previous warranties and
no employee of this company is authorized to extend
additional warranties, or agreements, or implications
not explicitly covered herein.
Buyers Products Company warrants all parts of the
product to be free from defects in material and work-
manship for a period of one (1) year. Parts must be
properly installed and used under normal conditions.
Normal wear is excluded.
Any part, which has been altered, including modifica-
tions, misuse, accident, or lack of maintenance will
not be considered under this warranty.
The sole responsibility of Buyers Products Company
under this warranty is limited to repairing or replac-
ing any part(s), which are returned, prepaid, 30
days after such defect is discovered, and returned
part(s) are found to be defective by Buyers Products
Company.
Authorization from Buyers Products Company must
be obtained before returning any part. The following
information must accompany defective parts returned
to Buyers Products Company: RMA #, spreader model,
serial number, date installed, and distributor from
whom purchased.
Buyers Products Company shall not be liable for
damage arising out of failure of any unit to operate
properly, or failure, or delay in work, or for any con-
sequential damages. No charges for transportation
or labor performed on any part will be allowed under
this warranty.
Quality since 1946
2
USE ALL TIE DOWNS
TO LIFT A SPREADER
(Fig.1)

Quality since 1946
3
-30°
15.0°
-45°
35.0°
3. Control Box and Vehicle Wiring Harness
Installation
WARNING! Do not drill holes into fuel tanks, fuel
lines, through electrical wiring, etc that may be
damaged by drilling.
To insure good performance of your spreader,
check the condition of truck’s electrical system.
Using digital voltmeter, check alternator and
battery voltage. With engine running and head
lights and heater fan on good voltage reading
should fall between 13.0 and 15.3 volts. If voltage
reading falls out of this range, check and adjust
your electric system.
WARNING! Use extreme caution when working
around an operating vehicle engine.
(Fig. 2)
B. Then rotate the Chute into operating position
and lock using two spring latches.
(Fig. 4)
E. Center the spreader from side to side on the
vehicle. Securely strap the spreader to the truck
using four ratchet straps as shown. Front straps
must be attached to anchor points located in front
of the spreader to create longitudinal stability for
the spreader. Rear straps must be tightened evenly
to secure the spreader in the middle of the truck.
Additional supports and restrictors can be used.
Verify with the vehicle’s manufacturer that the
factory installed anchor points are designed for
tie-down of such load. Periodically check that the
spreader mounting hardware is securely tightened.
2. Mounting the Spinner/Chute Assembly
A. Attach the Chute Assembly to the spreader.
First, hook the Chute to the spreader by openings
in the Chute’s handle.
(Fig. 3)

Quality since 1946
A. Lay out a wiring path for the Vehicle Wiring
Harness. Connect the Wire Harness smaller termi-
nal to the Chute’s harness, large terminal to the
Hopper’s harness. Drill all necessary holes or use
existing ones to pass the round terminal into the
trucks cab. Attach harness to truck’s frame.
B. Mount the Controller in a convenient location
in the truck cab. It is recommended not to mount
Controller directly in front of the heat vents.
C. Connect the Wire Harness round terminal to
the Controller round terminal.
D. Lay out path for the Power Cable in the truck’s
engine compartment. Drill hole in the firewall or
use an existing one to pass wire harness. It is
recommended to pass the Power Cable from
inside of the cab to the battery due to the large
high amperage connector. Do not route close to
exhaust system!
E. Connect Power Cable terminal to Controller.
F. Connect the Power Cable ring terminals to the
truck’s battery, red-positive, and black-negative.
G. Make sure that the Controller is OFF. Connect
blue wire’s small female terminal to Controller’s
Ignition wire. Connect the blue wire from the
Controller to an accessory wire/terminal that is
controlled by the vehicle’s ignition switch.
4
(Fig.5)

Quality since 1946
Spreader Operation
1. SHPE2000 spreader is equipped with a dual
independent speed Controller with warning lights
and a Vibrator switch. To start the spreader, press
the ON-OFF switch. Switch will illuminate. The
auger will accelerate to full speed for 2 sec., then
slow down to dialed speed. The spinner will accel-
erate to full speed for 2 sec., then slow down to
dialed speed.
2. To activate the Vibrator press the Vibrator
switch ON. Vibrator switch will illuminate.
3. To stop the spreader push ON-OFF switch to
OFF position.
Material Flow Adjustments
Always use screen during spreader operation!
Various materials have different moisture absorp-
tion rate, some materials may not perform as de-
sired. Therefore, the substitution of the alternate
material may be necessary for optimum perfor-
mance.
SHPE2000 has two discharge openings in the
bottom of the hopper. Material flow through these
openings can be controlled using two sliding
baffles. The spreader is shipped from the factory
with baffles adjusted for dry bagged salt. In this
setting rear baffle has 4.0” opening and baffle in
the middle of the hopper has 2.5” opening.
However if you are using a sand/salt mixture or
any chunky and hard to flow materials, it is advised
to increase the open portion of discharge openings.
Important!
Always open rear (closer to gear motor compart-
ment) opening first. Always turn off power before
adjusting baffles!
Warning lights.
Salt Dogg Controller has two warning lights:
“Overload” and “Jam”. The “Overload” light will
be illuminated when the auger is in “Unclogging”
mode. In this mode auger will automatically
reverse several times to free itself. If the auger will
not be able to unclog itself, the “Jam” light will be
illuminated and the Controller will shut-off.
To unclog auger manually, first remove the chute.
Apply 1-1/4” open wrench on auger’s nut. Turn
auger counterclockwise several times.
Salt Dogg controller has an internal circuit breaker
in the vibrator circuit. The vibrator circuit breaker
will trip and the light in the vibrator switch will go
out in an overload situation. To reset the vibrator
circuit breaker: Turn off the vibrator switch for 30
seconds. Turn the vibrator switch on to restart the
vibrator.
Do not run the vibrator longer than 30 minutes with
15 minutes between runs to avoid overheating.
Spreader Maintenance
WARNING! Always disconnect power when
servicing spreader.
1. Use dielectric grease on all electrical connectors
before an electrical connection is made or after con-
nector is disconnected
2. Grease Auger bearing after every 20 hours of
use.
3. Empty the spreader of all ice control materials
when not in use. Wash out the spreader to prevent
material builds up.
4. It is recommended to cover spreader with the
tarp during storage periods. Tarp can be attached
to anchors on both sides of tie downs.
Vibrator is not serviceable. Controller is not
serviceable.
Warning! Never attempt to remove spreader
with material in hopper.
Never leave material in the hopper for extended
period of time. Material may freeze and seriously
damage spreader!
5

Quality since 1946
Bill of Materials
1 3007329 1 Chute Poly Std. Length
1 3007526 1 Chute Poly Ext. Length
2 3006833 1 Gear Motor 12 VDC Spinner
3 3007824 1 Retainer Gearmotor
4 —
3 Washer, 5/16 Lock SST
5 3007564 1 Bracket, Shield SST
6 — 3 Screw, Hex HD Cap 5/16 - 18 x 1-1/4 SST
7 3004611 1 Spinner, 11.5" Poly
8 3007299 1 Handle, Chute
9 3007004 1 Shield, Spinner
10 3007413 1 Cover, Gear Motor, Chute
item part no. qty. description
Repair Parts-Chute Assembly
6
11 3006753 1 Wire Harness, Chute
12 — 16 Washer, Flat 3/8 USS SST
13 — 6 Screw, HHC 3/8 - 16 x 1 304 SST
14 — 10 Nut, Nylock 3/8 - 16 x 7/16 SST
15 — 4 Screw, HHC 3/8 - 16 x 1.25 SST
16 — 6 Screw, Sheet Mtl #12 x 3/4 Hex Washer HD SST
17 — 1 Pin, Clevis, 5/16 x 2-1/2, .141 Hole ZN
18 — 1 Cotter Pin, 1/8 x 1, Zinc
19 3002631 1 Label, “No Step”
20 3007844 1 Decal, “Danger, Stay Clear”
item part no. qty. description

Quality since 1946
7
Bill of Materials
1 3007357 1 Trough, Weldment
2 3007000 1 Gasket, Felt Bearing
3 1411000 1 Bearing, 2-Hole Flanged 1"
4
—
4 Nut, Nylock 3/8-16 x 7/16 SST
5 3006831 1 Auger
6 3007730 1 Bracket, Vibrator Short
7 3007416 1 Vibrator 200 lbs. 12 VDC
8 3007824 1 Retainer Gearmotor
9 3006832 1 Gear Motor, 12 VDC, Auger
10
—
3 Washer, 5/16 Lock SST
11
—
3 Screw, HHC 5/16-18 x 5/8 SST
12
—
1 Pin, Clevis, 5/16 x 1-1/2, W/ 5/32 PH, ZN
13
—
1 Cotter Pin, 1/8 x 1, Zinc
14
3006844
1 Wire Harness
item part no. qty. description
Repair Parts-Trough

8
Bill of Materials
1 3008001 1 Hopper, Poly 2 cu. yards
2 3007591 1 Trough, Auger Assembly
3
—
14 Washer, Flat 3/8 x 1.5 x .048 SST
4
—
14 Washer, Lock RHS - 3/8 SST
5
—
14 Screw. HHC - 3/8-16 x 3/4 SST
6 3006959 1 Baffle, SHPE1500
7 3007731 1 Bracket Vibrator, Long SST
8
—
2 Nut, Nylock 3/8-16 x 7/16 SST
9
3007821
1 Strain Relief Bushing
item part no. qty. description
Repair Parts-Hopper
10 3007236 1 Cover Gearmotor
11
—
6 Washer, 1/4 in. Spring Lock SST
12
—
6 Screw, Cap 1/4-20 x 3/4 SST
13
—
4 Screw, Sheet MTL #12 x 3/4 Hex Washer HD SS
14 4375 2 Clamp, Hose .4375, 9/32 Hole
15 3006974 4 Stud, 1/2-13x .75 Both Ends, 9.75” Long ZC
16 3006958 4 Tie Down
17 3008849 8 Anchor, Tarp
18
—
8 Nut, Nylock 1/2-13 Zinc
item part no. qty. description
Quality since 1946

9
Repair Parts- Spreader
Bill of Materials
1 3008011 1 Hopper Poly 2 cu. yards Assembly
2 3008884 1 Accessories Box, SHPE2000
3 3007412 1 Chute Poly Std. SHPE1500
4 3006839 1 Decal, SaltDogg, Rear
5 3006911 2 Decal, SaltDogg, Side
6 3008391 2 Support, Top Screen SST
7 3008390 1 Screen, SHPE2000
8 3008787 4 Retainer, Screen
9
—
4 Washer, Lock RHS - 3/8 SST
10
—
4
Screw, HHC 3/8 - 16 x 304 SST
11 9240132 1 Decal #2, Danger Before SVCE
12
—
2
Screw, Sheet MTL #12 x 3/4 Hex Washer HD SST
item part no. qty. description
Quality since 1946

Quality since 1946
9049 Tyler Blvd. • Mentor, Ohio 44060
Phone (440) 974-8888 • Fax (440) 974-0165
Toll-Free Fax 800-841-8003 • buyersproducts.com
3008885 Rev. A
Bill of Materials
1 3006620 1 Controller, Buyers Logo
2 3006724 1 Wire Harness, Main
3 3006842 1 Power Cable, Control Box
4 1496505 1 Hold Down Kit, Spreader (4 Straps)
5 TS9 8 Strap, Rubber Tarp 9”
6 9225 16 S-Hook, 2.5” ZN, Tarp Strap
7 3008838 1 Tarp SHPE2000
8 0203700 1 Wire Assembly, 36 Long
item part no. qty. description
This manual suits for next models
1
Table of contents
Other Buyers Spreader manuals

Buyers
Buyers SaltDogg SHPE2500 Series User manual

Buyers
Buyers ATVS100 User manual

Buyers
Buyers Salt Dogg SHPE1500 User manual

Buyers
Buyers UTVS16 User manual

Buyers
Buyers ATVS100 User manual

Buyers
Buyers SaltDogg 1470601SSE User manual

Buyers
Buyers SaltDogg PRO4000 User manual

Buyers
Buyers Salt Dogg SHPE1000 Series User manual

Buyers
Buyers SaltDogg SHPE6000CH User manual

Buyers
Buyers SaltDogg 14708F463211 User manual