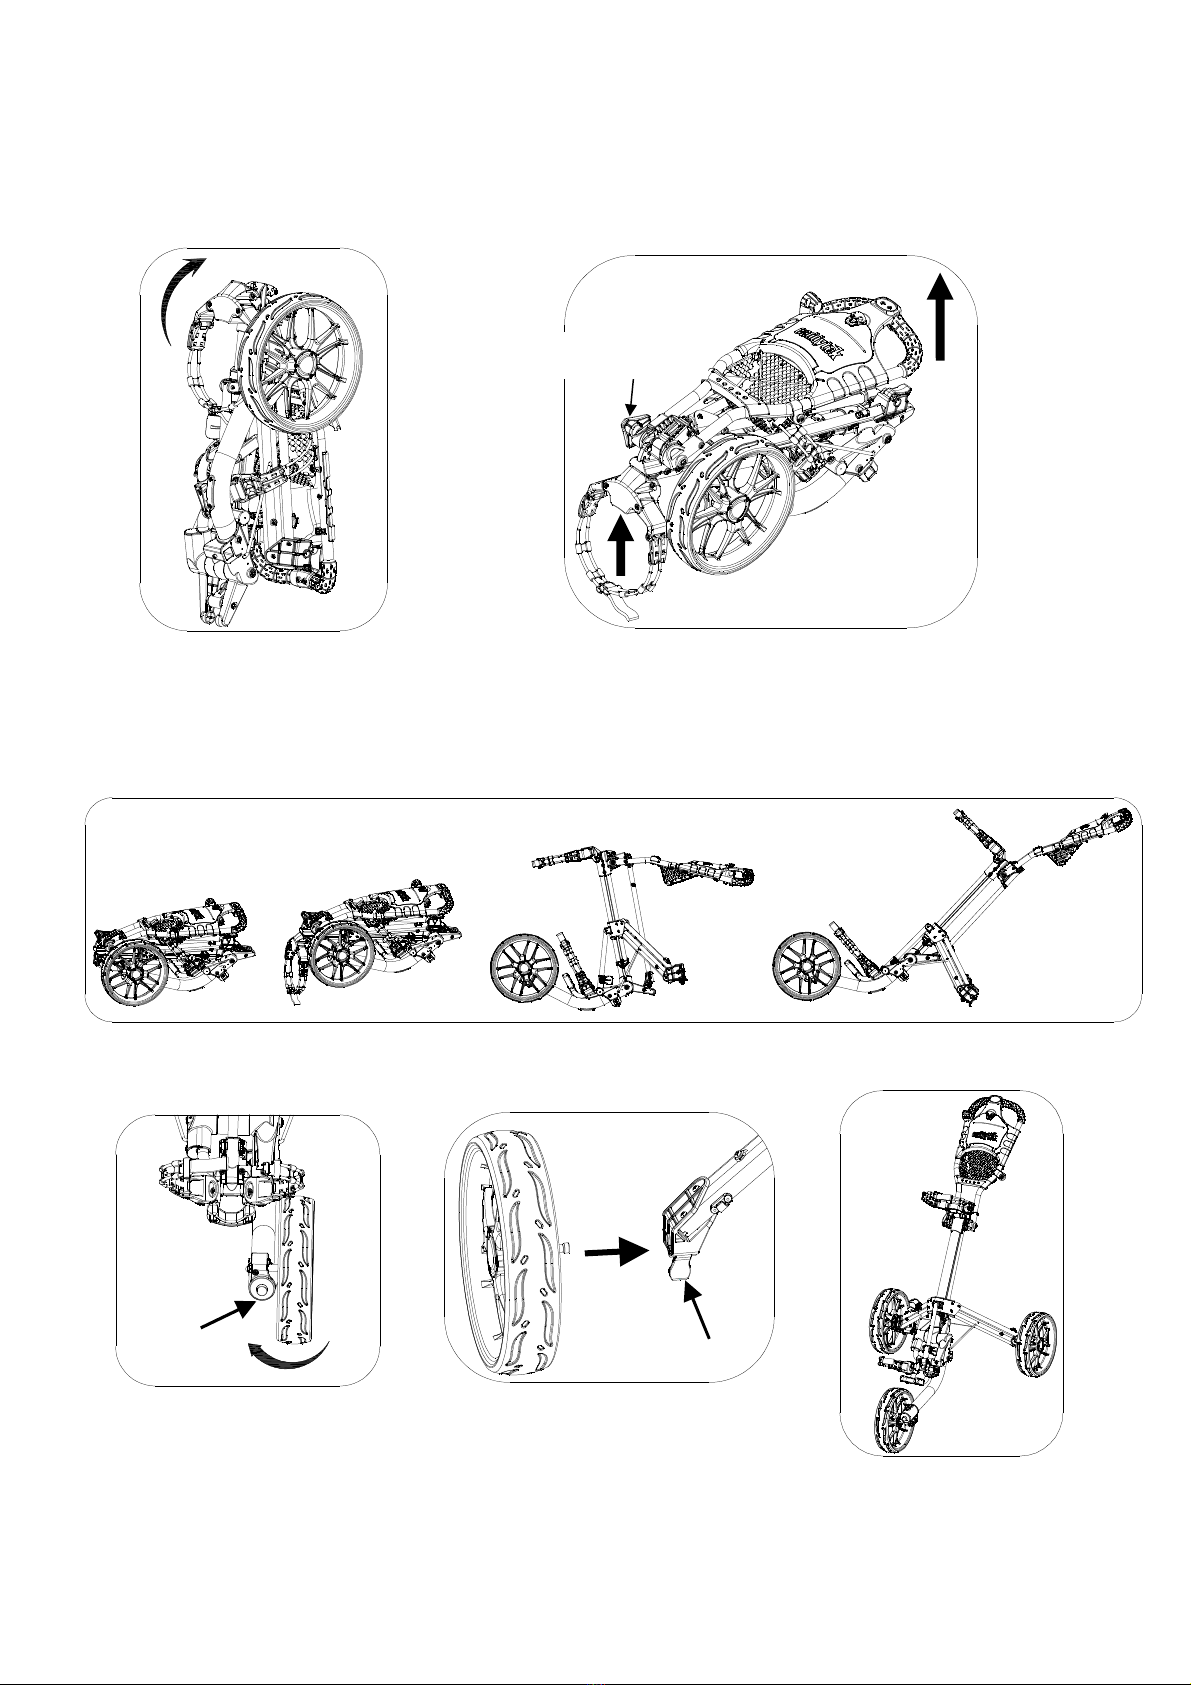
Caddytek EZ-Fold User manual

EZ-Fold 3 Wheel Golf Push Cart
Model: CaddyLite - EZ
User Manual Ver.1

CaddyTek Inc.
2 153 Paseo Del Prado
Walnut, CA 91789, USA
www.caddytek.com

WARNING:
FOR YOUR OWN SAFETY, PLEASE REVIEW THESE WARNINGS AND
KEEP THIS USER GUIDE FOR FUTURE REFERENCE.
●Before using this golf cart, please read and understand the important
instructions and warnings in this user guide.
●AVOID injury by always following the folding and unfolding the cart
instructions carefully
●AVOID INJURY by keeping clear of moving parts while adjusting, folding
or unfolding this cart.
●ALWAYS make sure the cart is fully extended and locked before use.
●ALWAYS make sure the cart is folded and locked properly before lifting or
transporting.
●ALWAYS use the brake when parking the cart.
●DO NOT run while using this cart.
●DO NOT use accessories other than those designed specifically for this
cart.
●Keep hands and fingers away from moving parts or sliding sections of the
cart!

Package contents:
1. The main frame of the cart with the front wheel
2. Two main wheels
3. Umbrella holder
4. Drink holder
5. This user manual
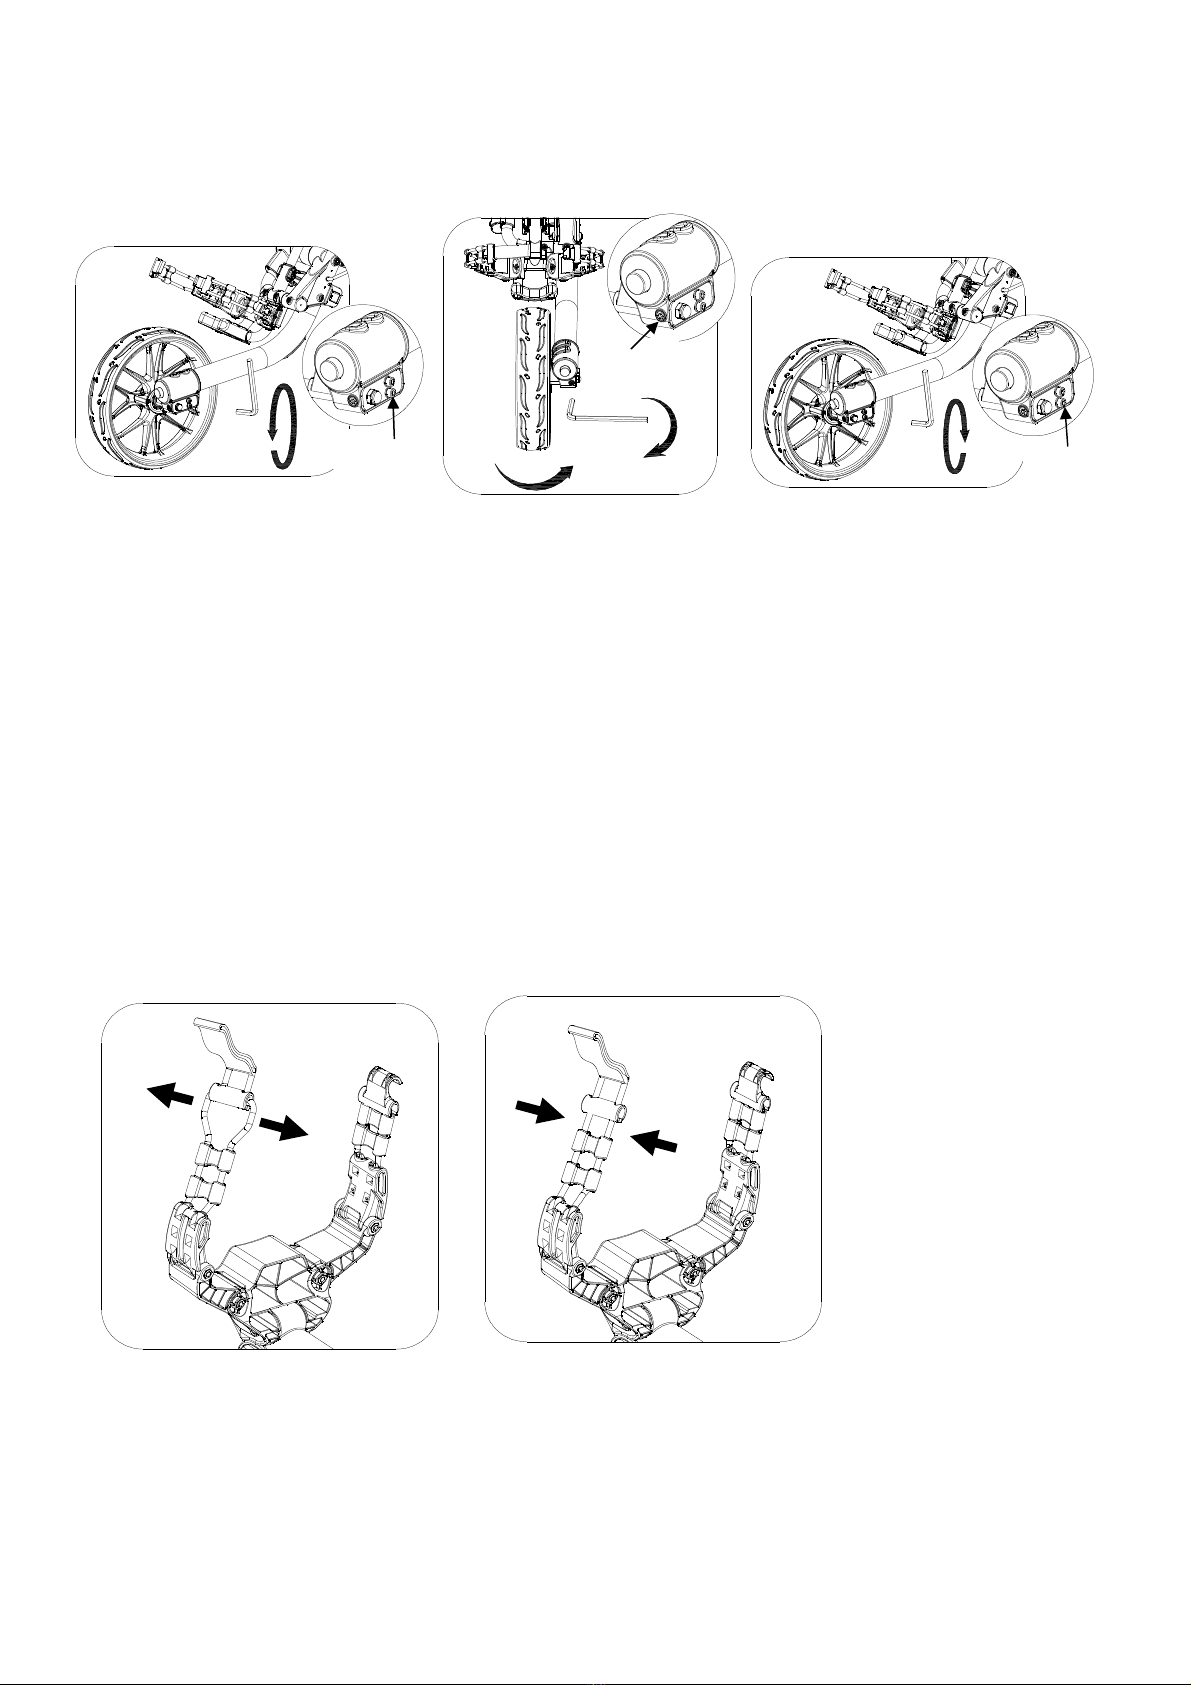
6. Tools for adjustment
In case any of above item is missing or damaged, please call 9 9-895-6478 or email
[email protected] to report.
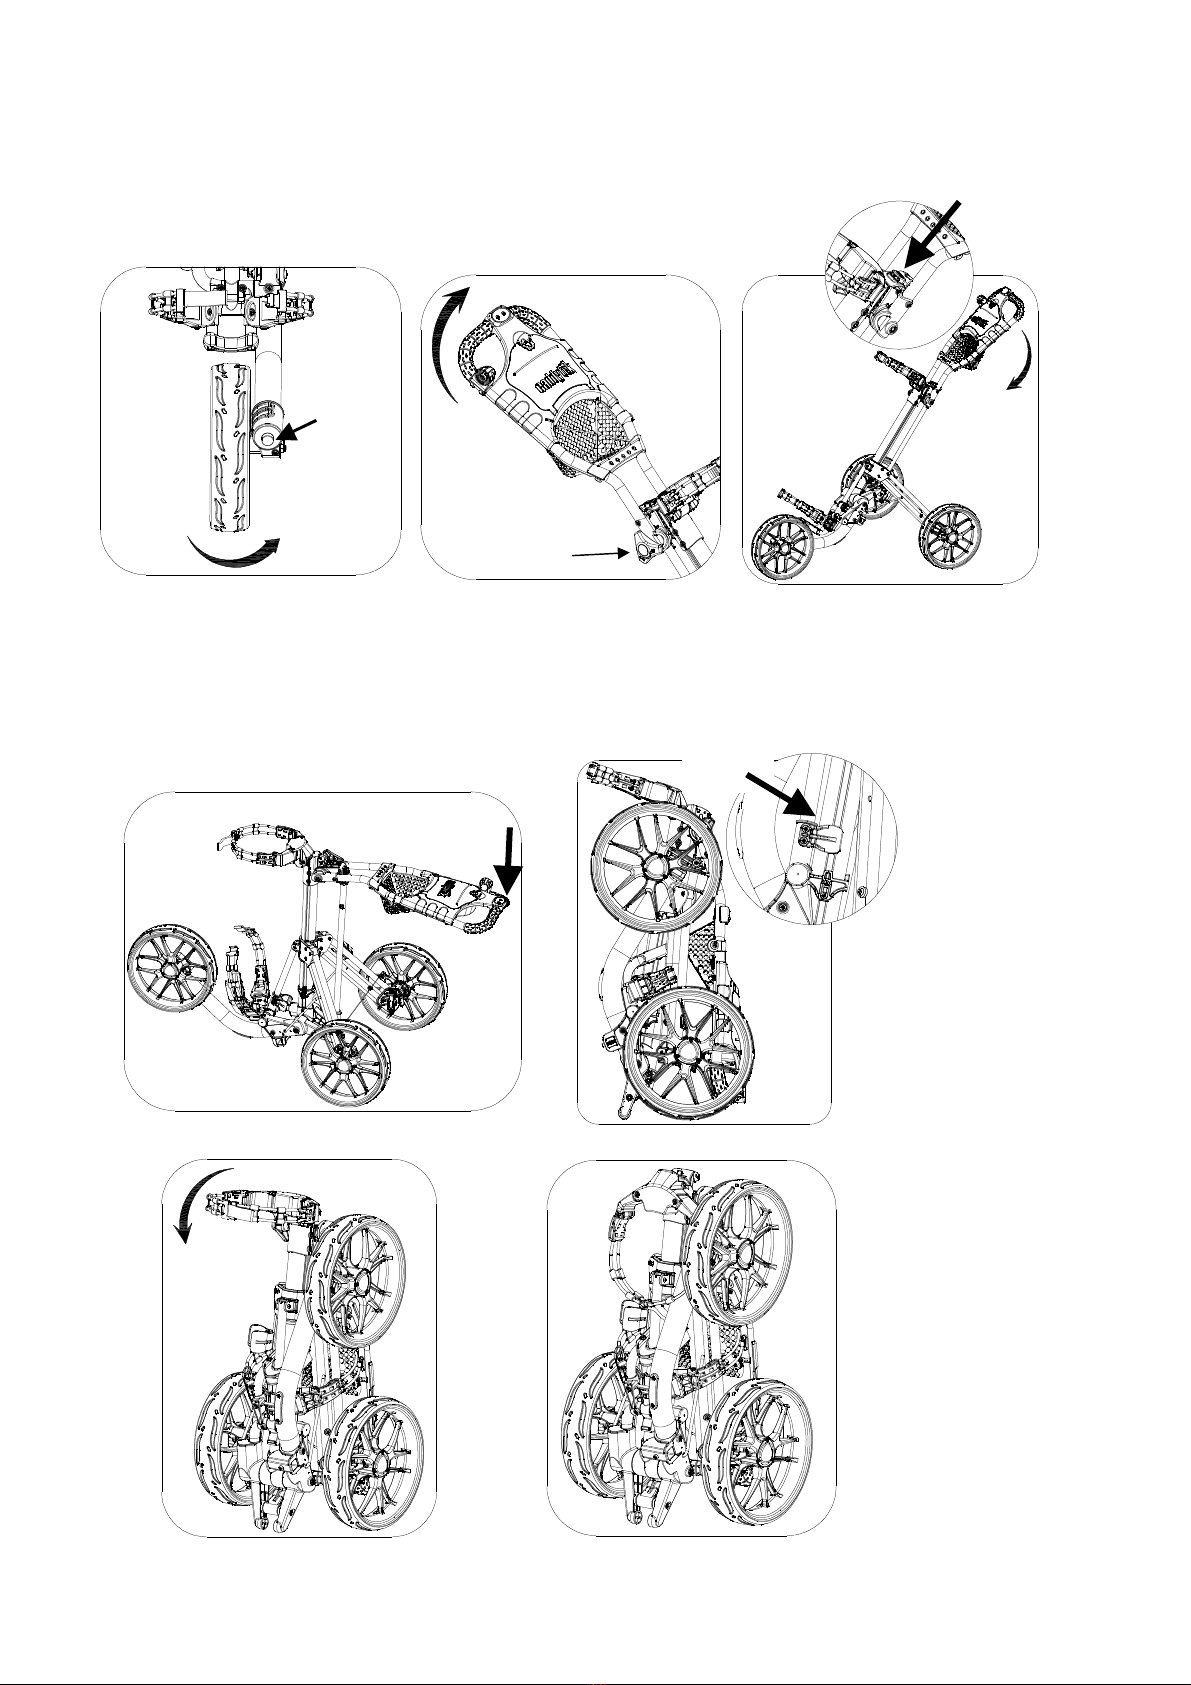
Parts identification:
A: PVC handle grip
B: Umbrella holder
C. Umbrella holder base
D: Scorecard holder assembly
E: Umbrella holder storage rack
F: Handle frame
G: Upper bag holder bracket assembly
H: Handle height adjusting knob assembly
I: Main frame
J: Front connection Rod
J1: Main connection Rod
K: Leg frame bracket
L: 2 holes right leg frame
L1: 2 holes left leg frame
M: 4 holes right leg frame
N: Lower bag holder bracket assembly
O: Optional seat installation slot
P: Supporting cable
Q: Right stabilization bar
Q1: Left stabilization bar
R: Right wheel lock mechanism
R1: Left wheel lock mechanism
S: Rear wheel assembly
T: Front wheel fork assembly
U: Front wheel assembly
V: Foot brake assembly
W: Basket with cooler
X: Drink holder
Y:
Handle mesh net
Z:
Main frame folding holder
W
1
Y
O
Z

Assembly the car
Lift the upper bag holder
bracket
Make sure the handle height adjusting knob is fully tighten .
Pull the
handle and upper bag bracket as shown in Fig. 2 to extend the cart. (Shake the
cart slightly to release the main frame from the holding slot if necessary.)
Release the wheel locking buckle,
insert the wheel axel into the wheel
holder completely and then tighten
the locking buckle.
The cart is fully extended
as shown in Fig. 5
Fig. 1
Fig. 2
Fig. 3 Fig. 4
Fig. 5
locking buckle
2
As shown in Fig 3, press the
button and rotate the front
wheel 18 degree clockwise
so the front wheel is at center
of the cart.
button
handle height adjusting
Unfolding motion

Press the button and rotate
the front wheel 18 degree
counterclockwise so the front
wheel is on the right of the
front wheel fork (when you
stand in front of the cart).
Make sure the handle height adjusting knob is fully tighten .Slightly
lift up the handle as Fig. 7 then press the folding button and push
the handle downward as shown in Fig. 8 , Fig. 9 to fold the cart till
the main frame clicks into the holding slot as in Fig. O.
The cart is fully folded.
Fig. 6
Fig. 1
Fig.11
3
Folding the cart
Folding button
Fold down the upper bag
holder bracket
Fig. 7
Fig. 8
Fig. O
adjusting
Fig. 9
handle height
button

Umbrella Holder
To put in use:
Simply attach the umbrella holder
onto the cart as in fig. 15/16
Fig. 15 Fig. 17
4
Fig. 16
To store:
Attach the umbrella holder to
the storage rack on the right
leg frame as in Fig. 17.
U
se the b
rake
Install the drink holder
Press the brake pedal to
brake and push again to
release as Fig. 18
Fig. 13
Fig. 12
Fig. 14
Fig. 18
Slot on holder
Fixed block on base notch
When installing the drink holder, align the smallest part of the slot on
the holder with the fixed blocks. Then pull horizontally to fit the holder
on the base.

Front Wheel Alignment
Bag Holder Stra Length Adjustment
If the cart veers to the right:
Step 1: Face the front wheel of the cart and use the provided Allen
wrench to loose the two side screws as in fig. 19.
Step 2: Then use the Allen wrench to adjust the front bolt clockwise until
the front wheel is centered as in Fig. 2 . Then tighten the two side
screws as in fig. 21.
If the cart veers to the left:
Step1: The same as above.
Step 2: Adjust the front bolt counterclockwise until the front wheel is
centered as in fig.2 . Then tighten the two side screws as in fig. 21.
Refer to the Fig. 22 & Fig. 23:
1. Pull the elastic strap out of the strap buckle as in fig. 22
2. Adjust the strap to the desired length.
3. Push the elastic strap back to the strap buckle as in fig. 23
Fig. 2
Fig. 19
Fig. 22
5
Fig.
21
Fig. 23
bolt
screws
screws

WARRANTY
CaddyTek Inc. warrants its products to be free of defects and workmanship
for one year from the date of purchase. We will either repair or replace
defective products at our option.
Normal wear and fading of products are not considered manufacturer's
defect. This warranty does not apply to claim of damage to items used in
connection with CaddyTek Inc. products. In the case of deterioration due to
normal use we will repair the item for a normal charge. CaddyTek Inc. is the
sole judge of any claim or warranty.
For customers in North America, please contact CaddyTek Inc. for the
service. For customers outside of North America, please contact with your
dealer for the warranty service or you are welcome to contact CaddyTek Inc.
directly.

PRODUCT REGISTRATION
I have read and understand this product's operation and warranty, and wish to record
my purchase:
Model: ______________________________
Name (Mr./Mrs./Miss):________________________________
Address: ______________________________________________
City: ______________ State: ____________ ZIP: ______________
Tel:____________ E-Mail____________________
Date of Purchase: ______________Name of Store/Dealer: __________________
Round of Golf per Month: _______________ HCAP_______________________
Signed: ________________________ Date:________________________
Failure to return this card may result in delayed response to you warranty claim

Caddytek Inc.
2 153 Paseo Del Prado
Walnut, CA 91789
USA
You can also register your Golf Cart on www.caddytek.com
Stamp
This manual suits for next models
1
Table of contents
Other Caddytek Golf Trolley manuals

Caddytek
Caddytek CaddyLite 15.3 V2 User manual

Caddytek
Caddytek CaddyCruiser ONE V4 User manual

Caddytek
Caddytek CaddyLite ONE V3 User manual

Caddytek
Caddytek CaddyCruiser ONE V3 User manual

Caddytek
Caddytek incontro sports Operating and maintenance manual

Caddytek
Caddytek CaddyLite ONE-S User manual

Caddytek
Caddytek CaddyLite 13.5 User manual