manuals.online logo
Brands
  1. Home
  2. •
  3. Brands
  4. •
  5. Calflex
  6. •
  7. Bathroom Fixture
  8. •
  9. Calflex CARIMALI DUETTO 00-1604-CR User manual

Calflex CARIMALI DUETTO 00-1604-CR User manual

INSTALLAZIONE –INSTALLATION
MONTAGE –EINBAU
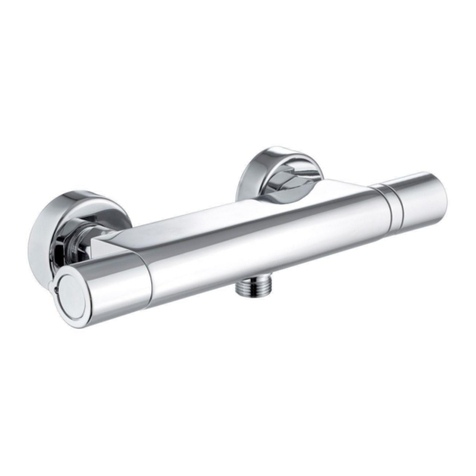
Art. 00-1604-CR
Art. 00-1614-CR
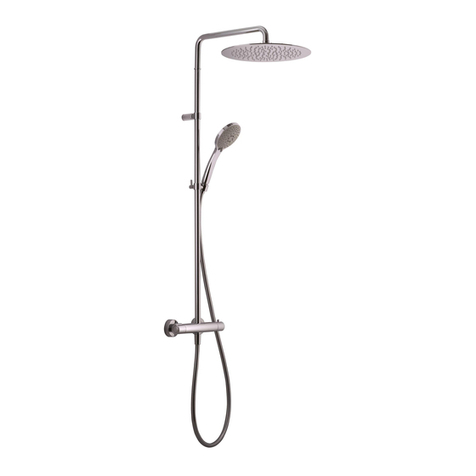
COLONNA COMPLETA "DUETTO" CON RUBINETTO TERMOSTATICO
“DUETTO“ COMPLETE SHOWER COLUMN WITH THERMOSTATIC FAUCET
“DUETTO“ COLONNE DOUCHE COMPLETE AVEC ROBINET THERMOSTATIQUE INTEGRE’
"DUETTO" KOMPLETTE DUSCHSÄULE MIT THERMOSTATISCHEN WASSERHAHN
(I) INFORMAZIONI PRELIMINARI
I miscelatori termostatici della linea CARIMALI sono idonei al funzionamento con acqua calda fornita da accumulatori in pressione. Per
il funzionamento con scalda acqua istantanei elettrici o a gas verificare che questi abbiano una potenza non inferiore a 18 KW o 250
Kcal/min. ; per il tipo a gas è consigliato l’utilizzo di apparecchi con regolazione automatica della fiamma in funzione del volume di
acqua prelevato.
ATTENZIONE: con i miscelatori termostatici non si possono utilizzare accumulatori di acqua calda senza pressione.
ATTENZIONE: in caso di pericolo di gelo svuotare l’impianto domestico e smontare la cartuccia termostatica (vedere
paragrafo USO E MANUTENZIONE-Smontaggio cartuccia termostatica per pulizia) per consentire il completo svuotamento
del miscelatore.
DATI TECNICI
- Pressione dinamica minima………………………………………..1 bar
- Pressione max di esercizio (statica)....……………………………6 bar
- Pressione di esercizio raccomandata (statica)………………..…2-5 bar
- Temperatura acqua calda massima……………………………….65°C
- Temperatura acqua calda minima………………………………...+5°C della temperatura dell’acqua miscelata richiesta
- Ingresso acqua calda……………………………………………….G1/2” a sinistra
- Ingresso acqua fredda…………………………………………...…G1/2” a destra
-
-
(UK) PREVIOUS INFORMATION
The thermostatic mixers of the CARIMALI line are suitable to operate with hot water supplied by accumulators in pressure.
For use with instantaneous electric or gas water heaters make sure they have a minimum output of 18 kW or 250 Kcal / min.;
for the gas type it is recommended the use of devices with automatic adjustment of the flame according to the volume of the taken
water.
WARNING: thermostatic mixers cannot be used with hot water storage without pressure.
WARNING: in case of danger of frost drain the home system and remove the thermostatic cartridge (see section USE AND
MAINTENANCE Removing thermostatic cartridge for cleaning) to allow the complete emptying of the mixer.
TECHNICAL DATA:
- Minimum dynamic pressure………………………………………..1 bar
- Maximun working pressure (static)......……………………………6 bar
- Recommended operating pressure (static)……..……………..…2-5 bar
- Maximum hot water temperature….……………………………….65°C
- Minimum hot water temperature ….……………………………...+5°C of the required mixing water temperature
- Hot water inlet……………………………………………………….G1/2” on the left
- Cold water inlet…………………………………………………...…G1/2” on the righ
-
-
(F) INFORMATIONS PRELIMINAIRES
Les mixers thermostatiques de la ligne CARIMALI adaptés à fonctionner avec l’eau chaude fournie par accumulateurs en pression.
Pour le fonctionnement avec chauffe-eau instantanés électriques ou a gaz, vérifier que ceux-ci aient une puissance non inférieure à 18
KW ou 250 Kcal/min. ; pour le type à gaz il est recommandé l’usage d’appareillage avec réglage de la flamme en fonction du volume
d’eau prélevé.
ATTENTION: On ne peut pas utiliser les accumulateurs d’eau chaude sans pression avec les mixers thermostatiques.
ATTENTION: En cas de danger de glace vider l’implantation domestique et démonter la cartouche thermostatique (voir
paragraphe USAGE et MANUTENTION démontage cartouche thermostatique pour le nettoyage) pour consentir le vidage
complet du mixer..
DONNEES TECHNIQUES
- Pression dynamique minime………………………………..……..1 bar
- Pression max de fonctionnement (statique)......…………………6 bar
- Pressione de fonctionnement recommandée (statique)……..…2-5 bar
- Temperature eau chaude maximum ……………………………….65°C
- Temperature eau chaude minimum ……………………………...+5°C de la température de leau mélangée demandée
- Arrivée eau chaude ….……………………………………………….G1/2” à gauche
- Arrivée eau froide……………………………………………...…...…G1/2” à droite
-
(D) VORINFORMATION
Die thermostatische Mischbatterie der CARIMALI Linie sind für den Lauf mit warmem Wasser geeignet, das aus Druck- Akkumulatoren
ausgestattet wird. Um den Lauf mit Elektrisch/Gas- Durchlauferhitzer prüfen Sie, dass die Geräte eine Minimum Leistung von 18 KW
oder 250 Kcal/Min. haben; für das Gas-Gerät riet man, ein mit automatische Regelung der Flamme zu benutzen, die in Funktion des
Volume des entnommenen Wasser ist.
ACHTUNG: mit thermostatische Mischbatterie darf man nicht die “Ohne-Druck” warmes Wasser Akkumulatoren benutzen.
ACHTUNG: Im Frost-Notfall leeren die ganze häusliche Anlage und zerlegen die Thermostatische Kartusche, um die ganze
Leerung der Mischbatterie zu erlauben.(Sehen Abschnitt VERWENDUNG UND WARTUNG - Thermostatische Kartusche
Demontage zum Reinigen).
TECHNISCHE DATEN
- Minimaler dynamischer Druck ……………….………………………..1 bar
- Maximaler Dienst-Druck (statisch)....…………….……………………6 bar
- Empfohlen Dienst-Druck(statisch)……………..…….……….……..…2-5 bar
- Max Temperatur warmes Wasser……..……………………………….65°C
- Min Temperatur warmes Wasser……………………………………...+5°C der Temperatur
Des gewünschtes gemischtes Wasser
- Eintritt warmes Wasser.……………………………………………….G1/2” nach Linke
-Eintritt kaltes Wasser ……………………………………….…...…G1/2” nach Rechte
Realizzare l’impianto di adduzione delle acque seguendo le indicazioni riportate nello schema.
Ingresso acqua calda a sinistra con attacco da G1/2”. Ingresso acqua fredda a destra con attacco da G1/2”.
Follow the indications reported in the pictures to make the connections to the water plant.
Hot water inlet left side with elbow G1/2”. Cold water inlet right side with elbow G1/2”.
Suivre les indications reportées dans les illustrations pour réaliser l’implant des raccords à l’eau.
Arrivée eau chaude à gauche avec raccord 1/2”G. Arrivée eau froide à droite avec raccord 1/2"G.
Folgen die oberen erwähnten Anleitungen, um die Wasseranlage zu realisieren
Eintritt des warmes Wassers Links, mit einem G1/2“ Angriff. Eintritt des kaltes Wassers Recht, mit einem G1/2“ Angriff.
Avvitare i raccordi eccentrici agli attacchi dell’impianto,
utilizzando canapa o similari per realizzare la tenuta idraulica.
Screw the eccentric connectors onto the water connections of
the plant using material like hemp to ensure the
waterproofing.
Visser les raccords excentriques sur les raccords d’eau de
l’implant en utilisant du chanvre ou autre similaire pour
assurer l’étanchéité du montage.
Schrauben die exzentrischen Verbindungen mit den
Anlageangriffe, benutzen Hanf oder ähnlich, um die
Wasserdichte zu realisieren.
Con l’ausilio di una livella e di un metro, posizionare
correttamente in bolla e ad una distanza di 150 mm i raccordi
eccentrici.
Using a level and a meter, put the eccentric connector at the
correct level at a distance of 150mm one from the other.
À l’aide d’un niveau a bulle et d’un mètre, mettre les raccords
à niveau les distanciant l’un de l’autre de 150 mm.
Mit einer Wasserwaage und einem Meter, positionieren die
exzentrischen Verbindungen in die richtigen Lage. Die
Entfernung zwischen den Verbindungen muss 150 mm sein.
Inserire i rosoni sulle calotte di serraggio.
Insert the rosettes on the fixing nuts.
Insérer les rosettes sur les écrous de serrage.
Stecken die Fensterrose auf die Spannenkappen.
Inserire le guarnizioni di tenuta nelle calotte di serraggio.
Insert the gaskets into the fixing nuts.
Insérer les joints dans les écrous de serrage
Stecken die Dichtungsringe in die Spannenkappen.
Montare il miscelatore termostatico alla parete serrando le
calotte con chiave esagonale da 30 mm .
Fix the thermostatic mixer to the wall tightening the nuts by
means of a 30 mm hexagonal wrench.
Fixer le robinet thermostatique au mur en serrant les écrous
à l’aide d’une clé hexagonale de 30 mm.
Montieren die thermostatische Mischbatterie an der Wand
und schließen die kappen mit einem 30 mm hexagonalen
Schlüssen.
Inserire la colonna sul raccordo di uscita superiore.
Insert the column on the upper outlet fitting.
Insérez la colonne sur le raccord de sortie supérieur.
Legen die Duschsäule an die obere Auslaufarmatur.
Con l’ausilio di una livella posizionare correttamente in bolla
la colonna.
With a level put in correct bubble position the column.
A l’aide d’un niveau à bulle mettre à niveau la colonne
Mit einer Wasserwaage positionieren die Duschsäule in der
richtige Lage.
Marcare la posizione del supporto di fermo.
Mark the position of the fixing support.
Marquer la position du support de fixation
Markieren die Lage der unbeweglichen Stütze.
Sfilare la colonna dal raccordo di uscita superiore.
Disengage the column from the upper outlet fitting.
Retirer la colonne du le raccord de sortie supérieur.
Lösen die Duschsäule aus der oberen Auslaufarmatur.
Marcare la posizione del centro del supporto di fermo
spostandosi di 12.5 mm.
Mark the position of the center moving to 12.5 mm.
Marquer la position du centre en se déplaçant de 12,5 mm
Bewegen sich nach 12.5 mm, um die Lage der
unbeweglichen Stütze markieren.
Con una punta a muro Ø 8 praticare un foro nella parete.
With a wall drill Ø 8 make a hole in the wall.
Avec un perceuse Ø 8 faire le trou dans la paroi
Mit einer Ø 8 Mauere-Spitze, machen ein Loch in die Wand.
Inserire il tassello nel foro e fissare il supporto alla parete
serrando la vite.
Insert the plug in the hole and fix the support to the wall
tightening the screw.
Placet le tasseau dans le trou e fixer le support au mur en
serrant la visse.
Stecken den Dübel in das Loch und machen die Stütze auf
der Wand fest. Verschließen die Schrauben.
Inserire il perno nel supporto e la colonna sul raccordo di
uscita superiore.
Insert the pin into the support and the column into the upper
outlet fitting.
Insérer la goupille dans le support et la colonne dans le
raccord de sortie supérieure.
Legen Sie den Stift in die Unterstützung und die Duschsäule
in die obere Auslaufarmatur.
Con l’ausilio di una livella posizionare correttamente in bolla
la colonna.
With a level put in correct bubble position the column.
A l’aide d’un niveau à bulle mettre la colonne à niveau.
Mit einer Wasserwaage positionieren die Duschsäule in die
richtige Lage.
Serrare i grani di bloccaggio con chiave a brugola da 2 mm.
Tighten the screws with a 2mm Allen key.
Serrer les visses avec une clé Allen de 2mm.
Verschließen die Blockierung-Stifte mit einem 2mm
Inbusschlüssel.
Avvitare i raccordi conici del flessibile alla colonna ed alla
doccetta.
Assicurarsi di inserire la guarnizione.
Screw the conical connecting nuts of the flexible hose to the
column and to the hand shower.
Be sure to have put the washer.
Visser le calottes conique du flexible à la colonne et à la
douchette.
S’assurant d’avoir mis le joint d’étanchéité.
Die konischen Anschlussstücke des Schlauchs an der Säule
und an der Handbrause festschrauben.
Infilare la doccetta nella sede conica del supporto.
Insert the hand shower in the conical seat of the support.
Enfiler la douchette dans le siège conique du support.
Die Handbrause in den konischen Sitz der Halterung
einführen.
Avvitare il soffione all’attacco da 1/2” del tubo.
Assicurarsi di inserire la guarnizione.
Complimenti, la colonna è installata.
Screw the shower head to the 1/2" connection of the tube.
Be sure to have put the washer.
Congratulation, the shower column is installed.
Visser la pomme de douche au raccord 1/2" du tube
S’assurant d’avoir placer le joint d’étanchéité.
Compliment la colonne est installé.
Die Handbrause am 1/2”-Anschlussstück der Rohrleitung
festschrauben.
Sich vergewissern, die Dichtung einzulegen.
Herzlichen Glückwunsch, ist die Säule installiert.
USO E MANUTENZIONE: Funzionamento
USE AND MAINTENANCE: Functioning
UTILISATION ET ENTRETIEN: Fonctionnement
VERWENDUNG UND WARTUNG: Arbeitsweise
La manopola [1] regola la temperatura dell’acqua miscelata
(senso orario=calda / senso anti orario=fredda). E’ previsto un
blocco di sicurezza alla temperatura di 38°C; se si desidera
aumentare la temperatura dell’acqua miscelata occorre
premere il pulsante posto sulla manopola stessa.
La manopola [2] regola la portata d’acqua al soffione (senso
orario) e alla doccetta manuale (senso anti orario).
The handle [1] regulates the temperature of the mixed water
(clockwise = hot / counterclockwise= cold). It’s provided a
safety lock at the temperature of 38 ° C, if you want to
increase the temperature of the mixed water press the button
on the knob.
The handle [2] regulates the water flow to the shower head
(clockwise) and to the hand shower (counterclockwise).
La poignée [1] régule la température de l'eau mixte (dans le
sens horaire = chaud / dans le sens antihoraire = froid). Il est
prévu un verrou de sécurité à la température de 38 ° C, si
vous voulez augmenter la température de l'eau mélangée
appuyez sur le bouton de la molette.
La poignée [2] régule le débit de l'eau à la tête de douche
(sens horaire) et pour la douche à main (sens antihoraire).
Der Griff [1] regelt die Temperatur des gemischten Wassers
(im Uhrzeigersinn = heiß / gegen den Uhrzeigersinn = kalt).
Eine Sicherheitssperre bei der Temperatur von 38 ° C
vorgesehen ist. Wenn die Temperatur des gemischten
Wassers erhöhen möchten, drücken die Taste auf dem
Knopf.
Der Griff [2] regelt die Wasserzufuhr zum Duschkopf (im
Uhrzeigersinn) und die Handbrause (gegen den
Uhrzeigersinn).
USO E MANUTENZIONE: Smontaggio cartuccia termostatica per pulizia o sostituzione
USE AND MAINTENANCE: Removing the thermostatic cartridge for cleaning or replacement
UTILISATION ET ENTRETIEN: Retrait de la cartouche thermostatique pour le nettoyage ou le
remplacement
VERWENDUNG UND WARTUNG: Das Entfernen der Thermostat-Kartusche zum Reinigen oder
Austauschen
Chiudere gli ingressi dell’acqua fredda e dell’acqua calda.
Aprire la manopola di regolazione della portata [2].
Svitare il grano con chiave a brugola da 3 mm.
Close the cold and hot water inlets.
Open the handle for adjusting the flow rate [2].
Unscrew the screw with a 3 mm Allen key.
Fermez les arrivées d'eau chaude et froide.
Ouvrez la poignée pour ajuster le débit [2].
Dévisser la vis avec une clé Allen de 3 mm.
Schließen die Kalt-und Warmwasser Eintritte.
Öffnen die Knöpfe der Durchflussmenge [2].
Lösen die Schraube mit einem 3 mm-Inbusschlüssel.
Sfilare la cartuccia termostatica.
Pull the thermostatic cartridge.
Tirez la cartouche thermostatique.
Entfernen die thermostatische Kartusche.
Nel caso fosse necessario pulire i filtri a rete utilizzare uno
spazzolino e risciacquare in acqua corrente; nel caso di
incrostazioni di calcare immergere per 8-10 ore la cartuccia in
una soluzione di acqua e aceto (50%) e poi risciacquare in
acqua corrente. Rimontare la cartuccia serrando il grano con
chiave a brugola da 3 mm.
In case you need to clean the mesh filters use a toothbrush
and rinse under running water, in the case of liming soak for
8-10 hours the cartridge in a solution of vinegar and water
(50%) and then rinse under running water. Reassemble the
cartridge and tighten the screw with a 2,5 mm Allen key.
Dans le cas où vous avez besoin pour nettoyer les filtres à
tamis utiliser une brosse à dents et rincer sous l'eau courante,
dans le cas de chaulage tremper pendant 8-10 heures de la
cartouche dans une solution de vinaigre et d'eau (50%), puis
rincez sous l'eau courante.
Montés de la cartouche et serrer la vis avec un clé Allen de 3
mm.
Im Notfall benötigt man, die Netz-Filter zu putzen, benutzen
eine Zahnbürste und unter fließendem Wasser abspülen; im
Notfall den Kalkstein weichen die Kartusche für 8-10 Stunden
in einer Lösung aus Essig und Wasser (50%) ein und dann
unter fließendem Wasser abspülen.
Zusammenbau der Kartusche und ziehen die Schraube mit
einem 3 mm- Inbusschlüssel.
Nel caso fosse necessario sostituire la cartuccia togliere la
placchetta e svitare il grano con chiave a brugola da 2,5 mm.
In case you need to replace the cartridge remove the cap and
unscrew the screw with a 2,5 mm Allen key.
Dans le cas où vous avez besoin de replacer la cartouche
enlever le capuchon et dévisser la vis avec une clé Allen de
2,5 mm.
In Fall müssen die Kartusche ersetzen, entfernen den Deckel
und mit einem 2,5 mm-Inbusschlüssel lösen die Schraube.
Sfilare la manopola e la ghiera di limitazione della
temperatura.
Remove the handle and the temperature limitation ring.
Enlevez le poignée et la bague de limitation de la
température.
Entfernen den Drehknopf und die Temperaturbegrenzung
Ring.
Prima di rimontare la cartuccia verificare che la tacca
verniciata sia allineata. Se non lo fosse ruotare l’asta per
allinearla.
Before replacing the cartridge verify that the painted mark is
aligned. If not rotate the shaft to align.
Avant de remplacer la cartouche vérifier que la marque peinte
est aligné. Si ce n'est pas faire tourner l'arbre à aligner.
Vor dem Austausch der Kartusche überprüfen, dass die
gemalten Zeichen mit der Referenz ausgerichtet ist. Wenn
nicht, drehen die Stange, um die aufzureihen.
Inserire la cartuccia nel corpo del miscelatore e serrare il
grano con chiave a brugola da 3 mm.
Insert the cartridge into the mixer body and tighten the scew
with a 3 mm Allen key.
Insérez la cartouche dans le corps du mitigeur et serrer la vis
avec une clé Allen de 3 mm..
Setzen die Kartusche in den Mischer Körper und
verschrauben die Schraube mit einem 3 mm-Inbusschlüssel.
Inserire la ghiera limitatrice della temperatura con il
riferimento allineato alla tacca presente sul miscelatore.
Insert the temperature limitation ring with the reference
aligned with the notch on the mixer.
Insérez la bague de limitation de température avec la
référence aligné avec l'encoche sur le mélangeur.
Legen die Temperaturbegrenzung-Ring. Den Hinweis muss
auf die Mischer-Kerbe aufgereiht sein.
Inserire la manopola con il pulsante rivolto in avanti e con
l’indicazione 38°C allineata alla tacca presente sul
miscelatore SENZA ruotare l’asta della cartuccia. Serrare il
grano con chiave a brugola da 2,5mm e inserire la placchetta.
Insert the handle with the button facing forward and the
written 38 ° C aligned with the notch on the mixer WITHOUT
rotate the cartridge rod. Tighten the screw with a 2,5 mm
Allen key and insert the cap.
Insérez la poignée avec le bouton vers l'avant et l’écrite 38 °
C aligné avec l'encoche sur le mélangeur SANS tourner la
tige de la cartouche. Serrer la vis avec une clé Allen de 2,5
mm et insérer le capuchon.
Stecken den Griff mit der Taste nach vorne und die
schriftliche 38 ° C mit der Kerbe auf dem Mischer, ohne die
Patrone Stange zu drehen. Verschrauben die Schraube mit
einem 2,5 mm-Inbusschlüssel und stecken Sie die Kappe.
USO E MANUTENZIONE: Sostituzione della cartuccia deviatore
USE AND MAINTENANCE: Replacement of the diverter cartridge
UTILISATION ET ENTRETIEN: remplacement de la cartouche inverseur en céramique
VERWENDUNG UND WARTUNG: Austausch der Umstellung Keramik-Kartusche
Chiudere gli ingressi dell’acqua fredda e dell’acqua calda.
Togliere la placchetta e svitare il grano con chiave a brugola
da 2,5 mm.
Close the cold and hot water inlets.
Remove the cap and unscrew the screw with a 2,5 mm Allen
key.
Fermez les arrivées d'eau chaude et froide.
Enlever le capuchon et dévisser la vis avec une clé Allen de
2,5 mm.
Schließen die Kalt-und Warmwasser Eintritte.
Entfernen den Deckel und mit einem 2,5 mm-Inbusschlüssel
lösen die Schraube.
Sfilare la manopola e svitare la calotta con chiave esagonale
da 24 mm.
Remove the handle and unscrew the nut with a 24 mm hex
wrench.
Enlevez le poignée et dévisser l'écrou avec une clé
hexagonale de 24 mm.
Entfernen den Drehknopf und lösen die Kalotte mit einem 24-
mm-Hexagonal-Schlüssel.
Sfilare la cartuccia deviatore.
Pull the diverter cartridge.
Tirez la cartouche inverseur.
Entfernen die Umstellung Kartusche.
Svitare la vite con chiave a brugola da 2,5 mm e sfilare il
raccordo brocciato. Montare il raccordo sulla nuova cartuccia
deviatore serrando la vite.
Unscrew the screw with a 2.5 mm Allen key and remove the
splined connection. Mount the splined connection on the new
diverter cartridge by tightening the screw.
Dévissez la vis avec une clé Allen de 2,5 mm et tirez la
connexion cannelée. Monter la connexion cannelé sur la
cartouche inverseur nouvelle en serrant la vis.
Lösen die Schraube mit einem 2,5-mm-Inbusschlüssel und
entfernen Sie die Keilwellenverbindung. Montieren Sie die
Keilwellenverbindung auf die neue Umstellung Kartusche
durch Anziehen der Schraube.
Assicurarsi che la nuova cartuccia deviatore sia in posizione
chiuso.
Make sure the new diverter cartridge is in the closed position.
Assurez-vous que la nouvelle cartouche inverseur est en
position fermée.
Sich versichern, dass die neue Umstellung Keramik-
Kartusche in der geschlossenen Position ist.
Inserire la cartuccia deviatore nel corpo del miscelatore e
serrare la calotta con chiave esagonale da 24 mm.
Insert the diverter cartridge into the mixer body and tighten
the nut with a 24 mm hex wrench.
Insérez la cartouche inverseur dans le corps du mitigeur et
serrer l'écrou avec une clé hexagonale de 24 mm.
Setzen die Umstellung Kartusche in den Mischer Körper und
verschrauben die Kalotte mit einem 24-mm-Hexagonal-
Schlüssel.
Inserire la manopola con l’astina rivolta in avanti. Serrare il
grano con chiave a brugola da 2,5mm e inserire la placchetta.
Insert the handle with the rod pointing forward. Tighten the
screw with a 2,5 mm Allen key and insert the cap.
Insérez la poignée avec la tige vers l'avant. Serrer la vis avec
une clé Allen de 2,5 mm et insérer le capuchon.
Stecken den Griff mit der Stange nach vorne gerichtet.
Verschrauben die Schraube mit einem 2,5 mm-
Inbusschlüssel und stecken Sie die Kappe.
IST0081 REV.01 del 06-04-2012

This manual suits for next models

1

Other Calflex Bathroom Fixture manuals

Calflex CARIMALI COSI 00-1785-N-CR User manual

Calflex

Calflex CARIMALI COSI 00-1785-N-CR User manual

Calflex Carimali EXTREME MySlim 00-1212E-CR User manual

Calflex

Calflex Carimali EXTREME MySlim 00-1212E-CR User manual

Calflex CARIMALI EL'IT 26855 User manual

Calflex

Calflex CARIMALI EL'IT 26855 User manual

Calflex Carimali 00-2000-CR User manual

Calflex

Calflex Carimali 00-2000-CR User manual

Calflex CARIMALI RIGOLETTO 21510-CR User manual

Calflex

Calflex CARIMALI RIGOLETTO 21510-CR User manual

Calflex CARIMALI RIGOLETTO MySlim 00-1805-CR User manual

Calflex

Calflex CARIMALI RIGOLETTO MySlim 00-1805-CR User manual

Calflex CARIMALI 00-1719-CR User manual

Calflex

Calflex CARIMALI 00-1719-CR User manual

Calflex MySlim SLM0002CRX User manual

Calflex

Calflex MySlim SLM0002CRX User manual

Calflex CARIMALI RIGOLETTO 01-1803-CR User manual

Calflex

Calflex CARIMALI RIGOLETTO 01-1803-CR User manual

Popular Bathroom Fixture manuals by other brands

Pressalit MATRIX R2120 Operation and maintenance manual

Pressalit

Pressalit MATRIX R2120 Operation and maintenance manual

Foremost TIDES NEO-ANGLE installation manual

Foremost

Foremost TIDES NEO-ANGLE installation manual

Promac SLIM installation instructions

Promac

Promac SLIM installation instructions

CRAFFT G8231PS manual

CRAFFT

CRAFFT G8231PS manual

Hans Grohe Raindance Select 360 1jet 27112000 Instructions for use/assembly instructions

Hans Grohe

Hans Grohe Raindance Select 360 1jet 27112000 Instructions for use/assembly instructions

VINNOVA 314034-WR-MB Installation instruction

VINNOVA

VINNOVA 314034-WR-MB Installation instruction

Franke CAMPUS HDTX504 Installation and operating instructions

Franke

Franke CAMPUS HDTX504 Installation and operating instructions

Triton EXE LEVER Installation and operating instructions

Triton

Triton EXE LEVER Installation and operating instructions

Signature Hardware TRADITIONAL 949077 quick start guide

Signature Hardware

Signature Hardware TRADITIONAL 949077 quick start guide

Miomare 103012 Assembly, operating and safety instructions

Miomare

Miomare 103012 Assembly, operating and safety instructions

Produits Neptune KARMA LUNA installation manual

Produits Neptune

Produits Neptune KARMA LUNA installation manual

Kinedo DES1151C installation instructions

Kinedo

Kinedo DES1151C installation instructions

Grohe Grohtherm 3000 19 691 manual

Grohe

Grohe Grohtherm 3000 19 691 manual

Valore Effusion Installation and user guide

Valore

Valore Effusion Installation and user guide

Kinedo Kinemagic Royal 2 DES1298AG-A installation instructions

Kinedo

Kinedo Kinemagic Royal 2 DES1298AG-A installation instructions

ROGERSELLER Tectonic 3435003101 Care and maintenance

ROGERSELLER

ROGERSELLER Tectonic 3435003101 Care and maintenance

Hughes DEC-DS-6-M Installation, operation and maintenance instructions

Hughes

Hughes DEC-DS-6-M Installation, operation and maintenance instructions

Craft+Main MARINA installation instructions

Craft+Main

Craft+Main MARINA installation instructions

manuals.online logo
manuals.online logoBrands
  • About & Mission
  • Contact us
  • Privacy Policy
  • Terms and Conditions

Copyright 2025 Manuals.Online. All Rights Reserved.