manuals.online logo
Brands
  1. Home
  2. •
  3. Brands
  4. •
  5. Calflex
  6. •
  7. Bathroom Fixture
  8. •
  9. Calflex Carimali EXTREME MySlim 00-1212E-CR User manual

Calflex Carimali EXTREME MySlim 00-1212E-CR User manual

INSTALLAZIONE –INSTALLATION
MONTAGE –EINBAU
Art. 00-1212E-CR
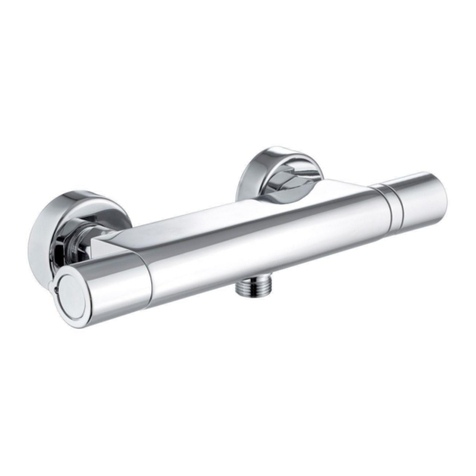
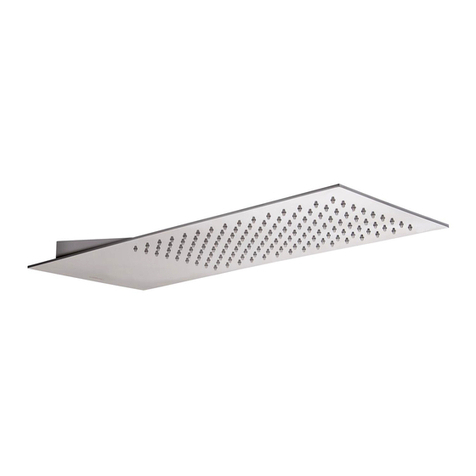
COLONNA COMPLETA "EXTREME MySlim" CON RUBINETTO TERMOSTATICO
“EXTREME MySlim“ COMPLETE SHOWER COLUMN WITH INTEGRATED THERMOSTATIC FAUCET
“EXTREME MySlim“ COLONNE DE DOUCHE COMPLETE DE ROBINET THERMOSTATIQUE INTEGRE’
"EXTREME MySlim" KOMPLETTE DUSCHSÄULE MIT THERMOSTATISCHEN WASSERHAHN
2
Pos.
Cod.
Q.ty
Realizzare l’impianto di adduzione delle acque seguendo le indicazioni
riportate nello schema.
Ingresso acqua calda a sinistra con attacco da G1/2”. Ingresso acqua
fredda a destra con attacco da G1/2”.
Make the connections to the water plant by following the indications
showed in the pictures above.
Hot water inlet left side with elbow G1/2”. Cold water inlet right side with
elbow G1/2”.
Suivre les indications reportées dans les illustrations pour réaliser
l’implant des raccords à l’eau.
Arrivée eau chaude à gauche avec raccord 1/2”G. Arrivée eau froide à
droite avec raccord 1/2"G.
Realisieren die Wasseranlage, und folgen die oben erwähnte
Anleitungen.
Eintritt des warmes Wasser Links, mit einem G1/2“ Angriff. Eintritt des
kaltes Wasser Recht, mit einem G1/2“ Angriff.
A
WCOR0099CR
1
B
WTUB0183CR/SC
1
C
WCOR0302CR
1
D
FLEX0026CR
1
E
49845-CR or
49945-CR
1
F
SLM0005CRX or
SLM0006CRX or
SLM0007CRX
1
3
Avvitare i raccordi eccentrici agli attacchi dell’impianto, utilizzando
canapa o similari per realizzare la tenuta idraulica.
Screw the eccentric connectors onto the plant elbows and use
hemp or similar material to assure the waterproofing.
Visser les raccords excentriques sur les raccords de
l’implantation, utiliser du chanvre ou un similaire pour assurer
l’étanchéité.
Schrauben die exzentrischen Verbindungen mit den
Anlageangriffe, benutzen Hanf oder ähnlich, um die Wasserdichte
zu realisieren.
Con l’ausilio di una livella e di un metro, posizionare correttamente
in bolla e ad una distanza di 150 mm i raccordi eccentrici.
With a bubble level and a meter, put the eccentric connectors in
the correct position and at a distance of 150mm one from the
other.
A l’aide d’un niveau à bulle et d’un mètre, mettre les raccords
excentriques en position correcte et à une distance de 150mm l’un
de l’autre.
Mit einer Wasserwaage und einem Meter, positionieren die
exzentrischen Verbindungen in der richtigen Lage. Die Entfernung
zwischen den Verbindungen muss 150 mm sein.
Inserire i rosoni sulle calotte di serraggio.
Insert the rosettes on the adaptors until in beat on the wall. Then,
after having oriented them correctly; tighten the fixing nut with a
2mm Allen wrench.
Insérer les rosettes sur les adaptateurs jusqu’à contact, après les
avoir correctement orientés, serrer le grain de fixation à l’aide
d’une clé Allen 2mm.
Stecken die Fensterrosen auf die Verbindungen bis zur Wand ein,
ausrichten die Fensterrosen und danach verschließen den
Blockierung-Stift mit einem 2mm Inbusschlüssel.
Inserire le guarnizioni di tenuta nelle calotte di serraggio.
Insert the gaskets into the fixing nuts.
Insérer les joints dans les calottes.
Stecken die Dichtungsringe in die Spannenkappen.
4
Montare il miscelatore termostatico alla parete serrando le calotte
con chiave esagonale da 30 mm.
Fix the thermostatic mixer to the wall tightening the nuts by a 30
mm hexagonal wrench.
Monter le thermostatique à la paroi et serrant les calottes avec
une clé hexagonale de 30 mm.
Montieren die thermostatische Mischbatterie an der Wand und
schließen die kappen mit einem hexagonalen Schlüssen.
Far scorrere i rosoni fino in battuta sulla parete.
ING
FRA
TED
Inserire la parte superiore della colonna nell’apposita sede.
Insert the upper part of the column in its seat.
Insérer la partie supérieure de la colonne dans son siège.
Stecken den oberen Teil der Duschsäule in den richtigen Sitz ein.
Con l’ausilio di una livella posizionare correttamente in bolla la
parte superiore della colonna.
With a level put in correct bubble position the upper part of the
column.
Avec un niveau positionner correctement en bulle la partie
supérieure de la colonne.
Mit einer Wasserwaage positionieren in die richtige Lage den
oberen Teil der Duschsäule.
5
Marcare la posizione del supporto di fermo.
Mark the position of the fixing support.
Marquer la position du support de fixation.
Markieren die Lage der unbeweglichen Stütze.
Sfilare la parte superiore della colonna dall’apposita sede.
Remove the upper part of the column from its seat.
Désenfiler la partie supérieure de la colonne de son siège.
Fädeln den oberen Teil der Duschsäule aus den richtigen Sitz.
Marcare la posizione del centro dell’attacco spostandosi di 15 mm.
Mark the position of the center by moving to 15 mm.
Marquer la position du centre en se déplacent de 15mm.
Bewegen sich nach 15 mm und markieren die Lage der Mitte des
Angriffs.
Con una punta a muro Ø 8 praticare il foro nella parete.
Make the hole in the wall with a Ø8 wall drill.
Avec une perceuse pointe de Ø8 faire le trou dans la paroi.
Mit einer Ø8 Mauere-Spitze, machen ein Loch in die Wand.
6
Inserire il tassello nel foro e fissare il supporto alla parete serrando
la vite.
Insert the plug into the hole and fix the support to the wall by
tightening the screw.
Insérer le tasseau dans le trou et fixer le support au mur en
vissant la visse.
Stecken den Dübel in das Loch ein und machen die Stütze an der
Wand fest und verschließen die Schrauben.
Inserire il centrale scorrevole porta doccetta e serrare avvitando il
pomolo con leva.
Insert the sliding mounting and tighten it by screwing the knob with
the lever.
Insérer le curseur porte douchette et serrer en vissant le bouton
avec le levier.
Stecken den verschiebbaren Mittler Dusche-Bringer und
schrauben den Hebelknopf und verschließen den Mittler.
Inserire la parte superiore della colonna nell’apposita sede e nel
supporto.
Insert the upper part of the column in its seat and in the support.
Insérer la partie supérieure de la colonne dans son siège et dans
le support.
Stecken den oberen Teil der Duschsäule in den richtigen Sitz und
in die Stütze ein.
Con l’ausilio di una livella posizionare correttamente in bolla la
parte superiore della colonna.
With a level put in correct bubble position the upper part of the
column.
Avec un niveau à bulle mettre la partie supérieure de la colonne
en position correcte.
Mit einer Wasserwaage positionieren den oberen Teil der
Duschsäule in die richtige Lage.0
7
Serrare i grani di bloccaggio con chiave a brugola da 2 mm.
Tighten the screws with a 2mm Allen wrench.
Serrer les vis de blocage avec une clé Allen 2 mm.
Verschließen die Blockierung-Stifte mit einem 2mm
Inbusschlüssel.
Avvitare i raccordi conici del flessibile alla colonna ed alla
doccetta.
Assicurarsi di inserire la guarnizione.
Screw the conical connecting nuts of the flexible hose to the
column and to the hand shower.
Make sure to have put the washer.
Visser le calottes conique du flexible à la colonne et à la
douchette.
S’assurant d’avoir mis le joint d’étanchéité.
Die konischen Anschlussstücke des Schlauchs an der Säule und
an der Handbrause festschrauben.
Infilare la doccetta nella sede conica del supporto.
Insert the hand shower in the conical seat of the support.
Enfiler la douchette dans le siège conique du support.
Die Handbrause in den konischen Sitz der Halterung einführen.
8
Avvitare il soffione all’attacco da 1/2” del tubo.
Assicurarsi di inserire la guarnizione.
Complimenti, la colonna è installata.
Screw the shower head to the 1/2" connection of the tube.
Be sure to have put the washer.
Congratulation, the shower column is installed.
Visser la pomme de douche au raccord 1/2" du tube
S’assurant d’avoir placer le joint d’étanchéité.
Compliment la colonne est installée.
Die Handbrause am 1/2”-Anschlussstück der Rohrleitung
festschrauben.
Sich vergewissern, die Dichtung eingelegt zu haben.
Herzlichen Glückwunsch, die Säule ist installiert.
USO E MANUTENZIONE: Funzionamento
USE AND MAINTENANCE: Functioning
UTILISATION ET ENTRETIEN: Fonctionnement
VERWENDUNG UND WARTUNG: Arbeitsweise
La manopola [1] regola la temperatura dell’acqua miscelata
(senso antiorario=calda / senso orario=fredda). E’ previsto un
blocco di sicurezza alla temperatura di 38°C; se si desidera
aumentare la temperatura dell’acqua miscelata occorre
premere il pulsante posto sulla manopola stessa.
La manopola [2] devia l’acqua al soffione (senso antiorario) e
alla doccetta manuale (senso orario).
The handle [1] regulates the temperature of the mixed water
(counterclockwise = hot / clockwise= cold). It’s provided a
safety lock at the temperature of 38 ° C, if you want to
increase the temperature of the mixed water press the button
on the knob.
The handle [2] regulates the water flow to the shower head
(counterclockwise) and to the hand shower (clockwise).
La poignée [1] régule la température de l'eau mixée (dans le
sens antihoraire = chaud / dans le sens horaire = froid). Il est
prévu un verrou de sécurité à la température de 38 ° C, si
vous voulez augmenter la température de l'eau mélangée
appuyez sur le bouton de la molette.
La poignée [2] régule le débit de l'eau à la pomme de douche
(sens antihoraire) et pour la douche à main (sens horaire).
Der Griff [1] regelt die Temperatur des gemischten Wassers
(gegen den Uhrzeigersinn = heiß / im Uhrzeigersinn = kalt).
Eine Sicherheitssperre bei der Temperatur von 38 ° C
vorgesehen ist. Wenn die Temperatur des gemischten
Wassers erhöhen möchten, drücken die Taste auf dem
Knopf.
Der Griff [2] regelt die Wasserzufuhr zum Duschkopf (gegen
den Uhrzeigersinn) und die Handbrause (im Uhrzeigersinn).
9
USO E MANUTENZIONE: Smontaggio cartuccia termostatica per pulizia o sostituzione
USE AND MAINTENANCE: Removing the thermostatic cartridge for cleaning or replacement
UTILISATION ET ENTRETIEN: Retrait de la cartouche thermostatique pour le nettoyage ou le
remplacement
VERWENDUNG UND WARTUNG: Das Entfernen der Thermostat-Kartusche zum Reinigen oder
Austauschen
Chiudere gli ingressi dell’acqua fredda e dell’acqua calda.
Aprire la manopola di regolazione della portata [2].
Rimuovere la placchetta.
Close the cold and hot water inlets.
Open the handle for adjusting the flow rate [2].
Remove the cover plate.
Fermer les arrivées d'eau chaude et froide.
Ouvrer la poignée pour ajuster le débit [2].
Retirer la plaquette cache trou.
Schließen die Kalt-und Warmwasser Eintritte.
Öffnen die Knöpfe der Durchflussmenge [2].
Entfernen das deckte Plättchen.
Rimuovere la manopola di regolazione della temperatura
svitando il grano con chiave a brugola da 2 mm.
Remove the temperature control knob unscrewing the screw
using a 2 mm Allen wrench.
Retirer la poignée de réglage de la température en dévissant
la vis à l’aide d’une clé Allen de 2 mm.
Schrauben den Griff zur Temperatureinstellung mit einem 2
mm Inbusschlüssel.
Sfilare la ghiera di limitazione della temperatura.
Remove the temperature limitation ring.
Enlever la bague de limitation de la température.
Entfernen die Temperaturbegrenzung Ring.
Svitare il grano con chiave a brugola da 2 mm.
Unscrew the screw with a 2 mm Allen key.
Dévisser la vis avec une clé Allen de 2 mm.
Lösen die Schraube mit einem 2 mm-Inbusschlüssel.
10
Sfilare la cartuccia termostatica.
Pull the thermostatic cartridge.
Tirer la cartouche thermostatique.
Entfernen die thermostatische Kartusche.
Nel caso fosse necessario pulire i filtri a rete utilizzare uno
spazzolino e risciacquare in acqua corrente; nel caso di
incrostazioni di calcare immergere per 8-10 ore la cartuccia in
una soluzione di acqua e aceto (50%) e poi risciacquare in
acqua corrente.
In case you need to clean the mesh filters use a toothbrush
and rinse under running water, in the case of liming soak for
8-10 hours the cartridge in a solution of vinegar and water
(50%) and then rinse under running water.
Dans le cas où vous avez besoin pour nettoyer les filtres à
tamis utiliser une brosse à dents et rincer sous l'eau courante,
dans le cas de chaulage tremper pendant 8-10 heures de la
cartouche dans une solution de vinaigre et d'eau (50%), puis
rincez sous l'eau courante.
Im Notfall benötigt man, die Netz-Filter zu putzen, benutzen
eine Zahnbürste und unter fließendem Wasser abspülen; im
Notfall den Kalkstein weichen die Kartusche für 8-10 Stunden
in einer Lösung aus Essig und Wasser (50%) ein und dann
unter fließendem Wasser abspülen.
Prima di rimontare la cartuccia verificare che la tacca
verniciata sia allineata. Se non lo fosse ruotare l’asta per
allinearla.
Before replacing the cartridge verify that the painted mark is
aligned. If not rotate the shaft to align.
Avant de remplacer la cartouche vérifier que la marque peinte
est aligné. Si ce n'est pas faire tourner l'arbre à aligner.
Vor dem Austausch der Kartusche überprüfen, dass die
gemalten Zeichen mit der Referenz ausgerichtet ist. Wenn
nicht, drehen die Stange, um die aufzureihen.
Inserire la cartuccia nel corpo del miscelatore.
Insert the cartridge into the mixer body.
Insérer la cartouche dans le corps du mitigeur.
Setzen die Kartusche in den Mischer Körper.
11
Assicurarsi che la cartuccia sia in posizione corretta.
Make sure the cartridge is in the correct position.
S’assurer que la cartouche est en position correct.
Sich versichern, dass die neue Keramik-Kartusche in der
geschlossenen Position ist.
Avvitare il grano con chiave a brugola da 2 mm.
Screw the screw with a 2 mm Allen key.
Visser la vis avec une clé Allen de 2 mm.
Schraube die Schraube mit einem 2 mm-Inbusschlüssel.
Inserire la ghiera limitatrice della temperatura con il
riferimento allineato alla tacca presente sul miscelatore.
Insert the temperature limitation ring with the reference
aligned with the notch on the mixer.
Insérer la bague de limitation de température avec la
référence aligné avec l'encoche sur le mélangeur.
Legen die Temperaturbegrenzung-Ring. Den Hinweis muss
auf die Mischer-Kerbe aufgereiht sein.
Inserire la manopola con il pulsante rivolto in alto e con
l’indicatore della temperatura allineato alla tacca presente sul
miscelatore SENZA ruotare l’asta della cartuccia.
Insert the handle with the button facing upward and the
written 38°C aligned with the notch on the mixer WITHOUT
rotate the cartridge rod.
Insérer la poignée avec le bouton vers le haut et l’écrite 38°C
alignée avec l'encoche sur le mélangeur SANS tourner la tige
de la cartouche.
Stecken den Griff mit der Taste nach oben und die schriftliche
38°C mit der Kerbe auf dem Mischer, ohne die Patrone
Stange zu drehen.
Bloccare la manopola di regolazione della temperatura
avvitando il grano con chiave a brugola da 2 mm.
Block the temperature control handle by screwing the screw
using a 2 mm Allen wrench.
Fermer la poignée de réglage de la température en vissant la
vis à l’aide d’une clé Allen de 2 mm.
Schrauben den Griff zur Temperatureinstellung durch die
Schraube mit einem 2 mm Inbusschlüssel.
12
Inserire la placchetta.
Put the cover plate.
Insérer la plaquette cache trou.
Legen des deckte Plättchen.
13
USO E MANUTENZIONE: Sostituzione della cartuccia deviatore
USE AND MAINTENANCE: Replacement of the diverter cartridge
UTILISATION ET ENTRETIEN: remplacement de la cartouche d’inverseur en céramique
VERWENDUNG UND WARTUNG: Austausch der Umstellung Keramik-Kartusche
Chiudere gli ingressi dell’acqua fredda e dell’acqua calda.
Aprire la manopola di regolazione della portata [2].
Rimuovere la placchetta.
Close the cold and hot water inlets.
Open the handle for adjusting the flow rate [2].
Remove the cover plate.
Fermer les arrivées d'eau chaude et froide.
Ouvrer la poignée pour ajuster le débit [2].
Retirer la plaquette cache trou.
Schließen die Kalt-und Warmwasser Eintritte.
Öffnen die Knöpfe der Durchflussmenge [2].
Entfernen das deckte Plättchen.
Rimuovere la manopola del deviatore svitando il grano con
chiave a brugola da 2 mm.
Remove the diverter control knob unscrewing the screw with
a 2 mm Allen key.
Retirer la poignée d’inverseur en dévissant la vis avec une clé
Allen de 2 mm.
Schrauben den Umstellgriff durch die Schraube mit einem
2mm Inbusschlüssel.
Svitare la calotta con chiave esagonale da 24 mm.
Unscrew the nut with a 24 mm hex wrench.
Dévisser l'écrou avec une clé hexagonale de 24 mm.
Lösen die Kalotte mit einem 24-mm-Hexagonal-Schlüssel.
Sfilare la cartuccia deviatore.
Pull the diverter cartridge.
Enlever la cartouche d’inverseur.
Entfernen die Umstellung Kartusche.
14
Assicurarsi che la nuova cartuccia deviatore sia in posizione
chiuso.
Make sure the new diverter cartridge is in the closed position.
S’assurer que la nouvelle cartouche d’inverseur est en
position fermée.
Sich versichern, dass die neue Umstellung Keramik-
Kartusche in der geschlossenen Position ist.
Inserire la cartuccia deviatore nel corpo del miscelatore.
Insert the diverter cartridge into the mixer body.
Insérer la cartouche d’inverseur dans le corps du mitigeur.
Setzen die Umstellung Kartusche in den Mischer Körper.
Serrare la calotta con chiave esagonale da 24 mm.
Tighten the nut with a 24 mm hex wrench.
Serrer l'écrou avec une clé hexagonale de 24 mm.
Verschrauben die Kalotte mit einem 24 mm Hexagonal-
Schlüssel.
Inserire la manopola.
Insert the handle.
Insérer la poignée.
Stecken den Griff.
Assicurarsi che la manopola sia in posizione corretta.
Make sure the handle is in the correct position.
S’assurer que la poignée est en position correcte.
Sich versichern, dass die Griff in der geschlossenen Position
ist.
15
Bloccare la manopola del deviatore avvitando il grano con
chiave a brugola da 2 mm.
Block the diverter handle by screwing the screw with a 2 mm
Allen key.
Fermer la poignée d’inverseur en vissant la vis avec une clé
Allen de 2 mm.
Schrauben den Umstellgriff durch die Schraube mit einem
2mm Inbusschlüssel.
Inserire la placchetta.
Put the cover plate.
Insérer la plaquette cache trou.
Legen des deckte Plättchen.
16
Per una politica di continuo miglioramento, CALFLEX S.r.l. si riserva la possibilità di
applicare modifiche tecniche sui suoi articoli senza nessun preavviso.
For a continuous improvement policy, CALFLEX S.r.l. reserves the right to modify the
technical features of its articles at any time without notice.
Pour une politique d'amélioration continue, CALFLEX S.r.l. se réserve le droit d'effectuer
des modifications techniques de ses articles sans préavis.
Um einen kontinuierlichen Verbesserungsprozess zu verbürgen, CALFLEX S.r.l. behält
sich das Recht vor, die geltende technische Zeichnungen zu ändern, ohne vorherige
Ankündigung zu geben.

Other Calflex Bathroom Fixture manuals

Calflex CARIMALI 00-1719-CR User manual

Calflex

Calflex CARIMALI 00-1719-CR User manual

Calflex MySlim SLM0002CRX User manual

Calflex

Calflex MySlim SLM0002CRX User manual

Calflex CARIMALI RIGOLETTO 21510-CR User manual

Calflex

Calflex CARIMALI RIGOLETTO 21510-CR User manual

Calflex Carimali 00-2000-CR User manual

Calflex

Calflex Carimali 00-2000-CR User manual

Calflex CARIMALI RIGOLETTO 01-1803-CR User manual

Calflex

Calflex CARIMALI RIGOLETTO 01-1803-CR User manual

Calflex CARIMALI RIGOLETTO MySlim 00-1805-CR User manual

Calflex

Calflex CARIMALI RIGOLETTO MySlim 00-1805-CR User manual

Calflex CARIMALI DUETTO 00-1604-CR User manual

Calflex

Calflex CARIMALI DUETTO 00-1604-CR User manual

Calflex CARIMALI COSI 00-1785-N-CR User manual

Calflex

Calflex CARIMALI COSI 00-1785-N-CR User manual

Calflex CARIMALI EL'IT 26855 User manual

Calflex

Calflex CARIMALI EL'IT 26855 User manual

Popular Bathroom Fixture manuals by other brands

Insignia Platinum Series installation manual

Insignia

Insignia Platinum Series installation manual

Franke RODX602E Installation and operating instructions

Franke

Franke RODX602E Installation and operating instructions

Hans Grohe AXOR Montreux 16530 Series Assembly instructions

Hans Grohe

Hans Grohe AXOR Montreux 16530 Series Assembly instructions

Villeroy & Boch Squaro Super Flat installation instructions

Villeroy & Boch

Villeroy & Boch Squaro Super Flat installation instructions

Delta B112915C Series manual

Delta

Delta B112915C Series manual

Kalia Kareo BF1998 installation instructions

Kalia

Kalia Kareo BF1998 installation instructions

Gessi RETTANGOLO T 20301 quick start guide

Gessi

Gessi RETTANGOLO T 20301 quick start guide

METHVEN RERE 16-1027 installation guide

METHVEN

METHVEN RERE 16-1027 installation guide

ProFlo PF3880CP instructions

ProFlo

ProFlo PF3880CP instructions

BELLOSTA 0813/5/1/L Installation instruction

BELLOSTA

BELLOSTA 0813/5/1/L Installation instruction

Fleurco SH001 instruction manual

Fleurco

Fleurco SH001 instruction manual

Santec LIZA 5161LZ75 installation instructions

Santec

Santec LIZA 5161LZ75 installation instructions

Zenna Home 36602SS installation instructions

Zenna Home

Zenna Home 36602SS installation instructions

AQUALUX Aqua 3 quick start guide

AQUALUX

AQUALUX Aqua 3 quick start guide

Pyle PCSHPT12 user manual

Pyle

Pyle PCSHPT12 user manual

KEUCO Edition 400 21533 171351 Instructions for use

KEUCO

KEUCO Edition 400 21533 171351 Instructions for use

Toto Aquia TB416DD Installation and owner's manual

Toto

Toto Aquia TB416DD Installation and owner's manual

Duscholux PANELLE Enlight installation instructions

Duscholux

Duscholux PANELLE Enlight installation instructions

manuals.online logo
manuals.online logoBrands
  • About & Mission
  • Contact us
  • Privacy Policy
  • Terms and Conditions

Copyright 2025 Manuals.Online. All Rights Reserved.