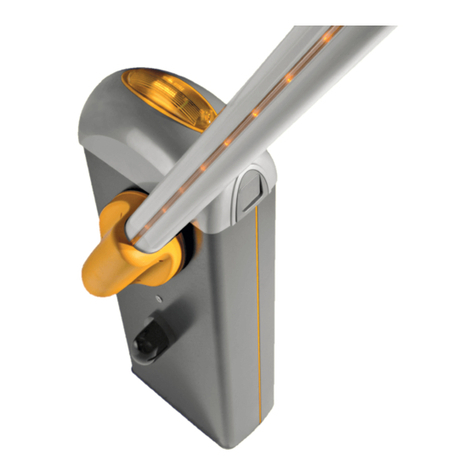
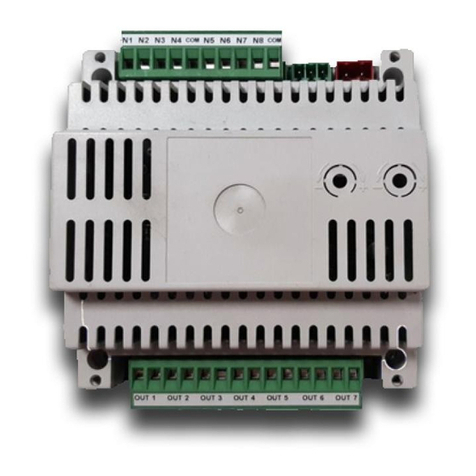
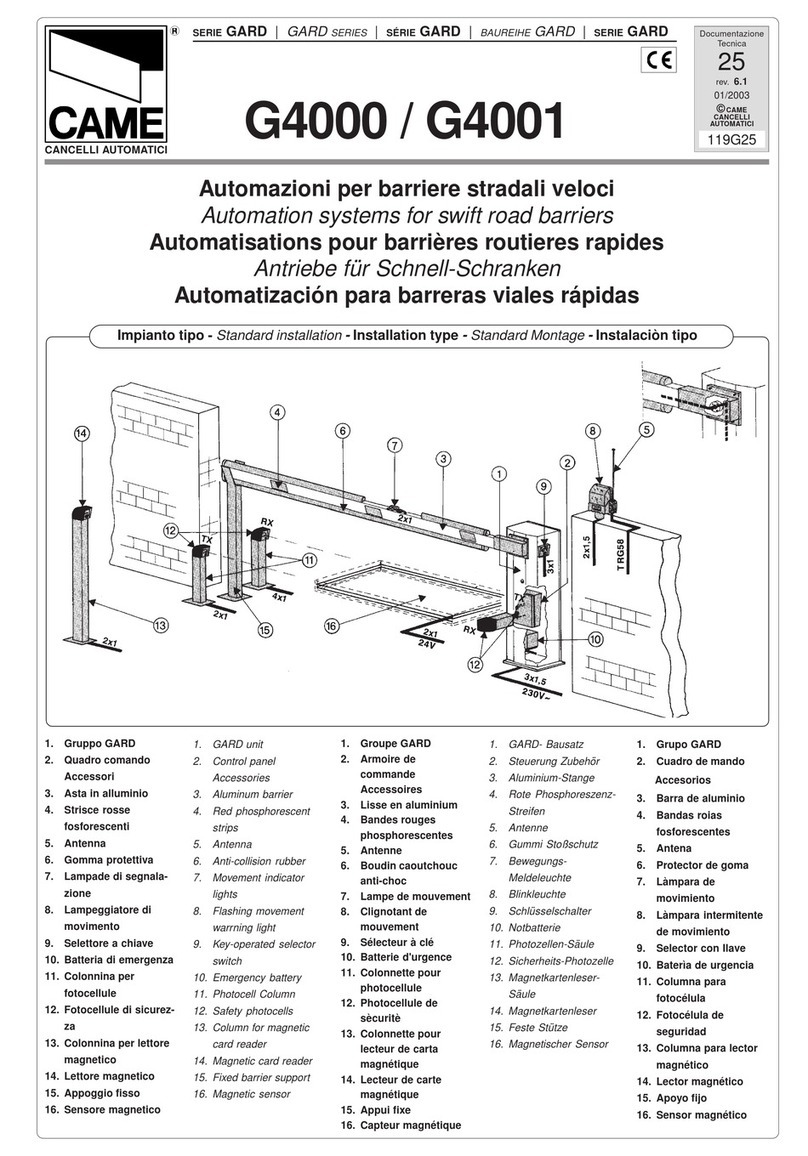
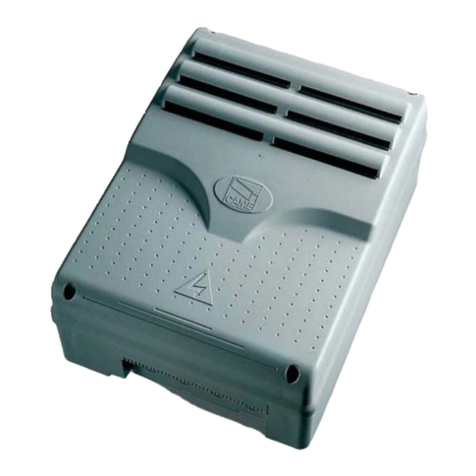
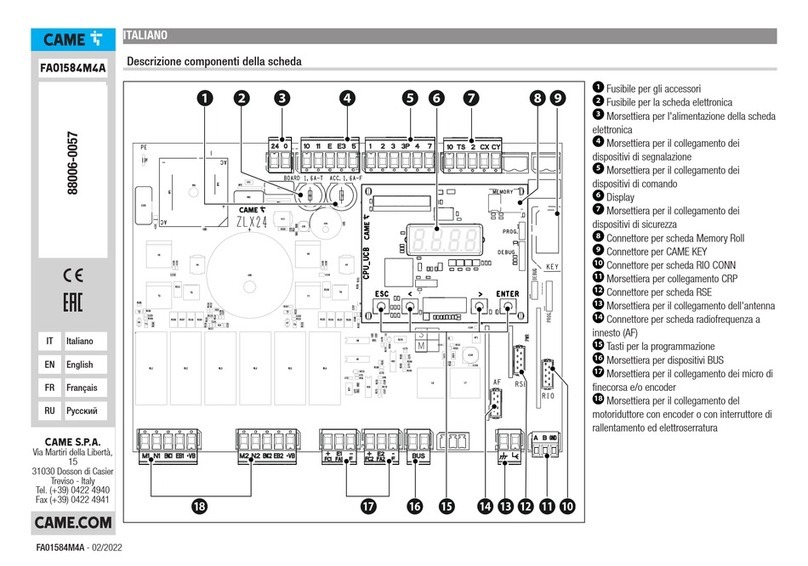
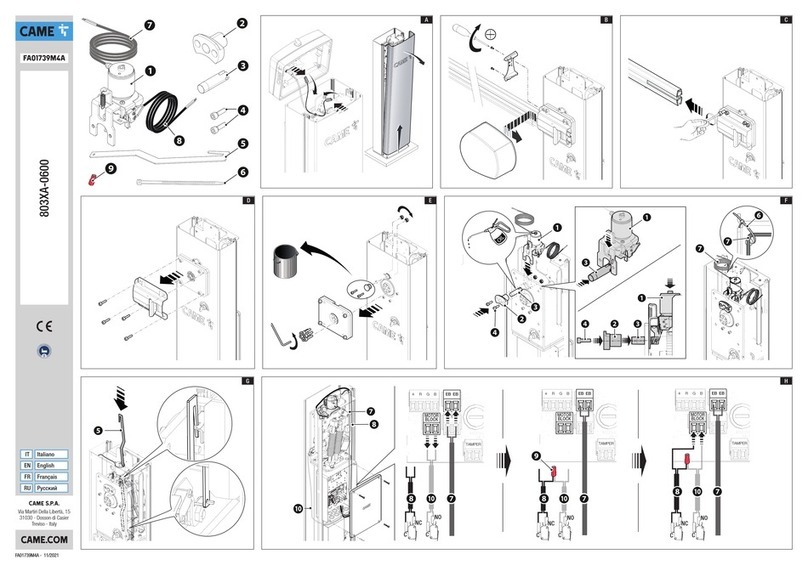
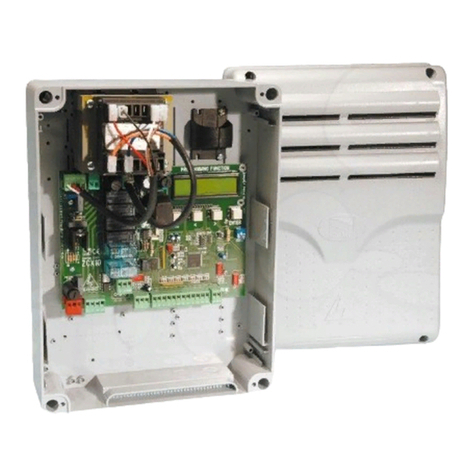
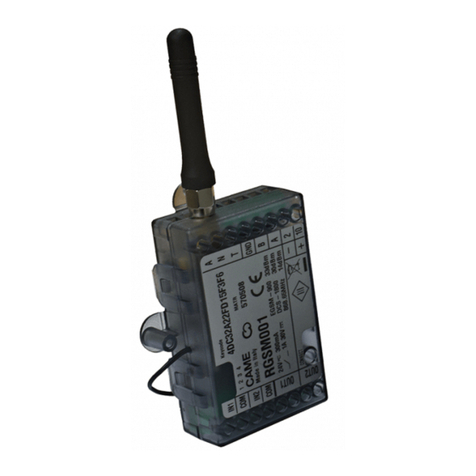
CAME ZG5 User manual

RICAMBI ORIGINALI
ORIGINAL SPARE PARTS
PIECES DE RECHANGE ORIGINALES
ORIGINALERSATZTEILE
REPUESTOS ORIGINALES
ORIGINEEL ONDERDEEL
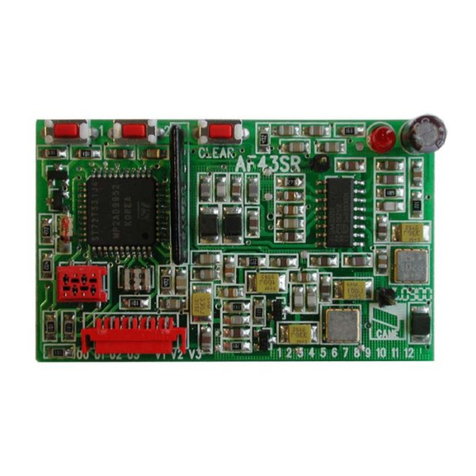
SCHEDA ELETTRONICA
CONTROL BOARD
CARTE ELECTRONIQUE
STEUER PLATINE
TARJETA ELECTRONICA
ELEKTRONISCHE PRINTKAART
Nederlands NL
Español ES
Deutch DE
Français FR
English EN
Italiano IT
ZG5

5
67
&#
&!&
/.
%" %" 63 #4 ,4 ,4 ).4%2",/##/
.,
'.$
"! $
% 6"
% % 43 0 # #
$IS
C
D F
B
E
A
5
67
&#
&!&
/.
%" %" 63 #4 ,4 ,4 ).4%2",/##/
.,
'.$
"! $
% 6"
% % 43 0 # #
$IS
C
D F
B
E
A

ITALIANO
Pag.
3
- Codice manuale:
319
319
LR
LR
13
13 ver.
1.0
1.0 12/2007 © CAME cancelli automatici s.p.a.
I dati e le informazioni indicate in questo manuale sono da ritenersi suscettibili di modifica in qualsiasi momento e senza obbligo di preavviso da parte di CAME cancelli automatici s.p.a.
% % 43 0 # #
Collegamenti elettrici
IT
L-N Alimentazione 230V (a.c.) 50/60 Hz
10-11
Alimentazione accessori 24V (a.c.)
10-E7
Cupola lampeggiante 24V - 8W max.
10-5
Lampada spia (Portata contatto: 24V - 3W max.) barriera aperta
10-E6
Cordone luminoso 24V - 24W max.
2-C1 Contatto (N.C.) di riapertura durante la chiusura
2-C5 Contatto (N.O.) di chiusura immediata
U-V-W Motoriduttore 230V a.c.
1-2
Pulsante di stop (contatto N.C.)
2-3
Pulsante di apertura (N.O.)
2-3P Pulsante di apertura (N.O.) per funz. abbinato e/o bussola
2-4
Pulsante di chiusura (N.O.)
2-7
Pulsante per comandi (N.O.)
EB-EB
Uscita di alimentazione per eletroblocco
(VB2 = elettroblocco a 24V, VB1 = elettroblocco a 12V)
F-FA
Finecorsa apre (N.C.)
F-FC
Finecorsa chiude (N.C.)
A-B-GND
Collegamento per barriere abbinate
+ E D
Collegamento Encoder
Collegamento antenna
Collegamento elettrico per il funzionamento del test di sicurezza delle fotocellule
48
48
48 #
.#
(DIR) - selezionare il dip 8 in ON per attivare il funzionamento del test.
IMPORTANTE:
Quando si attiva la funzione test di sicurezza, i contatti N.C. - se non utilizzati - vanno esclusi
sui relativi DIP.
Regolazioni C
Trimmer A.C.T. = Tempo chiusura automatica: da 1" a 120"

ITALIANO
I dati e le informazioni indicate in questo manuale sono da ritenersi suscettibili di modifica in qualsiasi momento e senza obbligo di preavviso da parte di CAME cancelli automatici s.p.a.
Pag.
4
- Codice manuale:
319
319
LR
LR
13
13 ver.
1.0
1.0 12/2007 © CAME cancelli automatici s.p.a.
-Collegare il cavo RG58 dell’antenna agli appositi morsetti.
-Innestare la scheda di radiofrequenza sulla scheda elettronica DDOPO AVER TOLTO LA TENSIONE (o scollegato le batterie).
N.B.: La scheda elettronica riconosce la scheda di radiofrequenza solo quando viene alimentata.
Attivazione del comando radio
Memorizzazione
CH1 = Canale per comandi diretti a una funzione della scheda del motoriduttore (comando “solo apre” / “apre-chiude-inversione” oppure
“apre-stop-chiude-stop”, a seconda della selezione effettuata sui dip-switch 2 e 3).
CH2 = Canale per comando diretto a un dispositivo accessorio collegato su B1-B2.
-Tenere premuto il tasto “CH1” Asulla scheda elettronica. Il led lampeggia. B
-Premere il tasto del trasmettitore da memorizzare. Il led rimarrà acceso a segnalare l’avvenuta memorizzazione.
-Ripetere la procedura del punto 1 e 2 per il tasto “CH2” associandolo con un altro tasto del trasmettitore.
Selezione funzioni E
1 ON Funzione chiusura automatica attivata; (1 OFF-disattivata);
2 ON Funzione "apre" con trasmettitore radio (scheda AF inserita) attivato;
2 OFF Funzione "apre-chiude-inversione" con pulsante (2-7) e trasmettitore radio (scheda AF inserita) attivato;
3 ON Funzione ad "azione mantenuta" (esclude la funzione del trasmettitore radio) attivato; (3 OFF disattivato);
4 ON Prelampeggio in apertura e in chiusura attivato, con dispositivo collegato sui morsetti 10- E7 (4 OFF disattivato);
5 ON Rilevazione ostacolo. A motore fermo (barriera chiusa, aperta o dopo un comando di stop totale), impedisce qualsiasi movimento
se i dispositivi di sicurezza (es. fotocellule) rilevano un ostacolo;
6 OFF Funzione di stop totale (collegare pulsante su 1-2) attivato;(se non utilizzato posizionare il dip in ON);
7 OFF Funzione di riapertura in fase di chiusura (collegare i dispositivi di sicurezza sui morsetti 2-C1) attivata; (se non utilizzato
posizionare il dip in ON);
8 ON Funzione del test di sicurezza per la verifica dell’efficienza delle fotocellule attivato; (8 OFF disattivata).
9 OFF Encoder attivato per la rilevazione degli ostacoli (9 ON disattivato);
10 Non utilizzato

ITALIANO
Pag.
5
- Codice manuale:
319
319
LR
LR
13
13 ver.
1.0
1.0 12/2007 © CAME cancelli automatici s.p.a.
I dati e le informazioni indicate in questo manuale sono da ritenersi suscettibili di modifica in qualsiasi momento e senza obbligo di preavviso da parte di CAME cancelli automatici s.p.a.
Per variare la coppia motrice, spostare il faston indicato (con il filo di colore nero) su
una delle 4 posizioni: 1 min ÷ 4 max.
G2081 - G2081I G4041 - G4041I
Led n°1 = 5000 manovre
Led n°2 = 10000 manovre
Led n°3 = 25000 manovre
Led n°4 = 50000 manovre
Led n°5 = 100000 manovre
Led n°6 = 250000 manovre
Led n°7 = 500000 manovre
Led n°8 = 1000000 manovre
Per la gestione dello spunto manovra,posizionare il dip n°1 e n°3 in ON,tutti gli 8 led del contatore
manovre saranno accesi (memorizzazione default per barriere G2081 e G2081I), per selezionare
la gestione dello spunto per barriere G4041 e G4041I, posizionare i dip 1 e 3 in ON e premere il
pulsante CH1, i primi 4 led saranno accesi. Riposizionare il dip n°3 in OFF e il dip n°1 può essere
lasciato posizionato in ON, se si desideri la funzione di chiusura automatica.
Conteggio del numero di manovre visualizzato tramite n°8 led, per azzerare
il conteggio, posizionare il dip n°1 in OFF (se selezionato in ON) e il dip n°3
in ON, premere il pulsante CH1 ed attendere che tutti i led si spengano. Dopo
l’azzeramento, riposizionare il dip n°1 in ON (se selezionato) e il dip n°3 in OFF.
Gestione spunto manovra F
Contatore manovre F
Limitatore di coppia

ITALIANO
I dati e le informazioni indicate in questo manuale sono da ritenersi suscettibili di modifica in qualsiasi momento e senza obbligo di preavviso da parte di CAME cancelli automatici s.p.a.
Pag.
6
- Codice manuale:
319
319
LR
LR
13
13 ver.
1.0
1.0 12/2007 © CAME cancelli automatici s.p.a.
CAME Cancelli Automatici S.p.A.
via Martiri della Libertà, 15
31030 Dosson di Casier - Treviso - ITALY
tel (+39) 0422 4940 - fax (+39) 0422 4941
Dichiara sotto la propria responsabilità, che i seguenti prodotti per l’automazione di cancelli e porte da garage,
così denominati:
… sono conformi ai requisiti essenziali ed alle disposizioni pertinenti, stabilite dalle seguenti Direttive e alle parti
applicabili delle Normative di riferimento in seguito elencate.
2006/95/CE DIRETTIVA BASSA TENSIONE
2004/108/CE DIRETTIVA COMPATIBILITÀ ELETTROMAGNETICA
EN 60335-1 EN 61000-6-2
EN 13241-1 EN 61000-6-3
DICHIARAZIONE CE DI CONFORMITÀ
Ai sensi della Direttiva Bassa Tensione 73/23/CEE
L’AMMINISTRATORE DELEGATO
Andrea Menuzzo
ZG5
I nostri prodotti sono realizzati con materiali diversi. La maggior parte di essi (alluminio, plastica, ferro, cavi elettrici) è assimilabile ai rifiuti
solidi e urbani. Possono essere riciclati attraverso la raccolta e lo smaltimento differenziato nei centri autorizzati.
Altri componenti (schede elettroniche, batterie dei transmettitori etc.) possono invece contenere sostanze inquinanti.
Vanno quindi rimossi e consegnati a ditte autorizzate al recupero e allo smaltimento degli stessi.
Dismissione e smaltimento
Codice di riferimento per richiedere una copia conforme all’originale: DDF L IT Z006c
AVVERTENZA IMPORTANTE!
È vietato mettere in servizio il/i prodotto/i, oggetto della presente dichiarazione, prima del completamento
e/o incorporamento, in totale conformità alle disposizioni della Direttiva Bassa Tensione 73/23/CEE

The data and information reported in this installation manual are susceptible to change at any time and without obligation on CAME cancelli automatici s.p.a. to notify users.
Pag.
7
- Manual code:
319
319
LR
LR
13
13 ver.
1.0
1.0 12/2007 © CAME cancelli automatici s.p.a.
ENGLISH
Electrical connections
Electrical connection to operate the photocells’ safety test
- Set DIP switch 8 to ON to activate the test.
IMPORTANT:
When the safety test function is activated, the N.C. contacts:
- If unused – are to be excluded on their relative DIP switches.
EN
% % 43 0 # #
L-N
230V (a.c.) power supply
50/60 Hz
10-11
24V (A.C.) max. 30W supply accessories
10-E7
Flashing dome 24V (A.C.) max.8W
10-5
Pilot light indicating “barrier open” (24V-3W max.)
10-E6 C
ord signals 24V (A.C.) max. 24W
2-C1
Contact (N.C.) of «reopening during closing»
2-C5
Contact (N.O.) of «immediate closing»
U-V-W
230V (a.c.) motor
1-2
Stop pushbutton (N.C.)
2-3
Open pushbutton (N.O.)
2-3P Opening pushbutton (N.O.) for combined and/or bush function
2-4
Closing pushbutton (N.O.)
2-7
Command pushbutton (see dip-switch 2 in function selections)
EB-EB
Output supplied for electric lock
(VB2 = 24V electric lock, VB1 = 12V electric lock)
F-FA
Open end stop connection (N.C.)
F-FC
Close end stop connection (N.C.)
A-B-GND
Combined barrier connection
+ E D
Encoder connection
Connection of antenna
48
48
48 #
.#
(DIR)
Adjustments C
A.C.T Trimmer = min. automatic closing time 1 sec, max. 120 sec.

The data and information reported in this installation manual are susceptible to change at any time and without obligation on CAME cancelli automatici s.p.a. to notify users.
Pag.
8
- Manual code:
319
319
LR
LR
13
13 ver.
1.0
1.0 12/2007 © CAME cancelli automatici s.p.a.
ENGLISH
-Connect the antenna’s RG58 cable to the apposite terminals.
-Lock the radiofrequency card into the electronic card DAFTER CUTTING OFF THE POWER SUPPLY (or after disconnecting the batteries).
N.B.: the electronic card only recognises the radiofrequency card when the power is on.
Activating the remote control
Memorisation
CH1 = Channel for direct command to a function of the the gearmotor’s card, (“open only / “open-close-invert” or “open-stop-close-stop”
command, depending on the choice made on DIP switches 2 and 3).
CH2 = Channel for direct command an accessory device connected to B1-B2.
-Keep the “CH1” Abutton on the electronic card pressed. The LED flashes. B
-Press the transmitter button you wish to memorise. The LED will stay on to show memorisation has been successful.
-Repeat the points 1 and 2 procedures for the “CH2” button associating this to another button on the transmitter.
Selezione funzioni E
1 ON Automatic closing function activated; (1 OFF-deactivated);
2 ON “Open” function with activated remote control (HF board inserted);
2 OFF “Open-close-reverse” function with pushbutton (2-7) and activated remote control (HF board inserted) ;
3 ON “Maintained Action” function (remote control function disabled) activated; (3 OFF deactivated);
4 ON Activated pre-flashing during opening and closing,, with device connected on terminals 10- E7 (4 OFF deactivated);
5 ON Obstacle detection. With the motor off (bar closed, open or after a total-stop command), movement is blocked if safety devices
(e.g. photoelectric cells) detect an obstacle;
6 OFF Total stop function activated, connect pushbutton to 1-2 (if not set the dipswitch to ON);
7 OFF Reopening function during closure activated, connect the safety devices to terminals 2-C1 (if not used set the dipswitch to ON);
8 ON Safety test function to check photoelectric cell efficiency (page.7) activated; (8 OFF deactivated).
9 OFF Encoder activated for obstacle detection (9 ON deactivated);
10 Not used

The data and information reported in this installation manual are susceptible to change at any time and without obligation on CAME cancelli automatici s.p.a. to notify users.
Pag.
9
- Manual code:
319
319
LR
LR
13
13 ver.
1.0
1.0 12/2007 © CAME cancelli automatici s.p.a.
ENGLISH
To vary the motor torque, move the indicated faston to one of the four positions:
1=min, 4=max
G2081 - G2081I G4041 - G4041I
Led n°1 = 5000 manoeuvres
Led n°2 = 10000 manoeuvres
Led n°3 = 25000 manoeuvres
Led n°4 = 50000 manoeuvres
Led n°5 = 100000 manoeuvres
Led n°6 = 250000 manoeuvres
Led n°7 = 500000 manoeuvres
Led n°8 = 1000000 manoeuvres
Management of the manoeuvre pick-up function F
Operation counter F
Motor torque limiter
To manage the manoeuvre pick-up function, position the dip 1 and dip 3 to ON; all 8 LED
of the manoeuvre counter will be on (default memorization for G2081 and G2081I); to select
management of manoeuvre pick-up function for G4041 e G4041I barriers, position the dip 1 and
3 to ON and press the CH1 button. The first 4 LEDs will be on. Reposition the dip 3 to OFF and
dip 1 can be left on the ON position, if automatic closure is desired.
Counts the number of operations displayed with the 8 LED to zero out the count,
position the dip 1 to OFF (if selected to ON) and the dip 3 to ON, press the CH1
and wait for all the LED to turn off. After zeroing out, return the dip 1 to ON (if
selected) and dip 3 to OFF.

The data and information reported in this installation manual are susceptible to change at any time and without obligation on CAME cancelli automatici s.p.a. to notify users.
Pag. 1010 - Manual code: 319319LRLR1313 ver. 1.01.0 12/2007 © CAME cancelli automatici s.p.a.
ENGLISH
Disposal
This product, including the packaging, is made up of several types of materials that can be recycled.
Investigate the recycling or disposal systems of the product, complying with prevailing local legislation.
Some electronic components may contain polluting substances. Do not litter.
CAME Cancelli Automatici S.p.A.
via Martiri della Libertà, 15
31030 Dosson di Casier - Treviso - ITALY
tel (+39) 0422 4940 - fax (+39) 0422 4941
Declares under its own responsibility that the equipments for automatic garage doors and gates listed below:
… comply with the National Law related to the following European Directives and to the applicable parts of the
following Standards.
2006/95/EC LOW VOLTAGE DIRECTIVE
2004/108/EC ELECTROMAGNETIC COMPATIBILITY DIRECTIVE
EN 60335-1 EN 61000-6-2
EN 13241-1 EN 61000-6-3
EC DECLARATION OF CONFORMITY
Pursuant to the Low Voltage Directive
THE MANAGING DIRECTOR
Andrea Menuzzo
ZG5
Reference code to request a true copy of the original: DDF L EN Z006c
IMPORTANT WARNING!
Do not use the equipment specified here above, before completing the full installation. In full compliance to
the Low Voltage Directive 73/23/EEC

Pag.
11
11 - Code manuel:
319
319
LR
LR
13
13 ver.
1.0
1.0 12/2007 © CAME cancelli automatici s.p.a.
Les données et les indications fournies dans ce manuel d’installation peuvent subir des modifications à tout moment sans avis préalable de la part de CAME cancelli automatici s.p.a.
FRANÇAIS
Branchements électriques
Connexion électrique pour le fonctionnement du test de contrôle de sécurité des photocellules
- sélectionnez le dip 8 sur ON pour mettre en fonction le test ;
IMPORTANT :
Quand vous mettez en fonction le test de sécurité, si vous n’utilisez pas les contacts N.C,
vous devez les exclure sur les DIP correspondants
FR
% % 43 0 # #
L-N
Alimentation 230V (a.c.)
10-11
Alimentation accessoires 24V (A.C.) max. 30W
10-E7
Clignotant coupole 24V (A.C.) max.8W
10-5
Voyant “barrière ouverte (24V-3W max.)
10-E6
Cordon lumineux 24V (A.C.) max. 24W
2-C1
Contact (N.F.) de «réouverture durant la fermeture»
2-C5
Contact (N.O.) de «fermeture immédiate»
U-V-W
Moteur 230V (a.c.)
1-2
Bouton d’arrêt (N.F.)
2-3
Bouton ouvre (N.O.)
2-3P Bouton pour l’ouverture (N.O.) pour la fonction accouplé
et/ou douille.
2-4
Bouton de fermeture (N.O.)
2-7
Bouton pour la commande (N.O.)
EB-EB
Sortie alimentée par le bloc électrique
(VB2 = bloc électrique 24V, VB1 = bloc électrique 12V)
F-FA
Branchement fin de course ouvre (N.F.)
F-FC
Branchement fin de course ferme (N.F.)
A-B-GND
Connexion pour barrières couplées
+ E D
Branchement Encoder
Branchement antenne
48
48
48 #
.#
(DIR)
Reglages
A.C.T Trimmer = temps de fermeture automatique min. 1 sec, max. 120 sec.
C

Les données et les indications fournies dans ce manuel d’installation peuvent subir des modifications à tout moment sans avis préalable de la part de CAME cancelli automatici s.p.a.
Pag.
12
12 - Code manuel:
319
319
LR
LR
13
13 ver.
1.0
1.0 12/2007 © CAME cancelli automatici s.p.a.
FRANÇAIS
-Branchez le câble RG58 de l’antenne aux borniers correpondants.
-Branchez la carte de radiofréquence sur la carte électronique DAPRÈS AVOIR COUPÉ LE COURANT (ou débranchez les batteries).
N.B. : La carte électronique reconnaît la carte de radiofréquence seulement quand elle est alimentée.
Mise en service de l’émetteur
Mise en mémoire
CH1 = Canal pour commandes directes à une fonction de la carte du motoréducteur (commande “ouvre seulement” / “ouvre-ferme-inver-
sion” ou bien “ouvre-stop-ferme-stop”, selon la sélection effectuée sur les dip-switch 2 et 3).
CH2 = Canal pour commande directe à un dispositif accessoire branché sur B1-B2.
-Appuyez sans relâcher la touche “CH1” Asur la carte électronique. La led clignote. B
-Appuyez sur la touche de l’émetteur à mémoriser. La led restera allumée pour confirmer que la mise en mémoire a été effectuée.
-Répétez l’opération en partant du point 1 et 2 pour la touche “CH2” en l’associant à une autre touche de l’émetteur.
Sélection des fonctions E
1 ON Fonction fermeture automatique activée ; (1 OFF-désactivé);
2 ON Fonction “ouvre” avec la transmetteur radio (carte AF branchée) activée;
2 OFF Fonction «ouvre-ferme-inversion» avec le bouton (2-7) et la transmetteur radio (carte AF branchée) activée;
3 ON Fonction dont «l’action reste maintenue» (ce qui exclut la fonction de la radiocommande) activée (3 OFF désactivé);
4 ON Pré-clignotement en ouverture et en fermeture activé, avec dispositif relié aux bornes 10- E7 (4 OFF désactivé);
5 ON Détection des obstacles. Quand le moteur est arrêté (barrière fermée, ouverte ou après une commande d’arrêt total), cette fonction
empêche tout mouvement si les dispositifs de sécurité (ex. photocellules) détectent un obstacle;
6 OFF Fonction d’arrêt total (brancher le bouton sur 1-2) activée ; (si elle n’est pas utilisée, mettre le microinterrupteur sur ON);
7 OFF Fonction de réouverture durant la phase de fermeture (brancher les dispositifs de sécurité aux bornes 2-C1) activée; (si elle n’est
pas utilisée, mettre le microinterrupteur sur ON)
8 ON Fonction du test de sécurité pour contrôler l’efficacité des photocellules (page.7) activée; (8OFF désactivée)
9 OFF Encodeur activé pour la détection des obstacles (9 ON désactivé);
10 Pas utilisé

Pag.
13
13 - Code manuel:
319
319
LR
LR
13
13 ver.
1.0
1.0 12/2007 © CAME cancelli automatici s.p.a.
Les données et les indications fournies dans ce manuel d’installation peuvent subir des modifications à tout moment sans avis préalable de la part de CAME cancelli automatici s.p.a.
FRANÇAIS
G2081 - G2081I G4041 - G4041I
Gestion amorce de la manœuvre F
Compteur des manœuvres F
Limiteur de couple moteur
Pour gérer l’amorce de la manœuvre, mettre les commutateurs n° 1 et 3 sur ON, les 8 diodes
du compteur des manœuvres s’allument (mémorisation par défaut pour les barrières G2081 et
G2081I). Pour sélectionner la gestion de l’amorce pour les barrières G4041 et G4041I, mettre les
commutateurs 1 et 3 sur ON et appuyer sur le bouton CH1, les 4 premières diodes s’allument.
Remettre le commutateur n° 3 sur OFF, tandis que le commutateur n° 1 peut rester sur ON si l’on
désire la fonction de fermeture automatique.
Comptage du nombre de manœuvres indiqué à l’aide de 8 diodes. Pour remettre
le compteur à zéro, mettre le commutateur n° 1 sur OFF (s’il est sur ON) et le
commutateur n° 3 sur ON,appuyer sur le bouton CH1 et attendre que toutes les diodes
s’éteignent. Lorsque le compteur est à zéro, remettre le commutateur n° 1 sur ON (s’il
est sélectionné) et le commutateur n° 3 sur OFF.
Pour varier le couple du moteur, déplacer le connecteur indiqué sur l’une des
4 positions; 1 min. - 4 max.
Led n°1 = 5000 manœuvres
Led n°2 = 10000 manœuvres
Led n°3 = 25000 manœuvres
Led n°4 = 50000 manœuvres
Led n°5 = 100000 manœuvres
Led n°6 = 250000 manœuvres
Led n°7 = 500000 manœuvres
Led n°8 = 1000000 manœuvres

Les données et les indications fournies dans ce manuel d’installation peuvent subir des modifications à tout moment sans avis préalable de la part de CAME cancelli automatici s.p.a.
Pag. 1414 - Code manuel: 319319LRLR1313 ver. 1.01.0 12/2007 © CAME cancelli automatici s.p.a.
FRANÇAIS
Cet appareil, y compris l’emballage, est constitué de plusieurs types de matériaux pouvant être recyclés.
S’informer sur les systèmes de recyclage ou d’élimination de l’appareil en se conformant aux lois locales en vigueur.
Certains composants électroniques pourraient contenir des substances polluantes, ne pas les jeter n’importe où.
Recyclage et élimination
CAME Cancelli Automatici S.p.A.
via Martiri della Libertà, 15
31030 Dosson di Casier - Treviso - ITALY
tel (+39) 0422 4940 - fax (+39) 0422 4941
Déclare sous sa responsabilité, que les produits suivants pour l’automation de portails et portes de garage, ainsi
dénommés:
... sont conformes aux conditions nécessaires et aux dispositions appropriées, fixées par les Directives suivantes
et aux articles applicables des Règlementations de référence indiqués ci-après.
2006/95/CE DIRECTIVE BASSE TENSION
2004/108/CE DIRECTIVE COMPATIBILITÉ ELECTROMAGNETIQUE
EN 60335-1 EN 61000-6-2
EN 13241-1 EN 61000-6-3
DECLARATION CE DE CONFORMITE
Aux termes de la Directive Basse Tension
L’ADMINISTRATEUR DÉLÉGUÉ
Andrea Menuzzo
ZG5
Code de référence pour demander une copie conforme à l’original: DDF L FR Z006c
AVIS IMPORTANT !
Il est interdit de mettre en service les produits, objet de cette déclaration, avant de les incorporer à
l’installation et/ou de terminer le montage de cette dernière, conformément aux dispositions de la Directive
Basse Tension 73/23/CEE

Seite 1515 - Handbuch-Code: 319319LRLR1313 ver. 1.01.0 12/2007 © CAME cancelli automatici s.p.a.
Sämtliche in der Installationsanleitung aufgeführten Daten und Informationen können jederzeit und ohne Vorankündigung von CAME cancelli automatici s.p.a verändert werden.
DEUTSCH
Elektrischer anschluss
Elektrische Verbindung für Sicherheitstest der Lichtschranken
DE
- Dip 8 auf ON stellen, um Sicherheitstest zu aktivieren.
WICHTIG:
Wenn die Funktion Sicherheitstest aktiviert wird, müssen die Kontakte N.C. – bei
Nichtverwendung – auf den jeweiligen DIPs ausgeschlossen werden
% % 43 0 # #
L-N
Speisung 230V (W.S.)
10-11
Speisung der Zubehörteile 24V (W.S.) max. 30W
10-E7
Blinkkuppel 24V (A.C.) max.8W
10-5
Kontrolllampe “ Schranke offen” (24V-3W max.)
10-E6
Leuchtschnur 24V (A.C.) max. 24W
2-C1 Kontakt (N.C.) für erneute Öffnung während der Schließung
2-C5 Kontakt (N.O.) Sofortige Schließung
U-V-W
Einphasen 230V (W.S.)
1-2
Stoppaste (N.C.)
2-3
Öffnungstaste (N.O.)
2-3P Öffnungstaste (N.O.) für gekoppelte Funktion u/o Kompass
2-4
Schließtaste (N.O.)
2-7
Steuertaste (siehe Dip 2 Funktionswahl)
EB-EB
Für Elektrosperre gespeister Ausgang
(VB2 = Elektrosperre 24V, VB1 = Elektrosperre 12V)
F-FA
Anschluss Öffnungsendschalter (N.C.)
F-FC
Anschluss Schließendschalter (N.C.)
A-B-GND
Verbindung für kombinierte Schranken
+ E D
Encoder Anschluss
Antenne Anschluss
48
48
48 #
.#
(DIR)
Einstellungen C
Trimmer T.C.A. = Automatikschließzeit min. 1”, max. 120”

Sämtliche in der Installationsanleitung aufgeführten Daten und Informationen können jederzeit und ohne Vorankündigung von CAME cancelli automatici s.p.a verändert werden.
Seite
16
16 - Handbuch-Code:
319
319
LR
LR
13
13 ver.
1.0
1.0 12/2007 © CAME cancelli automatici s.p.a.
DEUTSCH
Speichem
-Kabel RG58 der Antenne an die dafür vorgesehenen Klemmen anschließen.
-Funksteckmodul auf der Steuerplatine aufstecken D, NACH UNTERBRECHUNG DER STROMZUFUHR (bzw. nach Entfernung der Batterien).
N.B.: Die Steckkarte erkennt das Funksteckmodul nur wenn sie mit Strom gespeist wird.
Aktivierung des Senders
CH1 = Kanal für Befehle an eine Funktion der Steuerung des Getriebemotors (Befehl „nur auf“ / „auf-zu-reversiere“ bzw. „auf-stopp-zu-
stopp“ je nach Wahl auf den Dip-Switches 2 und 3).
CH2 = Kanal für Befehle an ein auf B1-B2 angeschlossenes Zusatzgerät.
-Den Taster “CH1” Aauf der Steuerplatine gedrückt halten. Das Led blinkt. B
-Den zu speichernden Taster auf dem Sender drücken. Das Led bleibt an und zeigt so die erfolgte Speicherung an.
-Den in Punkt 1 und 2 beschriebenen Vorgang für den Taster “CH2” wiederholen und diesen mit einem anderen Taster auf der Fernbedienung
kombinieren.
1 ON Funktion Automatikschließung aktiviert; (1 OFF deaktiviert;
2 ON Funktion “öffnet” mit Funksteuerung (Karte AF ON) aktiviert;
2 OFF Funktion “öffnen -schließen-Umsteuerung” mit Drucktaste (2-7) und Funksteuerung (Karte AF ON) aktiviert;
3 ON Funktion “andauernde Betätigung” (schließt Funksteuerung aus) aktiviert;
4 ON Vorheriges Blinken bei Öffnung und Schließung aktiviert, mit angeschlossener Vorrichtung an den Klemmen 10-E7 (4 OFF deaktiviert);
5 ON Erfassung eines Hindernisses Bei ausgeschaltetem Motor (Schranke geschlossen, offen oder nach einem Gesamtstopp) wird
jegliche Bewegung verhindert, wenn die Sicherheitsvorrichtungen (z.B. Photozellen) ein Hindernis erfassen;
6OFF Funktion “Gesamtstopp” (Drucktaste an 1-2 anschließen) aktiviert; bei Nichtbenutzung den Dip auf ON stellen);
7OFF Funktion erneute Öffnung während des Schließens; Sicherheitsvorrichtungen an den Klemmen 2-C5 anschließen aktiviert; bei Nichtbe-
nutzung den Dip auf ON stellen);
8 ON Funktion “Sicherheitstest” zur Überprüfung der Photozelleneffizienz (Seite 7) aktiviert; (8 OFF deaktiviert);
(falls nicht benutzt, den Dip auf ON wählen);
9 OFF Encoder zur Erfassung eines Hindernisses aktiviert (9 ON deaktiviert);
10 Nicht benutzt
Funktionswahl E

Seite
17
17 - Handbuch-Code:
319
319
LR
LR
13
13 ver.
1.0
1.0 12/2007 © CAME cancelli automatici s.p.a.
Sämtliche in der Installationsanleitung aufgeführten Daten und Informationen können jederzeit und ohne Vorankündigung von CAME cancelli automatici s.p.a verändert werden.
DEUTSCH
G2081 - G2081I G4041 - G4041I
Led n°1 = 5000 Betätigungen
Led n°2 = 10000 Betätigungen
Led n°3 = 25000 Betätigungen
Led n°4 = 50000 Betätigungen
Led n°5 = 100000 Betätigungen
Led n°6 = 250000 Betätigungen
Led n°7 = 500000 Betätigungen
Led n°8 = 1000000 Betätigungen
Überwachung des Getriebemotoranlaufs F
Schrankenbetätigungszähler F
Drehmomentbegrenzer
Zur Überwachung des Getriebemotoranlaufs Dip N° 1 und N° 3 auf ON stellen; alle 8 LEDs
sind eingeschaltet (Defaultspeicherung für Schranken G2081 und G2081I); zwecks Wahl der
obengenannten Funktion für Schranken G4041 und G40411, Dip 1 und 3 auf ON stellen und
die Taste CH1 drücken; es sind die ersten 4 LEDs eingeschaltet. Dip N° 3 erneut auf AUS stellen,
während bei Wahl der automatischen Schließung, Dip N° 1 auf EIN gestellt bleiben kann.
Die Anzahl der Betätigungen wird durch N° 8 LEDs angezeigt; zur
Nullstellung des Zählers Dip N° 1 auf AUS (wenn auf EIN) und Dip N° 3
auf EIN stellen, die Taste CH1 drücken und abwarten, dass sich alle LEDs
ausschalten. Nach der Nullstellung, Dip N° 1 erneut auf EIN (falls gewählt)
und Dip N° 3 auf AUS stellen.
Zur Änderung des Motor-Drehmoments den angegebenen Faston auf eine der
4 Stellungen positionieren: 1 min. - 4 max.

Sämtliche in der Installationsanleitung aufgeführten Daten und Informationen können jederzeit und ohne Vorankündigung von CAME cancelli automatici s.p.a verändert werden.
Seite 1818 - Handbuch-Code: 319319LRLR1313 ver. 1.01.0 12/2007 © CAME cancelli automatici s.p.a.
DEUTSCH
Dieses Produkt einschließlich Verpackungen besteht aus verschiedenen wiederverwertbaren Materialien.
Informieren Sie sich unter Berücksichtigung der örtlich geltenden Rechtsvorschriften über die Recycling- und Entsorgungssysteme des
Produkts.
Einige elektronische Bauteile könnte verschmutzende Substanzen enthalten – nicht in der Umwelt zerstreuen.
Entsorgung
L’ADMINISTRATEUR DÉLÉGUÉ
Andrea Menuzzo
CAME Cancelli Automatici S.p.A.
via Martiri della Libertà, 15
31030 Dosson di Casier - Treviso - ITALY
tel (+39) 0422 4940 - fax (+39) 0422 4941
Bestätigt unter eigener Verantwortung, dass folgende automatische Antriebe für Tore und Garagentore:
.... den grundlegenden Anforderungen und entsprechenden Bestimmungen der folgenden Richtlinien und der
anzuwendenden Teilbestimmungen der im folgenden aufgeführten Gesetzesvorschriften entsprechen.
2006/95/EG NIEDERSPANNUNGSRICHTLINIE
2004/108/EG RICHTLINIE ÜBER ELEKTROMAGNETISCHE VERTRÄGLICHKEIT
EN 60335-1 EN 61000-6-2
EN 13241-1 EN 61000-6-3
EG-KONFORMITÄTSERKLÄRUNG
Gemäß der Niederspannungsrichtlinie
ZG5
Code zur Anforderung einer dem Original entsprechenden Kopie: DDF L DE Z006c
WICHTIGE HINWEISE !
Ist es untersagt, die diese Erklärung betreffenden Produkte vor Fertigstellung und/oder Einbau gemäß den
Bestimmungen der Niederspannungsrichtlinie 73/23/EWG zu verwenden.

Pag.
19
19 - Codigo manual:
319
319
LR
LR
13
13 ver.
1.0
1.0 12/2007 © CAME cancelli automatici s.p.a.
Los datos y las informaciones indicadas en este manual de instalación podrían modificarse en cualquier momento y sin obligación de aviso previo por parte de la firma CAME cancelli automatici s.p.a.
ESPAÑOL
Conexiones eléctricas
ES
- seleccionar el dip 8 en ON para activar el funcionamiento del test.
IMPORTANTE:
Cuando se activa la función test de seguridad, los contactos n.c., si no se utilizan, se
excluyen en sus relativos DIP.
% % 43 0 # #
L-N
Alimentación 230V (a.c.
) 50/60 Hz
10-11
Alimentación accesorios 24V (C.A.) máx. 30W
10-E7
Cúpula intermitente 24V (A.C.) máx. 8W
10-5
Indicador luminoso “barrera abierta” (24V-3W máx.)
10-E6
Cordón luminoso 24V (A.C.) max. 24W
2-C1
Contacto (N.C.) de “apertura durante el cierre”
2-C5
Contacto (N.A.) de “cierre immediato”
U-V-W
Motor 230V (a.c.)
1-2
Botón parada (N.C.)
2-3
Botón abierto (N.O.)
2-3P Botón para la apertura (N.A.) para función combinada o
interbloqueada.
2-4
Botón de cierre (N.A.)
2-7
Botón para mando (véase dip-switch 2 selecciones funciónes)
EB-EB
Salida alimentada para Electrobloqueo
(VB2 = Electrobloqueo 24V, VB1 = Electrobloqueo 12V)
F-FA
Conexión fin de carrera abrir (N.C.)
F-FC
Conexión fin de carrera cerrar (N.C.)
A-B-GND
Conexión para barreras combinadas
+ E D
Conexión Encoder
Conexión antena
Conexión eléctrica para el funcionamiento del test de seguridad de las fotocélulas
48
48
48 #
.#
(DIR)
Regulaciones C
Trimmer T.C.A. = Tiempo cierre automático mín. 1”, máx. 120”

Los datos y las informaciones indicadas en este manual de instalación podrían modificarse en cualquier momento y sin obligación de aviso previo por parte de la firma CAME cancelli automatici s.p.a.
Pag.
20
20 - Codigo manual:
319
319
LR
LR
13
13 ver.
1.0
1.0 12/2007 © CAME cancelli automatici s.p.a.
ESPAÑOL
-Conectar el cable RG58 de la antena a los respectivos bornes.
-Insertar la tarjeta de radiofrecuencia en la tarjeta electrónica DDESPUÉS DE HABER QUITADO LA TENSIÓN (o desconectado las baterías).
Nota: La tarjeta electrónica reconoce la tarjeta de radiofrecuencia sólo cuando es alimentada.
Activación del mando radio
Memorización
CH1 = Canal para mandos dirigidos a una función de la tarjeta del motorreductor (mando “sólo abre” / “abre-cierra-inversión” o bien
“abre-stop-cierra-stop”, en base a la selección efectuada en los dip-switch 2 y 3).
CH2 = Canal para mando dirigido a un dispositivo accesorio conectado en B1-B2.
-Tener apretada la tecla “CH1” Aen la tarjeta electrónica.El led parpadea. B
-Apretar la tecla del transmisor a memorizar: El led quedará encendido lo que indica que la memorización se ha verificado.
-Repetir el procedimiento desde el punto 1 y 2 para la tecla “CH2” asociándolo a una tecla del transmisor.
Selecciones funciones E
1 ON Función cierre automático activa; (1 OFF-desactivada);
2 ON
Función “abrir”con transmisor radio
(tarjeta AF conectada) activa;
2 OFF Función “abrir-cerrar-inversión” con botón (2-7) y radiomando (tarjeta AF conectada) activa;
3 ON Función de “accionamiento continuo” (desactiva la función del transmisor radio) activa; (3 OFF desactivada)
4 ON Destello previo durante la apertura y cierre activo, con dispositivo conectado a los bornes 10- E7 (4 OFF desactivado);
5 ON Detección de obstáculos. Con el motor detenido (barrera cerrada, abierta o después de un mando de parada total), impide cual-
quier movimiento si los dispositivos de seguridad (por. ej. fotocélulas) detectan un obstáculo;
6 OFF Función de parada total (conecte el botón en 1-2) activa; (si no se utiliza, coloque el dip en ON);
7 OFF Función de reapertura durante el cierre (conecte los dispositivos de seguridad a los bornes 2-C1) activa; (si no se utiliza, coloque
el dip en ON);
8 ON Función del test de seguridad para el control del funcionamiento de las fotocélulas (pág. 6) activa; (8 OFF desactivada).
9 OFF Codificador activo para la detección de obstáculos (9 ON desactivado);
10 No utilizado
Other manuals for ZG5
1
Table of contents
Languages:
Other CAME Control System manuals

CAME
CAME GARD 8 SERIES User manual

CAME
CAME GARD PT Brushless User manual

CAME
CAME GARD 8 SERIES User manual

CAME
CAME G3000 User manual

CAME
CAME ZLJ24 User manual

CAME
CAME PST001 User manual

CAME
CAME GGT40AGS User manual

CAME
CAME GARD 8 SERIES Owner's manual

CAME
CAME GLT40AOS User manual

CAME
CAME G5000 User manual
Popular Control System manuals by other brands

Beninca
Beninca VE.500 Operating instructions and spare parts catalogue

ENAPART
ENAPART EasyLine RM-208 CB.13.01 manual

Leb Electronics
Leb Electronics CTR640 instructions

Seav
Seav LXB 2150 manual

Tidomat
Tidomat smartONE 2 Start guide

Carrier
Carrier 3V VVT 33ZCVVTZC-01 Installation and start-up instructions