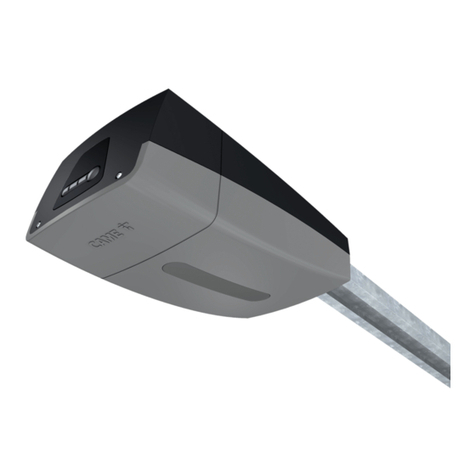
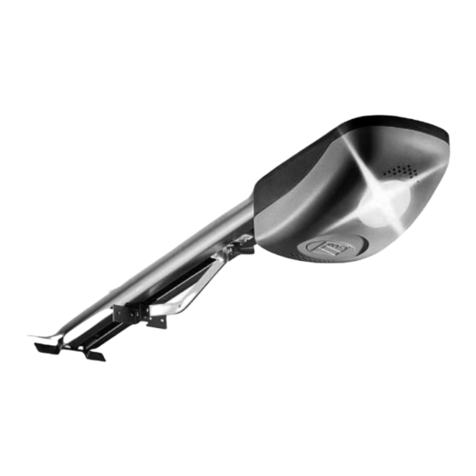
CAME C-BX User manual

C-BX_C-BXK_CBXE_CBXEK
C-BXT_C-BXET_C-BXE24
EN
English
FA01734-EN
INSTALLATION MANUAL
INDUSTRIAL
DOOR OPERATOR

Page 2- Manual FA01734-EN - 06/2022 - © CAME S.p.A. - The contents of this manual may be changed, at any time, and without notice. - Translation of the original instructions
⚠IMPORTANT! Important safety instructions.
Please follow all of these instructions. Improper installation may cause serious bodily harm.
Before continuing, please also read the general precautions for users.
• Only use this product for its intended purpose. Any other use is hazardous. • The manufacturer cannot be held liable
for any damage caused by improper, unreasonable or erroneous use. • This product is defined by the Machinery Directive
(2006/42/EC) as partly completed machinery. • Partly completed machinery means an assembly which is almost machinery
but which cannot in itself perform a specific application. • Partly completed machinery is only intended to be incorporated
into or assembled with other machinery or other partly completed machinery or equipment thereby forming machinery to
which the Machinery Directive (2006/42/EC) applies. • The final installation must comply with the Machinery Directive
(2006/42/EC) and the European reference standards in force. • The manufacturer declines any liability for using non-original
products, which would also void the warranty. • All operations indicated in this manual must be carried out exclusively by
skilled and qualified personnel and in full compliance with the regulations in force.• The device must be installed, wired,
connected and tested according to good professional practice, in compliance with the standards and laws in force. • All the
components (e.g. actuators, photocells and sensitive edges) needed for the final installation to comply with the Machinery
Directive (2006/42/EC) and with the reference harmonised technical standards are specified in the general CAME product
catalogue or on the website www.came.com. • Make sure the mains power supply is disconnected during all installation
procedures. • Check that the temperature ranges given are suitable for the installation site. • Do not install the operator on
surfaces that could yield and bend. • If necessary, add suitable reinforcements to the anchoring points. • Make sure that no
direct jets of water can wet the product at the installation site (sprinklers, water cleaners, etc.). • Make sure you have set up
a suitable dual-pole cut-o device along the power supply that is compliant with the installation rules. It should completely
cut o the power supply according to category III surcharge conditions. • Demarcate the entire site properly to prevent
unauthorised personnel from entering, especially minors. • In case of manual handling, have one person for every 20 kg
that needs hoisting; for non-manual handling, use proper hoisting equipment in safe conditions.• Use suitable protection to
prevent any mechanical hazards due to persons loitering within the operating range of the operator.• The electrical cables
must pass through special pipes, ducts and cable glands in order to guarantee adequate protection against mechanical
damage.•The electrical cables must not touch any parts that may overheat during use (such as the motor and transformer).
• Before installation, check that the guided part is in good mechanical condition, and that it opens and closes correctly.• The
product cannot be used to automate any guided part that includes a pedestrian gate, unless it can only be enabled when
the pedestrian gate is secured. •Make sure that nobody can become trapped between the guided and fixed parts, when the
guided part is set in motion. • All fixed controls must be clearly visible after installation, in a position that allows the guided
part to be directly visible, but far away from moving parts. In the case of a hold-to-run control, this must be installed at a
minimum height of 1.5 m from the ground and must not be accessible to the public. • Where operated with a hold-to-run
control, install a STOP button to disconnect the main power supply to the operator, to block movement of the guided part.
• If not already present, apply a permanent label describing how to use the manual release mechanism close to it. • Make
sure that the operator has been properly adjusted and that the safety and protection devices and the manual release are
working properly. • Before handing over to the final user, check that the system complies with the harmonised standards
and the essential requirements of the Machinery Directive (2006/42/EC). • Any residual risks must be indicated clearly with
proper signage axed in visible areas, and explained to end
users. • Put the machine’s ID plate in a visible place when
the installation is complete.
AVVERTENZE GENERALI PER L’INSTALLAZIONE
Danger of hand crushing
Danger! High volt-
age.
No transiting while the bar-
rier is moving
Danger of foot crushing

Page 3- Manual FA01734-EN - 06/2022 - © CAME S.p.A. - The contents of this manual may be changed, at any time, and without notice. - Translation of the original instructions
LEGEND OF SYMBOLS
This symbol tells you to read the part very carefully.
This symbol tells of parts that have to do with safety.
This symbol tells what to say to the user.
INTENDED USE AND LIMITS TO USE
Intended use
The CBX series gearmotor was designed to mainly power sectional doors which are directly coupled onto Ø 1” (Ø 25,4 mm) spring loaded,
chain transmission shafts. It is also suited for large sliding and folding doors with their relative accessories.
Any use other than the above mentioned intended one and installations made differently than what is explained in this technical manual,
are prohibited.
Limits to use
For large, directly-coupled
sectional doors
•door height up to 5.5 m
•Speed* 7.15 m/1’ with ~Ø 105 mm reel barrel
•Speed* 9.3 m/1’ with ~Ø 138 mm reel barrel
For large chain-transmission
sectional doors
•door height up to 8.5 m
•Speed* 9.15 m/1’ with ~Ø 208 mm reel barrel
For large, sliding or folding doors •Door width of up to 5.5 m for the C-BXE / C-BXE24 / C-BXET / C-BXEK
•Door width of up to 11 m for C-BX / C-BXT / C-BXK
•Door weight max 1,000 kg
* Speed is variable depending on the barrel diameter. The descriptions are based on common cable winch barrels, in the above mentioned
sizes, as used by mainstream sectional door manufacturers.
Contexts of operation
C-BX / C-BXK / C-BXE / C-BXEK Residential - Apartment block - Industrial
C-BXE24 Residential - Apartment block
C-BXT / C-BXET Industrial

Page 4- Manual FA01734-EN - 06/2022 - © CAME S.p.A. - The contents of this manual may be changed, at any time, and without notice. - Translation of the original instructions
DESCRIPTION
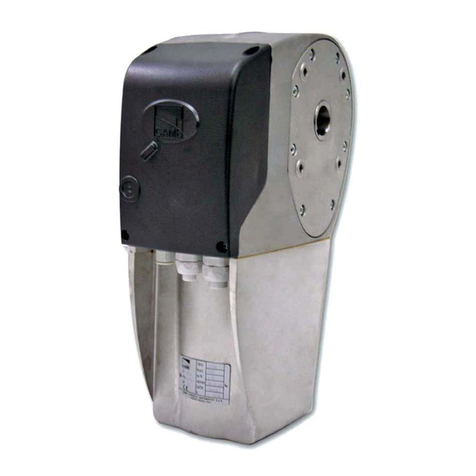
Gearmotor
The gearmotor is designed and manufactured by Came S.p.A. and complies with the current safety standards laws.
The case, is partly made of cast aluminium, holds a working electromechanical, irreversible gearmotor, and partly made of ABS plastic
coating to hold the electronic connection terminals.
The CBX series comes in several versions depending on the intended use; whether it’s for residential, apartment block or industrial
applications, with mechanical or encoder based endstops (see paragraph 2.3 Contexts of application).
The complete range:
230V Gearmotor with mechanical gearmotor and control panels
001C-BX / 001C-BXK - 230V A.C. Gearmotor with mechanical endstop
002 ZC3 / 002 ZM3E - Control Panel
002 ZC3C / 002 ZM3EC - Control panel with safety locking of command buttons
230 V Gearmotor with encoder and control panels
001C-BXE / 001C-BXEK - 230V A.C. Gearmotor with encoder
002 ZCX10 – Control panel
002 ZCX10C – Control panel with safety locking of command buttons
230V/400V tri-phase Gearmotor with mechanical endstops and control panels
001C-BXT - 230V/400V A.C. tri-phase gearmotor with mechanical endstop
002 ZT6 – Control panel
002 ZT6C - Control panel with safety locking of command buttons
230V/400V tri-phase Gearmotor with encoder and control panel
001C-BXET - 230V/400V A.C. Gearmotor with encoder
002 ZT5 – Control Panel
002 ZT5C - Control panel with safety locking of command buttons
24V Gearmotor with encoder and control panels
001C-BXE24 - 24V D.C. Gearmotor with encoder
002 ZL80 – Control panel
002 ZL80C - Control panel with safety locking of command buttons
002LBD2 – Card for connecting two (12V - 1.2Ah) emergency batteries
The CBX series may come with some of the following accessories, depending on the type of installations (i.e. sectional, folding or sliding):
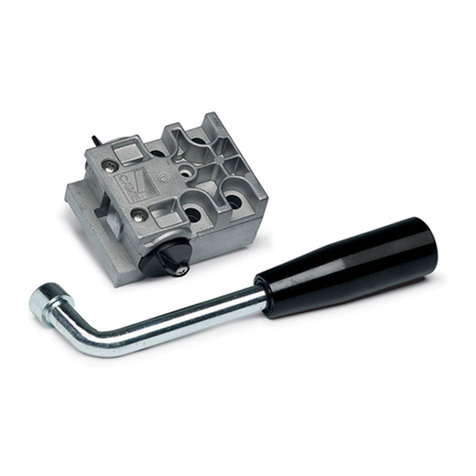
001 CMS – Release handle with customised key and reset cord (L = 7 m);
009 CCT – Simple 1/2” chain for large sliding or folding doors;
009 CGIU – Joint for 1/2” chain;
821XC-0150 – Manual winch for large sectional doors;
001 C002 – Pendulum release system;
001 C003 - Chain tension reset system and brackets for large sliding doors;
001 C004 – Chain tension reset system and brackets for large folding doors;
001 C005 – Chain transmission system for large sectional doors with heights greater than 5.5 m;
001 C006 – Package with two brackets for large sectional doors (specific for direct coupling applications with Ø 1 spring loaded shafts”);
001 C007/8 – Adaptors for sectional doors with Ø25 mm (C007), or Ø40 mm (C008) shafts;
001 C009 – Bracket for large sectional doors (specific for direct coupling applications with Ø 1 spring loaded shafts”);
001 C011 - Chain transmission mechanism for o-axis applications with a transmission ratio of 1:1
Make sure that the command and safety equipment and accessories are CAME originals; this ensures easy installation and system’s
maintenance.

#!-%
2
v
#!-%
2
v
C-BX / C-BXE
C-BXT / C-BXET
C-BXE24
C-BXK / C-BXEK
Page 5- Manual FA01734-EN - 06/2022 - © CAME S.p.A. - The contents of this manual may be changed, at any time, and without notice. - Translation of the original instructions
Technical information
C-BX C-BXK C-BXE C-BXEK C-BXT C-BXET C-BXE24
Power to motor 230V A.C.
50/60Hz
230-400V A.C.
50/60Hz
24V D.C.
50/60Hz
Draw* A 2.2 3.6 2.2 3.6 2.5 9
Power* W 450 750 450 750 780 240
Max torque* Nm 60 120 60 120 80 25
Gear ratio 1/67,45
Max n. of shaft revolutions 32 32 16 16 32 16 16
Rotation velocity rpm 21.5 2.5
Duty cycle 30% 30% 30% 30% 50% 50% intensive
Protection rating IP54
Motor’s thermal protection 150 °C /
Weight kg 11.3 11.8 13.3 13.9 11.2 11.3 11.2
Working temperature -20 / +55 °C
Operator insulation Class I
* Values depending on control panel in use
Overall dimensions

②
④
①
⑪
⑩
⑨
#!-%
2
#!-%
① ②
③ ④ ⑤ ⑥ ⑦
⑧
③
C-005 C-011
Page 6- Manual FA01734-EN - 06/2022 - © CAME S.p.A. - The contents of this manual may be changed, at any time, and without notice. - Translation of the original instructions
Description of parts
ACCESSORIES
①821XC-0150 - Winch
②C002 – Pendulum release system
③C003 - Chain tension reset system and brackets for large sliding doors
④C004 - Chain tension reset system and brackets for large folding doors
⑤C-005 / C011 - Chain transmission system for large sectional doors
⑥C006 – Perforated brackets for motors on large sectional doors
⑦C007/8 – Adaptors for large sectional doors
⑧C009 – Bracket for motor support on large sectional doors
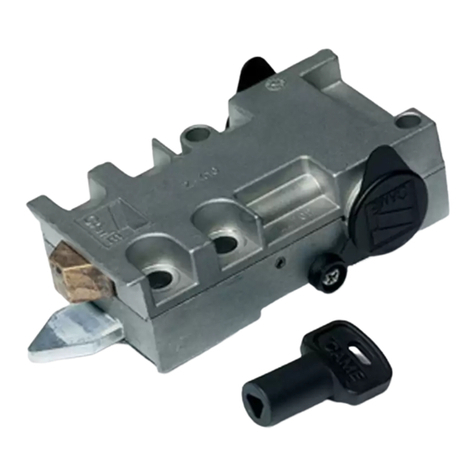
⑨CMS – Release handle with key
⑩CCT - Simple 1/2” chain
⑪CGIU - 1/2” chain coupling
GEARMOTOR ASSEMBLY
①Motoriduttore
②Maniglia di sblocco
③Calotta inferiore
④Coperchio di protezione

Page 7- Manual FA01734-EN - 06/2022 - © CAME S.p.A. - The contents of this manual may be changed, at any time, and without notice. - Translation of the original instructions
INSTALLAZIONE
The installation must be done by qualified, expert personnel and in compliance with the current laws.
Initial checks
Before installing the automation you must:
• make sure the gearmotor will be fixed where the it is protected from impact, and that the anchoring surface is solid and that the gearmotor
is fixed using suitable means (i.e. screws, bolts, etc.) to the surface;
• make sure you include a suitable omnipolar cut-off device, that features a distance of more than 3 mm among contacts, and that the power
is insulated.
• Connections within the case made for protection circuit continuity are allowed, as long as they are fitted with supplementary insulation
as compared to other internal conducting parts;
• Set up proper tubes and conduits for electrical cables to run through, and to guarantee protection from mechanical damage;
• Check that the door structure is robust enough, that the hinges are in proper working order and that there is no friction among fixed and
moving parts.
• Make sure there is a mechanical door jamb for both closing and opening.
Tools and equipment
Check that you have all the necessary tools and equipment, to carry out the installation in total safety, according to the current laws. The figure
shows an installer’s minimal equipment and tool requirements.
SECTIONAL DOORS SLIDING DOORS FOLDING DOORS

28
48 48
28
Page 8- Manual FA01734-EN - 06/2022 - © CAME S.p.A. - The contents of this manual may be changed, at any time, and without notice. - Translation of the original instructions
Cable type and minimum thicknesses
Connection Cable length
1 < 10 m
Cable length
10 < 20 m
Cable length
20 < 30 m
Power 230/400V AC 4G x 1,5 mm24G x 1.5 mm24G x 2.5 mm2
Power 230V AC 3G x 1,5 mm23G x 1.5 mm23G x 2.5 mm2
Power to motor 230/400V AC 4G x 1,5 mm24G x 1.5 mm24G x 2.5 mm2
Power to motor 230/400V AC 3G x 1,5 mm23G x 1.5 mm23G x 2.5 mm2
Power to motor 24V DC 2G x 1,5 mm22G x 1.5 mm22G x 2.5 mm2
Flashing light 2 x 1,5 mm22 x 1.5 mm22 x 1.5 mm2
Left Photocells 2 x 0,5 mm22 x 0.5 mm22 x 0.5 mm2
Right Photocells 4 x 0,5 mm24 x 0.5 mm24 x 0.5 mm2
Power to accessories 2 x 0,5 mm22 x 0.5 mm22 x 1 mm2
Command buttons 2 x 0,5 mm22 x 0.5 mm22 x 0.5 mm2
Endstops 3 x 0,5 mm23 x 1 mm23 x 1.5 mm2
Encoder connection max. 30 m
Antenna connection max. 10 m
When operating at 230 V and outdoors, use H05RN-F-type cables that are 60245 IEC 57 (IEC) compliant; when indoors, use H05VV-F-type cables
that are 60227 IEC 53 (IEC) compliant. For power supplies up to 48 V, use cables compliant with standard EN 50267-2-1 (CEI).
To connect the antenna, use RG58 cable (up to 5 m).
If cable lengths dier from those specified in the table, establish the cable sections depending on the actual power draw of the connected
devices and according to the provisions of regulation CEI EN 60204-1.
For multiple, sequential loads along the same line, recalculate the values in the table according to the actual power draw and distances.
For connecting products that are not covered in this manual, please see the documentation accompanying the relevant products.
①Gearmotor
②Control panel with buttons
③Radio receiver
④Flashing light
⑤Antenna
⑥Safety photocell
⑦Motor release
Installing the operator
on large and regular
sectional doors

#!-%
2
C009
C006
Page 9- Manual FA01734-EN - 06/2022 - © CAME S.p.A. - The contents of this manual may be changed, at any time, and without notice. - Translation of the original instructions
VERTICALLY APPLIED HORIZONTALLY APPLIED
Rod
The following applications are only examples, in that the space needed for fixing the gearmotor and accessories varies depending on the
overall dimensions and so it is up to the installer to choose the most suitable solution.
DIRECT COUPLING
The CBX gearmotor is made to be vertically inserted and directly coupled onto the 1 inch (25.4 mm) spring shaft. It can also be installed
horizontally. To do this, it requires the
proper complementary accessory (Art.
C006 or C009).di completamento (Art.
C006 o C009).
For the following gearmotors only: CBXE, CBXEK, C-BXET and C-BXE24, before inserting the motor into the post, move the door
halfway along its run.
Before inserting the gearmotor onto the shaft, open the door and check the direction of rotation of the cable winch-barrel. Insert the
gearmotor vertically or horizontally depending on the direction of rotation. (see diagram).
1) insert the gearmotor onto the spring shaft using the handle. 2) Manually release the gearmotor using the rod in a clockwise
direction and move the door so that the spring-shaft cavity coincides
with that of the gearmotor’s cable.

v
A
B
Page 10 - Manual FA01734-EN - 06/2022 - © CAME S.p.A. - The contents of this manual may be changed, at any time, and without notice. - Translation of the original instructions
3) With “C006” accessory:
Insert tab A or B depending on the shaft type (see fig A) between
the two cavities. Insert the bushing into the shaft and secure using
the screw.
SOLID SHAFT
HALLOW SHAFT
Fig.A
3) With “C009” accessory:
Insert tab A or B depending on the shaft type (see fig A) between the
two cavities.
4) Assemble the brackets and fix them ( N.B. don’t tighten them com-
pletely) to the gearmotor using the issued screws.
4) Secure the elbow bracket to the gearmotor using UNI5739 M8x16
screws (N.B. : don’t tighten them completely)
5) Secure the brackets to the wall using suitable screws. Tighten
them on the gearmotor
5) Secure the brackets to the wall using suitable screws. Tighten them
on the gearmotor
6) Insert the bushing into the shaft and secure it using the UNI5927
M6x16 headless screw.

H > 5,5 m.
1
2
3
v
A
B
C-005 C-011
Page 11 - Manual FA01734-EN - 06/2022 - © CAME S.p.A. - The contents of this manual may be changed, at any time, and without notice. - Translation of the original instructions
Fig.1
CHAIN TRANSMISSION
When installing on large sectional doors
that are taller than 5 m., the (Art. C005)
accessory must be used.
For doors where the gearmotor cannot
be assembled in alignment with the door
springs, use the C-011 accessory.
For the following gearmotors only: CBXE, CBXEK, C-BXET and C-BXE24, before securing the chain to the motor, move the door halfway
along its run.
Before securing the chain to the motor, open the large door to check the direction of rotation of the cable winch-barrel. Insert the
gearmotor vertically or horizontally depending on the direction of travel.
1) First insert the A or B tab into the spring shaft, (see fig. 1) and then
the cog wheel line with the tab. Secure the cog wheel and shaft using
the screw.
2) insert the A tab into the cavity of the cogged pinion shaft, insert the
pinion into the gearmotor hallow shaft and secure it using UNI 5933
M6x16 screw and the two washers on the opposite side.
3) Secure the elbow bracket to the gearmotor using the issued
screws.
VERTICALLY APPLIED HORIZONTALLY APPLIED
HALLOW
SHAFT
SOLID
SHAFT

1
2
3
Page 12 - Manual FA01734-EN - 06/2022 - © CAME S.p.A. - The contents of this manual may be changed, at any time, and without notice. - Translation of the original instructions
4) Join the ends of the chain using the joint and lay it onto the cog wheel, leaving it hanging.
5) Anchor the gearmotor’s pinion shaft to the hanging chain. 6) Manually release the gearmotor by turning the rod clockwise.
7) Secure the gearmotor’s elbow bracket, making sure that the two cog wheels are perpendicularly in line.

1
3
++
1
2
3
C003 CCT CGIU
Page 13 - Manual FA01734-EN - 06/2022 - © CAME S.p.A. - The contents of this manual may be changed, at any time, and without notice. - Translation of the original instructions
Installing the operator on large and regular, sliding doors
LARGE, ONE OR TWO-LEAFED DOORS
When installing on large one or two-leafed doors, you must use the C003 accessory (reset system for sliding doors).
For the following gearmotors only: CBXE, CBXEK, C-BXET and C-BXE24, before securing the chain to the motor, move the door halfway
along its run.
2) INsert the tab into the cavity of the Z26 cogged pinion shaft, insert
the pinion into the gearmotor hallow shaft and secure it using the UNI
5933 M6x16 screw and the two washers on the opposite side.
3) Secure the whole assembly either at the top right or left of the door
using proper screws and bolts..
4) Secure the chain tension reset opposite the gearmotor an in line
with the pinion.
1) Assemble the two elbow brackets and secure them to the gearmotor
(see drawing).

A
1
2
Page 14 - Manual FA01734-EN - 06/2022 - © CAME S.p.A. - The contents of this manual may be changed, at any time, and without notice. - Translation of the original instructions
5) Place the ½ inch (CCT) chain between the gearmotor and the reset. The length of the chain must be equal to twice distance A.
7) Adjust the chain tension using the reset screw and then lock the nuts.
8) First secure the brackets and the plates to the chain, and then to the door leaves.
6) Join the two ends of the chain using the (CGIU) joint).

1
2
3
2
++
CCT CGIU
Page 15 - Manual FA01734-EN - 06/2022 - © CAME S.p.A. - The contents of this manual may be changed, at any time, and without notice. - Translation of the original instructions
LARGE FOLDING DOORS
When installing large folding doors with anti derailment-flaps, you must use the C004 accessory (reset system for large, folding doors).
For the following gearmotors only: CBXE, CBXEK, C-BXET and C-BXE24, before securing the chain to the motor, move the door
halfway along its run.
2) Insert the A tab into the cavity of the Z26 cogged pinion shaft,
insert the pinion into the gearmotor hallow shaft and secure it using
UNI 5933 M6x16 screw and the two washers on the opposite side.
3) Secure the whole assembly either at the top right or left of the door
using proper screws and bolts.
4) Secure the chain tension reset opposite the gearmotor an in line
with the pinion.
1) Assemble the two elbow brackets and secure them to the gearmotor
(see drawing).

A
Page 16 - Manual FA01734-EN - 06/2022 - © CAME S.p.A. - The contents of this manual may be changed, at any time, and without notice. - Translation of the original instructions
5) Place the ½ inch (CCT) chain between the gearmotor and the reset. The length of the chain ust be equal to twice distance A.
6)Join the two ends of the chain using the (CGIU) joint).
7) Adjust the chain tension using the reset screw and then lock the nuts.
8) Secure the chain to the pin of the first door-leaf using the chain bracket and UNI 931 M8X30 screws.

#ONDENS
%
#!-%
2
56 7%
76 5
%
-
#!-%
2
-. %
-.
-
%
+ E -
CAME
R
U V W E
W V U
M
T°
+E -
Page 17 - Manual FA01734-EN - 06/2022 - © CAME S.p.A. - The contents of this manual may be changed, at any time, and without notice. - Translation of the original instructions
Electrical connection to the control panel for encoder based gearmotors encoder
For the electrical connection, use proper cable sheaths and glands so as to guarantee the stated protection rating.
To set the encoder, check the technical literature for the control panel.
CONTROL PANEL
ZCX10 / ZCX10C
2402c 22AWG Screened cable
GEARMOTOR
C-BXE / C-BXEK
CONTROL PANEL
ZT5 / ZT5C GEARMOTOR
C-BXET
2402c 22AWG Screened cable
CONTROL PANEL
ZL80 / ZL80C
GEARMOTOR
C-BXE24
2402c 22AWG Screened cable

FC FA F
CAME
R
U V W E
W V U
M
T°
FC FA F
&# &! &
#!-%
2
56 7%
76 5
&&# &!
-
&! &#
#!-%
2
78 9 %
76 5
&&# &!
-
Page 18 - Manual FA01734-EN - 06/2022 - © CAME S.p.A. - The contents of this manual may be changed, at any time, and without notice. - Translation of the original instructions
Electrical connection to the control panel for gearmotors with mechanical endstops
For the electrical connection, use proper cable sheaths and glands so as to guarantee the stated protection rating.
To set the encoder, check the technical literature for the control panel.
CONTROL PANEL
ZC3 / ZC3C
GEARMOTOR
C-BX / C-BXK
CONTROL PANEL
ZT6 / ZT6C GEARMOTOR
C-BXT
Condenser
CONTROL PANEL
ZM3E / ZM3EC GEARMOTOR
C-BX / C-BXK
Only for large sliding or folding doors
Condenser

#!-%
2
76 5
&&# &!
-
Page 19 - Manual FA01734-EN - 06/2022 - © CAME S.p.A. - The contents of this manual may be changed, at any time, and without notice. - Translation of the original instructions
Direct electrical connection via inter-blocked buttons only for the C-BX / C-BXK gearmotor
Adjusting the endstops (only for models with mechanical endstops)
Make sure the door is closed and that the two cog wheels of the gearmotor assembly are both positioned on the left.
the gearmotor is already set to the closing position, that is, the closing endpoint microswitch is activated.
Fully open the gate, either manually or using the button on the control panel. The two cog wheels will move to the right
Using a screwdriver, raise the endpoint spring from the cog wheels, manually turn the white cog wheel until it reaches the opening microswitch
and then lower the spring back onto the cog wheels.
Opening endpoint
micro-switch
Endpoint spring
White opening cog wheel
Red closing cog wheel
Closing endpoint micro switches
CLOSE BUTTON
OPEN BUTTON
POWER
Condenser

Page 20 - Manual FA01734-EN - 06/2022 - © CAME S.p.A. - The contents of this manual may be changed, at any time, and without notice. - Translation of the original instructions
Safety leverRelease rod
Micrometric lever
Safety lever
Corona dentata
Fully close the door and make sure that the release rod is free of the safety lever.
the safety lever lets you activate the (CMS or C002) emergency release only when the door is closed.
For large, sectional doors, after making the adjustments, there may be an empty space between the lower part of the door and the ground.
To correct this, shift the micrometric lever up or down one notch to lower or raise the door by about one centimetre.
For gearmotors that are installed on large sliding and folding doors, remove the safety lever and relative spring.
Setting the endpoint lever (only for encoder-based models)
Before making any adjustments, perform the door-run calibration procedure, as described in the control panel’s technical literature. Once this
is complete, make sure the door is fully- closed and that the gearmotor’s cog wheel is positioned on the left.
Sollevare la molla di finecorsa sganciandola dalla staa di sostegno e abbassarla sopra la corona dentata.
Other manuals for C-BX
1
This manual suits for next models
5
Table of contents
Other CAME Door Opening System manuals
Popular Door Opening System manuals by other brands

QUAD
QUAD EZ-4000 Owners and installation manual

Dorex
Dorex 9500 Series installation instructions

SECO-LARM
SECO-LARM ENFORCER SD-962AR-36M installation manual

Remote Solutions
Remote Solutions SAFE-T-RACK SR-U Operation manual

DITEC
DITEC Entrematic Hurricane DS20 Installation and service manual

4Ddoors
4Ddoors 4DR2 Installation instructions and user guide