manuals.online logo
Brands
  1. Home
  2. •
  3. Brands
  4. •
  5. Canon
  6. •
  7. Printer
  8. •
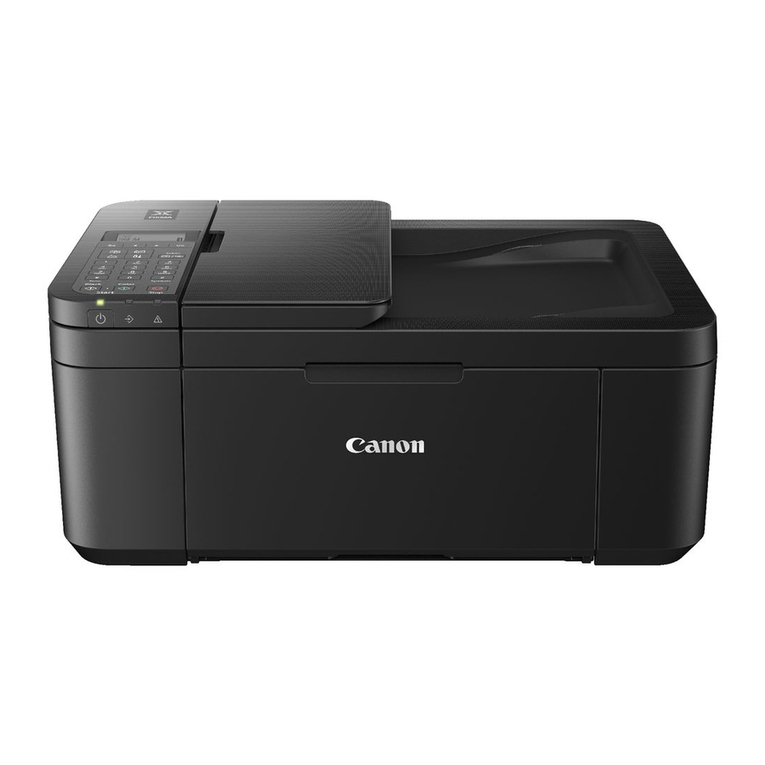
  9. Canon MP280 User manual

Canon MP280 User manual

FRANÇAIS
DEUTSCH
ENGLISH
ITALIANO
Guida Rapida
Leggere questo manuale prima di utilizzare la stampante. Tenerlo a portata di mano per consultarlo all’occorrenza.
Inbetriebnahme
Bitte lesen Sie dieses Handbuch vor der Verwendung des Geräts. Bewahren Sie es so auf, dass Sie es bei Bedarf zur Hand
haben.
Démarrage
Veillez à lire ce manuel avant d’utiliser la machine. Conservez-le à portée de main an de pouvoir vous y reporter
ultérieurement.
Getting Started
Make sure to read this manual before using the machine. Please keep it in hand for future reference.
Simboli utilizzati in questo
documento
■
Microsoft è un marchio registrato di Microsoft
Corporation.
Windows è un marchio o un marchio registrato
di Microsoft Corporation negli Stati Uniti e/o in
altri paesi.
Windows Vista è un marchio o un marchio
registrato di Microsoft Corporation negli Stati
Uniti e/o in altri paesi.
Internet Explorer è un marchio o un marchio
registrato di Microsoft Corporation negli Stati
Uniti e/o in altri paesi.
Macintosh, e Mac sono marchi di Apple Inc.,
registrati negli Stati Uniti e in altri paesi.
•
•
•
•
•
Istruzioni che includono
informazioni importanti.
Azioni proibite.
In questo manuale, il sistema operativo
Windows 7 viene denominato Windows 7
e il sistema operativo Windows Vista viene
denominato Windows Vista.
In questo manuale, le schermate si basano
su Windows 7 Home Premium e Mac OS
X v.10.6.x. Se non specicato altrimenti,
le schermate si riferiscono a Windows 7.
•
•
Modello numero: K10355 (MP280)
In diesem Dokument
verwendete Symbole
■
Microsoft ist eine eingetragene Marke von
Microsoft Corporation.
Windows ist eine Marke oder eingetragene
Marke von Microsoft Corporation in den
Vereinigten Staaten und/oder anderen Ländern.
Windows Vista ist eine Marke oder eingetragene
Marke von Microsoft Corporation in den
Vereinigten Staaten und/oder anderen Ländern.
Internet Explorer ist eine Marke oder
eingetragene Marke von Microsoft Corporation
in den Vereinigten Staaten und/oder anderen
Ländern.
Macintosh und Mac sind Marken von Apple Inc.,
eingetragen in den Vereinigten Staaten und
anderen Ländern.
•
•
•
•
•
Anweisungen, die wichtige
Informationen beinhalten.
Unzulässige Aktionen.
In diesem Handbuch wird das Betriebssystem
Windows 7 als Windows 7 bezeichnet, das
Betriebssystem Windows Vista als Windows
Vista.
Die Bildschirme in diesem Handbuch beziehen
sich auf das Betriebssystem Windows 7 Home
Premium und Mac OS X v.10.6.x. (Sofern
nicht anders angegeben beziehen sich die
Bildschirme auf Windows 7.)
•
•
Modellnummer: K10355 (MP280)
Symboles utilisés dans ce
document
■
Microsoft est une marque déposée de Microsoft
Corporation.
Windows est une marque ou une marque
déposée de Microsoft Corporation aux
États-Unis et/ou dans d’autres pays.
Windows Vista est une marque ou une
marque déposée de Microsoft Corporation aux
États-Unis et/ou dans d’autres pays.
Internet Explorer est une marque ou une
marque déposée de Microsoft Corporation aux
États-Unis et/ou dans d’autres pays.
Macintosh et Mac sont des marques d’Apple
Inc., déposées aux États-Unis et dans d’autres
pays.
•
•
•
•
•
Instructions comportant des
informations importantes.
Actions interdites.
Dans ce guide, le système d’exploitation
Windows 7 est appelé Windows 7 et le système
d’exploitation Windows Vista est appelé
Windows Vista.
Dans ce guide, les captures d’écran ont été
prises sous Windows 7 Édition Familiale
Premium et Mac OS X v.10.6.x. (Sauf mention
contraire, les écrans sont ceux de Windows 7.)
•
•
Référence du modèle : K10355 (MP280)
Symbols Used in This
Document
■
Microsoft is a registered trademark of Microsoft
Corporation.
Windows is a trademark or registered trademark
of Microsoft Corporation in the U.S. and/or other
countries.
Windows Vista is a trademark or registered
trademark of Microsoft Corporation in the U.S.
and/or other countries.
Internet Explorer is a trademark or registered
trademark of Microsoft Corporation in the U.S.
and/or other countries.
Macintosh and Mac are trademarks of Apple
Inc., registered in the U.S. and other countries.
•
•
•
•
•
Instructions including important
information.
Prohibited actions.
In this guide, Windows 7 operating system is
referred to as Windows 7 and Windows Vista
operating system as Windows Vista.
In this guide, the screens are based on
Windows 7 Home Premium and Mac OS X
v.10.6.x. (Unless noted otherwise, the screens
are those of Windows 7.)
•
•
Model Number: K10355 (MP280)
1
I manuali a video possono essere visualizzati su un computer. Tali manuali sono inclusi nel CD-ROM di installazione (Setup CD-ROM) e vengono installati durante l’installazione del software. È possibile che parti del
manuale per alcune lingue vengano visualizzate in inglese. Per ulteriori informazioni sull'apertura dei manuali a video, vedere a pagina 25.
Vengono descritti l’impostazione e l’utilizzo del dispositivo.
Guida Rapida
(questo manuale)
•
Descrive le operazioni di base e i supporti
e offre un’introduzione delle altre funzioni
disponibili.
Guida Base
Descrive le procedure operative che
consentono di utilizzare le diverse
funzioni della stampante.
Guida Avanzata
Vengono forniti suggerimenti per la
risoluzione dei problemi che possono
vericarsi durante l’utilizzo della
stampante.
Risoluzione dei
problemi
Die Online-Handbücher können auf einem Computer angezeigt werden. Sie sind auf der Installations-CD-ROM (Setup CD-ROM) enthalten und werden zusammen mit der Software installiert. In einigen Sprachen
werden Teile des Handbuchs in Englisch angezeigt. Weitere Informationen zum Öffnen der Online-Handbücher nden Sie auf Seite 25.
Beschreibt, wie das Gerät eingerichtet und verwendet wird.
Inbetriebnahme
(dieses Handbuch)
•
Beschreibt die grundlegende Bedienung
sowie Medien und stellt weitere
verfügbare Funktionen vor.
Basishandbuch
Beschreibt verschiedene Verfahren zur
Bedienung des Geräts, damit Sie dessen
Funktionalität vollständig nutzen können.
Erweitertes Handbuch
Erläutert Fehlerbehebungstipps für
Probleme, die beim Umgang mit dem
Gerät auftreten können.
Fehlersuche
Les manuels en ligne sont consultables sur un ordinateur. Ils gurent sur le CD-ROM d’installation et sont installés en même temps que le logiciel. Il est possible que, pour certaines langues, des parties du manuel
s’afchent en anglais. Pour plus d’informations sur l’ouverture des manuels en ligne, reportez-vous à la page 25.
Explique comment installer et utiliser la machine.
Démarrage
(ce manuel)
•
Explique le fonctionnement de base et les
supports, et présente les autres fonctions
disponibles.
Guide d’utilisation de
base
Présente diverses procédures permettant
une utilisation optimale de la machine.
Guide d’utilisation
avancée Fournit des solutions de dépannage
face aux problèmes que vous pouvez
rencontrer en utilisant la machine.
Dépannage
Getting Started
(this manual)
•
Describes basic operations and media,
and gives an introduction to other
functions available.
Describes various operating procedures
to make full use of machine. Describes troubleshooting tips for
problems you may encounter when using
the machine.
Basic Guide Advanced Guide Troubleshooting
On-screen manuals can be viewed on a computer. They are included on the Setup CD-ROM and are installed during the software installation. For some languages parts of the manual may be displayed in English.
For details on opening the on-screen manuals, refer to page 25.
Describes how to set up and use your machine.
2
Sommario■
Prova di esecuzione di una copia P.27
Stampa di foto da un computer P.29
5 Utilizzo della stampante P.25
6 Manutenzione P.31
1 Preparazione P.3
2 Installazione delle cartucce FINE (FINE
Cartridges) P.9
4 Installazione del software P.16
3 Caricamento della carta P.15
7 Speciche P.35
Inhalt■
Kopieren S.27
Drucken von Fotos von einem Computer S.29
5 Testen Sie das Gerät S.25
6 Wartung S.31
1 Vorbereitung S.3
2 Einsetzen der FINE-Patronen (FINE
Cartridges) S.9
4 Installieren der Software S.16
3 Einlegen von Papier S.15
7 Technische Daten S.34
Sommaire■
Première copie P.27
Impression de photos depuis un ordinateur
P.29
5 Essai d’utilisation de la machine P.25
6 Entretien P.31
1 Préparation P.3
2 Installation des cartouches FINE P.9
4 Installation du logiciel P.16
3 Chargement du papier P.15
7 Spécications P.33
Try Copying P.27
Print Photos from a Computer P.29
5 Try Using the Machine P.25
6 Maintenance P.31
1 Preparation P.3
2 Install the FINE Cartridges P.9
4 Install the Software P.16
3 Load Paper P.15
7 Specications P.32
Contents■
1
A
3
1
Rimuovere tutti i materiali protettivi e il nastro
arancione dalla parte esterna della stampante.
La forma e la posizione del nastro e dei materiali protettivi
potrebbero essere diverse da quelle effettive.
•
Preparazione
Non installare la stampante in una posizione su cui potrebbero cadere degli oggetti.
Inoltre, non collocare oggetti sopra la macchina. Potrebbero cadere all'interno della
macchina durante l'apertura dei coperchi, con conseguente malfunzionamento.
Il vassoio di uscita della carta (A) si apre automaticamente all'avvio della stampa.
Non collocare nessun oggetto davanti al vassoio di uscita della carta.
•
•
Entfernen Sie das Schutzmaterial und alle
orangefarbenen Klebebänder vom Äußeren des
Geräts.
Klebebänder und Schutzmaterial können in Form und
Position von der tatsächlichen Anwendung abweichen.
•
Vorbereitung
Stellen Sie das Gerät nicht an Standorten auf, an denen Gegenstände darauf fallen
können. Legen Sie keine Gegenstände auf das Gerät. Sie können in das Gerät fallen,
wenn Sie die Abdeckungen öffnen, was zu einer Fehlfunktion führen würde.
Das Papierausgabefach (A) wird automatisch geöffnet, wenn der Druckvorgang
beginnt. Legen Sie keine Gegenstände vor das Papierausgabefach.
•
•
Retirez la totalité du ruban et du plastique de
protection à l’extérieur de la machine.
La forme et la position réelles du ruban et du plastique de
protection peuvent varier.
•
Préparation
N’installez pas la machine dans un endroit présentant un risque de chute d’objet sur
la machine. En outre, ne placez aucun objet sur le dessus de la machine. L’objet
risquerait de tomber dans la machine à l’ouverture du capot et de provoquer un
dysfonctionnement.
Le bac de sortie papier (A) s’ouvre automatiquement au démarrage de l’impression.
Ne posez rien devant le bac de sortie papier.
•
•
Remove all the protective materials and orange tape
from the outside of the machine.
The tape and protective materials may differ in shape and
position from what they actually are.
•
Preparation
Do not install the machine where an object may fall on it. In addition, do not place any
object on the top of the machine. It may fall into the machine when opening covers,
resulting in malfunction.
Paper Output Tray (A) automatically opens when printing starts. Do not place
anything in front of the Paper Output Tray.
•
•
2
34
5
21
A
4
Alcuni accessori (1) e (2) si trovano all'interno del vassoio di uscita della carta (A). Aprire il vassoio
di uscita della carta per rimuoverli.
1. Cartucce FINE (FINE Cartridges) (Colore, Nero)
2. Cavo di alimentazione
3. Manuali
4. CD-ROM di installazione (Setup CD-ROM) (contenente i driver, le applicazioni e i manuali
a video)
5. Altri documenti
Assicurarsi che siano presenti i seguenti elementi.
Per collegare la stampante al computer, è necessario un cavo USB.•
Die Zubehörkomponenten (1) und (2) werden im Papierausgabefach (A) aufbewahrt. Öffnen Sie das
Papierausgabefach, um diese zu entnehmen.
1. FINE-Patronen (FINE Cartridges) (Farbe, Schwarz)
2. Netzkabel
3. Handbücher
4. Installations-CD-ROM (Setup CD-ROM) (mit Treibern, Anwendungen und Online-Handbüchern)
5. Sonstige Dokumente
Vergewissern Sie sich, dass alle unten gezeigten Objekte in der Verpackung
enthalten sind.
Um das Gerät mit Ihrem Computer zu verbinden, benötigen Sie ein USB-Kabel.•
Certains accessoires (1) et (2) sont stockés dans le bac de sortie papier (A). Ouvrez le bac de sortie
papier pour les enlever.
1. Cartouches FINE (Couleur, Noir)
2. Cordon d’alimentation
3. Manuels
4. CD-ROM d’installation (contient les pilotes, les applications et les manuels en ligne)
5. Autres documents
Vérifiez que vous avez bien reçu tous les éléments suivants.
Un câble USB est nécessaire pour relier la machine à votre ordinateur.•
Some accessories (1) and (2) are stored within the Paper Output Tray (A). Open the Paper Output
Tray to remove them.
1. FINE cartridges (Color, Black)
2. Power cord
3. Manuals
4. Setup CD-ROM (containing the drivers, applications and on-screen manuals)
5. Other documents
Make sure all the following items are supplied.
A USB cable is necessary to connect the machine with your computer.•
B
D
D
C
3 4
E
F
5
Sollevare l’unità di scansione (coperchio) (B) e fissarla utilizzando il supporto dell’unità di
scansione (C).
Chiudere il coperchio dei documenti (D) e sollevarlo con l’unità di scansione (coperchio).
Rimuovere con cura il nastro arancione (E).
Il materiale protettivo (F) viene rimosso insieme al nastro arancione.
Heben Sie das Scan-Modul (Abdeckung) (B) an, und fixieren Sie es mit der Scan-Modul-Stütze
(C).
Schließen Sie den Vorlagendeckel (D), und heben Sie ihn mit dem Scan-Modul (Abdeckung) an.
Ziehen Sie vorsichtig das orangefarbene Band (E) ab.
Das Schutzmaterial (F) wird zusammen mit dem orangefarbenen Band entfernt.
Soulevez l’unité de numérisation (capot) (B) et fixez-la à l’aide du support de l’unité de
numérisation (C).
Fermez le couvercle du scanner (D) et soulevez-le en même temps que l’unité de numérisation (capot).
Retirez le ruban orange (E) délicatement.
Le plastique de protection (F) est retiré avec le ruban orange.
Lift the Scanning Unit (Cover) (B) and fix it with the Scanning Unit Support (C).
Close the Document Cover (D) and lift it with the Scanning Unit (Cover).
Remove the orange tape (E) carefully.
The protective material (F) is removed along with the orange tape.
2
1
3
5
6
Sollevare leggermente l’unità di scansione (coperchio) (1) e ripiegare il supporto dell’unità di scansione (2), quindi chiudere delicatamente l’unità di scansione
(coperchio) (3).
Heben Sie das Scan-Modul (Abdeckung) leicht (1) an, klappen Sie die Scan-Modul-Stütze (2) ein, und schließen Sie dann vorsichtig das Scan-Modul (Abdeckung) (3).
Soulevez légèrement l’unité de numérisation (capot) (1), repliez le support de l’unité de numérisation (2), puis refermez doucement l’unité de numérisation (capot) (3).
Lift the Scanning Unit (Cover) slightly (1) and fold the Scanning Unit Support (2), then gently close the Scanning Unit (Cover) (3).
76 G
7
Inserire il cavo di alimentazione nel connettore sulla parte posteriore sinistra della
macchina e nella presa a muro.
NON collegare il cavo USB in questa fase.
Assicurarsi che il coperchio dei documenti sia chiuso.
•
•
Premere il pulsante ON (G) e verificare che sia acceso e di colore verde.
Il pulsante ON funziona dopo circa 4 secondi che il cavo di alimentazione è stato collegato alla
presa elettrica.
•
Schließen Sie das Netzkabel am Netzkabelanschluss links auf der Rückseite des
Geräts an, und stecken Sie das andere Ende in die Wandsteckdose.
Schließen Sie das USB-Kabel noch nicht an.
Der Vorlagendeckel muss geschlossen sein.
•
•
Drücken Sie die Taste EIN (ON) (G), und prüfen Sie, ob diese grün leuchtet.
Es dauert ca. 4 Sekunden, bis die Taste EIN (ON) nach Anschluss des Netzkabels funktioniert.•
Insérez fermement le cordon d’alimentation dans le connecteur à l’arrière de la
machine, sur le côté gauche, et dans la prise secteur.
Ne branchez PAS le câble USB à ce stade.
Vériez que le couvercle du scanner est fermé.
•
•
Appuyez sur le bouton MARCHE (ON) (G) et assurez-vous qu’il est allumé en vert.
Il faut environ 4 secondes pour que le bouton MARCHE (ON) réagisse après le branchement
du cordon d’alimentation.
•
Press the ON button (G) and make sure that it lights green.Insert the power cord into the connector on the left side at the back of the machine
and into the wall outlet firmly.
It takes about 4 seconds for the ON button to work after the power cord is plugged in.•
Do NOT connect the USB cable at this stage.
Make sure that the Document Cover is closed.
•
•
1 2
8
Quando è necessario spegnere la stampante
La specica del cavo di alimentazione varia in base al
paese o alla regione.
•
Attenersi alla procedura illustrata di seguito.
La stampante potrebbe continuare a emettere il rumore di quando è in funzione per massimo 40 secondi, poi
si spegne.
1. Premere il pulsante ON per spegnere la macchina.
2. Assicurarsi che tutte le spie sul pannello dei comandi siano spente.
Prima di scollegare la presa di alimentazione, assicurarsi che tutte le spie sul
pannello dei comandi siano spente. Se si scollega la presa di alimentazione
mentre tutte le spie sul pannello dei comandi sono accese o lampeggiano,
si potrebbe vericare l'essiccazione e l'ostruzione delle cartucce FINE (FINE
Cartridges) con una conseguente scarsa qualità di stampa.
•
Wenn das Gerät ausgeschaltet werden muss
Die Spezikationen des Netzkabels fallen je nach
Land oder Region unterschiedlich aus.
•
Gehen Sie bitte wie nachfolgend beschrieben vor.
Die Betriebsgeräusche können bis zu 40 Sekunden andauern, bis sich das Gerät ausschaltet.
1. Drücken Sie die Taste EIN (ON), um das Gerät auszuschalten.
2. Achten Sie darauf, dass die Anzeigen des Bedienfelds nicht leuchten.
Die Anzeige des Bedienfelds darf nicht leuchten, wenn Sie den Stecker
entfernen. Entfernen Sie den Netzstecker, während die Anzeige des
Bedienfelds leuchtet oder blinkt, können die FINE-Patronen (FINE Cartridges)
austrocknen und verstopfen, wodurch sich die Druckqualität verschlechtert.
•
Lorsqu’il est nécessaire de mettre la machine hors tension
Les caractéristiques techniques du cordon
d’alimentation varient suivant le pays ou la région.
•
Veillez à suivre la procédure ci-dessous.
Le bruit de fonctionnement peut continuer jusqu’à 40 secondes, jusqu’à la mise hors tension de la machine.
1. Appuyez sur le bouton MARCHE (ON) pour mettre la machine hors tension.
2. Vériez que tous les voyants du panneau de contrôle sont éteints.
Avant de retirer la che d’alimentation, vériez que tous les voyants du
panneau de contrôle sont éteints. Si vous retirez la che d’alimentation alors
que tous les voyants du panneau de contrôle sont allumés ou clignotent, les
cartouches FINE risquent de sécher et de se boucher, ce qui donnera une
impression de mauvaise qualité.
•
When it is necessary to power off the machine
Be sure to follow the procedure below.
Operating noise may continue for up to 40 seconds until the machine turns off.
1. Press the ON button to turn off the machine.
2. Make sure that all the lamps on the Operation Panel are not lit.
When removing the power plug, make sure that all the lamps on the Operation
Panel are not lit before removing the plug. Removing the power plug while
all the lamps on the Operation Panel light up or ash may cause drying and
clogging of the FINE Cartridges, resulting in poor printing.
•
The specication of the power cord differs for each
country or region.
•
1
A
E
D
E
9
2
Sollevare l’unità di scansione (coperchio) (A) e fissarla utilizzando il supporto dell’unità di scansione (D).
Chiudere il coperchio dei documenti (E) e sollevarlo con l’unità di scansione (coperchio).
Installazione delle cartucce FINE (FINE Cartridges)
Heben Sie das Scan-Modul (Abdeckung) (A) an, und fixieren Sie es mit der Scan-Modul-Stütze (D).
Schließen Sie den Vorlagendeckel (E), und heben Sie ihn mit dem Scan-Modul (Abdeckung) an.
Einsetzen der FINE-Patronen (FINE Cartridges)
Soulevez l’unité de numérisation (capot) (A) et fixez-la à l’aide du support de l’unité de numérisation (D).
Fermez le couvercle du scanner (E) et soulevez-le en même temps que l’unité de numérisation (capot).
Installation des cartouches FINE
Lift the Scanning Unit (Cover) (A) and fix it with the Scanning Unit Support (D).
Close the Document Cover (E) and lift it with the Scanning Unit (Cover).
Install the FINE Cartridges
G
F32 4
10
Il supporto della cartuccia FINE (FINE Cartridge
Holder) (F) si sposta nella posizione di installazione. Seguire la procedura successiva
per inserire le cartucce FINE (FINE
Cartridges) nera e a colori negli
slot corrispondenti e .
Se il supporto della cartuccia FINE (FINE Cartridge Holder) non
si sposta, verificare che la stampante sia accesa. Per ulteriori
informazioni, vedere da a a pagina 7 in "1 Preparazione".
Aprire il coperchio di bloccaggio della cartuccia di inchiostro sul
lato destro.
Stringere (G) e tirare il coperchio verso l'alto.
Die FINE-Patronen-Halterung (FINE Cartridge Holder)
(F) fährt in die Installationsposition. Gehen Sie wie nachfolgend
beschrieben vor, um die schwarze
und die farbigen FINE-Patronen
(FINE Cartridges) in die jeweils dafür
vorgesehenen Steckplätze und
einzusetzen.
Wenn sich die FINE-Patronen-Halterung (FINE Cartridge
Holder) nicht bewegt, prüfen Sie, ob das Gerät eingeschaltet
ist. Einzelheiten hierzu finden Sie unter bis auf Seite 7 im
Abschnitt „1 Vorbereitung“.
Öffnen Sie die Verriegelung der Tintenpatronen auf der rechten
Seite.
Drücken Sie fest auf die Abdeckung (G), und ziehen Sie diese nach oben.
Le support de la cartouche FINE (F) se déplace en
position d’installation. Suivez la procédure ci-après pour
insérer les cartouches FINE Noir
et Couleur dans leurs logements
correspondants et .
Si le support de la cartouche FINE ne se déplace pas, vérifiez
que la machine est bien allumée. Pour plus d’informations,
reportez-vous aux étapes à à la page 7 de la section
« 1 Préparation ».
Ouvrez le couvercle de verrouillage de cartouche d’encre sur le
côté droit.
Pincez (G) fermement et soulevez le capot.
The FINE Cartridge Holder (F) moves to the
installation position. Follow the next procedure to insert the
Black and Color FINE Cartridges
into their corresponding slots and .
If the FINE Cartridge Holder does not move, make sure that the
machine is turned on. For details, refer to to on page 7 in
"1 Preparation".
Open the Ink Cartridge Locking Cover on the right side.
Pinch (G) firmly and pull up the cover.
5
H
H
11
Dopo avere estratto la Cartuccia FINE (FINE Cartridge) nera dalla confezione, tirare il nastro arancione di protezione (H) nella direzione della freccia e rimuoverlo
con cautela.
Maneggiare con cura le cartucce FINE (FINE Cartridges). Evitare di farle cadere o di applicarvi una pressione eccessiva.
Accertarsi di utilizzare cartucce FINE (FINE Cartridges) fornite.
Fare attenzione a non macchiare le mani o la zona circostante con l'inchiostro presente sul nastro protettivo.
Non toccare le parti metalliche delle Cartucce FINE (FINE Cartridges). In caso contrario, la stampante potrebbe non stampare correttamente.
•
•
•
•
Nachdem Sie die schwarze FINE-Patrone (FINE Cartridge) aus der Schachtel genommen haben, ziehen Sie das orangefarbene Schutzband (H) in Pfeilrichtung, und
entfernen Sie es vorsichtig.
Gehen Sie sorgfältig mit den FINE-Patronen (FINE Cartridges) um. Lassen Sie sie nicht fallen, und üben Sie keinen übermäßigen Druck darauf aus.
Verwenden Sie nur die mitgelieferten FINE-Patronen (FINE Cartridges).
Achten Sie darauf, dass die Tinte auf dem entfernten Klebeband nicht an Ihre Hände oder auf die umliegende Arbeitsäche gelangt.
Berühren Sie nicht die Metallteile der FINE-Patronen (FINE Cartridges). Bei Berührung druckt das Gerät möglicherweise nicht ordnungsgemäß.
•
•
•
•
Après avoir retiré la cartouche FINE Noir de sa boîte, tirez le ruban protecteur orange (H) dans le sens de la flèche, puis retirez-le délicatement.
Manipulez les cartouches FINE avec précaution. Ne les faites pas tomber et n’exercez pas trop de pression dessus.
Veillez à utiliser les cartouches FINE fournies.
Veillez à ne pas tacher vos mains ou les objets environnants avec l’encre présente sur le ruban de protection.
Ne touchez pas les parties métalliques des cartouches FINE. La machine risque de ne pas imprimer correctement.
•
•
•
•
After removing the Black FINE Cartridge from its box, pull the orange protective tape (H) in the direction of the arrow and remove it carefully.
Handle the FINE Cartridges carefully. Do not drop or apply excessive pressure to them.
Be sure to use the supplied FINE Cartridges.
Be careful not to stain your hands or surrounding work area with ink on the removed protective tape.
Do not touch the metal parts of the FINE Cartridges. The machine may not print properly if you touch them.
•
•
•
•
76
12
Inserire la cartuccia FINE (FINE Cartridge) nera
nello slot corretto .
Evitare che la cartuccia FINE (FINE Cartridge) urti i lati del supporto.
Eseguire l’installazione della cartuccia in un ambiente
adeguatamente illuminato.
Installare la cartuccia FINE (FINE Cartridge) Nero nello slot di
destra e la cartuccia FINE (FINE Cartridge) Colore in quello
di sinistra .
•
•
•
Premere verso il basso del coperchio di bloccaggio della cartuccia di inchiostro finché non scatta in
posizione.
Controllare che il coperchio di bloccaggio della cartuccia di inchiostro sia bloccato correttamente (non deve essere inclinato).
Setzen Sie die schwarze FINE-Patrone (FINE
Cartridge) in den rechten Steckplatz ein.
Stoßen Sie mit der FINE-Patrone (FINE Cartridge) nicht gegen
die Seiten des Halters.
Achten Sie beim Einsetzen auf eine gut beleuchtete Umgebung.
Setzen Sie die schwarze FINE-Patrone (FINE Cartridge) in
den rechten Steckplatz und die farbige FINE-Patrone (FINE
Cartridge) in den linken Steckplatz ein .
•
•
•
Drücken Sie der Verriegelung der Tintenpatronen nach unten, bis Sie ein Klicken hören, um diese vollständig
zu schließen.
Schauen Sie gerade auf die Verriegelung der Tintenpatrone , und vergewissern Sie sich, dass sie richtig verriegelt ist und nicht
schief sitzt.
Insérez la cartouche FINE Noir dans le logement
droit .
Ne cognez pas la cartouche FINE contre les bords du
support.
Installez-la dans de bonnes conditions d’éclairage.
Installez la cartouche FINE Noir dans le logement droit
, et la cartouche FINE Couleur dans le logement
gauche .
•
•
•
Appuyez sur le couvercle de verrouillage de cartouche d’encre jusqu’à ce que vous entendiez le déclic de
fermeture complète.
Mettez-vous en face du couvercle de verrouillage de cartouche d’encre et vérifiez qu’il est correctement verrouillé (il ne doit pas être
de travers).
Place the Black FINE Cartridge into the right slot . Push down of the Ink Cartridge Locking Cover until you hear a click to close it completely.
View the Ink Cartridge Locking Cover straight on and check that it is locked correctly (not at an angle).
Do not knock the FINE Cartridge against the sides of the
holder.
Install in a well-lit environment.
Install the Black FINE Cartridge into the right slot ,
and the Color FINE Cartridge into the left slot .
•
•
•
8 9
3
1
2
13
Inserire la cartuccia FINE (FINE Cartridge) a colori nel supporto cartuccia
FINE (FINE Cartridge Holder) sinistro come fatto per la cartuccia FINE (FINE
Cartridge) nera.
Sollevare leggermente l’unità di scansione (coperchio) (1) e ripiegare il supporto
dell’unità di scansione (2), quindi chiudere delicatamente l’unità di scansione
(coperchio) (3).
Setzen Sie die farbige FINE-Patrone (FINE Cartridge) auf dieselbe Weise in die
linke FINE-Patronen-Halterung (FINE Cartridge Holder) ein wie die schwarze
FINE-Patrone (FINE Cartridge).
Heben Sie das Scan-Modul (Abdeckung) leicht (1) an, klappen Sie die Scan-
Modul-Stütze (2) ein, und schließen Sie dann vorsichtig das Scan-Modul
(Abdeckung) (3).
Insérez la cartouche FINE Couleur dans le support de la cartouche FINE de
gauche de la même manière que la cartouche FINE Noir. Soulevez légèrement l’unité de numérisation (capot) (1), repliez le support de
l’unité de numérisation (2), puis refermez doucement l’unité de numérisation
(capot) (3).
Insert the Color FINE Cartridge into the left FINE Cartridge Holder in the
same way as the Black FINE Cartridge. Lift the Scanning Unit (Cover) slightly (1) and fold the Scanning Unit Support (2),
then gently close the Scanning Unit (Cover) (3).
10
J
I
14
Dopo avere installato le cartucce FINE (FINE Cartridges), non rimuoverle se non in caso di
effettiva necessità.
Se la spia Allarme (Alarm) (J) si accende in arancione, vericare che le cartucce FINE (FINE
Cartridges) siano installate correttamente.
•
•
1compare dopo circa 90 secondi.•
Verificare che il LED (I) cambi come mostrato nell'illustrazione e passare alla fase
successiva.
Il LED si spegne se la stampante non viene utilizzata per circa 5 minuti. Per ripristinare il
display, premere qualsiasi pulsante tranne il pulsante ON.
•
Nehmen Sie die FINE-Patronen (FINE Cartridges) nach dem Einsetzen nicht unnötig heraus.
Wenn die Alarm-Anzeige (J) orangefarben leuchtet, stellen Sie sicher, dass die FINE-Patronen
(FINE Cartridges) richtig eingesetzt wurden.
•
•
Es dauert ca. 90 Sekunden, bis 1angezeigt wird.•
Achten Sie darauf, dass sich die LED (I) wie oben gezeigt ändert, und fahren Sie
dann mit dem nächsten Schritt fort.
Die LED-Anzeige schaltet sich ab, wenn das Gerät etwa 5 Minuten lang nicht bedient wird. Um
die Anzeige wiederherzustellen, drücken Sie eine beliebige Taste, außer der Taste EIN (ON).
•
Après avoir installé les cartouches FINE, ne les retirez pas inutilement.
Si le témoin d’Alarme (Alarm) (J) clignote en orange, vériez que les cartouches FINE sont
correctement installées.
•
•
Il faut environ 90 secondes pour que 1apparaisse.•
Vérifiez que la DEL (I) change comme indiqué sur l’illustration puis passez
à l’étape suivante.
La DEL s’éteint si la machine n’est pas utilisée pendant environ 5 minutes. Pour restaurer
l’afchage de l’écran, appuyez sur n’importe quel bouton, sauf MARCHE (ON).
•
Once you have installed the FINE Cartridges, do not remove them unnecessarily.
If the Alarm lamp (J) lights orange, make sure that the FINE Cartridges are correctly installed.
•
•
It takes about 90 seconds until 1appears.•
Make sure that the LED (I) changes as shown in the illustration and go to the next
step.
The LED will turn off if the machine is not operated for about 5 minutes. To restore the display,
press any button except the ON button.
•
23
A
B
1 2 D
C
43
15
3
Preparare il supporto per
la carta (A). Spostare le guide della
carta (B) alle estremità di
entrambi i lati.
1. Aprirlo.
2. Ripiegarlo verso l'alto.
3. Inclinarlo all'indietro.
Caricamento della carta
Caricare la carta al
centro del vassoio
posteriore (C).
Caricare la carta con
orientamento verticale con il
lato di stampa rivolto verso
l’alto.
Fare scorrere le guide della carta destra e sinistra fino
a quando non toccano entrambi i bordi del foglio.
Verificare che l’altezza della pila di carta non superi la linea (D).
Per informazioni su come maneggiare la carta, consultare
“Caricamento della carta” nel manuale a video: Guida
Base al termine dell’installazione.
•
Klappen Sie die
Papierstütze (A) aus.
Schieben Sie die
Papierführungen (B) ganz
nach außen.
1. Öffnen Sie sie.
2. Ziehen Sie sie nach
oben.
3. Ziehen Sie sie nach
hinten.
Einlegen von Papier
Legen Sie das Papier
mittig in das hintere
Fach (C) ein.
Legen Sie das Papier im
Hochformat ein. Die zu
bedruckende Seite zeigt nach
oben.
Schieben Sie die linke und rechte Papierführung bis
zum Anschlag an die beiden Papierkanten.
Achten Sie darauf, dass der Papierstapel nicht höher ist als
Linie (D).
Details zum Umgang mit Papier nden Sie unter „Einlegen
von Papier” im Online-Handbuch: Basishandbuch,
nachdem die Installation abgeschlossen ist.
•
Préparez le support
papier (A).
Ajustez les guides papier
(B) le long des deux
bords.
1. Déployez-le.
2. Tirez-le vers le haut.
3. Inclinez-le vers
l’arrière.
Chargement du papier
Chargez du papier au
centre du réceptacle
arrière (C).
Chargez du papier dans le
sens de la hauteur (orientation
Portrait), face à imprimer vers
le haut.
Faites glissez les guides papier gauche et droit contre
les deux bords du papier.
Vérifiez que la hauteur du papier chargé ne dépasse pas la
ligne (D).
Pour plus d’informations sur la gestion du papier, reportez-
vous à la section « Chargement du papier » dans le
manuel en ligne Guide d’utilisation de base lorsque
l’installation est terminée.
•
Prepare the Paper
Support (A).
Move the Paper Guides
(B) to both edges.
1. Open it.
2. Withdraw it upwards.
3. Tilt it back.
Load Paper
Load paper in the center
of the Rear Tray (C).
Load paper in portrait
orientation with the printing
side facing up.
Slide the left and right Paper Guides against both
edges of the paper.
Make sure that the height of the paper stack does not exceed the
line (D).
For details on how to handle paper, refer to "Loading
Paper" in the on-screen manual: Basic Guide after
installation is complete.
•
16
4
Installazione del software
Non collegare ancora il cavo USB.
Per utilizzare la stampante collegandola a un computer, nel
software sono disponibili i driver da copiare (installare) sul
disco rigido del computer. Il processo di installazione richiede
circa 20 minuti. La durata dell'installazione varia a seconda
dell'ambiente del computer o del numero di applicazioni da
installare.
•
Prima di eseguire l’installazione, chiudere tutte le applicazioni in
esecuzione.
Accedere al computer come amministratore (o membro del gruppo
Administrators).
Non alternare account utente diversi durante il processo di installazione.
Durante l’installazione potrebbe essere necessaria la connessione
aInternet. È possibile che siano presenti costi di connessione a carico del
cliente. Consultare il provider Internet.
Durante la procedura di installazione potrebbe essere necessario
riavviare il computer. Seguire le istruzioni a video e non rimuovere il
CD-ROM di installazione (Setup CD-ROM) durante il riavvio.
L'installazione riprenderà dopo il riavvio del computer.
Per informazioni sui requisiti di sistema, consultare "7 Speciche".
•
•
•
•
•
•
Installieren der Software
Schließen Sie das USB-Kabel noch nicht an.
Um das Gerät in Verbindung mit einem Computer verwenden
zu können, müssen Software und Treiber auf die Festplatte
des Computers kopiert bzw. installiert werden. Der
Installationsvorgang nimmt ca. 20 Minuten in Anspruch.
(Die Installationsdauer hängt von der Computerumgebung
sowie der Anzahl der zu installierenden Anwendungen ab.)
•
Schließen Sie vor der Installation alle offenen Anwendungen.
Melden Sie sich als Administrator (oder Mitglied der Administratorgruppe)
an.
Wechseln Sie während des Installationsvorgangs nicht den Benutzer.
Während der Installation ist möglicherweise eine Internetverbindung
erforderlich. Möglicherweise fallen Verbindungsgebühren an. Wenden Sie
sich hierzu an Ihren Internetprovider.
Möglicherweise muss während des Installationsvorgangs der Computer
neu gestartet werden. Folgen Sie in diesem Fall den Anweisungen
auf dem Bildschirm. Nehmen Sie die Installations-CD-ROM (Setup
CD-ROM) während des Neustarts nicht heraus.
Die Installation wird nach dem Neustart des Computers fortgesetzt.
Informationen zu den Systemanforderungen nden Sie unter
„7 Technische Daten“.
•
•
•
•
•
•
Ne branchez pas encore le câble USB.
Installation du logiciel
Pour pouvoir contrôler la machine à partir d’un ordinateur,
le logiciel contenant les pilotes doit être copié (installé)
sur le disque dur. Le processus d’installation prend
environ 20 minutes. (La durée de l’installation varie selon
l’environnement informatique et le nombre d’applications
àinstaller.)
•
Quittez toutes les applications en cours d’exécution avant l’installation.
Connectez-vous en tant qu’administrateur (ou membre du groupe
Administrateurs).
Ne changez pas d’utilisateur au cours du processus d’installation.
Une connexion Internet peut être requise lors de l’installation. Prévoir des
frais de connexion. Consultez le fournisseur d’accès Internet.
Vous devrez peut-être redémarrer votre ordinateur durant le processus
d’installation. Suivez les instructions à l’écran et ne retirez pas le
CD-ROM d’installation pendant le redémarrage.
Une fois l’ordinateur redémarré, le processus d’installation reprend là où il
s’était interrompu.
Pour connaître la conguration système requise, reportez-vous à la
section « 7 Spécications ».
•
•
•
•
•
•
To use the machine by connecting it to a computer, software
including the drivers needs to be copied (installed) to the
computer's hard disk. The installation process takes about
20 minutes. (The installation time varies depending on the
computer environment or the number of application software to
be installed.)
•
Do not connect the USB cable yet.
Install the Software
Quit all running applications before installation.
Log on as the administrator (or a member of the Administrators group).
Do not switch users during the installation process.
Internet connection may be required during the installation. Connection
fees may apply. Consult the internet service provider.
It may be necessary to restart your computer during the installation
process. Follow the on-screen instructions and do not remove the Setup
CD-ROM during restarting.
The installation resumes once your computer has restarted.
For the system requirements, refer to "7 Specications".
•
•
•
•
•
•
17
Se si collega la stampante tramite cavo USB prima dell’installazione del software:□
Se la finestra di dialogo viene chiusa, passare a a pagina 18.
1. Rimuovere il cavo USB collegato al computer.
2. Fare clic su Annulla (Cancel).
3. Passare a a pagina 18.
Per Windows 7
1. Rimuovere il cavo USB collegato al computer.
2. Passare a a pagina 18.
Per Windows Vista/Windows XP
Potrebbe essere visualizzata questa nestra di dialogo.
Easy-WebPrint EX è un software di stampa
Web che viene installato nel computer
insieme al software fornito. Per utilizzare
questo software è necessario disporre di
Internet Explorer 7 o versione successiva.
Per eseguire l'installazione, è necessario
disporre di una connessione a Internet.
Easy-WebPrint EX□
Wenn Sie vor der Installation der Software das Gerät mit einem USB-Kabel anschließen:□
Wird das Dialogfeld geschlossen, fahren Sie mit auf Seite 18 fort.
1. Ziehen Sie das USB-Kabel vom Computer ab.
2. Klicken Sie auf Abbrechen (Cancel).
3. Fahren Sie mit auf Seite 18 fort.
Für Windows 7
1. Ziehen Sie das USB-Kabel am Computer ab.
2. Fahren Sie mit auf Seite 18 fort.
Für Windows Vista/Windows XP
Dieses Dialogfeld wird möglicherweise angezeigt.
Bei Easy-WebPrint EX handelt es sich
um die Webdrucksoftware, die bei der
Installation der mitgelieferten Software
auf Ihrem Computer installiert wird. Zur
Verwendung dieser Software ist Internet
Explorer 7 oder höher erforderlich. Für
die Installation ist eine Internetverbindung
erforderlich.
Easy-WebPrint EX□
Si vous connectez la machine avec un câble USB avant d’installer le logiciel :□
Si la boîte de dialogue se ferme, passez à l’étape de la page 18.
1. Débranchez le câble USB de l’ordinateur.
2. Cliquez sur Annuler (Cancel).
3. Passez à l’étape à la page 18.
Sous Windows 7
1. Débranchez le câble USB connecté à votre ordinateur.
2. Passez à l’étape à la page 18.
Sous Windows Vista/Windows XP
Il se peut que cette boîte de dialogue apparaisse.
Easy-WebPrint EX□
Easy-WebPrint EX est un logiciel
d’impression Web qui est installé sur
l’ordinateur en même temps que le
logiciel fourni. Internet Explorer 7 ou une
version ultérieure est requise pour utiliser
le logiciel. Vous devrez vous connecter
à Internet pour l’installation.
If you connect the machine via USB cable before installing the software:□
If the dialog box closes, proceed to on page 18.
1. Remove the USB cable connected to your computer.
2. Click Cancel.
3. Proceed to on page 18.
For Windows 7
1. Remove the USB cable connected to your computer.
2. Proceed to on page 18.
For Windows Vista/Windows XP
This dialog box may appear.
Easy-WebPrint EX□
Easy-WebPrint EX is Web print software
that is installed on the computer when
installing the supplied software. Internet
Explorer 7 or later is required to use
this software. An Internet connection is
required for installation.
A21
18
NON collegare ancora il cavo USB al computer e alla
stampante. Se si è già collegato il cavo, scollegarlo ora.
•
La stampante potrebbe continuare a emettere il rumore di quando
è in funzione per massimo 40 secondi, poi si spegne.
Premere il pulsante ON (A) per SPEGNERE LA
STAMPANTE.
Per Windows
Se il programma non viene avviato automaticamente, fare doppio clic sull’icona del CD-ROM in Computer o Risorse del
computer (My Computer). Quando viene visualizzato il contenuto del CD-ROM, fare doppio clic sul le MSETUP4.EXE.
•
Se si utilizza Windows, il programma di installazione verrà avviato automaticamente.
Accendere il computer, quindi inserire il CD-ROM di installazione (Setup CD-ROM) nell’unità CD-ROM.
Schließen Sie das USB-Kabel zwischen Gerät und
Computer NOCH NICHT an. Wenn Sie das Kabel bereits
angeschlossen haben, ziehen Sie es nun ab.
•
Die Betriebsgeräusche können bis zu 40 Sekunden andauern, bis
sich das Gerät ausschaltet.
Drücken Sie die Taste EIN (ON) (A), um DAS GERÄT
AUSZUSCHALTEN.
Für Windows
Wenn das Programm nicht automatisch startet, doppelklicken Sie auf das CD-ROM-Symbol unter Computer oder Arbeitsplatz
(My Computer). Wenn der Inhalt der CD-ROM angezeigt wird, doppelklicken Sie auf MSETUP4.EXE.
•
Wenn Sie Windows verwenden, startet das Setup-Programm automatisch.
Schalten Sie den Computer ein, und legen Sie die Installations-CD-ROM (Setup CD-ROM) in das CD-ROM-
Laufwerk ein.
Ne branchez pas encore le câble USB à l’ordinateur
et à la machine. Si vous avez déjà branché le câble,
débranchez-le.
•
Le bruit de fonctionnement peut continuer jusqu’à 40 secondes,
jusqu’à la mise hors tension de la machine.
Appuyez sur le bouton MARCHE (ON) (A) pour
METTRE LA MACHINE HORS TENSION.
Sous Windows
Si le programme d’installation ne se lance pas automatiquement, double-cliquez sur l’icône de CD-ROM dans Ordinateur
(Computer) ou Poste de travail (My computer). Une fois le contenu du CD-ROM afché, double-cliquez sur MSETUP4.EXE.
•
Si vous utilisez Windows, le programme de configuration démarre automatiquement.
Allumez l’ordinateur et insérez le CD-ROM d’installation dans le lecteur de CD-ROM.
Turn on the computer, then insert the Setup CD-ROM into the CD-ROM drive.
If you are using Windows, the setup program starts automatically.
Press the ON button (A) to TURN OFF THE
MACHINE.
Operating noise may continue for up to 40 seconds until the
machine turns off.
Do NOT connect the USB cable to the computer and the
machine yet. If you have already connected the cable,
disconnect it now.
•For Windows
If the program does not start automatically, double-click the CD-ROM icon in Computer or My Computer. When the CD-ROM
contents appear, double-click MSETUP4.EXE.
•

Other manuals for MP280

3

Other Canon Printer manuals

Canon BJC-2100 Series User manual

Canon

Canon BJC-2100 Series User manual

Canon imagePROGRAF W6200 User manual

Canon

Canon imagePROGRAF W6200 User manual

Canon Color imageCLASS LBP633Cdw User manual

Canon

Canon Color imageCLASS LBP633Cdw User manual

Canon imagePROGRAF iPF8300 User manual

Canon

Canon imagePROGRAF iPF8300 User manual

Canon iP4600 - PIXMA Color Inkjet Printer User manual

Canon

Canon iP4600 - PIXMA Color Inkjet Printer User manual

Canon i960 Series Configuration guide

Canon

Canon i960 Series Configuration guide

Canon imageCLASS MF5600 Series User manual

Canon

Canon imageCLASS MF5600 Series User manual

Canon i455 Series User manual

Canon

Canon i455 Series User manual

Canon EOS Rebel X/XS User manual

Canon

Canon EOS Rebel X/XS User manual

Canon PIXMA G7000 Series User manual

Canon

Canon PIXMA G7000 Series User manual

Canon GX7000 Series User manual

Canon

Canon GX7000 Series User manual

Canon imagePROGRAF PRO-6100 User manual

Canon

Canon imagePROGRAF PRO-6100 User manual

Canon imagePRESS C8000VP User manual

Canon

Canon imagePRESS C8000VP User manual

Canon PIXMA MX350 User manual

Canon

Canon PIXMA MX350 User manual

Canon CP-300 User manual

Canon

Canon CP-300 User manual

Canon LASER SHOT LBP-1210 User manual

Canon

Canon LASER SHOT LBP-1210 User manual

Canon IPF670 User manual

Canon

Canon IPF670 User manual

Canon imageFORMULA DR-G2140 User manual

Canon

Canon imageFORMULA DR-G2140 User manual

Canon iPF8400S Series User manual

Canon

Canon iPF8400S Series User manual

Canon PIXMA TS6100 series User manual

Canon

Canon PIXMA TS6100 series User manual

Canon LBP3310 User manual

Canon

Canon LBP3310 User manual

Canon BJC-55 Series User manual

Canon

Canon BJC-55 Series User manual

Canon imageRUNNER 2745i User manual

Canon

Canon imageRUNNER 2745i User manual

Canon ImageCLASS LBP720 Series User manual

Canon

Canon ImageCLASS LBP720 Series User manual

Popular Printer manuals by other brands

Oki B 6100 user guide

Oki

Oki B 6100 user guide

SWIZ PP-38T5 user manual

SWIZ

SWIZ PP-38T5 user manual

Samsung SL-M2820DW user manual

Samsung

Samsung SL-M2820DW user manual

SEWOO SLK-TL20X Series user manual

SEWOO

SEWOO SLK-TL20X Series user manual

Kyocera Mita Ecosys FS-6020 Operation guide

Kyocera Mita

Kyocera Mita Ecosys FS-6020 Operation guide

Lexmark C950 Series manual

Lexmark

Lexmark C950 Series manual

Squid Ink CoPilot 500 user guide

Squid Ink

Squid Ink CoPilot 500 user guide

Reiner jetStamp 1025 operating manual

Reiner

Reiner jetStamp 1025 operating manual

Xerox Phaser 8500 user guide

Xerox

Xerox Phaser 8500 user guide

Brother DCP-9042CDN user guide

Brother

Brother DCP-9042CDN user guide

MIMAKI UJF-7151 plus Operation manual

MIMAKI

MIMAKI UJF-7151 plus Operation manual

FujiFilm ApeosPro C810 user manual

FujiFilm

FujiFilm ApeosPro C810 user manual

Dell 2350D user guide

Dell

Dell 2350D user guide

Epson STYLUS PHOTO RX610 Series Start here

Epson

Epson STYLUS PHOTO RX610 Series Start here

Konica Minolta Magicolor 3300 user guide

Konica Minolta

Konica Minolta Magicolor 3300 user guide

MIMAKI UJF-3042FX Operation manual

MIMAKI

MIMAKI UJF-3042FX Operation manual

Lexmark MS610 Series Specfications

Lexmark

Lexmark MS610 Series Specfications

Kyocera Mita FS-C5016N Service manual

Kyocera Mita

Kyocera Mita FS-C5016N Service manual

manuals.online logo
manuals.online logoBrands
  • About & Mission
  • Contact us
  • Privacy Policy
  • Terms and Conditions

Copyright 2025 Manuals.Online. All Rights Reserved.