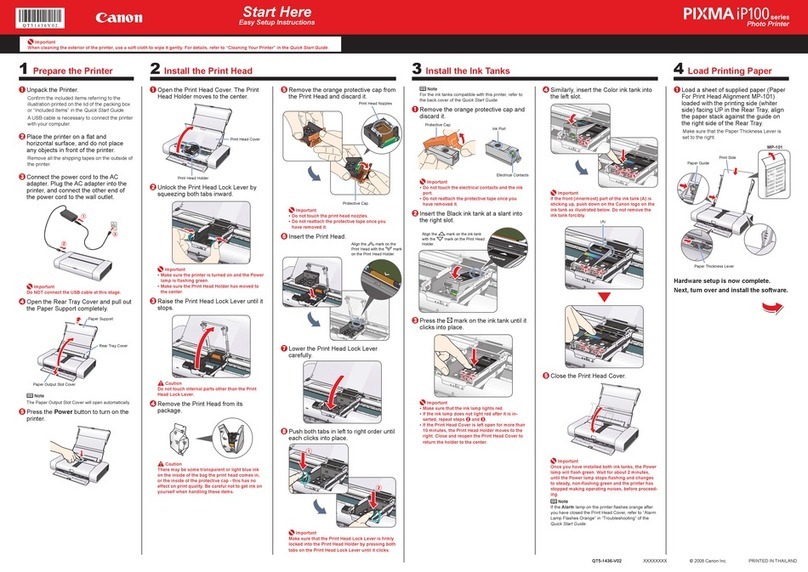
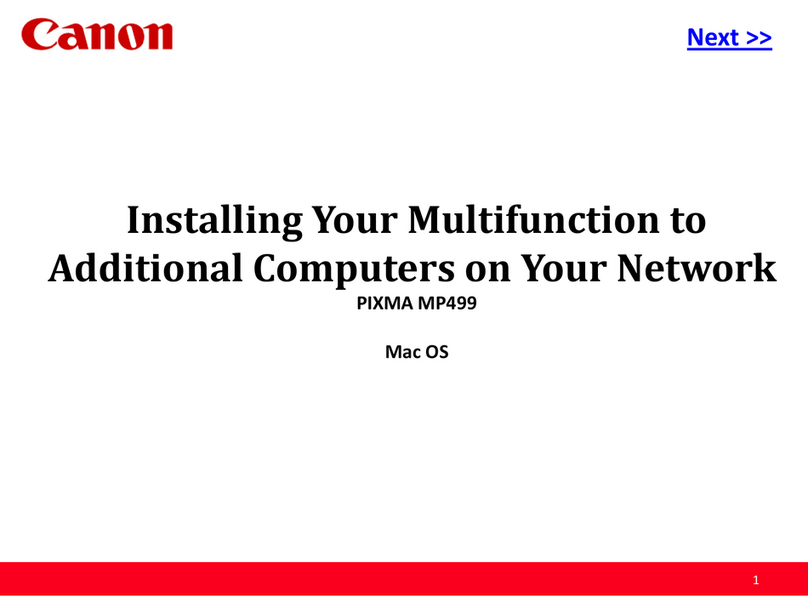
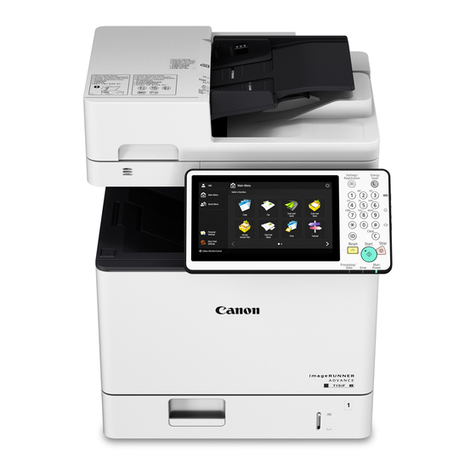
manuals.online logo
Brands
  1. Home
  2. •
  3. Brands
  4. •
  5. Canon
  6. •
  7. Printer
  8. •
  9. Canon PIXMA MP230 User manual

Canon PIXMA MP230 User manual

1
XXXXXXXX © CANON INC. 2012
4
2
3
2
1
1
5
1
2
1
2
3
Verique os itens incluídos.
Um cabo USB é necessário.
PORT DO BRASIL
Itens incluídos
Para congurar, coloque a máquina próxima ao computador.
Leia-me primeiro!
Mantenha-me à mão para consulta futura.
Windows é uma marca comercial ou
registrada da Microsoft Corporation nos
EUA e/ou em outros países.
Windows Vista é uma marca comercial
ou registrada da Microsoft Corporation
nos EUA e/ou em outros países.
Mac e Mac OS são marcas comerciais
da Apple Inc., registradas nos EUA e em
outros países.
•
•
•
Número do modelo: K10379
Para Começar
Conecte o cabo de alimentação.
44
Não conecte o cabo USB ainda.
Pressione o botão ATIVADO (ON).
55
Retire a ta laranja e o material de proteção.
22
Feche a Unidade de Digitalização/Tampa.
33
Levante a Unidade de Digitalização/Tampa e, em seguida, prenda-a com o Suporte da Unidade de
Digitalização.
A Tampa de Documentos deve ser fechada para levantar a Unidade de Digitalização/Tampa!
11
Não permita que objetos caiam dentro da máquina. Eles podem afetar seu funcionamento.
Compruebe que se le han suministrado los siguientes elementos.
Es necesario un cable USB.
ESPAÑOL
Elementos
suministrados
¡Léame en primer lugar!
Consérvelo a mano para utilizarlo
como referencia en el futuro.
Windows es una marca comercial o una
marca comercial registrada de Microsoft
Corporation en EE. UU. y/u otros países.
Windows Vista es una marca comercial
o una marca comercial registrada de
Microsoft Corporation en EE. UU. y/u
otros países.
Mac y Mac OS son marcas comerciales
de Apple Inc., registradas en EE. UU. y
en otros países.
•
•
•
Número de modelo: K10379
Para llevar a cabo la instalación, coloque el equipo cerca del ordenador.
Guía de inicio
No conecte aún el cable USB.
Conecte el cable de alimentación.
44
Pulse el botón ACTIVADO (ON).
55
Retire la cinta naranja y el material de protección.
22
Cierre la cubierta/unidad de escaneado.
33
Levante la cubierta/unidad de escaneado, y sujétela con el soporte de la unidad de escaneado.
¡La cubierta de documentos debe estar cerrada para levantar la cubierta/unidad de escaneado!
11
Evite que caigan objetos dentro del equipo. Podrían provocar fallos en el funcionamiento.
Vériez les éléments fournis avec l'imprimante.
Un câble USB est nécessaire.
FRANÇAIS
Éléments
fournis
Démarrage À lire en premier !
Conservez ce document à portée de
main an de pouvoir vous y reporter
ultérieurement.
Windows est une marque ou une
marque déposée de Microsoft
Corporation aux États-Unis et/ou dans
d'autres pays.
Windows Vista est une marque ou
une marque déposée de Microsoft
Corporation aux États-Unis et/ou dans
d'autres pays.
Mac et Mac OS sont des marques
d'Apple Inc., déposées aux États-Unis et
dans d'autres pays.
•
•
•
Référence du modèle : K10379
Pour procéder à l'installation, placez la machine à proximité de l'ordinateur.
Ne branchez pas encore le câble USB.
Branchez le cordon d'alimentation.
44
Appuyez sur le bouton MARCHE
(ON).
55
Retirez la bande orange ainsi que le matériau protecteur.
22
Fermez l'unité de numérisation / le capot.
33
Soulevez l'unité de numérisation / le capot, puis xez-la au support de l'unité de numérisation.
N'oubliez pas de fermer le couvercle du scanner avant de soulever l'unité de numérisation / le capot !
11
Veillez à ce qu'aucun objet ne tombe à l'intérieur de la machine. Cela pourrait entraîner un
dysfonctionnement.
Check the included items.
A USB cable is required.
ENGLISH
Included Items
Getting Started Read me rst!
Keep me handy for future reference.
Windows is a trademark or registered
trademark of Microsoft Corporation in the
U.S. and/or other countries.
Windows Vista is a trademark or
registered trademark of Microsoft
Corporation in the U.S. and/or other
countries.
Mac and Mac OS are trademarks of
Apple Inc., registered in the U.S. and
other countries.
•
•
•
Model Number: K10379
To perform setup, place the machine near the computer.
Do not connect the USB cable yet.
Connect the power cord.
44
Press the ON button.
55
Remove the orange tape and protective material.
22
Close the Scanning Unit / Cover.
33
Lift the Scanning Unit / Cover, then x it with the Scanning Unit Support.
Document Cover must be closed to lift Scanning Unit / Cover!
11
Do not allow objects to fall inside the machine. These could cause malfunction.
QT5-5747-V01 PRINTED IN XXXXXXXX
IMPRIME XX XXXXXXXX
2
1
5
3
6
6
4
2
Insira o Cartucho FINE (FINE
Cartridge) preto no slot direito .
Não bata nas laterais do cartucho!
44
Cuidado com a tinta na ta de
proteção.
Retire o Cartucho FINE (FINE
Cartridge) da embalagem e, em
seguida, retire a ta de proteção.
33
Abra a Tampa de Fixação do Cartucho do lado direito.
22
Empurre para baixo da Tampa
de Fixação do Cartucho até
ouvir um clique para fechá-la
completamente.
Observe o alinhamento da Tampa de
Fixação do Cartucho e verique se
ela está travada corretamente (não
enviesada).
55
Não toque!
Repita para para instalar
o outro Cartucho FINE (FINE
Cartridge).
66
À esquerda é onde o Cartucho FINE (FINE Cartridge) colorido deve ser instalado e à direita é onde o Cartucho
FINE (FINE Cartridge) preto deve ser instalado.
Se o indicador luminoso Alarme
(Alarm) pisca em laranja, pressione o
botão ATIVADO (ON) para desligar a
máquina, em seguida faça novamente
desde .
Verique se o ALIMENTAÇÃO
(POWER) está aceso em verde.
66
Abra a Unidade de Digitalização / Tampa.
Consulte em .
11
Aqui é onde os Cartuchos FINE (FINE
Cartridges) devem ser instalados.
Não o toque até que ele pare.
Aperte rmemente e puxe a tampa para cima.
Introduzca el cartucho FINE (FINE
Cartridge) negro en la ranura
derecha.
¡No lo golpee contra los lados!
44
Tenga cuidado con la tinta de la cinta
protectora.
Desembale el cartucho FINE
(FINE Cartridge) y retire la cinta
protectora.
33
Abra la tapa de bloqueo del cartucho de tinta del lado derecho.
22
Para cerrar completamente la tapa
de bloqueo del cartucho de tinta,
presione en hasta que oiga un
clic.
Compruebe que la tapa de bloqueo
del cartucho de tinta esté derecha y
correctamente cerrada, es decir, que no
esté inclinada.
55
¡No tocar!
Repita de a para instalar
el otro cartucho FINE (FINE
Cartridge).
66
A la izquierda debe instalarse el cartucho FINE (FINE Cartridge) de color y a la derecha debe instalarse el
cartucho FINE (FINE Cartridge) negro.
Si la luz de Alarma (Alarm) se ilumina
en naranja, pulse el botón ACTIVADO
(ON) para apagar el equipo y repita
desde .
Compruebe que la luz de ENCENDIDO
(POWER) se ilumina en verde.
66
Abra la cubierta/unidad de escaneado.
Consulte en .
11
Aquí deben instalarse los cartuchos FINE
(FINE Cartridges).
No toque hasta que se detenga.
Sujete rmemente y levante la tapa.
Insérez la cartouche FINE noire
dans le logement droit .
Ne cognez pas la cartouche contre
les bords !
44
Faites attention à l'encre se trouvant
sur le ruban protecteur.
Enlevez la cartouche FINE de
son emballage, puis le ruban
protecteur.
33
Ouvrez le couvercle de verrouillage de cartouche d’encre sur le côté droit.
22
Appuyez sur sur le couvercle de
verrouillage de cartouche d’encre
jusqu’à ce qu’il se xe en place.
Mettez-vous en face du couvercle de
verrouillage de cartouche d’encre et
vériez qu’il est correctement verrouillé
(il ne doit pas être de travers).
55
Ne pas toucher !
Répétez les étapes à pour
installer l'autre cartouche FINE.
66
La cartouche FINE couleur doit être installée à gauche et la cartouche FINE noire doit être installée à droite.
Si le voyant Alarme (Alarm) clignote
en orange, appuyez sur le bouton
MARCHE (ON) pour mettre la machine
hors tension, puis reprenez à partir de
l'étape .
Vériez que le voyant ALIMENTATION
(POWER) est allumé en vert.
66
Ouvrez l'unité de numérisation / le capot.
Reportez-vous à l'étape dans .
11
C'est ici que les cartouches FINE doivent être
installées.
Évitez tout contact tant qu'elle n'est pas arrêtée.
Pincez fermement et soulevez le capot.
Insert the Black FINE Cartridge
into the right slot .
Do not knock it against the sides!
44
Be careful of ink on the protective tape.
Unpack the FINE Cartridge, then
remove the protective tape.
33
Open the Ink Cartridge Locking Cover on the right side.
22
Push down of the Ink Cartridge
Locking Cover until you hear a
click to close it completely.
View the Ink Cartridge Locking Cover
straight on and check that it is locked
correctly (not at an angle).
55
Do not touch!
Repeat to to install the other
FINE Cartridge.
66
The left is where the Color FINE Cartridge is to be installed and the right is where the Black FINE Cartridge is to
be installed.
If the Alarm lamp ashes orange,
press the ON button to turn OFF the
machine, then redo from .
Check that the POWER lamp lights
green.
66
Open the Scanning Unit / Cover.
Refer to in .
11
This is where the FINE Cartridges are to be
installed.
Do not touch it until it stops.
Pinch rmly and pull up the cover.
4
3
1
3
4
2
1
7
Colocando papel
fotográco
Abra o Suporte de Papel.
11
Deslize a Guia do Papel até o nal.
22
Coloque o papel na Bandeja
Traseira.
33
Ajuste a Guia do Papel para ela se
adequar à largura do papel.
44
Para obter mais informações sobre
papel, consulte o Manual Interativo
que será instalado mais tarde.
Insira o CD-ROM no computador.
11
Se o cabo USB já estiver conectado,
desconecte-o. Se uma mensagem
aparecer no computador, clique em
Cancelar (Cancel).
Quando usar papel fotográco, as congurações da máquina para tipo de mídia e tamanho deverão ser
ajustadas. Para detalhes, consulte o Manual Interativo que será instalado mais tarde.
Se o indicador luminoso Alarme
(Alarm) estiver piscando em laranja,
verique se o Cartucho FINE
(FINE Cartridges) está instalado
corretamente.
Feche a Unidade de Digitalização /
Tampa como em -.
O indicador luminoso ALIMENTAÇÃO
(POWER) pisca em verde por cerca de
20 segundos. Aguarde até que a luz
esteja acesa e, em seguida, prossiga.
77
Cargar papel
fotográfico
Abra el soporte del papel.
11
Deslice la guía del papel a ambos
lados.
22
Cargue el papel en la bandeja
posterior.
33
Ajuste la guía del papel a la
anchura del papel.
44
Para obtener más información sobre el
papel, consulte el Manual en pantalla
que se instalará posteriormente.
Introduzca el CD-ROM en el
ordenador.
11
Si el cable USB ya está conectado,
desconéctelo. Si aparece un mensaje
en el ordenador, haga clic en Cancelar
(Cancel).
Cuando use papel fotográco, deberá ajustar la conguración del equipo al tipo y al tamaño del soporte.
Para obtener más detalles, consulte el Manual en pantalla que se instalará posteriormente.
Si la luz de Alarma (Alarm) parpadea
en naranja, compruebe que los
cartuchos FINE (FINE Cartridges)
estén instalados correctamente.
Cierre la cubierta/unidad de
escaneado como en -.
La luz de ENCENDIDO (POWER)
parpadea en verde durante
aproximadamente 20 segundos. Espere a
que se encienda y continúe.
77
Chargement de
papier photo
Ouvrez le support papier.
11
Faites glisser le guide papier vers
les deux extrémités.
22
Chargez le papier dans le
réceptacle arrière.
33
Réglez le guide papier en fonction
de la largeur du papier.
44
Pour plus d'informations sur le papier,
reportez-vous au Manuel en ligne, qui
sera installé ultérieurement.
Insérez le CD-ROM dans
l'ordinateur.
11
Si le câble USB est déjà branché,
débranchez-le. Si un message apparaît
sur l'écran de l'ordinateur, cliquez sur
Annuler.
Lorsque vous utilisez ce type de papier, il vous faut modier les paramètres de la machine relatifs au type
et au format de support. Pour plus d'informations, reportez-vous au Manuel en ligne, qui sera installé
ultérieurement.
Si le voyant Alarme (Alarm) clignote
en orange, vériez que les cartouches
FINE sont correctement installées.
Fermez l'unité de numérisation /
le capot comme dans -.
Le voyant ALIMENTATION (POWER)
clignote en vert pendant environ 20
secondes. Attendez que le voyant soit
allumé en permanence, puis continuez.
77
Loading Photo
Paper
Open the Paper Support.
11
Slide the Paper Guide to both
ends.
22
Load the paper in the Rear Tray.
33
Adjust the Paper Guide to t the
paper width.
44
For information about paper, refer to
the On-screen Manual which will be
installed later.
Insert the CD-ROM into the
computer.
11
If the USB cable is already connected,
unplug it. If a message appears on the
computer, click Cancel.
When using photo paper, machine settings for media type and size should be adjusted. For details, refer to
the On-screen Manual which will be installed later.
If the Alarm lamp ashes orange,
check that the FINE Cartridges are
installed correctly.
Close the Scanning Unit / Cover as
in -.
The POWER lamp blinks green for
about 20 seconds. Wait until it is lit, then
proceed.
77
2
Cartuchos
FINE (FINE
Cartridges)
compatíveis
Se o CD-ROM não executar
automaticamente:
Clique duas vezes em (Meu)
Computador ((My) Computer) > ícone
do CD-ROM > MSETUP4.EXE.
Clique duas vezes no ícone do CD-
ROM na área de trabalho.
Siga as instruções da tela para
prosseguir.
Para selecionar um idioma, clique em
Idioma (Language).
22
Leia o Manual Interativo no
computador
Cartuchos
FINE (FINE
Cartridges)
compatibles
Siga las instrucciones que
aparezcan en pantalla para
continuar.
Para seleccionar un idioma, haga clic en
Idioma (Language).
22
Si el CD-ROM no se ejecuta
automáticamente:
Haga doble clic en (Mi) PC ((My)
Computer) > icono de CD-ROM >
MSETUP4.EXE.
Haga doble clic en el icono de CD-
ROM del escritorio.
Lea el Manual en pantalla en el
ordenador
Cartouches
FINE
compatibles
Suivez les instructions à l'écran
pour continuer.
Pour sélectionner une langue, cliquez sur
Langue.
22
Si le CD-ROM ne s'exécute pas
automatiquement :
Double-cliquez sur Poste de travail
/ Ordinateur > icône CD-ROM >
MSETUP4.EXE.
Double-cliquez sur l'icône CD-ROM
située sur le bureau.
Consultez le Manuel en ligne sur
l'ordinateur
Compatible
FINE
Cartridges
Follow the on-screen instructions
to proceed.
To select a language, click Language.
22
If the CD-ROM does not autorun:
Double-click (My) Computer > CD-
ROM icon > MSETUP4.EXE.
Double-click the CD-ROM icon on the
desktop.
Read the On-screen Manual on
the Computer
Color: CL-211XL
Color: CL-211
Black: PG-210XL
Black: PG-210

Other Canon Printer manuals

Canon LASER SHOT LBP3210 User manual

Canon

Canon LASER SHOT LBP3210 User manual

Canon BJC-3010 User manual

Canon

Canon BJC-3010 User manual

Canon PIXMA PRO-100 Series User manual

Canon

Canon PIXMA PRO-100 Series User manual

Canon MK5000 User manual

Canon

Canon MK5000 User manual

Canon BJC-4000 User manual

Canon

Canon BJC-4000 User manual

Canon I6100 - i Color Inkjet Printer User manual

Canon

Canon I6100 - i Color Inkjet Printer User manual

Canon Image Prograf PRO-2000 User manual

Canon

Canon Image Prograf PRO-2000 User manual

Canon PIXMA MP230 Series User manual

Canon

Canon PIXMA MP230 Series User manual

Canon MG2900 Series User manual

Canon

Canon MG2900 Series User manual

Canon imagePROGRAF iPF820 User manual

Canon

Canon imagePROGRAF iPF820 User manual

Canon PIXMA TR7540 User manual

Canon

Canon PIXMA TR7540 User manual

Canon imagePROGRAF iPF750 MFP M40 User manual

Canon

Canon imagePROGRAF iPF750 MFP M40 User manual

Canon imagePRESS C6000 Technical manual

Canon

Canon imagePRESS C6000 Technical manual

Canon imagePRESS C10010VP User manual

Canon

Canon imagePRESS C10010VP User manual

Canon CP-10 User manual

Canon

Canon CP-10 User manual

Canon imageRUNNER 2745i User manual

Canon

Canon imageRUNNER 2745i User manual

Canon iP6210D - PIXMA Color Inkjet Printer Manual

Canon

Canon iP6210D - PIXMA Color Inkjet Printer Manual

Canon PIXMA Inkjet MP230 User manual

Canon

Canon PIXMA Inkjet MP230 User manual

Canon TS3500 Series Setup guide

Canon

Canon TS3500 Series Setup guide

Canon imageCLASS LBP237dw User manual

Canon

Canon imageCLASS LBP237dw User manual

Canon CP-10 User manual

Canon

Canon CP-10 User manual

Canon CLBP360PS Ver-up User manual

Canon

Canon CLBP360PS Ver-up User manual

Canon iPF750 - imagePROGRAF Color Inkjet Printer User manual

Canon

Canon iPF750 - imagePROGRAF Color Inkjet Printer User manual

Canon IB4000 series Setup guide

Canon

Canon IB4000 series Setup guide

Popular Printer manuals by other brands

Olivetti d-Copia 163MF Service manual

Olivetti

Olivetti d-Copia 163MF Service manual

Kyocera FS-2000D Features

Kyocera

Kyocera FS-2000D Features

Oce 2465 user manual

Oce

Oce 2465 user manual

Avery Dennison SNAP 500 user manual

Avery Dennison

Avery Dennison SNAP 500 user manual

Citizen CLP-7401 user manual

Citizen

Citizen CLP-7401 user manual

MIMAKI JFX500-2131 Operation manual

MIMAKI

MIMAKI JFX500-2131 Operation manual

Polaroid ColorShot Printer user guide

Polaroid

Polaroid ColorShot Printer user guide

Compaq PrintNet 5525B user manual

Compaq

Compaq PrintNet 5525B user manual

Lexmark X748dte Service manual

Lexmark

Lexmark X748dte Service manual

Compaq LA36 Service manual

Compaq

Compaq LA36 Service manual

Samsung CLP-415 series Service manual

Samsung

Samsung CLP-415 series Service manual

Xerox Synergix 8825 Service manual

Xerox

Xerox Synergix 8825 Service manual

Brother HL-L3210CW Operation manual

Brother

Brother HL-L3210CW Operation manual

Epson PictureMate Show - PM 300 - PictureMate Show Digital... Start here

Epson

Epson PictureMate Show - PM 300 - PictureMate Show Digital... Start here

Epson EcoTank L15160 Start here

Epson

Epson EcoTank L15160 Start here

Sharp MX-B467P user guide

Sharp

Sharp MX-B467P user guide

Schilling SP100+ instruction manual

Schilling

Schilling SP100+ instruction manual

Kyocera Copystar CS-2035 Service manual

Kyocera

Kyocera Copystar CS-2035 Service manual

manuals.online logo
manuals.online logoBrands
  • About & Mission
  • Contact us
  • Privacy Policy
  • Terms and Conditions

Copyright 2025 Manuals.Online. All Rights Reserved.