manuals.online logo
Brands
  1. Home
  2. •
  3. Brands
  4. •
  5. Caple
  6. •
  7. Wine Cooler
  8. •
  9. Caple WI6119 Manual

Caple WI6119 Manual

WI6119
Caple 60cm wine cabinet
Technical information
Item Part Code Description Qty
1DG13-1 Water tank 1
2DG2-14 Power cord 1
3DG1-77 Compressor 1
4DG13-272-1 Electrical box cover 1
5DG6-15 Transformer 1
6DG3-99-11 PCB board 1
7DG26-191 Cabinet 1
8DG13-268 Decorative nail 3
9DG13-7 Shelf support 2
10 DG20-1 Wire clamp 2
11 DG8-7-R Senser 1
12 DG14-190-SR Top right hinge 1
13 DG12-1-2 Evaporator 1
14 DG8-7-W Senser 1
15 DG18-93 Foam 2
WI6119
- Caple 60cm wine cabinet
16 DG7-3.1-BH Evaporator fan 1
17 DG19-6 Fan cover 1
18 DG22-111 Air duct board 1
19 DG13-327 Display support 1
20 DG3-17-W LED light 1
21 DG22-379 Electrical box 1
22 DG20-385 Display panel film 1
23 DG13-1.2 Humid box 1
24 DG15-211-1-D Wooden shelf 1
25 DG13-3149 Fixing bracket A 1
26 DG23-243 Door 1
27 M160-050 Gasket 1
28 DG22-3027 Handle 1
29 DG22-3057 Door axis 1
30 DG13-3155 Door axis spacer 1
31 DG15-33-1 Wooden shelf NEW G2 1
32 DG15-211-D Wooden shelf 4
33 DG13-130-S Bottom 4
34 DG14-212-SR Low right hinge 1
35 DG22-330 Support bracket of front legs 1
36 DG13-8 Decorative nail 3
37 DG12-91 Condenser 1
38 DG13-3146 Cabinet leg 4
39 DG19-9 Condenser cover 1
40
A
DG7-3.2-BH Condenser fan 1
40B DG17-145-2 Wire 1
41 DG19-3 Fan cover 1
Item Part Code Description Qty
WI6119
- Caple 60cm wine cabinet
42 DG12-6.1 Air-circulating pipe 1
43 DG22-331 Compressor bracket 1
44 DG11-45 Dry filter 1
-DG14-190-SL Top left hinge 1
-- DG14-212-SL Low left hinge 1
--- DG22-3021 Bottom grill 1
---- DG13-3154 Slider 2
----- DG13-3152 Fixing bracket B 1
WI6119
Ca
p
le
Sin
g
le
zone
wine
cabinet
Caple Single zone wine cabinet
Service Manual
1
SERVICEMANUAL
(One temperaturezone controlwinecoolar)
JGseriesincludesJG18 series,JG32B,JG45AJG50A,JG50A-1,JG50FA
Thecontentbelowshowsdifferentdefault mighthappenwhenthewinecoolerisworking,andalsoshowshowto
find thedefaultsandrepairthedefaults.Pleasefindthecorrespondingdefault statementandfindtherepair
informationinthecorresponding pages.
Statement:(Fig.4)shows thecorrelativediagramFig.4
( 6)shows thecorrelativepage6
WARNING:BeforeattemptinganycleaningormaintenancethisunitMustbedisconnectedformthe
electricalsupply, topreventelectricalshock.
▲Preparationbeforemaintenance
○Tools
1. Pliers
2. Phillipsheadscrewdrivers
3. Process pipe
4. ElectricalMultimeter
5.Ampmeter(5A)(calipercable type)
6. Electricalsolderingiron
7.Wirestrippers
8. Sealpliers
9/Scissors
○Equipment
1. Vacuumpump
2.Soldering ironforcopperpipes
3.Gas meter
▲Coolingsystemfault
○HowtoEvaluate thefault ... (Page 3)
○Howtorepairthefault (Page 3)
○Howtoremove theairductboard.. . (Page4)
○Diagramshowingthefrontside solderedjoints.. (Page 6)
○Diagramshowingthe rearside solderedjoints (page 7)
▲Noise problems
○Compressornoise. .. (Page 8)
○Fannoise.. .(Page 8)
○Refrigerantjetnoise... ... (Page 9)
○Capillaryvibrationnoise... ... . ... (Page 9)
○Oiljamnoise.. ... . (Page10)
▲Evaporatorfreezingproblems .(Page 10)
2
▲Unstableinternaltemperatureproblems .(Page 12)
▲Controlsystemproblems
○Faultfindingbythe self-checkmode ..(Page 12)
○Sensorfault ...(Page 12)
○LEDdisplayfault..(Page14)
○Howtoremove theelectricalbox. (Page 14)
○Thedismantlementmethod oftheelectricalboxspearpart. . (Page 14)
○Howtoreplace thelight .. (Page16)
○Howtoreplace theDecorativeframe .. (Page17)
3
△Coolingsystemfaults.
○Howtodiagnosefaults:
Itshouldtakeapproximate3hourstoreachthelowestsettingtemperatureof5℃foranemptyunit(assuming ambient
tempof32degreescentigradeandcontinuousoperation). Ifnot,checkthecompressor,coolingfans,controller, andsensors.
Ifall theseareworking normally,thereisprobablyacoolingsystem’sfault.
○Howtorepairthedefualt
1. Checkthe compressor
Turnonthe unitandcheckthere iselectricitycurrentflowingtothecompressorusinga calipertypeAmpmeter,the
currentshouldbewithin0.6to2Amps.Ifthereadingsarenotinthisrange, turnoffandcutoffthepipes (See Fig.8
showingG) andthesealpliers (See Fig.8showing E.) fromthecompressor,thenturntheunit onagain(inthiscase
onlyrun thecompressorforafewminuets,soastoavoidthecompressorabsorbmoistair)andrecheckthe
currentand ifthereispressureattheoutletpipe. Ifthecurrentreadingisstill outofrangespecifiedaboveandno
pressurefromthe compressoroutlet, replace the whole compressor.
2. Checkthecoolingsystempipe work:
Carefullycheckthecooling systemafterverifying thecompressorisworking normally.Thenfollowtheprocedure
below.
1>. Thencutoffprocess pipeandchecktherefrigerant.Ifthereisnotenoughrefrigerant,thedefualt oftherefrigerant
systemshouldbecausedbytheleaking.Ifthe refrigerantissufficient., itisprobablyjamedinthecapillary.
2>.Ifthedefault is concentratedon thecooling system,thechecking procedureis as below.
A.Cutoff theventpipeofthecompressor, andinfuse0.8-1MPnitrogenby process pipe, andpleaseputthehandclose
tothecutkerfoftheventpipe.Ifthereis alittlegas leakformtheterminal,it meansnormal, orit is jamed.
B. Makesurethecapilaryisworkingnormally,whenthedrainpipeisconnetcedagain,and infuse0.8-1MPnitrogen
thentesttheleakageifthecoolingsystemofthesoldering pointwiththesoapwater.Checkfromthethesoldering
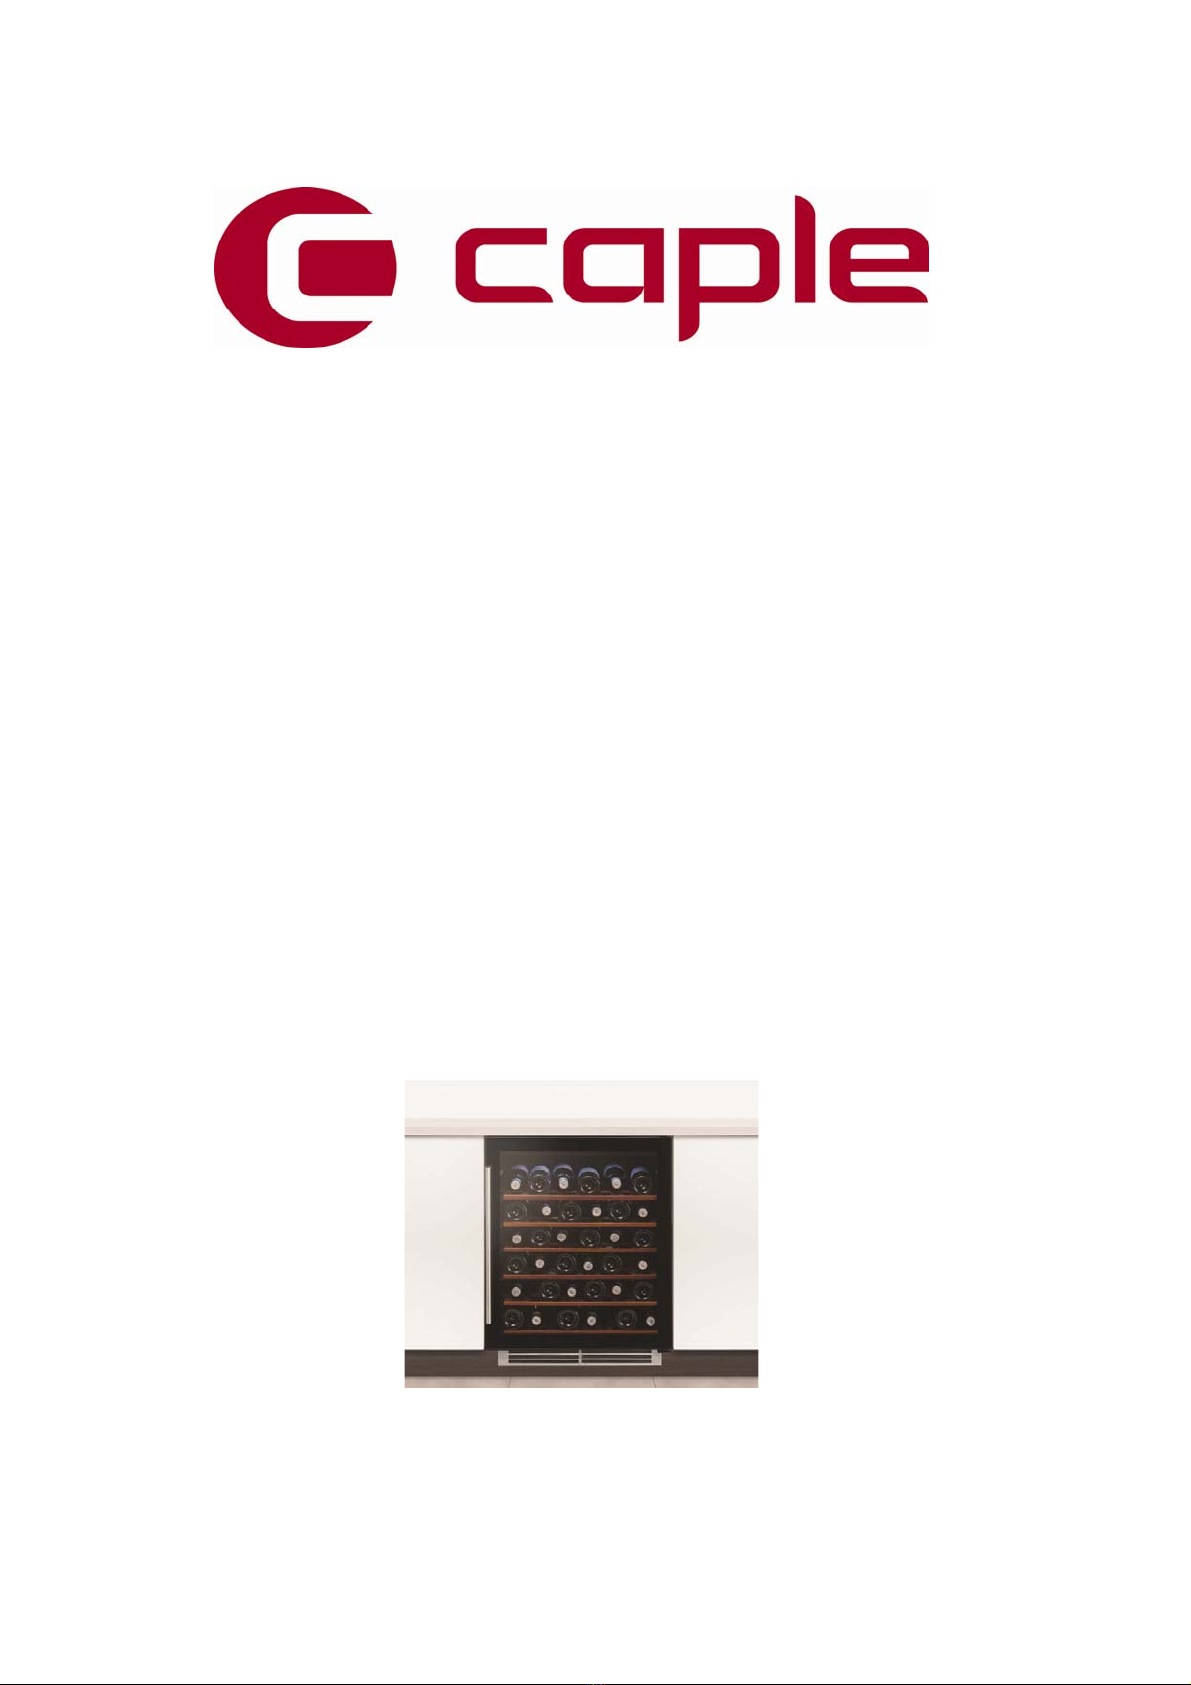
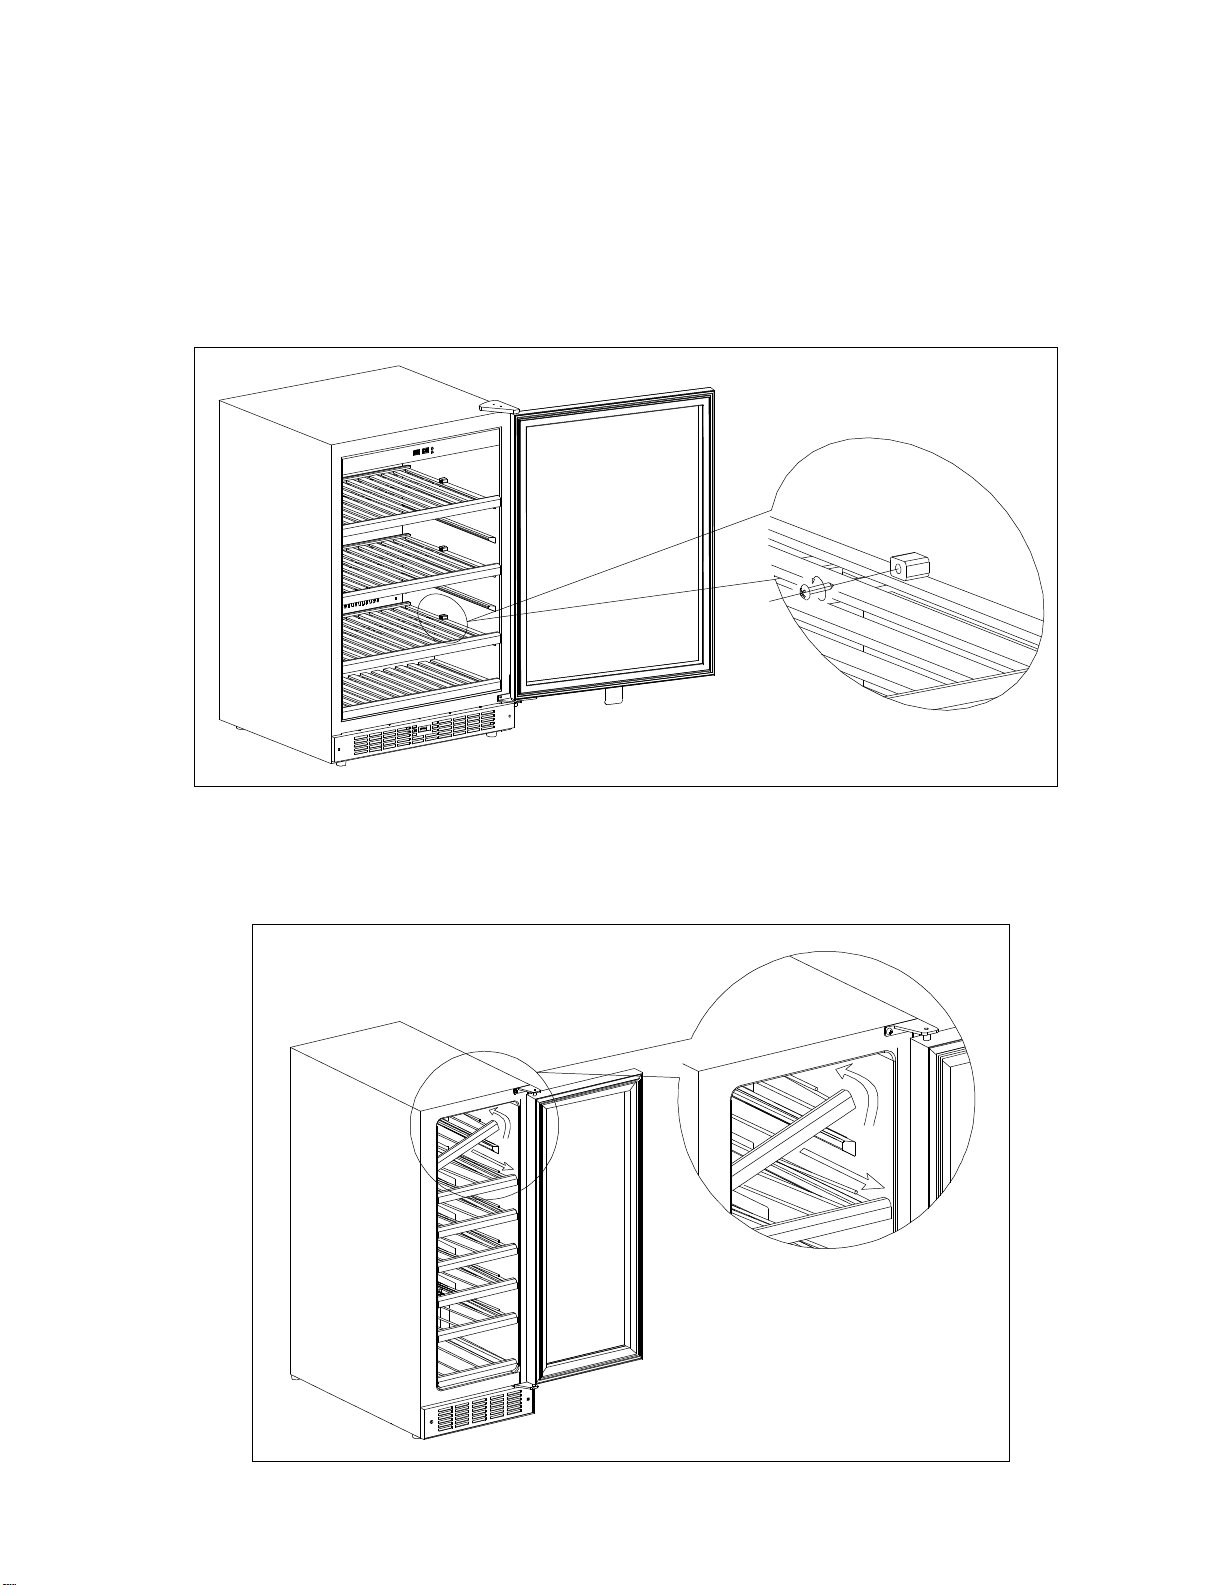
pointarroundthecompressor(Fig.8&Fig.9、Fig.9.1),andifeverythingis ok,removetheair-ductboardand chech
thesoldering pointaround evaporator(Fig.6 &Fig.7).pleaseseetheremovemethodand theprocedureasbelow.
(Fig.1,Fig.2,Fig.3,Fig.4&Fig.5)
C.IfallthesolderingpointinB isnotleaking,therearetwopossibility, oneis leakageintheinnercondenser,another
isthedamageon theparts(suchas evaporator,condenserand soon)inthecoolingsystem.Ifitis theinnerdamage,
itcannotberepaired,andifthedamageontheparts, replace them.
3>.Makesurethatthereis notleakageinthecooling system, refilltherefrigerant.
3.Refillthe refrigerant:
1>. Using thevacuumpumpforma vacuuminthesystem,via the jointofthelow-pressureprocesspipeonthecompressor,
thehigh-pressurepipelineisontheprocess pipeofthefilter.Applythevacuumpumpforapproximately20 minutes.Until
thevacuumislowerthan100Pa.Thensolderthecompressorprocess pipeofthefilter.Keepthevacuumrunningwhile
solderingthisjoint
2>.FillCooling systemwithrefrigerantviatheprocesspipe. (TherefrigerantisR134a.Regardingrefrigerantquantity
Pleaserefertotheinstructionatbacklabelofwinecellar).Thensolderthecompressorprocess pipeafterthesystemis
chargedwithrefrigerant.
4.Running test:
Replaceall thecomponentsaftertheproceduresaboveandturntheuniton.Toverifytheeffectiveness oftherepair,
monitor
4
theunit thecompressorshouldautomaticallystopwithin-2.5degcentigradeofthesettemperatureandstartwith+2.5deg
centigradeofthe settemperaturewithinapprox3hours(assuminganambienttemperatureof32℃andtheunit isempty).
○Howtoremovethe airduct board.
1.Removetheshelvesfirstly.
a. Remove theshelves;somemodelshavePhillipsheadscrewstoholdothermodelshavenoscrews (Fig.1)
Fig.1
②. Pull theshelvestothebottom,circumvolveanysideoftherightandleft,andletthesetter
oftheshelvegooutofthechannel, andthendrawouttheshelves. (Fig.2)
Fig.2
5
③. Driveuptheshelvesmakeit abovethefixer1 (Fig.3),then takeitout according tothearrowhead
Fdirection(Fig.4)
Fig.3
Fig.4
2>.Howtoremovetheairductboard(A).(inFig.51~10arethescrewsfixingtheairductboard,in
differenttypes,thesituationsand quantityofthemaredifferent,A~Darethescrewsfixingthefan,noneed
toremove),Removethefixingscrewsofairductboard(1,2,3,4,5,6,7,8,9,10),thenpulloutairductboard(A).
See (Fig5)
Beattentiontounplugtheconnectionwirewhenremoving theair-ductboard.Youcanmoveslowlyaside
untilyou cansee thefans wire,andunplugit, andthentakeoutthewholeair-ductboard. ;
Fig.5
6
3>.ForaViewofthe internalconfigurationafterremovalofthe airductboard,see (Fig.6&Fig.7)
○Diagramshowingthefrontsidesolderedjoints(Therearetwodifferenttypesofevaporator:Finnedandpipe
evaporator,se (Fig.6&Fig.7)
A.CapillarysolderedjointsB.evaporatorsolderedjoints
Fig.6
Finnedevaporator
Fig.7
Pipe boardevaporator
7
○Diagramshowingtherearsidesolderjoints.Therearetwodifferentcondensers:built-in(Fig.8) and outboard
condenser).See (Fig.9&Fig.9.1)
B: Dryfilterprocess pipesolderedjoint C: Dryfiltersolderedjoint D: Capillarysolderedjoint
E: Process pipesolderedjoint F: Suction pipesolderedjoint G: Dischargepipesolderedjoint
H: Condenserprocesspipesolderedjoint I: Anti-Dewpipesolderedjoint
Fig.8
Built-incondenser
Fig.9
8
Fig.9.1
Outboardcondenser
▲High noiseofwinecellar
○compressornoise
1.Theworking ofmotorand pistonmotionwill causenoisewhencompressorworking.Soifnoiseis
steadyandnotexceeds42 dB,it’snormal.If noiseisnotsteadyorveryhigh,it’scompressorfault andit
shouldberepairedorreplaced.
2.If compressor’sshockabsorptionrubberishardeningordamaged,orfixingscrewofcompressoristoo
tightorloose,it willcausenoise.Thesettlementistochangenewshockabsorptionrubberoradjustfixing
screws.
○Fannoise
1>. Normalfanmotorandairflowshouldnotexceed32dB.
2>. Ifthereis noiseabove32dBorthenoiselevels fluctuate, thefanshaftis eitherdamagedorworn.
3>. Howtoreplacethefans
Fig.10
9
a. Replacingtheevaporatorfan
1>.Removetheshelfholdefixing screws, andremovetheshelves. See (Fig.1,Fig.2,Fig.3,Fig.4)
2>.Removetheairductboard.See(Fig.5)
3>.Removethefanfixingscrews(1,2,3,4), and replace thefan.See (Fig.10)
b.Replacing thecondenserfan(differentmodelmayhavedifferentfanposition,buttheprocedurefor
replacementisthe same)
1>.Removeclip(A),thentakeoff the electricalboxcoverofthe compressor.See (Fig.11)
2>.Markthetwoendsofthepowercordofthefan(thisisimportanttoensurereplacementiscorrect),and
thenremovesthe powercords(C,D), (Thefigure isasper “ZEL”compressor;differentcompressor
mayhavedifferentpowercordpositions, see (Fig.11)
3>.Removethe twoscrewsunderthefan(1,2), andremove thecondenserfan.See (Fig.11)
4>.Removethefourfansecuring screws(3,4,5,6), and replacethefan. See (Fig.11.1)
5>.Re-assembletheunit
○Refrigerantjetnoise
Ifthereiscontinuousnoiselikeawatersprayfromthecapillary,theendofcapillaryisinthewrongposition,or
thereareroughedgesontheendofthecapillary.
1>.Heatthesolderedjointofthecapillary(AofFig.8and Fig.9,Fig.9.1),thenremovethecapillaryfromthe
evaporatorandsmooththeendwithaneraser(Caution:Donotallowanyparticlesintocapillaryunit
2>.Replace thecapillaryintotheevaporator,thensolderitbackintothecorrectposition(notexceeding
15mm intheevaporator) andpackthejointwithanti vibrationcompound
3>.Rechargewithrefrigerant.See (Page7)
○Capillaryvibrationnoise
Fault: Hightfrequencyimpactnoiseincapillaryzone
Causedbyeither:
1>.Thecapillarybeinginserttoodeepinttheevaporator,sowhentherefrigerantisjetting,theendof
vibration capillarywill hittheinsideoftheevaporator.
2>.Vibrationfrom thecapillarytouchigtheinsideofthecabinetorairductboard,thenwhenrefrigeranis
jetting.
Howtorepairthis problem
10
1>.De-solderthecapillaryandre-solderinthecorrectpositionavoiding contactwiththeinsideofthe
evaporator, (Thedepthshouldbewithin15mm), thenrechargetheunitwithrefrigerantsee (7)
2>.Ifthecapillarytouchestheinsideofthecabinetorairductboard,youshouldadjustpositionof
capillaryandpackit withanti-vibration compound. (Fig.8&Fig.9、Fig.9.1)
Oiljammednoise
Fault:intermittentanddeepjetnoisecomingfrom insideofthecapillary.
Causedby:Compressoroil flowing intothecoolingsystempipeworkbecauseofwinecoolerleanduring
transportation, andthejetting oil inthecapillarycausenoise.
Solutions:
Cleanthecoolingsystempipe,and rechargewithrefrigerantsee (page7)
▲Evaporatorfreezing
○This is normallydueto
A/Poorsealbetweendooranddoorframe
B/Thedoornotclosedcorrectlyforalongperiodoftime
Thisallowsmoistairintothecabinet,whichfreezesintheevaporator,iftheiceisallowedtogettoothick,it
maydamagethefan.
1>. Ensuredoorissealedagainsttheframe,ifthereis slightdistortionoftheseal, heattheeffectedareagently
withahairdryergenrlysee (fig12) withsmoothstrokesofthehairdryer,thenwhenstillwarmpulltheeffected
area backintoitsoriginalposition,thisprocess mayhavetoberepeateduntilthesealiscompletelybacktoits
originalcondition.
Fig.12
2>.If theicehasdamagethefanit willneedtobereplacedsee. (Fig.10)
○Insomeoldermodels,theelectricalconnectorofthefanwiresisfixedundertheevaporator,andwater
from evaporatormaydripontothisjunctionbox,thismayeffecttheelectricalconnection,causingthefan
tostop.Whichinturncausessurfacefreezing.
1>.Removetheairductboardsee(Fig.1,Fig.2,Fig.3,Fig.4&Fig.5),removethecableclipsecuring
screws(A), andremovethecableclipsee (Fig.13)
2>. Cutoffthebothconnectorssee. (Fig.13.1)
3>.Striptheendsofthewiresabout12mmandre-connectthen.
Ensure thiselectricaljointissealedagainstfuturewaterdamage,and iselectricallysafe(Fig.14)
11
4>.Fixthewireinthecorrectpositionusing thecableclipwithscrew (Fig.15)
Fig.14
Fig.15
5>.Iffanis foult ,pleaserelacethewholefan.
6>.Note:theuppermethodonlyfortheconnectorfixedundertheevaporator.
12
▲Unstalbetemperatures insidethecabinet
Unstabletemperaturesinsidethecabinetismostlyduetoafault intheevaporatorfan,youcancheck
thisby:Whencompressorworks,the “RUN”indicatorlightshouldcomeonandthefanshouldspin,If
fandoesnotspincheckthefanselectricalconnectionsarefaultyandrepairthemorifthefanis
damagedreplace thewholefanunitsee (fig10).
▲Controlsystemfault.
○Usetheself-checkmodetocheckthisfault.
Thisserieswinecellarhasacomputerizedcontrollerwithbuilt inself-checkfunction.
Starttheself-checkmodeasfollows:
1>.Pressandhold “Setlower”and “Setupper”buttonwithpoweron.2beepswillsound,andthen
thecontrollerwillstarttheself-checkfunction
2>.If everythingisoperatingcorrectly:
a. Noresponsewhenpressing buttons.
b. TheLEDdisplayis: “——“
c. Thecompressorworksandthe “RUN”indicatorlightareonallthetime.
d. Thecondenserandevaporatorfans(Somemodelsdo nothaveevaporatorfan)workatfull
speed
e. Theswitchwhichcontrolsthelightfunctionsnormally
3>.If thecontrolpanelandthevariouscomponentsoftheunitdonotrespondasabove
Checkthefaultypartandrelevantconnection.If thisdoesnotcurethefaultreplacethecontrol
boardsee (Fig.18 &Fig.19)
4>.Ifyoureturnthecontrolpaneltoitsnormalworkingmode,pleasepullouttheplugandplugit
inagain
○Sensorfault
1>.NormallytheLEDtemperaturedisplayshouldtheambienttemperatureshortlyaftertheunit
ispluggedin,ifnot,disassembletheelectricalboxsee (fig18),checkifthesensorplug
marked “XI”“X10”connectedproperly,ifthesconnectionaremadecorrectlyandthefault
persistsreplacethissensoraftertheairductboard(Fig.1,Fig.2,Fig.3,Fig.4&Fig.5).
2>.If theLEDdisplays”E1””E2”,itindicatesthesensor “E1””E2,”shouldbereplacedthe
sensorontheevaporator(Fig.16,Fig.16.1)
3>.Takeoff thescrew(A)andcableclip(Fig.16);
4>.Cutoff thefaultsensor,pleasenotedthatdonotcuttoolongofwire(Fig.16.1);
13
5>. Striptheendsofthewires,cutoftheconnectofnewsensorandstriptheendsofwiresabout
12mm, re-connectthem.
Ensure thiselectricaljointissealedagainstfuturewaterdamage,and iselectricallysafe
Fixthewireinthecorrectpositionusing thecableclipwithscrew(Fig17& Fig17.1)
Fig.17
Fig.17.1
6>.If theLEDdisplays”E3””E4”,it indicatesthesensor “E3””E4,”shouldbereplacedthe
anti-frostsensorundertheevaporator(Thereplacementmethodisassameasbelow)
○Sincethelocation ofsensorontheoldmodelisdifference,checkthesensoras below:
1>.NormallytheLEDtemperaturedisplayshouldtheambienttemperatureshortlyaftertheunit
ispluggedin,ifnot, disassembletheelectricalboxsee (Fig.18&Fig.19), checkifthesensor
plugmarked “XI”connectedproperly,ifthisconnectionismadecorrectlyandthefault
persistsreplacethissensor,
14
2>.If theLEDdisplays”E1”it indicatestheinnersensorshouldbereplacedsee (Fig.18 &
Fig.19) 3>.If theLEDdisplays”E2”itindicatestheinnersensorshouldbereplacedsee (Fig.18&Fig.19)
4>.Forsomeoldermodelswitholdcomputerizedcontrolpanels,If theLEDdisplays37℃,99F
or,infinity,replacesthesensor.See(Fig.18& Fig.19)
○LEDdisplayerror
Replace theelectricaldisplayboardfault; see (Fig.18&Fig.19)
○Howtoremovetheelectricalbox.
1>.Removetheshelves;see (Fig.1,Fig.2,Fig.3,Fig.4)
2>.Removethetwoscrewsatbackofelectricalbox(2,3),thenhalf-removethetwofront
screws(1,4),thenremovetheelectricalbox;see (Fig.18)
Fig.18
3>.Removethesensorfixingscrew(1),unplugtheotherendfrom “X1”housing ofthecontrol
board,andfitanewsenor;see;(Fig19)
4>.Unplugalltheconnecters,thenpresstheheadofeachofthefourplasticscrews(4)oneby
one, thenremovethecontrolboardandreplace thecontrolboardsee (Fig.19)
5>.Removethetwotransformerfixing screwsandreplacethetransformer(6);(Fig.19)
6>.Toreplacingthedisplayboard,
Pullthefour4displaycover(8)fastenersasperarrowheaddirection,andthenremovethe
displayboardanditstwoconnectorsfrombothsides.Replace thedisplayboard.See
(Fig.19)
○Thedismantlementmethod oftheelectricalboxspearpart.
Therearetwotypeofelectricalbox,oldand divideversion.
PCBboardhas twomodes:
mode1 :PCB boardisacompleteblock,andintheelecticialboxofthesameboxwiththe
transformer;(Fig.19)
model2:PCB boarddivideinto2blocks,themainPCB boardisintheelectricalbox(Fig.22),theother
powerPCBboardisintheleftofthecompressor’s box withthetransformer. (Fig.21)
1>.Theoldstructureelectricalremovement.
Unplugall theconnectorsfromthe controlpanel, and pressthe4studs(4)onebyone, andupdrawthecontrolpanel,
Replaceit withthesamemodel’s PCB board; (Fig.19 )
2>.Thedividestructureelectricalremovement.
A.Howtoreplace themainPCB
15
a. Removethetheshelf, (Fig.19)
b.Unplug all theconnector,press the4studs(3)onebyone.UpdrawthecontrolPCBboard,and
drawoffthePCB board, , replaceitwiththesamemodel’sPCBboard.(Fig.19)
Fig.19
Fig.20
DiagramofthemainPCB(Fig.20).
1. TodisplayPCB(connectto8)2. TodisplayPCB(connectto9)
3.To evaporatorsensor (Red)4.Toinnersensor(White)
5.ToLEDlight (White)6.TopowerPCB(White)
7. Toouterfan(Yellow)
B.HowtoreplacethepowerPCB andtransformer.

Other manuals for WI6119

1

Other Caple Wine Cooler manuals

Caple WC177 Manual

Caple

Caple WC177 Manual

Caple WI6119 User manual

Caple

Caple WI6119 User manual

Caple WF1103 User manual

Caple

Caple WF1103 User manual

Caple WC1800 User manual

Caple

Caple WC1800 User manual

Caple JLWF153 User manual

Caple

Caple JLWF153 User manual

Caple WI6225 Manual

Caple

Caple WI6225 Manual

Caple WI6115 User manual

Caple

Caple WI6115 User manual

Caple WI3118 Manual

Caple

Caple WI3118 Manual

Caple WI3120 Manual

Caple

Caple WI3120 Manual

Caple WI6234 User manual

Caple

Caple WI6234 User manual

Caple WF1549 User manual

Caple

Caple WF1549 User manual

Caple WF1102 User manual

Caple

Caple WF1102 User manual

Caple WC6100 User manual

Caple

Caple WC6100 User manual

Caple Wi3115 User manual

Caple

Caple Wi3115 User manual

Caple WC6217 Manual

Caple

Caple WC6217 Manual

Caple Wi6129 User manual

Caple

Caple Wi6129 User manual

Caple WI6115 Manual

Caple

Caple WI6115 Manual

Caple WC6511 User manual

Caple

Caple WC6511 User manual

Caple WC1792 User manual

Caple

Caple WC1792 User manual

Caple WF1550 User manual

Caple

Caple WF1550 User manual

Caple WC6510 User manual

Caple

Caple WC6510 User manual

Caple Wi6223 User manual

Caple

Caple Wi6223 User manual

Caple Wi6128 User manual

Caple

Caple Wi6128 User manual

Caple WCi46B User manual

Caple

Caple WCi46B User manual

Popular Wine Cooler manuals by other brands

GE Monogram ZDWI240 owner's manual

GE

GE Monogram ZDWI240 owner's manual

Haier AWCE50ARS user manual

Haier

Haier AWCE50ARS user manual

Sub-Zero 315W Installation & operation

Sub-Zero

Sub-Zero 315W Installation & operation

Dometic B29G Installation and operating manual

Dometic

Dometic B29G Installation and operating manual

Klarstein BAROSSA 29D manual

Klarstein

Klarstein BAROSSA 29D manual

Rosehill Wine Cellars 6ft Premier Cru Kit Rack Assembly instructions

Rosehill Wine Cellars

Rosehill Wine Cellars 6ft Premier Cru Kit Rack Assembly instructions

Vinotemp 1500SSW Installation instruction

Vinotemp

Vinotemp 1500SSW Installation instruction

Avallon AWC241TDZ user guide

Avallon

Avallon AWC241TDZ user guide

Deni 4910 Instructions for proper use and care

Deni

Deni 4910 Instructions for proper use and care

GE GWS04 Owner's Manual & Installation Instructions

GE

GE GWS04 Owner's Manual & Installation Instructions

Haier AWCE26ARS user manual

Haier

Haier AWCE26ARS user manual

Fulgor Milano FWC 8746 U TC X manual

Fulgor Milano

Fulgor Milano FWC 8746 U TC X manual

Viking Designer DFUW2441CR Dimensions and installation information

Viking

Viking Designer DFUW2441CR Dimensions and installation information

Dometic CS 110 user manual

Dometic

Dometic CS 110 user manual

Eurocave Compact user manual

Eurocave

Eurocave Compact user manual

Haier JC-82G Service manual

Haier

Haier JC-82G Service manual

Summit Professional ALWC15 instruction manual

Summit Professional

Summit Professional ALWC15 instruction manual

New Age HOME BAR Series manual

New Age

New Age HOME BAR Series manual

manuals.online logo
manuals.online logoBrands
  • About & Mission
  • Contact us
  • Privacy Policy
  • Terms and Conditions

Copyright 2025 Manuals.Online. All Rights Reserved.