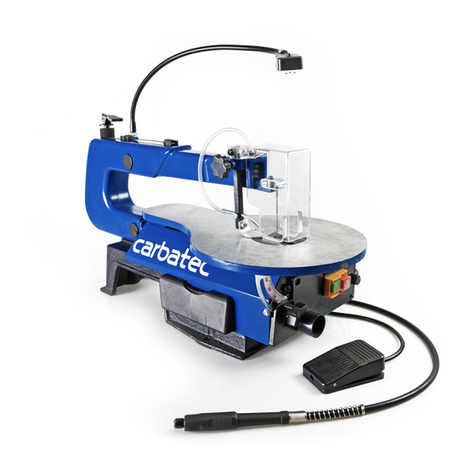
Carbatec SS-400C User manual

WARRANTY
t
OWNERS MANUAL
PROFESSIONAL SCROLL SAW
ss-400c/ss-s30c/ss-760c
carbatec.
c\
5rm

lndex of Contenis
ntrodu.tion & Wa(anty Out ne
Rules For Safe Ope6tion
Electrical Requirements
ldentification ofA4ain Parts & components
lnstallaton &A$emby
Choosinq & innallinq a Saw B ade 9, t0
]!laintenance, Adju(ments& 5eru c nq 11,1]lL
t4 t5
15
55 5400C Exploded Diagram/Pans List (A)
15
16,17
S5-s30C Exploded Dia96m/Patu List {B) 18, t9
SS'760C Exploded
Wning Diagram
23,21,25
26,21
lntroduction & Warranty Outline
THAN K YOU for purcha,ins the carbatec modetss 400c,
SS-530C or S5-760C scroll5aw.Thi5 scroll5aw has been (arefully tested
and inspected before shipment and if properly used and maintained,
will provide you with years of reliable sewice. To ensure optimum
performance and trouble free operatjon, and to get the most from
your investment, please take the time to read this manual before
assembling, installing and operating the unit
The manual's purpose is to fumilia se you with the safe operation,
basic function, and features of this scroll saw as well as the set-up,
maintenance and identifrcauon of ts pads and components. Ths
manua s not intended as d substtute for formal woodworkng
instruction, nortoofferthe user lnnruction n th€ craft of woodworklnq.
lfyou are not sure aboutthe safety of pedormlng a certain operation or
procedure, do not proceed untilyou can confrm, from know€dqeab e
and quali6ed sources,that it is 5afe to do so.
Once you've read throuqh thes€ nstructionr, keep this manua handy
A .ompon.ntpart\ofthecebarc.soo saw(dstrbuted n Austml a & New Terand
by[,lar s D nribution Pry Ltd], e.arelu ytened and nsp..r.d dur n9 ar naga\
of producron,andea.nunr sthoroughy nspe.tedup.n.ompetonolN.mby
Be.aus.oloor.ommitm.nltoqua lyand.unomeritnelon Marragreer(o
rep: ror rcp a.. wih n a p.iod ofl y. s lrom date.f pu(hd., anygeiuine part
or pat!whi.h, upon exam nat on, prov. to ba d.iedv. in w.rkmansh p or marerla
n orderlo obta n th s waiirhV, a deled vo pans mun be returned to Maris Repa 6
atlompt.d wllhout our wr tten author stion w I void th swatranty D scla neiThe
inlormation and sp..i6.ations n thk manua p.rta nlothe unll as it wd supp ed from
the ladoryand atthe time olpr nting. Eecause wearecomn tled to nak nq connant
improvemenis Maxir resetoer th. r qhtio male.hanqerto.omponents, pans or
jeatures ofth s un tas deem.d ne.esary,w thoui prio' not.e and wihout ob 9at on
to nsta any5u.h.hanqesonprevio$yd. ver€dunits.Reasonable.rr.istak.nat
the fadoryto.nsure that the sp..6.al onr and inlo'mation nihismanua .orespondr
withthatof theuniwihwh.h iwassuppied Noweve''afteria.iory'modifi.aton!
mayrenderrom.orai nlomation nthkm.nualinappl.abetoyourunt Further,
dseveralgeneraiionsotthi\(rol $wandsevemlveEonsoithsmanualmaybe
n.r.ulation,if youownanearisor atervatronof thkunit,thsmanua maynot
depi.tyour un t exa.ily iyouhaveanydoubtlorqueslons.otrtadyourretarerorour
supporr ine with the mode and\era numbe'ofy.ur!nti.r.arh.alon
Copyright O Maxis Dislribution Pty Ltd. All rights
without the express written permission of lraxis reserved. This publication may not be reproduced in part or whole
Distribution Pty Ltd.
A wa rn i n g ffi'[llii:]il:f;'::'n"'* trrow the correct saretv procedures
2
24,21
22

Rules for Safe Operation
To help ensure safe operation, please take a moment to learn the machine's
applications and Iimitations, as well as potential hazards. Maxis Distribution pty
Ltd, or its authorised resellers, disclaim any real or implied warranty and is not liable for
any injury that may result from the improper use of its equipment.
r 8e sure to read, understand and fo c,/' a saiet] $arn nqi and
instru.t ons n the suppleo Opefatori ii.nua
2. Do not operate the raw \!ir:r i r.d dii:.ect:. o. !rr.er rre
effects of drugs, a coho o' any mEa cailor trat rpa rj rE:l.x.j
or alertnels. Stay a ert 6 ve your r,crk yoL-r !nC ! .ed r:i3nt r.
3 Keepthe work area wel lt,ceanandfreeofdebrs.CLrfte..!
areas and benches nvte njurler.
a. Keep.hi dren and shop visltors at a safe distance while
operating the saw;do not permitthem to operate the scro lsaw.
t Childproofand tamper proofyour shop and all machlnery
with o.kr, master electr ca swtchesand switch keys, to prevent
unauthorised or !nsuperviled use. Fine partic!late dust is a
carcinogen that can be hazardoui to health Work in a well
ventiated area and use a dult colle.tor whenever pols b e.
7 Wearapproved safety qlasses, dust maskand nonskld
footwear. Do not wear oose c oth ng, gloves, bracelets, necklaces
orlewellery while operating the saw. Keep long hair contained by
wearing protect ve hair coverlng.
3 Be sure a I adlustment too 1, wrenches or other
.lutter are rernoved from the mach ne and/orth€ table surface
before operation. When not in ure, tools should be locked-up
in a dry place,outofch dr€nt reach and aw.y from flammabl€
e Keep hands weLlawayfrom saw b ade and a lmovtng parts.
Use a brush, not hands, to .lear away chips and sawdust.
ro Be sure that the law b ade is properly insta led, and in the
correctcutting direct on, before operat on. Always use a clean,
properysharpened blade.Dirtyordul biad€sareunsafeandcan
lead to accidents. Aiso, be sure the blade has gained full operaiinq
speed before b€g nring to cut.
rr Donotpu5horforcewood nto the b ade. The raw w ll peform
betterand more s.fe y',,r'hen work ng at ihe rare for wh ch i was
des gned. Do not us€ for pLrrposes noi ntended
r2 Avo d work ng from awkward oroffbalance pos tions. Do not
overrea.h while cuttinq; keep both feet on floor. Ne
or rea.h behind the blade and never pull the work p ecethrouqh
the cut from behind.
-l N€vernandor eanonthesaw.Seriousinlurycoudoccurif the
Jri !:ppedoverorif thebadeis!nlntentionallycontacted.
: Ls. ci pa(s and a..€5!or es NOT recomirended by lllaxis
Dlnr 5ut oi -a!:e5u i n equ pment malfunction orrskofinjury.
rs. N€ver leave the ma.h ne unatiended wh le runn ng or wtth
the power "ON .
r6. Always turn offand di!.onnect from power source before
serv.ing or changing ac.essor es, blades, bits, and .Lrtters, or
before performing any maintenance or adjustmenti.
r7 lMake sure that swit.h ls in the 'OFF" position before plLrgging
n the power cord. Do not use the saw ifthe power switch is
defe.ted, have defe.tlve switches replaced by an authorized
r3 Make sure saw s properly grounded.lfequipped with a three
prong piug it should be used wth a thr€e po e receptacie. Never
remove the third prong. Avoid body contact with grounded
surfaces (e.9. pipe!, radiators, stoves, refr qeratorr).
re. Repairs to the saw should only be carrled olt by qua i6ed
peop e using orlginal spare parts. A guard or other damaged p.
should b€ propery repa red or r€placed by an author zed servt.€
20 ln5pect power cords and extenslon wires perlodicai y f
damaged, havethem repaired by an autho.zeciserv ce fac lity.
Never yank cords and wires and keep a,{a! from heat, oi , and
2r.Thls too is for indoor Lrs. or t, D. rci expose to rain or ur€
ln rvet or danro o.:i or:
3

Safety lnstructions
Additional Safety Instnuctions
Specific to this Seroll Siarry
Becouse eoch shop snuotio^ is unique, 60 list oi solety guid€lin.s c(rn eve. be comptete.
The most importonl salety leoture in ony shop is ,he knowtedEe ond qood ju<tgemeri ot the use.
Use common sense on.l olwoys keep sorety conslcterotions, 6s they bppty td your tndividuot shop sitlotion rirt
dnd loremost in mind. ll you hove ony doubts obout tne sotety of on opercrion you cie oboul lo
pedo(m; SIOP! Do nol perlorm the operotlon qotil you hove volidoted lrom quolllled lndtvlduols
i, ihe operotion is sote io pertorm ond whot is the soiest method to pertorm il,
3
5.
I
7.
8. 17
Moterio ho d-down musl be properly set cinil
remoin in poslion dur ng use.
Neve..eoch under the lobie when ope.oling or
mcke cny .rc ushenis khiie the scro sor s run
ilng
Se.ure':e :.! a]- : o-.os .r
To..'-c ro'4,.,e
'{here pcssrb e -rse. c.rlps cr c ! ce io secure yoLrr
,oikpec€ h is soleril-ron !s ng youi hond.
Oo noi lin o. corry the sow by the upper orm.
Moke su.e blode iensron s properly ocljusied.
Avold owkword honcl posiiionswhere o sudden slip
could couse o hond io move inlo the sow b ode
Do noiploce fingers or hcrnds inlhe poth olthesow
wher remov ng shorl workpieces, or cleoning up
oround ihe loble, be sura thol lhe swilch rs ln lhe
OFF posilion and ihoi ihe blode hos come to o
Never lurn ihe sow ON be,ore moking sure thoi the
ioble s c eor except lor the workpiece ond reloied
ieed or suppo dev ces lor lhe cperoiion p onned.
I l. Do noJ ottempt io sow stock ihst does nol hove o
llol surtoce unless q suitsb e supporl is used.
12. Iurn afi m.ior i The moier o ressis be ng bocked
rL- op'o'e spr eo
'cr oc3lcci c.s
: CAIIT Ol.l Scne wood .cnro.s p.eservoiiles such
cs copper chrom um orsenole (CCA) which con
be ioxic When cunng ihese moleriols. enro core
shou d be loken to ovo d inholotion ond 10 mini
mlze sk n conloct.
Aways use o dusl mosk ond solery glosses when
sowlng.
(eep guords ln ploce ond in wo.klng order
Moke sure your fingec do nol conlcrcilhe lermino s
ol ihe power cord pltrg when pl'rqgng n or
unplugg ng the sow.
Never overleed or rorce work nto the blode
_r6(l 'or oliq.nen' o'o br.ciing o, orl -no/i-g
porls broken pods, mouniinq ond ony olher con-
dilions ihoi moy ofleciihe sows operolion.
(66p hond es dry o.d tee irom oirond greose
)4
15.
16.
18.
19.
lU Check lor proper blode slze ond lype
Io dvold elockiccl $hock, .cure mochine ls proporly groun l€d- Do not opsote in .lomp @nditioos. Oi.comet
lDm po*g slaply boaoro sorvioing. loploco luso wilh fh6 .ome type od roting only - 5 Anp.
B€ suro to r@d ond ondorstond owrer! monucl betoro op6r.ilng.
4

Electrical Requirements
Belore conno.ling th6 hochineto the power source, v6rity thoilho vottoge oryour powersuppty cotrospond. wiih
tho votloge rpecilied or lhe motor l.D- nomoplote.A powor soorce wilh greoter vottog. thon hoaded con r.sutt io
reriousinjury io rh€ us€r or w€llas domogo to the mochino- tt in doubti contdcl o quotined eloctrcion b6to.e cos
necli.g 1o Jhe powsr source,
lhis tool is lor indoor use only, Do not expose lo roi. o, !56 in wet or dohp tocotions.
6POUNpTNGjNSIE!C!rolti
ln the event oJ on eleclricol mo iu.rci or trr shor, circu t. groun,:1rnS
reduces lhe isk o, elecnic sirock The moic, .l inis mcch .e is *l:ed
iorSov singie Dhase oDeicion enc s eoLr opea wiir c I .o,id!c
1of coi.l ona c ! Dicn? gror..ed p !9,. i1 . 9ro!n.e! rype :ccep,
rce @
Nole: fhe use ot oD odoprot plug is illegal in sone drcns- Chack
DO NOT MODIFY THE PLUG PROVIDED
lf il wrll noi ft your recepioc e hove the proper re.epiocLe insiolled
o
by o qudiiiied etechicion
CHEC( wlih o quo iiied elecir c an or service pereon i, you.lc nor conrplelery undersiond i.es6 gro!ndi.g insiruc,
iions or f you ore noi sure lhe iool s propory grounded
EXTENSION OqXpJ
US! ONLY 3 WIRE ET'ENSION COI?DSTHAT HAVE 3-PRONG GROUNDING PLUGS AND 3,POLE RECEPTACLESTIAT ACCEPT
IHE TOOLS' PLUG, REPA]R OR REPLACE A DAMAGED OR WORN POWER CORD OR PLUG IMMEDIATELY
lf r'ou lind il necessorv 1o use on exiansion cord wilh yolr moch ne moke slre the cord roling is suirobje ior iho
.rmperoge isled on ihe moior lD. pole An undersrzed cord wil couse o drop in tine votlege resultng in toss ii
cower ana o!erieoiing.
5

o
o
ID
o
@
o
o
0
6
o
o
o
@
o
o
@
o
VARIABTE BLADE SPEED CONIROL KNOB
ONIOFF SWICH
UPPER ARM IENSIONER
BTADE CTAMP
BLADE
WORKPIECE HOLD DOWN
TABLE
BTADE NLI LOCKING TEVER
TILT HANDLE
ANGLE INDICATOR
ANGLE ADJUSIMENI SCALE
MOUNTTNG HOLES (4)
BLOWEP
UPPER ARM
MOTOR
BLADE TENSION LEVER
ON'OFF Rocher Switch (A)
Speed Contro D at (B)
NVR power isolating switch
?
G-...-i

Unpacking & Set Up
uxmcnxS
CorerLJ y unpock ond remove ihe scroll sow crnd its componenis lrom ihe box ond cne.k ror missig oi domoqed
iiems os per tne sr or conlenls below
Once the po s hove been removed liom lhe
pockogrng, you snould hove the loilow ng llerns:
ll$0IC0llIU!$ otr
A - SCROLL SAW ... ... .. ... ...1
I - powER coRD (attached) ......... .. ....... .. . .. ....r
C.3 MM ALLEN KEY. .,..,.,,.,, .,,, ,,,,,,, ,,,.,,, ,,,.,,, ,,.. ,, ,,,]
D- 81ADE................................................... .... .. ..1
E
lnstallation & Assembly
Unsciew ihe 4 shipplng boils ond removo ihe sow lrcm the protocllve plwvood shipping bose. For yoirr conven-
ience ihs scro sow ls shippednom th€ ioctory Do.llolly ossembed ond reqlires ony m nimoiosembryond sei
up belore bei.g pul inJo serv.e
B6tor€ ilorling lhe o$embly) mqk6 *r. thot th6 sitch is i. lh. "Oll" porilio. .nd lhdt iho powe.
cord i5 unpluggod. D6 trol pllg in o, turn .n the scroll so, until you hovo complst€d ihe .r.ombly
o.d instdllorion st6ps doscribed in this ssction of tho monuol.
rhe r-.s.).ooa ..,) o I .-
sloble s'r.ioce cble io sLpccr 'he lre.gni oil.e
moch ne ind ihe wo.kp ece w,l. eose
l'lever lns'ol lre mcchine over,he edge oiotobl6
7
el".-::":
+:iq
!..j'11-:1
- 1--

saw _o ua rd assemb v
Choosing & lnstalling a Saw Blade
t snronq y re.ommended that you mountthema.h netoaworkben.h or to
a purpose bu h stand, a pad bexveen the s.ro lswand the workb.n.h^rand
is aho re.ommended to redu.€ v bDt on
Dri I four 8mm holes in your workbench/stand and se.ure us nq
nuts bo ts washers (Not lncluded).
sotthequarddamplngam(dlihroughth.pre.di edhole nthehexaqoncamp(.).lnse'tihehexaqon
.lamp ra into the bra.keis h.ragon r..cs, p ace the washer (b)overthe hexagon damprhread and re.ur€
usinq the bufterny. amping knob (al
NOTE: DO NOT OVERTGHTEN othee se you may str p the lhread
NVR Switch assemblv
A power NVR switch has
been attach€d to isolate the
scrollsaw while not in use,
The green light indicates
mains power is connected,
. Plug the uhit in to mains
power, tum on then press
the 'GREEN', butron {Al to
put power to the sErollsaw,
. Ensure the speed dial
setting is on dow, then
press the rocker switch {B}
to 'ON' - setting 'l' to start
. Once operation has
been completed, press
the rocker switch {B} to
setting 'O' OFF, followed by
the scroll saws NVR power
using the'RED' button {C}.
glode Seleclion
Slode selec o'r is depe^oeni on ihe Vpe ond lhlckness ofihe moreriolbei.g cd, bul is olso o molter o, experience
ono personol prete'ance. Ihere o e rLmerous rypes oi blodes o,/orlobl€ oi lhe morkel specifrcoily sulleo lor vori-
ous cutling opplicoilons such os metol-cuftlng ond sprrol blodes which cut in oll direcilons. Tly test-culilng wilh o
sompl€ ot eoch lo oe'er-rrre *h,ch b,ode works b6st for you wdr.dfEre{ "noierlols. Repocemeni ond speclohy
blodes con be pulchosed itor. o vorieiv ol sources, Ask your locol lool or scroll sow oeoler for sJggesllors for
unolnnod 5" scloll sow blod6. oosed oh waot is ovolloble in vour o,eo
8
Sawgua.d a$embly (d)as€mb ed
Mounling lo o work surloce
ru M

Choosing & lnstalling a Saw Blade
Sonre genero gu de .es io consider whe. crooslng biodes
' Wde ih.k b odes wlh coorse ieelh ore suiled io cLrtr.,g stro ghl lrnes.nd swee.,ng .ur!es,:ui witLno urn
ilght !orne6. TheV wr culJggreslve!o..lleoveci.lrysnroathinhh.DLrmcyr.3!ebJrnmorksilthework
p e.e . iu.ed roo ighll\
' Nono,eril,:rnerbocieswlhrinerteelhwl :!tmorenowyburwLt rurnmJ..rgrre cc.re6tor cuiiinq very
-l''lp r .[ Tl e, w: 1 p r.] o .6.. s. oo,. D...rs..eu r.f h t-o..eq-,e.. o so. -. cr
'Ca.sid.rmoie.joihcknessw|enseectngblodesEnsurethoio.r.nrmLr.notiwccri::reejee:hlretncor
locl w ih lhe workpieee oi ol ilmes. For exomple, lrhen culiing i/8' injck moierioL Lrse c 3 oce wjrh o m ni,
mirrr oa o1 l5 2C leetr per inch
Regulor evenly spoced rooih pol1ern. Cons dered lhe mosi common oi scroL sow b cdes, i.rey o!e o!o(obte .
!r'idesl ronge ot sizes ond provicie o good combrnoto. ol iosi culitng ocnon wiih gooo cn p c ecronce on.t a I
1ve v smooih fnish.
BLADE wlDiH THtC(NaSS
,2/0 422 .0tc 28 Fo, exirernely inlricote sowlng Very iight cuis in I /16 -
l/4'wood veneer plosllc, hord rubber, peor eic
s0 424 .0ll 2a
#2 029 012 2X For lighl rodiLrs work wlh thin mcrler als 3/32 - l/2'
wood veneer wood. bone liber, ploslic e,c
035 .015 r5
*5 038 .0t6 12.5 For closo 'odlus work in moJenols l/8" or thickeL Good
u) .0t6 r2.5 ror scwrng harjl ond sofl woods bone horn ploslic. elc
045 .0t7 r t.5
.053 .0r8 lt.5 Populor sizes ro: culiing hor.l ond soli woods 3ll6'up
lo 2' Also culs Dlasiic paper ieli, bone et.
.a59 0t9 9.s
!12 .aa2 9.5
r4*L
Rev6re6l6oth otthB botom ofth€ blodes orovert
spllnt€rnO to the !noeNide ol jhe workp 6ce
BLADT WIDTH THICKNESS IEEIH/INCI sqme
Skip loolh
*2/0R 026 0ll 28/20
*2P 029 a)2 2A/13
,5R .038 .016 )2.5t9
049 018 f 5/8
.054 .019 I ] 5/8
*t2P .ob2 .t62 9.5/b
Fos'. c aan cuting ond very efficent cnip ceoronce
WIDTH IEETH/INCH Some
Skip Toolh
,t]D .026 0t3 30
93D .032 .0t4 23
*5D .038 .0t6 t6
+to .444 .0t8 l3
!53 !t8 ll
112D .06t .o22 t0
9
st(P
REVERSE TOOTH DOUBTE TOOIH

Choosing & lnstalling a Saw Blade
Il:lslllg g!!is!g!!g blodes
Al{oys turn o( otrd untlqg tbo mdchtns bolor6 removi.g! hoF
dring or chqnging blqd.s.
t.
2
3.
Remov$ crn insiolled worn or broken brcae .'. i pping 1ne biode 1en-
- .' e 'e ovo'o /oo.ihono h" o:e . - , ' .-, ""'O"1c
Glo-t.-ooe onci o*";.oo"-J. "O,1€ .--, : to,'
Wiih the blode teeth locing torrord slip o.e e^d .1 'ne b cce rhrolgh
lhe hoe in ihe loble ond ii eoch e.c ci il'e c ode rr. ihe.o espoG
.ling upper ond lcwer blode mc!.\ 'he^ llg.re. 're ihumbsclews
lirrn v by hond only .lo nol Jse roc s
ole: Ovedghlantng lho b1o<16 clomp lhumt\*te|9s @n cdue pt. dlue
|'et ,o tlb biocLs qipplDq tuioce o.d t*ud h blode slippoge-
tush iho b ode iensron e,e'.rc{ '..s1.€l ...c'lensrcn.nrhe
s. Tighien grub screw O io adil]sl far any s acK n the b ade mount. i
req!ired Do no1 over t ghienl
Helplul Hinls on btode tehsion -al.'-.... .ot,ecl 5icde re.si.! :s scmewioi sib/e./ive tl is ieatned lhrcugh
e:Eerie.ce ond i r.nleir:c: ie3e.c..:.. persc.,ct ceietenc-. A pop.tif i-ahsioned Diode flill iosl la.get ond
be rnu.n less iif'e r r. D e.< pter.t,t.tt ii f,he t!/.oe :erslon ls ioo loose, for v/ll na ce lhol lhe blcde will have o
lenoenc/ ro o.r]; cr sri. o'-ri.e wnen .irlii.g on.1 you ma/ olso expetience excestve vibtolion ot unusual naise. A
blcde thoi ts l.o ighl'till aeaK ptencltrcly
Assai,ing the atade has been prcpetiy iuslalled in the blode noDnts. \ hen lhe blsde lensian levet is pushed lully
back iot/otds tne rcat olthe sow, ltle blode shauld be ptope y lensioned.
TeEr lhe b o.i€ iension by ljghily pluck ng on ihe b ode, like you woulcl o gunor siring w lh your f nger' !f ihe blode is
iighi ond lensloned correciy you wil get o cleor ond even nole, ll so. you c,re reody to proceod to operoting
ond cLrlilng wilh the sow.
8r/off swilch
A slmpe, dusi prclected ,ocl<6r srls on/of swrich O s ocoied on the top
,.tih6 sow. (See F g 5)
Adiusting lhe blo*'_s!CcC
This ScrollSow s equipped wnh o vo ,rble Dlode spoeci connoiwhrch
c ows you io se ect or line-iune 1o ihe exaci blcde spee.l iequned (lrom
40111550 snokes per m .ule) for tesi resrits bosed cn ihe tYpe ond lh ck
ness of moier cl ond iype ol b ode berng Lsec
The blode speed conho krc. O s rocoiod on the iop otihe rno.hlne.
(see Flq 5)
. To increose biode s5eed hJrr hlelronirol knob clockwise.
'lc dei:reose bloce speed |Jn,ie.onlto knob cou.le. cockwise
{,;rli,tlill I r i: I l,; crl it r:i
Blo.ie spood selecllofl is subjeciive ond is dependori on o voiiety oi foclols: lype ond lh cknass oi mderiol being
cLrt,lype of blode belng used leed role reqL;rred Jinish quolltyos welLos exper enc6, persotol prelerence oncicom'
lod leveloilhe user There ore no hord d.d tosl rules.8e poiia i - prociiceond exper erce willb.a your beslieoeher
Here ore some generol guidelines io co.,sider when selecllng/odjusijng blode sp€e.l:
. Fo. besl res.rlls ond smoolhesi mcd emcleni cufling, olwoys selecl lhe highesi b ode speed llroi yoLr dre comfori
oble usinq bosed on your expeiience snd skil level.
' Generoiiy sp€oking, horcler or denser workpiece n]oieriol requires slower blode speeds,
. Slower speeds olso work beiler vliih very lhin blcrdes, or when culting mosl motols os well os toi bliliie or clelicote
moierloislci os fine venears.
. Some wood species wlll hove o iendency io burn quicker ot higher blode spoeds. To ovoid .r.ldilionol sonding
loi6r, reduce blscle speed ond feed speod atihe firsl siqns or burn morks on lhe workpiece.
10

Operating lnstructions
ACjusting liqqlatryc!
This Scrolsaw s equipped wilh o buiri-in blcwer lo help cleor cuning
ciusj fiom ihe workpiece surrace ln ironi orlhe blode ond on ony
qo -y,". o,o"..r,"eGl1. r6Foeo to oo., Jhr
. orta o. ,ae trLode to ser .t o. o , onfoiiob - di),o, ce ,c or nol To
oDsrrLr.l your hond movement os you work (See Fig 6)
l{orkp_-ieee H6ld"Down
Tne workpece holdrlownO(See tlg.6) cd lrB odjusted io osshi
. prevenling tne hlocje lrom lifling the workDtece up trom the
iooie our ng the c!i. lcosen lhe thur-nbscrewOlo sel the heighj
io your convenience bose.l oi the ihrckness-I the workptece
Belore culiing tesi to n1oke su.o ihoi ihe hoJ.j{own is noi odjusl,
e<l too iiglrtly lo ihe workpiece or thoi ri obsiru.is the movement
Adiustino the Oscillation (Front to Back)
P ace a 90'square upaq.inst the back ofthe blade. The
blade movement can be set between course and fine for
different cutt n9 task!.This can be adjusted by rotating the
motor withln its'mounts. Loosen the motor mounting .ap
head bolts, (F I A) enough to be able to rotate the motor
this can be quite stiflto turn. Stad the machine and run at
approximately l/4 sp€ed. By rotating the motor, (F q Bl and
carefully observing the blade you wi be ab e to 5ee ih-"
bLade chanqing its setting. The frnest setting is where the
b ade moves verti.al y with the least amouni o: mo!.ner:
ba(kward.nd forwards horzonta y iFg Cr Th s shou d 3 so
be wher€ th€ machin€ vibraiEs rhe east U/hen yoL h.!E
the setting where you wish il to be, re-t ghten the moior
mouniinq bolts.
Top & Bottom Blade holder Alionment
fthe blade is ouiofaliqnment p easefo o!!the procedure
be ow for adjulting ihe top and bottom b ade ho ders
Placea90 squareupaqa n:iihesideof theblade(FigA).
Uting a 4mm Hex key la adt!si ihe grub screw and butterfly
nlt ibl unti ihe b iie s parai . w th the square (Flg B).
isee Fr! a and I for d:ta led exar.p es).
'11

Sosic 90' slroighi or curved cuis
n;l .!1s moC6 wlh lhe biode ol90' io lhe ioble foliow the some bosrc principols Stori by no,king or lronslefi!nq
'' e" onto you wo kpiece
Nate: fhe SS-76AC has a 760nh thoat that allows lot a watkpiece al up ta 76ohh ta swing ampletely arcund without hiding lhe back
ol the saw 1l necessary, ptease rcugh cut yaut wotkpiee dawh to a watuable size beforc stadng any intbate wotu on the scrcll sa\|
This ptacrce alsa applies to the SS 4AAC and SS $aC
I Wiih lhe sow iurned cf onc unpugged. nslol the opproprole blode for
lhe lype or mder ollo be cui ond the Vpe cf cu,l to be mode (Rerorlo lhe
secllon Choosrng onc Lnsiolling o Sow B o.ie on page 9)
2. Aolusilhe w.rkpiece hol.l-lown ond:he bower no-eloyour ikog
3. lurn or lhe sow ond sel the speed coniro e' io ihe das fec . c.le
,1 ',Vlih tolr lingers hol.l .g lhe p e.e t'l.m ro lhe Toble, onc us ng yoLr
ihL,mbs for direcj o.ol corlrc , (See - g 17 & 8) reed the workpiece
1to.16ooc6 .l rQoo, -,6 l.-, j.
5. !4oke sure ih.l'4e b cce is cL.rnlnq on _he !/csre s de cr yorf ,efer
ence inecn. cdtLsr.eecdreclons ghlv.snee.ledro.ompensole
Clnidg Tips: To sloy in conttol on lighl cutve culs, slow clown yout
leed tale os neadad lo dllow the bla.le teeth lime lo moke lhe cul"
Avoid .aming lo o cohplele stop whenevet possible ds lhis cdn
ledre butn motks on lhe wotkpiece dn.! olso fiokes it more clifiicult
to gel the piec6 @lloded oncl moving through lhe cul dgdin. Avoicl
torcing lhtough a cuHe cul os ftis con co{rse lfie bldde lo twisl ond
cut ofl-hdck ot .ndy even cduse lhe bldcle to breck.
fre! !)uir!g
i:relor nsdecuiiing son operaiion thd .on oiry be pertormed on o scro lsow. Frelculilng lnvoves driliingqsmoll
guide or piol hoLe ihrough ihe nierior ot your potien\ on lte workp ece,lhen dlsconnecllng one end of the blode
which s iitted lhrough lhe guioe ho e ond re conn€cled essenl oly usLng ihrs gLride ho e os the sloriing poini fo c'rl
oul lhe plece nom wlhin A rypiccl erompe ol frei cuning woulcl be remov ng,he cenler port on or e11erin9.6ee
F!9 9)
iThis scroll saw is a greai too lor lret cuttinq, because, unlike mosl scro I saws il
ollows you lo rohe the uppei c.m wlh lhe blode olloched ne rpiile gur.le
hoe nyoLrrworkplecewlilhehoe n lhe iob e ond ihen lower ihe orm
whie gulC n9 jhe blode lhrough the ho e from obove Gee slep by slep
jnslruc'ons below) Th s c.n be o very uselLllrnre sovrnq reaiule, pori culots
l!,1or nii,cale or comp ex ftei ciesigns thor con irvorve clozens or even hun
Ndle: fho upper ot6locks t^ ploce in the @ised posllion lot edsiet in@dioo ol lho
bla.le thrcugh the hote iD the wotkpia.o and lot oosiot blod. chonges.
L
2.
Wih ihe so.,r i!rned oif ond unplugged, i.'stoi the oppropr ole blode
lo: ihe ty3e ol moreriol to be cui ond lre lype or cui io be mode
(Reler lo ile secUon "Choosing ond lnsto li:g o Sow B ode'on poge
with your poliern or desgn lronsfe(ed onl. the workpiece dril a
gu de r-o e nthe ns de wosle pcrilo. orlhe workpiece. (See Eig. I0)
lvloke s!'e lhol lhe nole s lorge enough lor ihe b ode 1o fl ihrough.
Helplul hhts od rtfling guide holes: f mufiipte |rc, cuts cue tequite.l
ot1the some wo*plece, chi dl ol yoqr Iequirecl guide holes belore
ldkihg lhe wo*plece to lho sctoll sow. fhis will keep you lrcm g.ing
back dn<l lot h lbm lhe scrw to ,he clill press.
Io ptolong bldcle lito by limiling u,necessory cuning, clril yout 9t i.te
,tor6a ds cro36 a3 possrbre ta you rclebncd llnes" (see Fig. I l) WEIEOME
12

3.
4
5.
1.
8.
Reieose iension on the blocle by rlipping the blode ienson lever toMord
ioosen lhe thumbscrew on ihe lower blode rnounl loco,red 'rnder ihe iob,te. to ret€ose lire btode trom t.e -c--.
Ro se ,he upper orm ossembly which wi I ifl lhe blode irp ihrouoh lhe hole ond obove the lobie
Pcslirol] lhe wo.kpiece on lhe tobe so ihol ihe guide hole lines up wilrr the hole ln ihe toble
L.wer ihe orm o$embly wlih one hond while guiding tho btode inrough the hole tn the workpiece ond tob e
Re-insioliihe boiiom end ofihe blode in ihe lower blode mouniond lighien Jhe lhurn bscrow lo secure the biode
n ihe lowe. b,ode mouni
9 Fip bock ihe Olode lenslon rever to re1ensbn lhe blode ond test ihe blode tension as clescribed r
'tnstolling or Chonqinq Biodes"seciion of lhis monuol.
l!. To begin cLrfling loiow the some sreps os clescrlbed in 'Boslc 90' shoighl or curved cuis' section on poge 9 of
A ro .ou* ttre ri"x ot lnjury, olwcy5 turn off iho sow .nd titroil lor ihe btode to come to o complolo ttop belo.e
l:\ r6ochinS in to romovo mste moterldl irom o lEt cut-
Anole or BevelCulling
One of lhe unique reotures ol these three modelscroll saws, islhe ob lily io
tiil the heocl o,lhe sow n order lo moke ongle o, beveL cuis. The iobie ond
lhe workpiece olwoys stoy horizonto (porollel lo the floor) whiie ihe btode
lilts. keeplng your honds in the some comroriobe cuiiing position os
they woulcl normo y be lor regu or rlghl ongle culs. Becolse you 016
notfiohtinq qrovilv oiworkins wlh your hon.ls orwrisls benJln owkword
posllons,ll co. be o hLrge odvonioge ond mokes ii eosierond sore.to
moke occurole bevel cuh
The blode lrli conlro s ore locoied lrnder the toble al lhe troni sow. asee
Flq.l2)
Io lili lhe blode Jor beve cLril ng:
l. Releose the locking lerer@Oy irrn ng ""rnrerclockwise
2 Turn the i I ng hond € Olefl or rlghi 1o sei lhe blode io lne desired
N.te: Ptsh in ond hotd lhe sptinE l@.\e.! h<lexing pin lDro tocote the toL
towhg common ongles:90",45'.30'A 22.s'both teft -o.l ghl,
When ri$ing lh6 bloda to lh6 l6lt ot ext.eme angl€6 il fioy be nacassory
,o omove dn.l reve/se tha lower bldda noud, thumb.cbw cssembty in
ot.,et lo mcxlmlzo clddrdnco un.rat ,he ldble. (lig. 13 shows tha lowe.
bto.to mount in cletuun positon dnct lig. 14.ttow it rcv66e.l,
fo ovoid kinkinc ot .lonoohd the bla<le ln the hol<ter. wh.n hdk,^d
odt|lJtnenh mdTe .urc theleiscrcw @toppos'ta the thinbscbw Gl) it
tht€octed in to ,he hotd.r to ptohu.le sliqhllv b.yoh.l lhe blcde slol
O.6ee Fis. tst
3 lighien ihe locking everOlo secure lhe bLode ol lhe .iesked ongle.
d To begrn cufling lolow lhe sorne sleps as dssc.ibed rn "Bosic 90'
strolghl or curved cuts' section on poge ll ot lhis monuol Fig 16
shows lhe sc.ollsow in posluon for bevelcuti.g
To reduco tho rl* ol Inlury, olwoys lurn o,f the sow ond won ior th€
blorl€ lo com6 io o completo stop beloro reachlng ln to romovB wost6
13

Maintenance, Adjustments & Servicing
Hondlind
C,,\LITI()N
SD I.{ilT IIFT SA\1/ EY TI{E U}FNN,{.RM"
LITTN{G
PNTNT __i e-dom T
\ -,.\} tIF'TING
PAINT
a
tr
itthe Oiode cngle ,equires odj'rsimenl loosen the 4 bolts
' 'l e'orrrJ-'.r' Clus^" rat,^aoo,'or rnerco'
By hond, movethe entne heod 1o brinq lhe bldde squore
wth lhe blode squore to lne iable hold ihe heod ir' posi'
iion ond reiighten lhe bolls on ihe ironi ond rear tiLrn-
0
H
!4-sufeosree
" Alwoys reLsose t€nsion or the b oale wnen lhe sow is nai
' Cieon ihe sow regulor y w lh a soli brisi o b:ush or by voc
Lrrmlng io keep cuiilng clusi fiom occurnuloring.
. An occosionol opplicolion of o light dob o, greos€ cr
ihe nont ond reor irunnions (See Fig l7) wi I keep the i li,
ing mechonlsm working smootlrly. li you ,ind lhe i liing
mechonism becoming rnore diffcuh 10 cperoro th.rts
oughly wrpe otf ony bu ilt-up .uning .l usl on lh6 irunnions
ond re'opply o Lilile greose
. Ihe bedrings in the drve mechonlsrn oreseqled ond por-
monently uD.icoled ond do ioi reecl io be oiled or
iclorirls liqblade telhqtsble
Depend ng on iiequency or use ond how much the iilling
mechonism ls usecl, normol weor will over rlme co'rse ihe
blode io come sLighiy our or olignmenl wlh ihe iobie
Peiodicolly chec k ihe blocle is squore wiii the toble. Wher
needed, odju6l os described In ihe i.oiiowrng sieps io re
olign the blade squore to the lobLe
L Turn o( ond unp ug lne sdw
2 Using lne biorle iit cornols {l lhe fronl ot lhe sow set lhe
bode ongle io reod 0 -whlch h 90'verl co to ihe lob e
3 Sel c mochinisis squoro on ihe iobe ond ogoinsl the
D o.le io veiry ihe b ode angle. (See Fig. r8)
14

Maintenance, Ad ustments & Servicin
t poer orm lension odiuslmen!
O/a' 'i"o o.d *t1 .,or1o dco,. trA LppFr oF.e ,on wr
'"or',"od,rrt-o"..o, od.heo r h.hF.orsed oosIo,l
Io odjusl itre upper orm lenstonl
I Loosen ihe tock rur. (See Fiq. l9)
2. Adjust ihe ienson screw unii ihe orm sioys in rotsed posi-
lion.
3 Rerighten the ock nui_
The 5S Series Scroll Saws take a 5 Amp 20 x 5mm glass fuse.
Follow the instructions below on how to change the fuse.
2. Unscrew the fuse cap to the rear ofthe scroll saw
and remove the 5 AMP fuse.
Code
4. Re-insert the fuse assembly and finger tighten.
s5-530C 55-760C
Carbatec Left1Blght Tiltilq!9qd lqqllsaw
Commercial Commercial Commercial
230V 50Hz 320W 230V SOHZ 32OW 230V 5OHz 3ZOW
535mm 762mm
Model
Rattqg
Power
Throat
Stroke llqlm
400 -1,400
Cuts per Minute
Max Depth ofCut 51mm
18mm lSmm
400 _1,550 400_1,550
51mm
Table Size
Arm Tilt
51mm
305 x 470mm 345 x 597mr.
Left 35'Right -45' Left 35" Right -45.
686x380x432mm 812x380x387mm '1,100x394x387mm
52kg
358 x 825mm
Left 35' Riqht -45"
Overall LxWx H
'1. Unplug the scroll saw from the mains. 3. lnsert a new 5 AMP fuse into the end cap holder.
ecifications
Weight 24.skg
15
29.sk1
Changing the Fuse
55,400C

Exploded Diagram
d
(,
o@
>l
%
@
A rs:
9<
9
O
@ E-l
>\
,.(D\
--E*l@

Parts List A
DEsCR P'I ON sPECIFICATION QTY
l(c21 A03N
KC3o-A03
KC2r -A04
KC2] AO5
Ka21 A,t2
BOLT
Ka21 A2l
KC2t A23
KC2r-426
l<c21 A21
KC21A28
KC2l A29
KC2t A3rCE
KC2r.A32CE
(c30 A32CE
KC2l
KC2
1
KC2 l
KC2t A4l
3/Axs/a l
3
3
KC2t A5l
Ka21 a52 2
KC21 A53 l
r/4.(0.0. rr) l
)
KC2t A5a
i!1a
KC21 A62
KC2l -A63
KC21 A64
KC21-A69
KC2l A7l
KC21-475
KCt6 A32
KC2l A35
KC2l A9l
KC21 A96
17
01
03N
!5
06
12
l6
t9
)o
21
a2
23
25
26
27
28
29
3l
32
33
t5
41
45
{a
51
52
!!
54
56
s1
58
,9'
60
6l
6a
6.
65
6
6t
nl
6i
70
72
7!
,5
76
3!
85
!6
a7
88
91
92
9l
9'
95
96
,i
101
102

Exploded Diagram
i'
9?
tr
IE
E
:i
lil
L
co
E.
o
,rr,@@
4
!l;
18
. --- I
,- n\
-'@
_@
%, a^
\re

Parts List B
sPEC F CAT ON QTY
(c21 301 2
KC21 802 2
KCI6 B4l
KC30"B02 2
KC2r 803
KC2t 804
KC2t B05N
KC16 842
KClo B05N
KC)1 807
KC21 308
KC2t -B09
KC2l Bt0 1/4-20UNC*1/2
KC2l 3tl 3
KC21 812 9
KCzl 813
KC2r Br4 2
KC2r Br5
KC2t-Bt6 2
KC21 817 a
KC2t Bl3 a
KC21 819 17
KC2t 820 l
KC?r 821 2
KC21-822 ETw'3 l
(c2t 823 l
I
KC21 824 l
KC21 825 l
KC2t 826 l
KC21 821
KC2l-823 I
KC21 829
KC2t-83s
(c2t'836 l
KCt6 845 l
KC30 836 1
KC21 837 3/3-t6UNC
KC21 B38
KC2t-839 l
KC2r-S40
KCI6-843 3
3
KC3o-845A
(c2t'845.1
KC21'845.2
KC2l 345.3
KC21"846
KC21'847
19
REF.
gl
02
oi
lftt
ni
6
aD
t1
't2
14
15
15
t7
18
,!
20
21
72
23
74
25
26
27
t8
29
!s
36
3!
39
ll3
{tl
,{3J
:16

\\,,
)tr
)'Jr
t-
^t\
\l
9\r
30el,,
bXG)t
VZ
. r \. 1, )
\ffi
\ffil,)
er19-
Iffi,,,,,,,,,,,,,,,)/
-(E]
A,
It
\G
'Y,,
t' ,"
il\\
(
e3"e
(
U
d.
(,
o
,tE
Other manuals for SS-400C
2
This manual suits for next models
2
Table of contents
Other Carbatec Saw manuals

Carbatec
Carbatec BS-345C User manual

Carbatec
Carbatec SS-400C User manual

Carbatec
Carbatec SS-400C User manual

Carbatec
Carbatec BS-B200H User manual

Carbatec
Carbatec BS-345C User manual

Carbatec
Carbatec SBW-6300 User manual

Carbatec
Carbatec BS-245H User manual

Carbatec
Carbatec CTH-110L 1PH User manual

Carbatec
Carbatec BS-X3452C User manual

Carbatec
Carbatec BAS-250C User manual