manuals.online logo
Brands
  1. Home
  2. •
  3. Brands
  4. •
  5. Carel
  6. •
  7. Gateway
  8. •
  9. Carel WEB-GATE WEBG0000B0 User manual

Carel WEB-GATE WEBG0000B0 User manual

cod. +050002720 rel. 1.2 - 08/10/02
WEBG0000B0- Gateway Ethernet-RS485 / Embedded Ethernet-RS485 Gateway
Vi ringraziamo per la scelta fatta, sicuri che sarete soddisfatti del vostro acquisto.
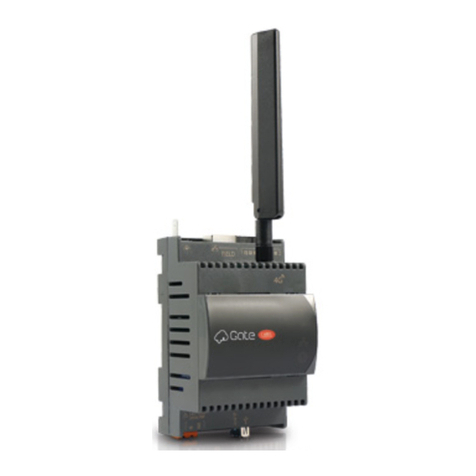
Il WebGate Carel è un dispositivo elettronico per l’interfacciamento di tutti i controllori Carel (max.16)
in rete RS485 a una qualsiasi rete Ethernet locale a 10 Mbps.
Chiedete al vostro amministratore di rete di predisporre una connessione di rete per il WebGate.
Le funzioni disponibili includono:
• accesso alle informazioni da ogni controllore (variabili di rete e parametri) mediante un normale
browser per Internet tipo Internet Explorer™ (versione 5 o superiore) o NetScape Communicator™
(versione 6 o superiore) installati su un PC collegato in rete locale o WAN al WebGate. I risultati
migliori si ottengono utilizzando un browser in grado di supportare i fogli di stile CSS.
• trasmissione dei dati ad un PC di supervisione collegato alla rete mediante protocollo standard
SNMP.
Avvertenza: se la rete locale a cui il WebGate è collegato è aperta all’esterno (WAN o Internet) tutte
le operazioni volte a garantire la sicurezza della rete sono a carico dell’amministratore di rete.Inoltre
tutti i dispositivi attivi (proxy, firewall, ecc.) che si frappongono tra il WebGate e l’utilizzatore finale non
devono alterare i pacchetti IP.
WEB server
Il web server integrato permette di visualizzare pagine HTML standard direttamente sul vostro
browser per Internet. Una applicazione client può quindi, in accordo con il suo livello di
autorizzazione, controllare e monitorare da remoto lo stato dell’impianto a cui il WebGate é collegato.
Le pagine HTML possono essere facilmente personalizzate e scaricate dall’utente finale.
Si possono utilizzare programmi di ampia diffusione sia per creare le proprie pagine HTML (es.
Macromedia®DreamWeaver™ o Microsoft®FrontPage™) sia per scaricarle sul WebGate (es.
SmartFTP™).
Gestione SNMP
Il “Simple Network Management Protocol v1” è il protocollo standard utilizzato dal WebGate per la
trasmissione dei dati al PC di supervisione con funzioni di SNMP manager collegato alla rete.
Configurazione
Per un corretto funzionamento del WebGate devono essere impostati alcuni parametri di base, quali
l’indirizzo IP e la subnet mask.Tutti i dispositivi di una rete devono avere un unico indirizzo IP per
comunicare con l’host. La subnet mask e l’indirizzo IP definiscono la serie di indirizzi IP della rete
Ethernet locale.
Chiedete al vostro amministratore di rete un indirizzo IP ed una subnet mask validi.
Il WebGate può essere configurato in 2 modi.
1) Attraverso la linea Ethernet, mediante web browser e pagine HTML di configurazione incorporate
nel dispositivo.
Per accedere alle pagine web di configurazione, digitare: http://<indirizzoIP>/ index.html
2) Attraverso la porta RS232, mediante una connessione seriale con software di emulazione di
terminale, come ad esempio Microsoft®Windows™ HyperTerminal™.
Questo metodo va utilizzato quando si installa il WebGate per la prima volta, poiché l’indirizzo IP di
default potrebbe essere in conflitto con l’indirizzo di altri dispositivi presenti nella rete.
Digitare “help” sul terminale per ottenere la lista dei comandi disponibili.
Impostazioni di default
indirizzo IP: 192.168.0.250
NetMask: 255.255.255.0
baudrate RS232: 19200
baudrate RS485: 19200
Numero massimo di dispositivi: 16
Interfaccia utente
Prevede 3 LED multicolore sul lato superiore e un tasto di reset su quello posteriore.
LED OFF Verde Rosso Giallo
ethernet collegato, collegato nessun collegamento non
nessun dato dati in transito fisico disponibile
RS485 collegato, RX dispositivi non TX
nessun dato collegati
status spento funzionamento inizializzazione in occupato
normale in corso
AVVERTENZA: per evitare che i dati vengano corrotti, non spegnete il dispositivo quando il LED
status è giallo.
Tasto reset: il tasto reset comporta una riconfigurazione (parziale o totale) del Gateway nel
seguente modo:
• premere per 2s e poi rilasciare per ricaricare le impostazioni di default;
• premere per 10s e poi rilasciare per eliminare tutti i dati, comprese le proprie
pagine Web e le password.
Thank you for your choice, we trust you will be satisfied with your purchase.
The Carel WebGate is an electronic device to interface all Carel controllers (max. 16) on a RS485
network to any local 10 Mbps Ethernet network.
Contact the network administrator or other responsible person to arrange a network connection to
the WebGate.
The following functions are therefore possible:
• access information (such as network variables and parameters) from each controller using a
standard web browser, such as Internet Explorer™ (version 5 or higher) or NetScape
Communicator™ (version 6 or higher) on any PC connected to the WebGate in a local network or
WAN.For the better results use a browser supporting CSS style sheets.
• pass data to a supervising PC connected to the network using the SNMP standard protocol.
Warning: if the local network to which the WebGate is connected can be accessed from the outside
(WAN or Internet), all the actions aimed at providing network security are the responsibility of the
network administrator.Moreover, all the active devices (proxy, firewall, etc.) that stand between the
WebGateand the final user must not alter the IP packages.
WEB server
The built-in web server allows standard HTML pages to be served directly to your Internet browser. A
client application can, in accordance with its level of authorisation, control and monitor remotely the
status of the installation that the WebGate is connected to.
The HTML pages can be easily customised and downloaded by the final user.
The user can use common software tools both for creating personal HTML pages (such as
Macromedia®DreamWeaver™ or Microsoft®FrontPage™) and for downloading them to the WebGate
(such as SmartFTP™).
SNMP management
The Simple Network Management Protocol v1 is the standard protocol used by the WebGate to pass
data to a supervising PC connected to the network with SNMP management functions.
Configuration
For the correct operation of the WebGate, some basic parameters must be set, such as the IP
address and the subnet mask. All devices in a network require a unique IP address which the host
can use to communicate with them.The subnet mask, along with the IP address, defines what range
of IP addresses are on the local Ethernet LAN.
Contact your network administrator to obtain a valid IP address and subnet mask.
There are 2 ways to configure the WebGate.
1) Through the Ethernet line, using a web browser and the configuration HTML pages embedded in
the device.
To access the configuration web page, type in: http://<IPaddress>/ index.html
2) Through the RS232 port, which provides a serial connection to terminal emulation software
such as Microsoft®Windows™ HyperTerminal™. Use this method when you are installing the
WebGate for the first time, as its IP default address could come into conflict with other device
addresses on the network.
Type “help” on your terminal to view a summary of the available console commands.
Factory settings
IP address: 192.168.0.250
NetMask: 255.255.255.0
RS232 baudrate: 19200
RS485 baudrate: 19200
Maximum number of devices:16
User interface
This is fitted with 3 multicolour LEDs on the upper side, and a reset key at the rear.
LED OFF Green Red Yellow
ethernet connected, exchanging data no physical link not available
no data
RS485 connected,no RX devices not connected TX
no data
status power off normal operation reset initialization busy
WARNING: to avoid data corruption, do not shutdown the device when the status LED is yellow.
Reset button: the reset button is used for the re-configuration (partial or total) of the Gateway, as
follows:
• hold it for 2s and then release to restore the factory settings;
• hold it for 10s and then release to completely erase the device, Web pages and
passwords included.
94
38,6
128
152
Dimensioni (mm) e significato dei connettori
Dimensions (mm) and connections meaning
Collegare qui l adattatore di alimentazione a
18Vac (installazione su tavolo)
Connect the 18Vac power adapter here (for
desktop installation)
Collegare qui l’alimentazione a 24Vac
(montaggio a pannello)
Connect the 24Vac power supply
here (for panel mounting)
interfaccia Ethernet 10BaseT con rete locale.
Ethernet 10BaseT interface to corporate LAN.
interfaccia seriale RS232 con consolle. Si richiede un cavo null-modem (non fornito)
tra il WebGate e la porta seriale del PC di configurazione.
RS232 serial interface to console. A null-modem cable (not supplied) is required
between the WebGate and the communication port of the PC used for
configuration.
interfaccia seriale RS485 con rete Carel.
RS485 serial interface to Carel network.
Fig. 1
CAREL S.p.A.
Via dell’Industria, 11 - 35020 Brugine - Padova (Italy)
Tel.(+39) 0499716611 – Fax (+39) 0499716600
http://www.carel.com – e-mail:[email protected]
Carel si riserva la possibilità di apportare modifiche o cambiamenti ai propri prodotti senza alcun preavviso.
Carel reserves the right to modify the features of its products without prior notice.
cod. +050002720 rel. 1.2 - 08/10/02
Caratteristiche Tecniche
Alimentazione:18Vac -15/+10%, 50/60Hz o 24Vac -15/+10%, 50/60Hz
Potenza nominale: 3 W
• Installazione su tavolo: tramite presa AC mini, ø 5 mm. Utilizzare ESCLUSIVAMENTE l’apposito
adattatore di alimentazione fornibile da Carel su richiesta cod.TRA1806ITA. L’utilizzo di adattatori
diversi può provocare danni all’hardware.
• Montaggio a pannello: tramite morsetti orizzontali removibili a 2 vie (passo 5,08 mm), sezione
dei fili 0,5-1,5 mm2.
Caratteristiche del fusibile, obbligatorio, da installare tra l’ingresso di alimentazione del Webgate ed
il trasformatore di alimentazione: 500 mAT.
Utilizzare un trasformatore di sicurezza e di classe 2 dedicato di almeno 6 VA.
È consigliato l’uso del trasformatore TRA1810DIN fornibile da Carel.
Interfacce:
• seriale RS485, opto-isolata, morsetti orizzontali removibili a 3 vie (passo 3,81 mm), sezione dei fili:
0,14/1,5 mm2.
Utilizzare un doppino ritorto schermato, AWG20-22, max. 1000 m, capacità tra i cavi <90 pF/m.
• seriale RS232 DTE, connettore DB-9 maschio a 9 vie; 19200 baud (configurabile), 8 bit di dati,
1 bit di stop, nessuna parità e nessun controllo flusso.
Utilizzare un cavo null-modem schermato, max. 10 m, capacità del cavo <2500pF.
• interfaccia Ethernet, connettore RJ-45 per Ethernet 10BaseT.
Utilizzare un cavo schermato, classe 5, max.100 m.
Caratteristiche funzionali:
Protocolli standard supportati: SNMP v1, HTTP, FTP
Memoria: 128KB RAM, 1MB Flash (400KB disponibili per pagine web e dati utente).
File System: max.100 file disponibili per l’utente.
Spazio minimo occupato da ogni file: 1KB
Caratteristiche generali:
Condizioni di funzionamento: 0T50°C, 0/90% U.R.non condensante
Condizioni di immagazzinamento: -10T70°C, 0/90% U.R.non condensante
Grado di Protezione (IP): IP20
Dimensioni (mm): 152 x 128 x 39
Inquinamento ambientale: normale
Categoria di resistenza al calore e al fuoco: D
Classe e struttura del software: A
Smaltimento del prodotto:
Il prodotto è composto da parti elettroniche, in metallo ed in plastica.
Tutte queste componenti vanno smaltite secondo le normative locali in materia.
Avvertenze per l’installazione
Evitare il montaggio delle schede in ambienti che presentino le seguenti caratteristiche:
• umidità relativa maggiore del 90%;
• forti vibrazioni o urti;
• esposizione a getti d'acqua;
• esposizione ad atmosfere aggressive ed inquinanti (es.: gas solforici e ammoniacali, nebbie
saline, fumi) con conseguente corrosione e/o ossidazione;
• elevate interferenze magnetiche e/o radiofrequenze (evitare, quindi, l'installazione delle
macchine vicino ad antenne trasmittenti);
• esposizione all'irraggiamento solare diretto e agli agenti atmosferici in genere;
• ampie e rapide fluttuazioni della temperatura ambiente;
• ambienti ove sono presenti esplosivi o miscele di gas infiammabili;
• esposizione alla polvere (formazione di patina corrosiva con possibile ossidazione e riduzione
dell'isolamento).
Per il collegamento del WebGate è necessario osservare alcune AVVERTENZE:
1Una tensione di alimentazione elettrica diversa da quella prescritta può danneggiare seriamente il
sistema.
2Utilizzare capicorda adatti per i morsetti in uso.Allentare ogni vite ed inserirvi i capicorda, quindi
serrare le viti. Ad operazione ultimata tirare leggermente i cavi per verificarne il corretto serraggio.
3Non avvicinarsi e/o toccare con le dita ai componenti elettronici montati sulle schede per evitare
scariche elettrostatiche (estremamente dannose) dall’operatore verso i componenti stessi.
Nota: Tutti i marchi registrati sono proprietà dei rispettivi titolari.
Technical Specifications
Power Supply:18Vac -15/+10%, 50/60Hz or 24Vac -15/+10%, 50/60Hz
Rated Power: 3W
• For desktop installation: from mini AC power jack, dia. 5mm. Use ONLY the power adapter
supplied on request by Carel P.N.TRA1806ITA. The use of different power adapters may damage
the hardware.
• For panel mounting: from 2-pole removable horizontal terminal blocks (spacing 5.08mm),
lead size 0.5-1.5mm2.
Characteristics of the fuse, obligatory, to be inserted between the WebGate power supply input and
the power supply transformer: 500mAT.
Use a class 2 dedicated safety transformer rated to at least 6VA.
The use of the power adapter TRA1810DIN supplied on request by Carel is suggested.
Interfaces:
• Serial RS485 opto-insulated, 3-pole removable horizontal terminal blocks (spacing 3.81mm),
lead size: 0.14/1.5mm2.
Use a twisted pair shielded cable AWG20-22, max 1000m, capacitance between the cables <90pF/m.
• Serial RS232 DTE interface, 9-pin male DB-9 connector; 19200 baud (configurable), 8 data
bits, 1 stop bit, no parity and no flow control.
Use a null-modem shielded cable, max.10m, cable capacity <2500pF.
• Ethernet interface, RJ-45 connector for 10BaseT Ethernet.
Use a class 5 shielded cable, max.100m.
Functional Characteristics:
Standard Internetworking Protocols: SNMP v1, HTTP, FTP
Memory: 128KB RAM, 1MB Flash (400KB available for web pages and user data).
File System: 100 files max.available to the user.
Minimum size used from a file: 1KB
Other:
Operating Conditions: 0T50°C, 0/90% rH non condensing
Storage Conditions: -10T70°C, 0/90% rH non condensing
Index of Protection (IP): IP20
Dimensions (mm): 152 x 128 x 39
Environmental pollution: normal
Category of resistance to fire and heat: D
Software class and structure: A
Disposal of the Product:
The product is made of electronic, metal and plastic parts.
Such components must be disposed of in accordance with the laws in force in each country.
Warnings for installation
Avoid installing the boards in environments with the following characteristics:
• relative humidity above 90%;
• strong vibrations or knocks;
• exposure to jets of water;
• exposure to aggressive and polluting agents (e.g.: sulphurous and ammonia gases, saline
mists, smoke) which may cause corrosion and/or oxidation;
• high levels of magnetic and/or radio-frequency interference (thus avoid installation near
transmitting antennas);
• exposure of the device to direct sunlight and atmospheric agents in general;
• large and rapid fluctuations in ambient temperature;
• environments where explosives or mixes of inflammable gases are present;
• exposure to dust (formation of corrosive patina with possible oxidation and reduction
of insulation).
When connecting WebGate the following WARNINGS should be heeded:
1.Voltages different from the power ratings will seriously damage the system.
2. Use cable-ends which are suitable for the terminals being used. Loosen each screw and
insert the cable-end, then tighten the screws. On completing the operation lightly tug the
cables to check that they are correctly inserted.
3. Avoid touching or nearly-touching electronic components mounted on the boards to avoid
electrostatic discharges (extremely damaging) from the operator to the components.
Note: All trademarks are property of their respective owners

12
1
2
3
4
Installazione / Installation
Su tavolo / Desktop
Montaggio a pannello / Panel mounting
Per l’installazione su tavolo montare i piedini in gomma negli appositi alloggi
For desktop installation, insert the rubber feet to the housings provided
Per il montaggio a guida DIN,
utilizzare un tronchese per togliere
le 2 parti in plastica prefratturate,
aprendo così i fori per il montaggio
dei ganci della guida DIN.
For DIN rail mounting, using cutting
nippers, remove the 2 pre-cut
plastic parts on the hatch, leaving
the holes for the DIN rail.
1
23

Other Carel Gateway manuals

Carel CloudGate-mini Wi-Fi Manual

Carel

Carel CloudGate-mini Wi-Fi Manual

Carel CloudGate Manual

Carel

Carel CloudGate Manual

Carel GATEWAYBN0 User manual

Carel

Carel GATEWAYBN0 User manual

Carel CloudGate User manual

Carel

Carel CloudGate User manual

Carel CloudGate Manual

Carel

Carel CloudGate Manual

Carel CloudGate Manual

Carel

Carel CloudGate Manual

Carel CloudGate-mini Wi-Fi Manual

Carel

Carel CloudGate-mini Wi-Fi Manual

Carel GTW 0BT0 Series User manual

Carel

Carel GTW 0BT0 Series User manual

Carel CloudGate Manual

Carel

Carel CloudGate Manual

Carel CloudGate User manual

Carel

Carel CloudGate User manual

Carel CloudGate Manual

Carel

Carel CloudGate Manual

Carel CloudGate Manual

Carel

Carel CloudGate Manual

Carel CloudGate Manual

Carel

Carel CloudGate Manual

Popular Gateway manuals by other brands

Amit RRU-WEC/1201 Operation manual

Amit

Amit RRU-WEC/1201 Operation manual

RTA 460ETCDFM-N2EW Product user guide

RTA

RTA 460ETCDFM-N2EW Product user guide

HW Group HWg-PWR manual

HW Group

HW Group HWg-PWR manual

TRUlink W01 installation guide

TRUlink

TRUlink W01 installation guide

Ingenium wings Center Link WW202000 quick start guide

Ingenium

Ingenium wings Center Link WW202000 quick start guide

RTA 460ECBMS-NNA1 Product user guide

RTA

RTA 460ECBMS-NNA1 Product user guide

Pathway connectivity solutions Pathport OCTO 64 Series user guide

Pathway connectivity solutions

Pathway connectivity solutions Pathport OCTO 64 Series user guide

Crestron C2N-IRGW-1G Operations & installation guide

Crestron

Crestron C2N-IRGW-1G Operations & installation guide

CARLO GAVAZZI UWP 3.0 manual

CARLO GAVAZZI

CARLO GAVAZZI UWP 3.0 manual

TCAM T8000-I user manual

TCAM

TCAM T8000-I user manual

D-Link DVG-3032S user manual

D-Link

D-Link DVG-3032S user manual

Opengear ACM5004-GS quick start guide

Opengear

Opengear ACM5004-GS quick start guide

NEP BDG?256 Installation and operation manual

NEP

NEP BDG?256 Installation and operation manual

Motorola SVG2500 SURFBOARD DIGITAL VOICE WIRELESS GATEWAY - annexe... Guía del usuario

Motorola

Motorola SVG2500 SURFBOARD DIGITAL VOICE WIRELESS GATEWAY - annexe... Guía del usuario

MSA fieldserver EZ Gateway M-Bus to Modbus &... Startup guide

MSA

MSA fieldserver EZ Gateway M-Bus to Modbus &... Startup guide

Samsung GX-MC990CL user manual

Samsung

Samsung GX-MC990CL user manual

Planet Networking & Communication MH-2001 user manual

Planet Networking & Communication

Planet Networking & Communication MH-2001 user manual

ABB ARR600 user manual

ABB

ABB ARR600 user manual

manuals.online logo
manuals.online logoBrands
  • About & Mission
  • Contact us
  • Privacy Policy
  • Terms and Conditions

Copyright 2025 Manuals.Online. All Rights Reserved.