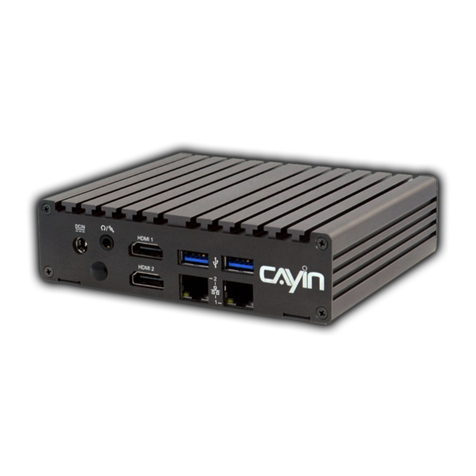
Cayin SMP-PROPLUS User manual

SMP-PRO4
Version 1.5
Version 2.0
SMP-PROPLUS
Version 2.5
Version 3.0
SMP-200
Version 1.0
SIGNAGE MEDIA PLAYER: SMP-PRO SERIES
User Manual
CAYIN TECHNOLOGY CO., LTD.
8F-2, NO. 577, Linsen N. Rd.,
Taipei City104, Taiwan, R.O.C
TEL: +886-2-2595 1005
FAX: +886-2-2595 1050
2012 © CAYIN Technology Co., Ltd.
All Rights Reserved
MPPO00/EN/121206
CAYIN TECHNOLOGY

About CAYIN
CAYIN Technology offers a complete portfolio of digital signage solutions, including media
players, servers, and software, for various commercial applications, such as education,
transportation, retail, hospitality, corporate communication, and financial and public
institutions. CAYIN is committed to being a reliable partner to its clients worldwide, and has
successfully set up various application references internationally. In order to best facilitate
the deployment of CAYIN products, the Company also provides tailored services to satisfy
the ascending market demands for almost limitless applications.
Copyright Notice
Copyright © 2012 CAYIN TECHNOLOGY CO., LTD. All Rights Reserved.
All the contents in this manual are the intellectual property of CAYIN Technology Co., Ltd.
(“CAYIN”). No part of this manual, including the products and software described in it, shall
be reproduced, transferred, distributed, stored in any form, or translated into any language
without the prior written permission of CAYIN. Specications and information in this manual
are subject to change at any time without obligation to notify any person of such revision or
changes.
This product adopts Arphic's "iFont" technology and fonts.
Trademark Notice
All brand names, icons, and trademarks appeared in this manual are the sole property of
their respective holders.
Disclaimers
THE CONTENTS OF THIS MANUAL ARE PROVIDED “AS IS.” CAYIN MAKES NO OTHER
REPRESENTATION OR WARRANTIES, EITHER EXPRESSED OR IMPLIED WITH
RESPECT TO THE CONTENTS HEREOF AND SPECIFICALLY DISCLAIMS THE IMPLIED
WARRANTIES OF MERCHANTABILITY OR FITNESS FOR A PARTICUAL PURPOSE. IN
NO EVENT SHALL CAYIN, ITS DIRECTORS, OFFICERS, EMPLOYEES OR AGENTS BE
LIABLE FOR ANY INDIRECT, SPECIAL, INCIDENTAL, OR CONSEQUENTIAL DAMAGES
(INCLUDING DAMAGES FOR LOSS OF PROFITS, LOSS OF USE OR DATA, AND THE
LIKE), EVEN IF CAYIN HAS BEEN ADVISED OF THE POSSIBILITY OF SUCH DAMAGES
ARISING FROM ANY DEFECT OR ERROR IN THIS MANUAL OR PRODUCT.
LITHIUM BATTERY CAUTION: Risk of Explosion if Battery is replaced by an incorrect
type. Dispose of used batteries according to the instructions.
SMP-PRO SERIES USER MANUAL
I
CONTENTS
About CAYIN ..................................................................................... i
Copyright Notice .............................................................................. i
Trademark Notice ............................................................................. i
Disclaimers ....................................................................................... i
1. SMP-PRO Series Overview......................................................... 1
1-1 SMP-PRO4 Appearance ................................................................ 2
1-1-1 Front View (P/N: LB-700)...................................................................2
1-1-2 Rear View (P/N: LB-700)....................................................................2
1-2 SMP-PROPLUS Appearance......................................................... 3
1-2-1 Front View (P/N: LB-300)...................................................................3
1-2-2 Rear View (P/N: LB-300)....................................................................3
1-3 SMP-200 Appearance .................................................................... 4
1-3-1 Front View (P/N: LB-50).....................................................................4
1-3-2 Rear View (P/N: LB-50)......................................................................4
1-4 Hardware Specications............................................................... 5
1-5 System Specications .................................................................. 6
1-6 Install SMP-PRO Series................................................................. 8
1-6-1 Install Hardware .................................................................................8
1-6-2 Login on SMP-PRO Series ...............................................................8
1-6-3 Remote PC Login.............................................................................11
1-7 Wall Mount Installation ............................................................... 12
1-8 Insert/Replace SD Card (SMP-200 only).................................... 13
2. Conguration in Wizard Mode ................................................. 14
2-1 Upload Files to SMP Player ........................................................ 15
2-2 Wizard Mode Introduction .......................................................... 18

USER MANUAL
II
2-3 Network Wizard............................................................................ 18
2-3-1 Step1: Ethernet Conguration..........................................................18
2-3-2 Step2: Wi Conguration (Optional).................................................19
2-3-3 Step3: Ping Gateway .......................................................................20
2-4 System Wizard ............................................................................. 21
2-4-1 Step1: Time & Language Settings ...................................................21
2-4-2 Step2: Display Settings....................................................................22
2-4-3 Step3: Media Folder Security Settings.............................................24
2-5 Content Update Wizard ............................................................... 24
2-5-1 Content Update Settings..................................................................24
2-6 Playback Wizard .......................................................................... 25
2-6-1 Step1: Skin.......................................................................................25
2-6-2 Step2: Multimedia 1 .........................................................................26
2-6-3 Step3: Multimedia 2 .........................................................................27
2-6-4 Step4: Image Slideshow 1 ...............................................................27
2-6-5 Step5: Image Slideshow 2 ...............................................................27
2-6-6 Step6: Ticker Text 1..........................................................................28
2-6-7 Step7: Ticker Text 2..........................................................................28
3. Multimedia Content Playback and Management.................... 29
3-1 Upload Multimedia Contents ...................................................... 30
3-2 Choose Your Skin........................................................................ 33
3-2-1 Use Default Skin ..............................................................................33
3-2-2 Use Your Own Skin ..........................................................................33
3-2-3 Control Skin by CMS Server ............................................................33
3-2-4 Export Skin.......................................................................................34
3-3 Choose Media Source and Set Playlist .................................... 34

SMP-PRO SERIES USER MANUAL
III
3-3-1 Play Files in Media Folder................................................................34
3-3-2 Play Files in USB Storage Device ...................................................37
3-3-3 Central Scheduling (by CMS Server) ..............................................37
3-3-4 RTB/RTP Streaming (SMP-PRO4 & SMP-PROPLUS)....................38
3-3-5 HTTP/MMS Streaming (SMP-PRO4 & SMP-PROPLUS) ................39
3-3-6 Video Input (SMP-PRO4 only) .........................................................39
3-3-7 Image Slide Show ............................................................................39
3-3-8 Mute Function ..................................................................................40
3-4 Image Slide Show Settings......................................................... 40
3-5 Ticker ............................................................................................ 42
3-5-1 Dene Font Format .........................................................................43
3-5-2 Set Background Color.....................................................................44
3-5-3 Scrolling Effect ................................................................................44
3-6 Volume.......................................................................................... 45
4. Edit Schedule on SMP Player (Local Schedule)..................... 46
4-1 Skin ............................................................................................... 47
4-2 Multimedia Zone .......................................................................... 48
4-3 Image Slide Show Zone .............................................................. 50
4-4 Ticker Zone .................................................................................. 52
4-5 Volume.......................................................................................... 54
5. Skin Management...................................................................... 56
5-1 Create Your Own Skin ................................................................. 57
5-1-1 Install Skin Editor .............................................................................57
5-1-2 Create a new skin le (.csk).............................................................58
5-1-3 Upload a Skin File into Skin Template..............................................64
5-1-4 Edit a Skin File in Skin Template......................................................65

USER MANUAL
IV
5-2 Create Your Own Clock (.clk) ..................................................... 66
5-2-1 Create a Clock (.clk).........................................................................66
5-2-2 Upload a Clock (.clk)........................................................................74
5-3 Upload the CAYIN Skin File into SMP........................................ 74
5-4 Apply Skin .................................................................................... 75
6. Content Update and Media Folder Management.................... 76
6-1 Update Media Folder ................................................................... 77
6-2 Manage Media Folder .................................................................. 81
7. System Status and Settings..................................................... 82
7-1 System Status.............................................................................. 83
7-1-1 Basic Information .............................................................................84
7-1-2 Advanced Information ......................................................................84
7-1-3 Firmware Information .......................................................................85
7-2 System Settings........................................................................... 86
7-2-1 Set System Time..............................................................................86
7-2-2 NTP Service .....................................................................................87
7-2-3 Change Web Administrator’s Password...........................................88
7-2-4 Change Service Port of Web Manager ............................................88
7-2-5 Choose Web Manager Language ....................................................89
7-2-6 Set System Reboot ..........................................................................89
7-2-7 Frequency of Server Communication...............................................90
7-2-8 RS-232 Setting.................................................................................90
7-3 System Maintenance................................................................... 92
7-3-1 Upload Firmware..............................................................................92
7-3-2 Restart/Shutdown System................................................................92
7-3-3 Upload Background Image...............................................................93

SMP-PRO SERIES USER MANUAL
V
7-3-4 Export/Import/Restore System Settings...........................................94
7-3-5 System Recovery.............................................................................94
7-4 Display Settings........................................................................... 96
7-4-1 Congure Display Properties (SMP-PRO4 & SMP-200) .............. 96
7-4-2 Congure Display Properties (SMP-PROPLUS) ........................ 98
7-4-3
Hardware Video Acceleration
(SMP-PROPLUS) ........................ 99
7-4-4 Turn On / Off Display......................................................................100
7-4-5 Video Input Settings (SMP-PRO4 & SMP-PROPLUS)............... 101
7-5 Location...................................................................................... 102
7-5-1 GPS................................................................................................102
7-5-2 Static Location................................................................................104
8. Network Settings..................................................................... 105
8-1 Ethernet ...................................................................................... 106
8-2 WIFI Wireless Network .............................................................. 107
8-3 3G Data Network........................................................................ 108
9. Log Management......................................................................111
9-1 Enable Syslog ........................................................................... 112
9-2 Use log_rcv to Change PORT................................................... 113
9-3 View Logs.................................................................................. 114
9-4 Export Log File ......................................................................... 115
9-5 Clear Log Files.......................................................................... 115
10. SMP Console ......................................................................... 116
11. System Recovery .................................................................. 118
Appendix...................................................................................... 120
Appendix A: Use “log_rcv” to collect syslog from clients .......... 121
Appendix B: SMP-200 Video Formats............................................ 123

SMP-PRO Series Overview
1-1 SMP-PRO4 Appearance ............................................ 2
1-1-1 Front View (P/N: LB-700)............................................. 2
1-1-2 Rear View (P/N: LB-700).............................................. 2
1-2 SMP-PROPLUS Appearance..................................... 3
1-2-1 Front View (P/N: LB-300)............................................. 3
1-2-2 Rear View (P/N: LB-300).............................................. 3
1-3 SMP-200 Appearance ................................................ 4
1-3-1 Front View (P/N: LB-50)............................................... 4
1-3-2 Rear View (P/N: LB-50)................................................ 4
1-4 Hardware Specications........................................... 5
1-5 System Specications .............................................. 6
1-6 Install SMP-PRO Series............................................. 8
1-6-1 Install Hardware ........................................................... 8
1-6-2 Login on SMP-PRO Series ......................................... 8
1-6-3 Remote PC Login........................................................11
1-7 Wall Mount Installation ........................................... 12
1-8 Insert/Replace SD Card (SMP-200 only)................ 13
1.

USER MANUAL
2
SMP-PRO Series, the dedicated digital signage media player, is a powerful zone-type
display engine for marketing and communication professionals to communicate with target
audiences in designated locations by high-quality videos, audios, graphics, and texts. SMP-
PRO Series provides an easy-to-use platform where they can promote, inform, educate,
and entertain specic audiences in a variety of commercial applications.
1-1 SMP-PRO4 Appearance
1-1-1 Front View (P/N: LB-700)
1. Power 2. USBx2 3. Power Indicator 4. Hard Disk Indicator
12
3
4
1-1-2 Rear View (P/N: LB-700)
13
58
9
2
4
67
1. Power Connector 2. DVI 3. VGA 4. USBx2 5. Ethernet LAN
6. RS-232x2 7. Audio-Out 8. Audio-In 9. S-Video-In

SMP-PRO SERIES USER MANUAL
3
1-2 SMP-PROPLUS Appearance
1-2-1 Front View (P/N: LB-300)
1. Power Indicator 2. Hard Disk Indicator 3. Reset 4. Power
12 3 4
1-2-2 Rear View (P/N: LB-300)
1 2 3
4 5 6 7 8
1. Power Connector 2. RS-232 3. Ethernet 4. VGA 5. USB×4
6. Line-In (reserve for future use) 7. Mic-In (reserve for future use)
8. Audio-Out

USER MANUAL
4
1-3 SMP-200 Appearance
1-3-1 Front View (P/N: LB-50)
1. USB 2. SD Card Slot 3. SD Card Door Lock
4. Power Indicator 5. Power
1 2 3 4 5
1-3-2 Rear View (P/N: LB-50)
12 3 4 5 6 7
1. Power Connector 2. Audio-Out 3. DVI-D 4. VGA 5. Ethernet
6. USBx2 7. RS-232

SMP-PRO SERIES USER MANUAL
5
1-4 Hardware Specications
SMP-PROPLUS
(P/N: LB-300)
SMP-PRO4
(P/N: LB-700)
SMP-200
(P/N: LB-50)
Dimension 380 (W) x 195 (D) x 44 (H) mm 268 (W) x 174 (D) x 47 (H) mm 196 (W) x 123 (D) x 33 (H) mm
Material Aluminum + Steel Aluminum + Steel (Fanless) Steel (Fanless)
Color Silver & Black Dark Gray Gray
Net Weight 4.4 Kg (with hard drive) 2.2 Kg (with hard drive) 655g
Network 10/100/1000 Mbps Ethernet 10/100/1000Mbps Ethernet 10/100 Mbps Ethernet
Internal
Storage
160GB, 3.5” IDE HDD 160GB, 2.5” SATA HD (share
with system rmware)
4 G Bytes onboard ash (share
with system rmware)
External
Storage N/A N/A
SD, SDHC (up to 32 GB; the
player does not include an SD
card)
Video Out VGA D-Sub VGA D-Sub, DVI-D (no HDCP
support)
VGA D-Sub, DVI-D
Audio Out Phone Jack (Stereo) RCA (Stereo) Phone Jack (Stereo)
Video In N/A S-Video N/A
Audio In N/A RCA (Stereo) N/A
Power 100~240V AC
(with internal adaptor)
100~240V AC
(with external adaptor)
100~240 V AC
(with external adaptor)
Others RS-232 (COM), USB x 4 RS-232 x 2 (COM), USB x 4 RS-232 (COM) x 1, USB x 3
Certicate CE, FCC, RoHS CE, FCC, LVD, RoHS, CB, CCC CE, FCC, RoHS, BSMI

USER MANUAL
6
1-5 System Specications
SMP-PROPLUS
(P/N: LB-300)
SMP-PRO4
(P/N: LB-700)
SMP-200
(P/N: LB-50)
Image les ● JPEG, GIF1
● Support up to 4 million pixels image resolution
Video Files ● MPEG, MPG, VOB, MP3, MP4
● WMV, WMA
● AVI
CODEC ● MPEG-1, MPEG-2 PS, MPEG-2 TS, MPEG-4 ISO
● MP3 (MPEG AUDIO LAYER 3)
● WMV 7/8/9
● WMA 7/8
● RAW DV
● H.2642
Please refer to the Appendix.
Network
Streaming
● CAYIN RTB (Encapsulation Method: MPEG TS , Codec: MPEG-2/
MPEG-4, bit rate: 256K~5 Mbps)
● RTP (Encapsulation Method: MPEG TS , Codec: MPEG-2/MPEG-4)
● HTTP/MMS
N/A
Video
Resolutions2
● Video Resolution and
Specification may differ for
different output methods,
supporting up to 720p
(1280x720); bit rate up to: 10~12
Mbps (MPEG2), 8~9 Mbps
(MPEG4), 4~8 Mbps (WMV), 3
Mbps (H.264) [Landscape, 25
fps, single video playback]2
● To avoid system running in the
low performance, we suggest
you do not use the following
screen resolutions when SMP
player is playing 720p HD
video: 1920x1200, 1920x1080,
1600x1200, 1280x1024(75Hz)
or similar high resolutions set in
the 'User dene' mode. 720p HD
video is also not suggested to
be used in the portrait mode.
● Video Resolution and
Specification may differ for
different output methods,
supporting up to 720p
(1280x720); bit rate up to: 10
Mbps (MPEG2), 8~9 Mbps
(MPEG4), 4~8 Mbps (WMV), 3
Mbps (H.264) [Landscape, 25
fps, single video playback]2
● To avoid system running in the
low performance, we suggest
you do not use the portrait
screen and high resolution when
SMP player is playing high
denition video.
● Please refer to the Appendix
for detailed video resolutions
and specications.
● The resolution of the Video
zone is max 1024 pixels in
the Portrait mode.

SMP-PRO SERIES USER MANUAL
7
SMP-PROPLUS
(P/N: LB-300)
SMP-PRO4
(P/N: LB-700)
SMP-200
(P/N: LB-50)
Ticker ● Enter text in Web Manager
● Get text le or RSS feed from remote web server
● Read text les in Hard-disk Drive
Skin ● 11 default skins
● Limited by system partition
storage
● 9 default skins
● Limited by system partition
storage
● 9 default skins
● Limited by system partition
storage
Display
Output
● Screen Resolutions3: 640x480,
800x600, 1024x768, 1152x864,
1 2 8 0 x 1 0 2 4 , 1 6 0 0 x 1 2 0 0 ,
1280x720 (720p), 1280x768,
1360x768, 1366x768, 1368x768,
1600x900, 1680x1050,
1920x1080, 1920x1200, User
Dene.
● Portrait Mode: Support 90 and
270 degree display rotation
● Screen Resolutions3: 640x480,
800x600, 1024x768, 1152x864,
1280x1024,1280x720 (720p),
1280x768, 1600x900, 1360x768,
1366x768, User Dene
● Portrait Mode: Support 90 and
270 degree display rotation
● Screen Resolutions3:
640x480, 800x600, 1024x768,
1152x864, 1280x720 (720p),
1280x768, 1360x768,
1366x768
● Portrait Mode: Support 90
and 270 degree display
rotation
Network
Interface
● 10/100/1000 Mbps Ethernet
● 802.11b/g/n wireless LAN
adaptor (optional)
● 3G data network (optional)
● 10/100/1000 Mbps Ethernet
● 802.11b/g/n wireless LAN
adaptor (optional)
● 3G data network (optional)
● 10/100 Mbps Ethernet
● 802.11b/g/n wireless LAN
adaptor (optional)
● 3G data network (optional)
Network
Protocols
● Support static IP and dynamic IP (DHCP)
● Support TCP/IP, HTTP, SMB, ICMP
Detect
EDID/DDC
parameters
● Support
1SMP series does not support animation GIF and CMYK JPEG.
The maximum bit-rate and resolution might be different based on your le encoding methods. We acknowledge
video playback result may be inuenced by many factors (eg. codec, bit-rate, screen resolution, or other component
run with video at same time… etc.). Please test the video on SMP players in advance. CAYIN DOES NOT
GUARANTEE EVERY VIDEO FILE CAN BE PLAYED ON SMP PLAYERS PROPERLY WITHOUT TESTING
BEFOREHAND.
The applicable resolution is also related to the resolutions of your display. Please check the specications of the
display and choose a suitable one for you.
2
3

USER MANUAL
8
1-6 Install SMP-PRO Series
1-6-1 Install Hardware
1. Open SMP package.
2. Connect the Ethernet to LAN port. (By default, SMP will get
an IP address from a DHCP server.)
3. Connect the VGA cable to your screen. (The default screen
resolution is 1024x768.)
4. If you need to congure system settings directly on the player,
please connect a keyboard and a mouse to any of the USB
connectors.
5. Connect the power adapter to a socket. The SMP player will
be turned on by itself.
6. Once you see the LOGIN page on the screen, you already
complete the installation.
1-6-2 Login on SMP-PRO Series
After installing SMP, please login and complete the initial settings
based on your network environment.
DHCP (Auto IP)
If you are in the DHCP network, SMP will get an IP address
automatically after installation. You can start to login the
Web Manager page of the player directly after you connect a
keyboard and a mouse to the SMP device.
1. Click [Wizard Mode] or [Advanced Mode] on the Web
Manager, and enter a username and password.
Default Username: webadmin
Default Password: admin
At any time, you can switch
between playback and Web
Manager in a local screen.
Plug a keyboard to SMP
device; press Ctrl-F10 and
switch to Web Manager Login
page; press Ctrl-F1 and
switch to playback mode.
Except for the initial
installation of SMP, we
suggest you manage or
change settings of SMP
by remote PC, rather than
directly on the player.

SMP-PRO SERIES USER MANUAL
9
Static IP
If you are in the static IP network, please follow below steps to login and complete network
settings.
1. Connect a keyboard and a mouse to USB connectors on the SMP player and connect the
power adapter to a socket to turn on the system. Click [Wizard Mode] or [Advanced
Mode] on the Web Manager, and enter a username and password.
Default Username: webadmin
Default Password: admin
2. Click [NETWORK SETTINGS] or [Network Wizard] on the screen. Then, click
“Static IP Address” in the Ethernet Settings area and set up all related network
settings for SMP.
3. After completing, click [SAVE] at the bottom and click [APPLY] or follow the wizard
steps to nish the settings. Then, the SMP player will reboot.

USER MANUAL
10
Wizard Mode
Advanced Mode

SMP-PRO SERIES USER MANUAL
11
1-6-3 Remote PC Login
If you try to manage SMP remotely on your own PC, please
follow below steps:
1. Insert the product CD into your CD-ROM, and run “CAYIN
Device Seeker” (\Tool\Device Seeker\seeker.exe). You can
also copy this le to your PC for future management.
2. Click [Seek] and the seeker will search all available SMP
clients or CMS servers in the same LAN. Select one player
and double click the player’s name. Or, you can also click a
player’s name, and click [Open Web].
1
2
3
3. You can also open the Media Folder of any player by "CAYIN
Device Seeker". Select the player you want to connect,
and click [Open Folder].
If the IP address of SMP
player shown in CAYIN
Device Seeker is 169.254.
x.x, it means that SMP player
cannot successfully get an
IP address from the DHCP
server. In this circumstance,
you can login directly on
the SMP player first (refer
to 1-5-2 Login on SMP).
Then, change the network
setting to static IP or change
the IP address of your PC to
the same subnet (169.254.
x.x). Finally, you can start to
manage the player remotely
on your PC.
If your PC and SMP player
are not in the same LAN,
you can open the browser
and enter the IP address
of the SMP. After you login
successfully, you can start to
manage SMP.

USER MANUAL
12
1-7 Wall Mount Installation
If you would like to mount your SMP player on the wall, please
read this section for installation instructions. Here we take SMP-
PRO4 for illustration.
1. Please nd the enclosed brackets and mounting screws.
2. Attach the brackets with your SMP player and secure brackets
with provided mounting screws.
3. Hang your SMP player to a suitable place and well secure it
with provided screws.
The enclosed accessories,
such as brackets and screws,
may differ from the product
you purchase.

SMP-PRO SERIES USER MANUAL
13
1-8 Insert/Replace SD Card
(SMP-200 only)
SMP-200 has built-in 4GB flash memory on board, and
approximately 2 GB can be used for Media folder. If you need
more storage, you can install an SD card by yourself.
1. Take out the key from your SMP-200 box.
2. Use the key to unlock and push the door to open the cover.
3. Insert an SC or SDHC card into the SD slot. The maximum
capacity is 32GB.
4. In few seconds, SMP-200 will detect the SD card and switch
the Media folder to the SD card’s storage space.
The SD storage space
replaces the original 2GB
space, which means the two
storage spaces won’t add
together.
SMP-200 doesn’t support
SDXC card. The file system
in the SD card should be FAT/
FAT32.
Other manuals for SMP-PROPLUS
1
This manual suits for next models
2
Table of contents
Other Cayin Media Player manuals

Cayin
Cayin SMP-PRO2 User manual

Cayin
Cayin SMP-WEB Series Original operating instructions

Cayin
Cayin iDAP-6 User manual

Cayin
Cayin SMP-WEB4 User manual

Cayin
Cayin SMP-WEB4 User manual

Cayin
Cayin N8 User manual

Cayin
Cayin SMP-PRO4 User manual

Cayin
Cayin SMP-2200 User manual

Cayin
Cayin SMP-8100 User manual

Cayin
Cayin SMP-WEBPLUS User manual