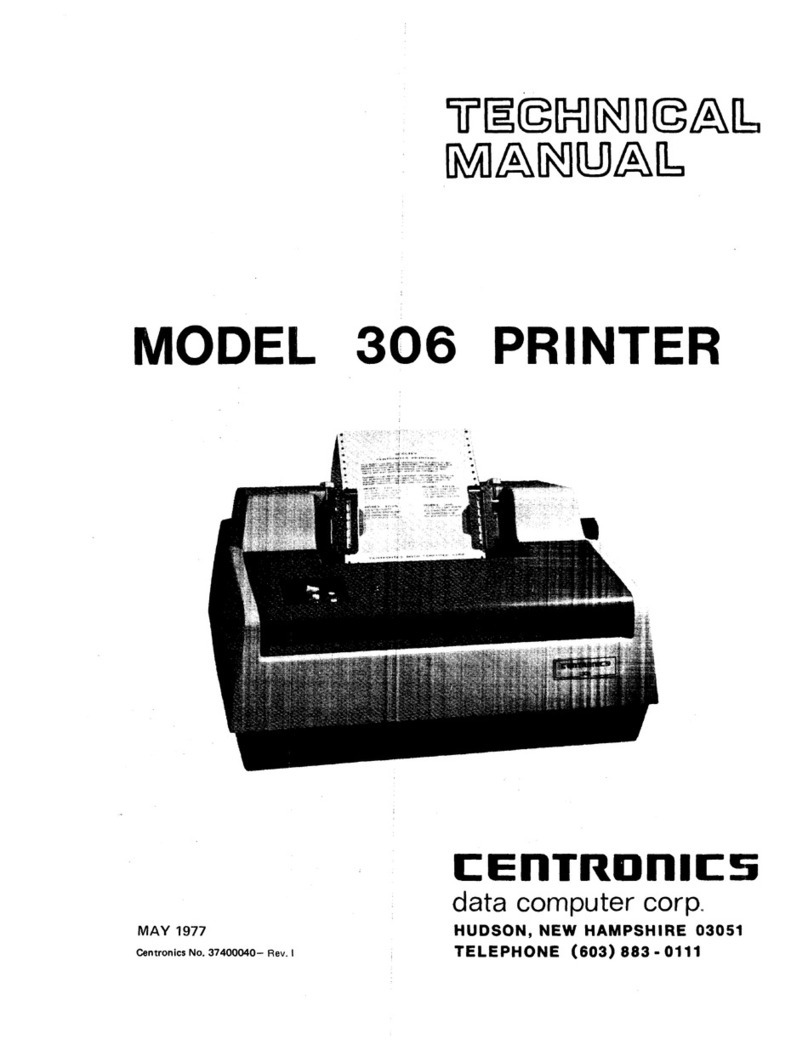
Centronics 306 User manual

.~
Ou
-
ZS-8
- / c
))2
S;:c?:1
~
¢
L/
f.-?
( ?
(;
-
G;O
'2.C>
l
Lf
t{ _ I q
_SI.J"'
''
'tv
w
(e,
MODEL
MARCH 1976
Centronics
No
. 37400040 -Rev F
306
· PRINTER
l:EnTRDnll:S
data computer corp.
HUDSON,
NEW
HAMPSHIRE
, 03051
TELEPHONE
(603)
883
- 0·111

MODEL
306
PRINTER
REVISION F
MARCH 1976
THE INFORMATION CONTAINED HEREIN
IS
PROPRIETARY AND
IS
NOT TO
BE
RELEASED
OR
REPRODUCED WITHOUT WRITTEN
PER-
MISSION OF CENTRONICS data computer corp.
I:EnTROnll:S
data computer corp.
HUDSON,
NEW
HAMPSHIRE
03051
TELEPHONE
(603)
883
-0111

TABLE
OF
CONTENTS
SECTION
1
INTRODUCTION
Section
1.1
1.2
1.3
GENERAL
DESCRIPTION.
.
LOGIC
FLOW
DIAGRAM
.
PRINTER
OPERATION
. .
1.
3.1
1.3. 2
1.3.3
Character Printing .
Paper
Movement.
.
Special Functions.
1.4
SYSTEM
FEATURES
1.4.1 Specifications
Summary.
. .
1.4.2 Standard
and
Optional Features
1.5
PHYSICAL
DESCRIPTION
. . . . . . .
2.1
SITE
PREPARATION
2.2
SHIPPING
CRATE
4.1
INTRODUCTION
4.2
BASIC
TIMING
SECTION
2
AND
3
INSTALLATION
AND
OPERATION
SECTION
4
THEORY
OF
OPERATION
-1-
1-2
1-2
1-3
1-3
1-4
1-5
1-6
1-6
1-7
1-7
2-1
2-2
4-1
4-1

TABLE
OF
CONTENTS
(cont'd)
Section
4.3
INITIALIZING
THE
PRINTER.
. . . . .
4.3.1
Prime.
. . . .
.•
.
•••
4.3.2 Select • . . . . . . . . .
Page
4-3
4-3
4-5
4.4
DATA
INPUT
.•......•..
4-6
4.4.1
Data
Input
Timing.
.
..
...•..
4-6
4.4.2
Busy
....
......•..
4-9
4.4.3
Function
Decoder. . . . . . . . . .
..
4-10
4.5
4.6
4.7
SHIFT
REGISTER
(BUFFER)
.
CHARACTER
PRINTING.
. .
4.6.1
. 4.6.2
4.6.3
4.6.4
4.6.5
Initiating the Printer Operation.
....
Character Registration
and
Timing
.
.•.
Character Generator
(ROM)
......
.
Print
Head
Operation. . . . . . . . . . .
Power
Driver Circuits .
..
...
PAPER
MOVEMENT
. • .
4.7.1
4.7.2
4.7.3
4.7.4
4.7.5
Line
Feed
. . . .
Form
Feed
• . . . • . .
••
...
Vertical
Tab
. . . . . . . . . . . . .
Vertical
Format
Unit
(Optional)
.....
Line
Feed
Solenoid
Driver.
. . . .
4.8
SPECIAL
FUNCTIONS
• . .
4.8.1
4.8.2
4.8.3
4.8.4
Bell
(Optional) . . . . .
Delete . . . . . . . . . . • .
+35V
Power
Supply
(Unregulated) .
Motor
Control
(Optional) . . . . . . . . .
4.9
POWER
SUPPLIES
4.9.1
4.9.2
4.9.3
+5V
Regulator. . . .
+12V
and
-12V
Regulators . .
+35V
Power
Supply
(Unregulated) .
4.10
OUTPUTS
FROM
LSI
CHIPS
(ME25
AND
ME16)
. .
4.10.1
LSI
Chip
ME25
4.10.2
LSI
Chip
ME16
-ii-
4-12
4-14
4-14
4-17
4-18
4-21
4-22
4-23
4-25
4-26
4-28
4-28
4-29
4-30
4-30
4-30
4-31
4-31
4-33
4-34
4-34
4-34
4-38
4-38
4-41

TABLE
OF
CONTENTS
(cont'd)
SECTION
5
REMOVAL
REPLACEMENT
AND
ADJUSTMENT
PROCEDURES
Section
5.1
5.2
6.1
6.2
6.3
INTRODUCTION.
· · ·
MECHANICAL
ASSEMBLIES.
5.2.1 Carriage
Mechanism
5.2.2
Platen (Figure
AB)
· · ·
5.2.3
Paper
Pan
(Fi
gure
AC). . . · ·
5.2.4
Driving
Mechanism
(Figure
AD,
Part
1).
5.2.5 Driving
Mechanism
(Figure
AE,
Part 2).
5.2.6
Idler Pulley
Assembly
(Figure
AF)
.
5.2.7
Reed
Switch
(AG)
· ·
5.2.8
Printer
Base
(Figure
AH)
. .
..
5.2.9
Frame
(Figure
AI)
· ·
5.2.10
Paper
Feed
(Figure
AJ).
.
5.2.11
Pin
Feed
Unit
(Figure
AK).
5.2.12
Ribbon
Feed
(Figure
AL)
·
5.2.13
Cover
(Figure
AM)
· · · ·
5.2.14 Operator
Panel
(Figure
AN)
· · ·
5.2.15 Electrical
Components
(Figure
AO)
5.2.16 Electrical
Components
(Figure
AP)
·
5.2.17 Electrical
Components
(Figure
AQ)
. · . . .
5.2.18 Print
Head
and
Associated
Assemblies
(Fig. 8-19)
5.2.19
5.2.20
5.2.21
Motor
Control
Assembly
Option
. .
Vertical
Format
Unit
(VFU)
-
Option
Printer
Drive
Mechanism,
Model
306.
SECTION
6
MAINTENANCE
ADJUSTMENTS.
•.
...
PREVENTIVE
MAINTENANCE
. . . .
TROUBLESHOOTING
GUIDE.
SECTION
7
· . .
DRAWINGS
AND
LISTS
OF
MATERIALS,
ELECTRICAL
-iii-
.
.
Page
5-1
5-1
5-2
5-6
5-9
5-11
5-14
5-21
5-24
5-27
5-27
5-29
5-32
5-34
5-45
5-45
5-46
5-46
5-46
5-46
5-51
5-52
5-54
6-1
6-2
6-8
7-1
Rev.
E

Section
A
B
TABLE
OF
CONTENTS
(cont'd)
SECTION
8
MECHANICAL
DRAWINGS
AND
PARTS
LISTS
APPENDICES
SIGNAL
GLOSSARY.
. . . . . .
PARALLEL
INTERFACE
SPECIFICATIONS.
.
-iv-
8-1
A-I
B-1

Figure
1-1
1-2
1-3
1-4
1-5
1-6
1-7
1-8
1-9
2-1
4-1
4-2
4-3
4-4
4-5
4-6
4-7
4-8
4-9
4-10
4-11
4-12
4-13
4-14
4-15
5-1
5-2
5-3
5-4
LIST
OF
ILLUSTRATIONS
Model
306
Printer
(Top
and
VFU
Covers
Removed).
Basic
Block
Diagram.
Printing the Letter
(H)
.
Print
Head
Components
.
Paper
Movement
Mechanism
.
Left Front
View
of
306
Right Front
View
of
306
.
Rear
View
of
306
Rear
View
(306
Logic/P.S.
Board
Removed).
Printer
Dimensions
.
Model
306
-
Block
Diagram.
Prime
Timing
Input
Data
Timing
-
No
Busy
Condition
Input
Data
Timing
-
Causing
Busy
Condition .
Forward
Clutch Interconnection
Diagram
.
Character
Timing
Normal
and
Elongated Characters.
Print
Head
Timing
.
Line
Feed
Timing
Form
Feed
and
Vertical
Tab
Timing
.
VFU
Tape
Reader
Amplifier (Located in
VFU)
•
Motor
Control
Timing
.
+5
Volt Regulator Interconnection
Diagram
.
~12V
Regulators Interconnection
Diagram
.
+35V
Unregulated
Supply
Interconnection
Diagram
.
Carriage
Movement
Adjustments .
Timi
ng
Fence
Mounting,
Model
306
.
Adjustment of
Timing
Belt
(AD-15)
(View
from
back
of
printer,
forward) .
Adjustment of
Timing
Belt
(AD-41)
(View
from
back
of
printer,
forward) . . . . .
-v-
Page
1-2
1-3
1-4
1-4
1-4
1-8
1-8
1-9
1-9
2-1
4-2
4-4
4-7
4-8
4-15
4-16
4-20
4-22
4-25
4-27
4-29
4-32
4-35
4-36
4-37
5-5
5-8
5-13
5-14
Rev.
E

LIST
OF
ILLUSTRATIONS
(cont'd)
Figure
5-5
Main
Motor
Belt
Adjustment
(AE-9).
5-18
5-6
Forward
Clutch
Adjustment
(Air-Gap) .
5-19
5-7
Bushing
End-Play
Adjustment
for
(Forward
Clutch Shaft
Air-Gap
and
Preload Clutch)
5-19
5-7A
Location of
Drive
Pulley Bracket
(AE-21)
.
5-20
5-8
Torque
Limiting
Device
(Brake)
5-24
5-9
Reed
Switch
Assembly,
Left
(AG)
.
5-25
5-10
Left
Reed
Switch
(AG-1)
Static-Adjustment .
5-26
5-11
Two
Adjustments,
Paper
Feed
Mechanism
(AJ).
5-31
5-12
Locating Idler Pulley
Assembly
5-37
5-13
Locating
Dimension
for
Ribbon
Feed
Rack.
5-38
5-14
Rack
and
Pinion Adjustment,
Ribbon
Mechanism
.
5-39
5-15
Locating
Dimension
for Left
Ribbon
Holder
Plate with
Respect
to
Rear
Guide
Bar
5-40
5-16
Locating
Dimension
for Right
Ribbon
Holder
Plate with
Respect
to
Rear
Guide
Bar
5-40
5-17
Left Operator
and
Stopper Adjustment.
5-41
5-18
Ribbon
Feed
Plate
and
Guide
Bar
(Left Side) .
5-42
5-19
Adjusting
Nuts
for Right
Pawl
Operator
Movement
.
5-42
5-20
Right
Pawl
Operator Starting Position .
5-43
5-21
Pawl,
Ratchet
and
Cam
Movement.
5-44
5-22
Spur
on
Left Releaser.(AL-174)
and
Roller
(AL-46).
5-44
5-23
Fibre Optics
Head,
Adjustment
from
Optic
Fence
.
5-50
5-24
Fibre Optics
Head
Alinement
and
Flexible
Timing
Fence.
5-50
5-25
Motor
Control Location
and
Installation.
5-51
5-26
Removal/Replacement
of
Drive
Shaft
63060142-5001
and
Couplings
63060144-2002
for
VFU
Assembly
.
5-53
5-27
Paper
Tape
Reader
Adjustment
.
5-54
5-28
Printer
Drive
Mechanism,
Model
306
.
5-55
7-1
Schematic
Diagram,
Logic/P.S.
Board
(+5V)
(Sheet 1 of
4)
7-3
7-2
Schematic
Diagram,
Logic/P.S.
Board
(+5V)
(Sheet 2 of
4)
7-4
7-3
Schematic
Diagram,
Logic/P.S.
Board
(+5V)
(Sheet 3 of
4)
7-5
7-4
Schematic
Diagram,
Logic/P.S.
Board
(+5V)
(Sheet 4 of
4)
7-6
7-5
Schematic
Diagram,
Power
Driver
Board
(Sheet 1 of
2)
.
7-7
7-6
Schematic
Diagram,
Power
Driver
Board
(Sheet 2 of
2)
.
7-8
Rev.
E
-vi-

Figure
7-7
7-8
7-9
7-10
7-1.1
7-12
7-13
7-14
7-15
7-16
7-17
7-18
7-19
7-20
8-i
8-1
8-2
8-3
8-4
8-5
8-5A
8-6
8-7
8-8
8-9
8-10
8-11
8-12
8-13
8-14
8-15
LIST
OF
ILLUSTRATIONS
(cont'd)
Page
Schematic
Diagram,
Video
Amplifier. · 7-9
Interconnection
Diagram,
Connector
Card
. . 7-10
Wiring
Diagram,
Printer
Mechanism.
. 7-11
Schematic
Diagram,
Elapsed
Time
Indicator (Option) . . 7-12
Logic/Power
Supply
Board
Connections
. . 7-13
PC
Board
Ass'y,
Logic/Power
Supply
Board
(Sheet 1 of 2). 7-15
PC
Board
Ass'y,
Logic/Power
Supply
Board
(Sheet 2 of 2). 7-16
PC
Board
Ass'y,
Power
Driver
Board
(Sheet 1 of 2). . 7-20
PC
Board
Ass'y,
Power
Driver
Board
(Sheet 2 of 2).
PC
Board
Ass'y,
Video
Amplifier
and
Cable
Ass'y .
PC
Board
Ass'y,
Connector
Card
PC
Board
Ass'y,
Elapsed
Time
Indicator (Option) .
Cable
Ass'y,
Data
Input .
Cable
Ass'y,
Computer
Input.
Model
306
Subassemblies •
Carriage -
AA
Platen -
AB
Paper
Pan
-
AC
.
Driving
Mechanism
(Part 1 of 2) -
AD
.
Driving
Mechanism
(AE,
Part
2)
(This
Drawing
Applies
to
Air-Gap
Clutch
Only)
Driving
Mechanism
(AE,
Part
2)
(This
Drawing
Applies
to Preload Clutch
Only)
Idler Pulley -
AF
Reed
Switch
-
AG
Base
-
AH
Frame
-
AI
Paper
Feed
-
AJ
.
Pi
n
Feed
-
AK.
Ribbon
Feed
-
AL
(Part 1 of 2) .
Ribbon
Feed
-
AL
(Part 2 of 2) •
Cover
-
AM
Operator
Panel
-
AN.
-vii-
· 7-21
· 7-23
· 7-25
· 7-27
· 7-29
· 7-31
· 8-3
· 8-5
· 8-7
· 8-9
• 8-11
· 8-13
· 8-15
· 8-17
8-19
· 8-21
· 8-23
8-25
· 8-29
· 8-31
· 8-32
· 8-35
· 8-37
Rev.
E

Figure
8-16
8-17
8-18
8-19
8-20
8-20A
4-1
LIST
OF
ILLUSTRATIONS
(cont'd)
Electrical
Components
(Part 1 of
3)
-
AO
Electrical
Components
(Part 2 of 3) -
AP
Electrical
Components
(Part 3 of
3)
-
AQ
Print
Head
and
Associated .
Tape
Reader
Assembly
68060125-5003
(Option)
Tape
Reader
Assembly
68060125-5002,
(Option) (Alternate).
TABLES
306
Special Function
Note
Refer
to
the
Engineering
Change
Notice
(ECN)
sheets
shipped
with
the
printer
for
changes
made
to
the
printer
which
have
not
yet
been
incorporated
into
the
technical
manual.
Always
keep
these
Engineering
Change
Notice
sheets
with
the
manual.
Note
Revision
level
indications
at
the
lower
right-hand
corner
of
a
page
reflect
at
what
revision
of
the
manual
that
page
was
updated.
-viii-
Page
8-39
8-41
8-43
8-45
8-47
8-49
4-8
Rev.
E

SECTION
1
INTRODUCTION
This
manual
describes the
Model
306
printer, manufactured
by
Centronics
Data
Computer
Corporation.
It
provides general information,
detailed theory of operation
and
maintenance information enabling
field
service personnel to service the printer.
For
serial input or other
detailed interface information, a separate
document
for
each
interface
is
published for
your
reference.
The
manual
is
subdivided into eight sections,
each
with
its
specific purpose.
Section 1 -
INTRODUCTION,
introduces the reader to the
scope
and
content of the
manual,
and
provides the reader with
a general description of the
printer.
Section 2 -
INSTALLATION,
contains
unpacking
and
installation
in-
structions for the printer.
Section 3 -
OPERATION,
describes the
use
of
all
operator controls
and
indicators.
Section 4 -
THEORY
OF
OPERATION,
contains a detailed description
of
each
major
operation
performed
by
the
printer
electronics, including
flow
charts, timing
diagrams
and
circuit
diagrams.
Section 5 -
REMOVAL,
REPLACEMENT
AND
ADJUSTMENT
PROCEDURES,
in-
cludes step-by-step
removal
and
replacement procedures
for
all
major
assemblies
and
sub-assemblies in the
printer.
Section 6 -
MAINTENANCE,
includes
electrical
adjustments, preventive
maintenance procedures,
and
a troubleshooting guide.
Section 7 -
ELECTRICAL
DRAWINGS
AND
LIST
OF
MATERIALS,
contains a
complete
set
of schematic, wiring
and
component
board
layout
diagrams
and
their
associated
list
of materials
for the
electrical
portion of the
printer.
Section 8 -
MECHANICAL
DRAWINGS
AND
PARTS
LISTS,
includes
all
printer
assembly
drawings
and
their
associated part
lists
for the
mechanical
portion of the
printer.
1-1

At
the
end
of the
manual
are several appendices
which
include a
glossary of signal
mnemonics,
standard 5 x 7
and
optional 9 x 7 character
set,
and
parallel interface specifications.
1.1
GENERAL
DESCRIPTION
(Figure
1-1)
The
Model
306
printer
is
a
medium
speed
impact
printer
which
uses
a standard 5 x 7 or optional 9 x 7 dot matrix for character generation.
Figure 1-1.
MODEL
306
PRINTER
(TOP
AND
VFU
COVERS
REMOVED)
The
unit prints
at
a rate of
120
characters per second,
which
is
approximately
one
full 80-character line per
second
(including carriage
return time).
Paper
is
sprocket-fep,
and
paper widths
from
4 inches to
9~
inches
can
be
accommodated.
The
printer
can
produce
one
original
and
four copies. Standard
print
format consists of
10
characters per
inch
horizontally
and
6 lines per inch
vertically.
1.2
LOGIC
FLOW
DIAGRAM
(Figure
1-2)
The
standard
printer
contains
an
80-character buffer.
For
serial
data inputs, optional
serial
interfaces allow data to
be
received
at
rates
from
100
to
9600
baud.
Several other optional interfaces are
available
as
required
by
the user.
Once
a line of printable characters
is
stored in the buffer,
head
motion
is
initiated
by
activating the
forward
clutch, causing the
print
head
to
move
from
left
to
right
across the paper.
With
the
head
in motion,
data
is
transmitted
from
the buffer to the character generator.
From
there,
character write pulses are sent to the driver
circuits,
which
energize
the
print
head
solenoids causing the print wires to
form
the characters
on
the paper.
Rev.
E 1-2

PARALLEL
INPUT
(TIMING)
M.,k
-
Binlty
, -
+2.410
!!U:;
Vo!U
5p";l
_
Bln.ty
Q - 0 10 +
0.4
'0'011
O.'I~~
'~':'Sl
~ ~
,"st"lo'
OI.IS.'Obl-U------U-
.t
I-ISImlnl1
5oo1-151
m
..
J
~--l....:.-+-"""
RS
232
SERIAL
INPUT
(TIMING)
Blud
A.'I
-tOO -
9600
5'1"
Puille -
On.
Bit
Timl
StOP
Puille -
min.
of
ani
Bit
Tlml
M"k
-
Binlty
, _
-3
to
·21
Voln
SPiel
-
Bin.,y
0 -
+3
to
+21
Voln
Figure 1-2.
BASIC
BLOCK
DIAGRAM
Paper
movement
is
initiated
by
a line feed, vertical tab
and
form
feed function.
In
the standard
306
printer,
vertical
form
movement
is
soft-
ware
controlled
by
means
of line count pulses, rather than hardware-controlled.
However,
an
optional vertical
format
unit,
(VFU)
is
available for
hardware-controlled vertical formatting, identical to the Series
100
printers.
In
addition, the
printer
recognizes the following special control
codes:
bell,
delete
and
elongated character,
as
described in Section 1.3.3.
1.3
PRINTER
OPERATION
Basically,
all
printer
functions
can
be
grouped
into
one
of the
following three categories:
1)
character printing,
2)
paper
movement,
and
3)
other auxiliary functions
such
as
bell,
delete,
etc.
1.3.1
CHARACTER
PRINTING
(Figures
1-3,
1-4)
A
small
aluminum
carriage supports the print
head
assembly.
During
printing operation, the carriage travels along the
print
line
from
left
to
right.
Printing
is
accomplished
by
selectively firing the
print
wires
as
the
print
head
moves
from
left
to
right
across the
print
line. Printing
impulses energize the
print
solenoids
and
drive the
print
wires against the
ribbon, paper
and
platen to
form
the characters
in
a dot matrix pattern.
When
the solenoids are de-energized, the wires are
withdrawn
so
they are
flush with the surface of the jewel.
Each
solenoid
can
fire
independently
up
to five
times
for anyone character. Figure
1-3
shows
an
example
of the
dot matrix
forming
the
letter
H.
All
character formation in the 5 x 7
and
9 x 7 dot matrix are
shown
in Series
300
Operators
Manual.
1-3
Rev.
F

JEWEL
'----A-~
Figure 1-3.
PRINTING
THE
LETTER
(H)
Figure 1-4.
PRINT
HEAD
COMPONENTS
The
print
head
(Figure
1··4)
consists of the jewel, casting
and
seven
solenoids with attached print wires.
The
seven
print solenoids
and
their
attached print wires are arranged radially
around
the print
head.
The
free
ends
of the print wires
pass
through
a wire
guide
at
the front of the print
head,
which
properly
spaces
the wires
so
that the correct wires
pass
through
the correct
hole
in
the print jewel.
Printing action
is
initiated
when
the input buffer
has
been
filled
or
a carriage return
(CR)
code
has
been
received.
The
print
head
then
sweeps
across the
page
until a
CR
command
is
decoded
at
the buffer output of the
head
reaches the
aO-column
limit switch.
At
this
time, the print
head
returns
to the
left
margin
and
an
automatic line
feed
is
performed.
As
an
option,
the automatic line
feed
can
be
disabled.
/'
1.3.2
PAPER
MOVEMENT
(Figure
1-5)
Paper
can
be
moved
manually
by
rotating the platen
knob
or
auto-
matically
by
any
of three
paper
movement
commands:
line feed, vertical tab
and
form
feed.
Figure 1-5.
PAPER
MOVEMENT
MECHANISM
Rev.
D

Power
necessary to drive the sprocket-feed
paper
tractors controlling
paper
movement,
is transmitted
from
the
main
motor
through
an
O-ring belt
to the
form
feed
mechanism,
where
it
is
then
transferred via the
paper
drive
shaft to the paper tractors.
The
form
feed
mechanism
consists of a
form
feed
or release clutch, a line
feed
solenoid
with
slide
unit,
and
a gear train
mechanically linking the
main
motor
to the
paper
feed tractors.
To
initiate
a single line feed, the line
feed
solenoid
is
energized
15
milliseconds.
Upon
completion
of the line
feed
command,
a
60-90
millisecond
delayed line
feed
interval
is
generated.
This
allows the clutch
pawl
and
clutch
mechanism
to return
home
before another line feed
is
allowed.
Vertical
forms
movement
is
accomplished
by
applying a
DC
level to
the
paper
feed
solenoid.
In
the standard
306
printer,
this
paper
movement
continues until
it
is either terminated
by
the reception of a delete
code
(octal
177)
or
an
INPUT
PRIME
signal
at
the
interface connector, or a
paper
time-out condition.
However,
if
the optional Vertical
Format
Unit
(VFU)
is
used, the
paper
movement
is
terminated
when
a
hole
is detected in the
appropriate
channel
of the vertical
format
paper
tape.
As
paper
moves
in
the printer,
each
line
advance
causes a line count
switch located in the
form
feed
mechanism
to
open
and
close.
The
two
wires
from
this switch
go
to the interface connector via the logic card.
As
a
result,
a line count level
from
the input device
is
switched
on
and
off
by
the printer for
each
line
advance.
If
the
306
contains
no
optional
VFU,
the user's software
can
control vertical formatting
by
counting these line
count pulses
and
terminating the paper
movement
operation
when
appropriate.
When
the printer
runs
out of paper, a sensing switch activates a
two-second
audible
tone
in
a speaker (option) located
at
the rear.
The
printer also stops printing
and
lights the
PAPER
EMPTY
light
on
the control
panel.
1.3.3
SPECIAL
FUNCTIONS
In
addition to the printable characters
shown
in
Appendix
B,
and
the carriage return, line feed,
form
feed,
and
vertical tab
codes
previously
described, the printer also recognizes the following special control codes.
Delete
(Octal
177)
-
Primes
the printer electronics
and
clears the
buffer.
Bell
(Octal
007)
-
With
Bell
option
only
-Generates a
two-second
audible tone
in
the speaker
at
the front of the printer.
Select
(Octal
021)
-
Allows
printer to receive data,
same
as
activating
SELECT
switch.
1-5
same
Rev.
0

Rev.
E
1.4
SYSTEM
FEATURES
1.4.1
SPECIFICATIONS
SUMMARY
The
Model
306
printer contains
all
the features described in the pre-
vious sub-sections of this
manual.
Some
of these features, in addition to a
few
characteristics not previously
mentioned,
are
summarized
in the
following specifications.
Printing Method
Printing Rate -Characters
-Full Lines
~
Short
Lines
Transmission Rate -Serial
-Parallel
Data Input
CharacterStructure
Code
Indicator-Switch Controls
Indicators
Manual Controls
Character Buffer
Format
PaperFeed
Paper
Number
of
Copies
Dimensions
Weight
Electrical Requirements
Temperature -Operating
-Storage
Humidity -Operating
-Storage
Impact, character-by-character, one line at a time
120 characters per second
60
lines
per
minute
(80
character line)
150
lines per minute (20-30 characters)
100 to
9600
baud (with Serial option)
See
Timing
Diagram,
Appendix
B
Parallel (Serial option available)
5 x 7
dot
matrix, 10-pointtype equivalent
9 x 7
dot
matrix, 10-point type equivalent (option)
USASCII-
64
characters printed
ON/OFF, SELECT, FORMS OVERRIDE.
Option. LINE FEED. TOP
OF
FORM
PAPER OUT, SELECT
Form ThiCkness, Paper Advance Knob
80
characters
(1
line)
80
characters maximum per line, 6 lines
per
inch
Sprocket feed, adjustable to 91
/2"
width
Standard sprocketed paper
Original and up to four carbon copies
12
3
//'
high, 183
//'
deep,
23
1
/4"
wide
66
pounds
115
VAC
±10%,60
Hz.
115/230 VAC
+10%,50
Hz (option)
40° to 100°F
-40°
to 160°F
5%
to
90%
(no condensation)
0%
to
95%
B.
RIBBON
SPECIFICATIONS
The
printer uses a I-inch
nylon
ribbon
mounted
on
3-inch diameter
spools.
The
following four colors are available:
Bl
ack
-Part
No.
63002293-·5001
Red
-Part
No.
63002293-5002
Green
-Part
No.
63002293-5003
Blue
-Part
No.
63002293-5004
1-6

C.
PAPER
SPECIFICATIONS
The
printer uses continuous
form
paper with standard
feed
holes
on
each
edge.
Paper
widths
from
4 to
9~
inches
can
be
accommodated
by
the
printer.
Using
multiple-part
form,
one
original
and
up
to 4 copies
can
be
printed,
all
very legible.
Paper
weight specifications are
as
follows:
Single-Part
Forms:
15
to
20
lb
Multiple-Part
Forms:
Original -
12
to
15
lb
Copies
-9 to
12
lb,
last
copy
15
lb
(Maximum
of five parts)
Carbon
Paper:
1.4.2
STANDARD
AND
OPTIONAL
FEATURES
standard
features
• Parallel data
input
• Elongated boldface characters (Iine-by-line)
•
Paper
runaway
inhibit
(10 second
time
out)
• Lower
case
prints
as
upper
case
•
Automatic
line feed on carriage return
" Gated strobe pulse (data input)
• 115 Volts, 60 Hertz
• Prints original plus
four
copies
• Coded character software
• Fixed vertical/horizontal registration
• Low noise level
• 5 x 7
Dot
matrix
1.5
PHYSICAL
DESCRIPTION
7~
lb with
medium
hardness
optional
features
• Vertical
format
control
•
Automatic
motor
control
• Additional
sets
of
64,96
or
128 characters
• 9 x 7
dot
matrix
character
sets
Q
Audio
alarm buzzer
g 50 Hertz,
230
Volts AC
• Line feed switch
• Non-gated strobe
•
Automatic
line feed disabled
• Selectable
sinQle
Character elongation
•
Automatic
carriage return on line feed,
vertical tab and
form
feed
• Serial communication interfaces
• Popular parallel computer interfaces
•
Bottom
of
form
•
Inhibit
delete code
The
printer
is
approximately
12"
high
by
19"
deep
by
23"
wide,
and
weighs
approximately
66
pounds
..
The
complete
printer
is
assembled
on
a
base
made
of
cast
aluminum.
Enclosing the printer are three
removable
plastic
covers: the
main
cover, top cover
and
VFU
cover.
The
top
cover
can
be
opened
to give access to the
print
head
by
tilting
the cover
back
of
lifting
it
completely
off.
The
VFU
cover
can
also
be
tilted
back
or
removed
for access
to the optional Vertical
Format
Unit,
if
it
is used.
Figures 1-6 to 1-9 are
different
photographic
views
of the
printer
taken with the covers
removed.
All
major
assemblies are
identified,
in
addition to a
few
other important
components,
the locations of
which
should
be
noted. 1-7
Rev.
D

1.
Print
Head
Assembly
2.
Video
Ampl.
and
Cable
Ass'y
3. Carriage
4.
Ribbon
Cable
5.
Damper
Piston
6.
Operator
Panel
7.
Damper
Cylinder
8.
left
Ribbon
Feed
9. Vertical
Format
Unit Option
10.
Pin
Feed
Mechan1sms
11.
Paper
Feed
Shaft
12.
Platen
13
. Platen
Knob
14
.
R1ght
R1bbon
Feed
Figure
1-6.
LEFT
FRONT
VIEW
OF
306
Rev.
0
1.
Ha1n
Dr1ve
Motor
2.
Dr1ve
Mechan1sm
3.
Forward
Clutch
'
4.
Reed
Swftch
(EOP)
5.
Mafn
Drfve
Belt
6.
T1m1ng
Fence
7.
Carr1age
Return
Spr1ng
8.
Power
Dr1ver
Board
9.
Optfcal
Pfck-Up
10.
l1ght
Source
11.
Optfc
Bundle
12.
Penetrat10n Control
Knob
13.
Form
Feed
Mechanfsm
14.
Solenofd Ffnger
Board
Figure
1-7.
RIGHT
FRONT
VIEW
OF
306
1-8

1.
Logic/Power
Supply
Board
2.
Logic/P.S.
Fuses
7.
AC
Power
Input
8. Input
Cable
(W2)
3.
AC
and
35V
Input
Connector
(JI)
9.
Motor
Control
Option
4.
DC
Output
Connector
(J2)
10.
Line
Feed
Solenoid
5.
Input
Connector
11.
Line
Count
Switch
6.
In-Line
Fuse
Figure 1-8.
REAR
VIEW
OF
306
1.
35V
Power
Supply
5.
Paper
Out
Switch
2.
Power
Transformer
6.
Main
Printer
Harness
3.
DC
Output
Connector
(J2)
4.
AC
and
35V
Input
Connector
(J1)
7.
Motor
Starting Capacitor
Figure 1-9.
REAR
VIEW
OF
306
(LOGIC/P.S.
BOARD
REMOVED)
Rev.D
1-9/1-10

SECTIONS
2
AND
3
INSTALLATION
AND
OPERATION
A separate Series
300
Operators
Manual
contains
most
of the in-
stallation,
set-up
and
operating procedures for the
Model
306
printer.
This
Operators
Manual
should
be
referred to during
normal
printer in-
stallation
and
operation.
Included
on
the following
pages
is
additional information
not
contained in the Operators
Manual.
2.1
SITE
PREPARATION
(Figure 2-1)
A line
drawing
of the printer
dimensions
is
shown
in Figure 2-1.
I
12.82"
It-------r.
I·
11--------~""'"'-===--2J.17"
HA,-===--~/I
WEIGHT:
615
POUNDS
Figure 2-1.
PRINTER
DIMENSIONS
Enviromental
and
electrical
requirements
at
the
installation
site
are
as
follows:
Temperature:
Humidity
(%
RH):
Electrical:
40~
to
100
0 F (Operating)
-40
to
160
0 F (Storage)
5%
to
90%
(no
condensation) -Operating
0%
to
95%
-Storage
115
VAC
±10%
60
Hz,
3
amps
115/230
VAC
t10%,
50
Hz,
3
amps
2-1
Other manuals for 306
1
Table of contents
Other Centronics Printer manuals
Centronics
Centronics 101 User manual
Centronics
Centronics 101AL Guide

Centronics
Centronics 702 User manual

Centronics
Centronics 705 User manual
Centronics
Centronics 352 User manual

Centronics
Centronics 101AL User manual
Centronics
Centronics 101A User manual
Centronics
Centronics 101A User manual
Centronics
Centronics 101 User manual

Centronics
Centronics 101A User manual
