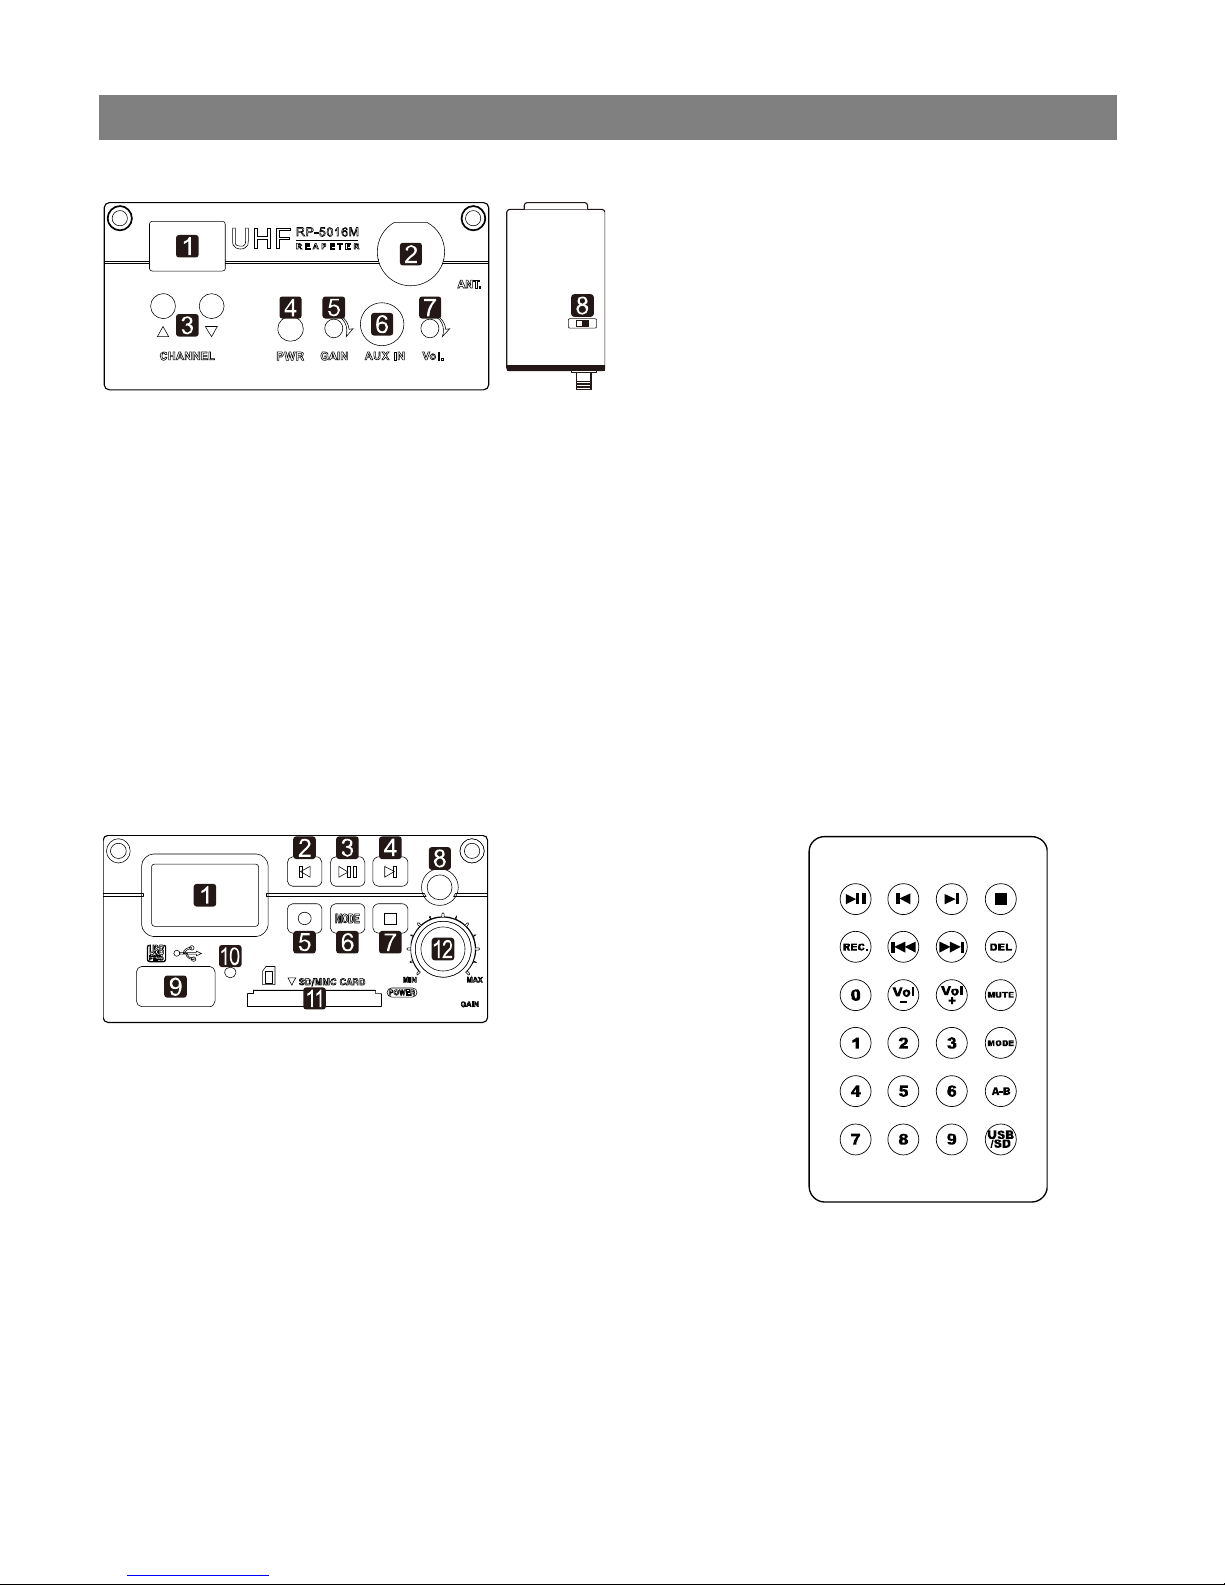
Chiayo QR-2000N User manual
Other Chiayo Microphone System manuals

Chiayo
Chiayo Live-100 series User manual

Chiayo
Chiayo SQ-6100 IrDAR User manual

Chiayo
Chiayo DH2400 User manual

Chiayo
Chiayo IrDA-9000 User manual

Chiayo
Chiayo RR-2000 User manual

Chiayo
Chiayo R-1001 User manual

Chiayo
Chiayo QR-4000N User manual

Chiayo
Chiayo SDR-5216 User manual

Chiayo
Chiayo QR-4000 U User manual

Chiayo
Chiayo R-1010 User manual

Chiayo
Chiayo NDR-3100 User manual

Chiayo
Chiayo IRX2 User manual

Chiayo
Chiayo Smart 300 User manual

Chiayo
Chiayo Stage-100 Series User manual

Chiayo
Chiayo SDR-8200 User manual

Chiayo
Chiayo AIR-812 User manual

Chiayo
Chiayo SDR-6200 IrDA User manual

Chiayo
Chiayo IWR-320 User manual

Chiayo
Chiayo R-1001 User manual

Chiayo
Chiayo IRX2 User manual


Popular Microphone System manuals by other brands


Sennheiser
Sennheiser Evolution Wireless Digital EW-DX EM 2 quick guide

Alpha Technologies
Alpha Technologies RBMS Installation & operation manual

SWIT Electronics Co.,LTD.
SWIT Electronics Co.,LTD. CW-S150 user manual

Shure
Shure UA844 user guide

Panasonic
Panasonic SHFX70 - DVD HOME THEATER WIRELESS SYSTEM operating instructions

Pyle
Pyle PDWM5000 user manual