manuals.online logo
Brands
  1. Home
  2. •
  3. Brands
  4. •
  5. chinavasion
  6. •
  7. Cell Phone
  8. •
  9. chinavasion CVYZ-M466-White User manual

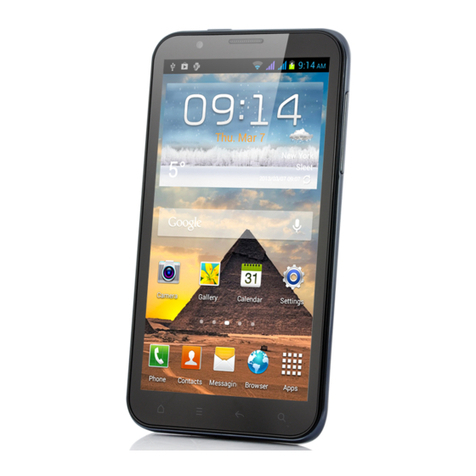
chinavasion CVYZ-M466-White User manual

ANDHOID
M u ltimed ia
I Safoty&Notice
WARI{lNG: Plo!.o pay attontlon lo thsso guidellnea, il's
d!ngarout !nd may broak tho law, ovon the manufacturor
wlll not undcrtrk. any rospon!lblllty to th6 user who doos
noi tollow wlth th. tollowlng rocommondations or
lmprop.rto utcthg 9mart Phone.
alt tho phono supports the "Flight mode'function, please
set th6 modo a8'Fllght mode" on tho plan€. lf not supPo.t,
plggso turn otlthg phon€ before boarding, because the phone
maycau!glntodergnceln aircraft Pleasefollowany
rgstrlctlons on tho alrplane.
aSwltch tho dovlce otf noar the fuol, chemicals, or blasting
aroa!, Kesp thg d6vlce away trom tho ohildren
iaWhll€ drlvlng please oboy local laws and regulations with
regard to Smart Phono uso. When talking on tho phone while
drlvlng, pl6a8e obey th6 followlng rules: Concentrate on
drlvlng and bg awaro of traffic conditions; if your Smart Phone
has a handB-fros functlon, pleaso use it in this mode. Under
poor drlvlng condltlons, pleaso stop the car before you dial or
plck up the phono.
aSwltch otfthe Smart Phones in the hospital orother
forblddan uslng Smart Phone place. The Sma{ Phones will
affgct the normal work of electronic equipment and medical
devlcoa, Buch ag pacemakers, hearing aida and other medical
el6clronlc8 gqulpment.
aNon-orlglnal accessories and components are not
provlded wlth repair warranty qualification.
aPleaso do not disassemble your phone by yourself, if your
phon6 l9 out of order, please contact your supplier.
aPloas6 do not charge the Smart Phone berore battery is
lnstalled. Do not short-circuit the battery
aSmart Phone must bo charged in the good vontilated and
coollng environment, and away from flammable and explosive
matgrials.
aln order to demagnetization, please keep Smart Phone
away from th€ magnetic matorial, such as disks, credit card
etc.
aKeep the devlce dry. Preoipitation, humldlty, and all typos
of liquids or moisture can contain minerals that wlll corrodo
electronic circuits. lf your devlco does ggt wgt, r€move th6
battery, and contact with the suppller'
aDo not use the Smart Phone in too hlgh or too low
temperature environment, and do not expoSg thg SmSrt Phono
to strong sunlight or high humidity.
aDo notuse liquid orwel clothwlth strong d6t6rg6ntlo
clean the device.
i)This smart Phone is provided photograph, vldro rlcordlng
and sound recording functions; please follow th€ rolavanl lawB
and regulationsto usethosefunctions Photograph, vldco
recording and sound recording wlthout authorlzatlon may
violate laws and regulations.
itwhile using tho network functlons, pleas€ dg not download
the tiles which hav6 virus. do not lnstall 9ny pholoa and rln0
tones which have beon damagod. lf It results ths phon!
abnormally, our company wlll not und6rtaks 8ny r!!pon!lblllly,
aPlease dispose of battorles accordlng tg local rogulatlons,
pleaso recycle when po39lblo. Ploagg do not dlspolc a!
household waste.
STATEMENT: our Company r...rv.t tho tlghl to rtvlr.
this manual contoniwlthout prlor notlca.
2 Gettlng st.rt.d
2.1 Turnlng the Phone On and Ott
Toturn on oroffthe phono please hold down iha Powarkty,
lf you turn on the phone without havlng lnlcrtcd tha SIM card'
phone will display "No Sltl c.rd'. Arler lnlartlng th. 8lM oard,
the phone will automatically check lf ths SIM lr ulaabll.
The following will be displayod ln th18 ordrri
lnput Phone Lock Code
-lfyou setth6 Phono Lock.
lnput PIN
-lf you set the SIM Lock.
Searchlng
-The phone will conduct a search to find the approprlat!
notwork connections.
2.2 Battery charging
lPlug the cha196r connector with the phone, and plug thr
chargor lnto the electrical outlet.
IAt thl6 timo tho charge level icon will repeatedly fl88h 8i tha
top rlght corner of the mobile phone's screen; lf the mobllr
phone charging while power off, a charging indication wlll
appoar on tho scroen. lf the mobile phone was us€d evgn lfttf
th6re was insufficient power, it might take some timo 6ttor
havlng begun charging until indicatlon ofcharging appear! on
thg screen.
Whgh tho battsry levol icon does not fla6h anymors, thls
mo€ns thatlhe b6ttery lsfullycharged. lfcharging whllo powa,
otf, th6rc wlll ltlll be an lndlcatlon on lhe screen whgn ths
charglng l! compl6to. Thls procoss usually takes moro than
2.5 hours(Tho llrst th166 tlmes you recharge, you'd bettor kaaP
'l2.14 houre, 68 thls wlll holp extend battery life).The mobll.
phon6 6nd charg6rwlll b6comewarm during charglng 9nd thll
l3 normsl.
lwhcn charglng ls complete, unplug the chargo connoctol
from tho oloctrlcal outlet and the mobile phone.
ATTENTIOil:
lChgrglng must be performed in a well-ventilated area wlth a
tampcraturo b6tween -10C and +45C. The factory-suppllEd
charger must be used. Using an unapproved charger could ba
dangorous ln addition to being in breach oI the provisions ot
tho ropalr warranty.
Ilt the moblle phone automatically shuts down, or indicatsa
lhgt'Battery is low'you should immediately charge the
b€tt€ry. lfthe battory has not been €ntirely used up befor€
charging, the mobile phone will automatically decrease th6
recharglng period.
@@B@
.Work 'Life . Play . Hello
User Manual
-.--trl
3 Function Menu
3.1 Contact
You can use the phonebook function to save @ntact
information. You can view or managemenl your contacts.
NOTICE: SIM card number of records siorage capacity and its
related
3.2 iressaging
You can send or receive SMS and MMS through information
function.
3.3 Phone features
3.3.1 Calling
Enter the phone number, including the arga code, select one of
lho SIM card and start to make a call. During in a call, it wiil
display the call status information, if you need to input tho
number, please directly press tho number key. For
international calls, press "0" key to switch, until the
international phone prefix "+' appears on the scroen, enter the
country code and full number you wish to call.
3.3.1.1 Shortcut di.l
ln the dialea interface, hold the shortcut diat number keys in
corresponding list of (2 - 9) can dial a phone. Numborl key
have been preset voice mail shortcul dial.
3.3.1.2 C.ll using thecontacts
1. Pressthe Home key, clickon the "People'Appto open the
contact.
2. Press the Menu key -> Search, Sea.ch for the contacts in
lhe contact list
3. Click on the contact -> select the SllU card call.
3.3.1.3 Call from the call log
1. Pr6ss the Home key, click on "Dial" icon to opon the dialer.
2. Click on the call records list. You can also choose from
contact interface call rocords lag page open call records list.
3. Click on the call log -> seloct the SIM card to mak€ the call.
3.3.1,,{ Call from the messago
1. Press the Home key, click on "Sl\rs" icon to open the
messago.
2. Clickloselectand open the needed messagesor
conversation,
3. Clickon the required mgssages. lfthe message cohtains
multiple number, the phone can be activated automatically to
options menu you choose information requirod number, click
on the call button to dial.
3.3.1.5 Emergency calls
Whether install the SIM card or not, the phone can calt the
emergency phone number for help. for example dial number
999.
3,3,1.6 Answer a call
When you received a call faom contacts, slide the answer
bulton to rightto answerthe call. lfthe headset is plugged in,
you can also usetho button on the headsetto answerthocall.
3.3.1.7 Endthecall
When you received a call from contacts, slide the button to left
to reluse the call. While answering, click on tho end call button
to end the current call.
3.3.1.8 Call options
Whil€ jn calling, you can do the operation:
aMut.
To stop transmitting the user's voico.
nHold
Put a call on pause.
lUn hold*
Resume tho call.
ISpeaker
Activaie or turn off the PA.
!Contacls
Enter contacls menu.
IAdd call
Add a new call.
lDial pad
Begin to dial new call.
IEnd c.ll
End the call.
3.4 Using the mobile phone memory card as U disk
1. Use USB line will be mobile phone connected to the
computer. The stalus bar will show the notiticatjon icon.
2. Open tho notice panel.
3. ln the notification panel, touch'USB connected'. and then
touch'turn on USB storage'.
NOTICE :lfyou ln the cell phone connections to the
computersolectopen USB storage devices, mobile phone
will not be able to identlty memory CARDS. you will not be
able to use some ofthe moblt€ phone applicatiqns, such
as the camera.
3.5 WLAN
Provide as faras 300 feetWLAN (l00 M)wireless network
access range. lf you want to use the mobile phono of WLAN,
you have to connect to wireless access point or.hot spots',.
NOTICE: The .vailabllity of WLAN signal coverage and wiil
depend on the quantity, infrastructure, and other signals
penetrate the obrect and decide.
3.5,1 OpentheWLANand connecttoawirelossnetwork
1. Press the Home key, click on Setting-> Wireless &
networks.
2. Select WLAN check box, to open Wi-Fi. The phone wiil
automatically scan can be used a wireless network_
3. Click on the Wi-Fi settings. Then WLAN network wiil
display a Iist of WLAN to find the network of the name and
security Settings.
4. Touch one ofthe WLAN network to connection. When you
select open network, mobile phone will be connected to the
network. lf selected is WEP, WPAMPA2 encryption network, it
must first corresponding input password, and thon the touch
connection
3.5.2 Connect to other WLAN networks
1. Wireloss and network on the screen, touch the WLAN
sottings. Find WLAN networks will be disptayed in the WLAN
nelwork list.
2. Touch other WLAN networks can be connected to the
network.
NOTICE: ln addition, the mobile phone via GPRS lnternet.
GPRS SIM card in our current default boot is open, the user
can manually selecl the specific location in "Settings -> SIM
management -> Data connection, touch "Data connection" to
close the current SIM card dala connection.
3.6 Bluetooth
3,6.1 Turn on Bluetooth oasetihe phone can be detectad
1. Press the Home key, clickon Setting
2. Click on "Wireless & networks", Then Select "Bluotooth"
check box, to open Bluetooth. The phone will automatically
scan can be used awireloss network.Afteropen, the slatus
bar will appear Bluetooth ( I ). Touch the "Scan for dovices"
will begin to scan Ior Bluetooth devices within rahge.
3. Touch Bluetooth Settings, All the equipment will show up in
Bluetooth devices list below.
(Select the check box can bo detected, the phor/e is set to be
detocted, so that within the scopo of other Bluetooth devices
can find the phono.)
lmportant: cell phones can detect the longest time for two
minutes.
3.6.2 iratching and connecling Bluetooth headset
'1. Press the Home key, click on Setting.
2. Click on "Wireiess & n6tworks" -> Bluetooth Settings, Then
Select Bluetooth check box, to open Bluetooth. Then your
phone to scan within the scope of the Bluetooth, and will all
find to device display in Bluetooth device list below.
Equipment found below in the list of Bluetooth devices.
3.6.3 lnterruptandtheBluetooth h.adsetconnectlon
1. Press the Home key, click on Setting -> Bluetooth Settings.
2. ln the list of Bluetooth devices, touch or tap and hold
hands-free headsot is connected.
3. Long press and select "Disconnect & un pair".
4 Application
4.1 Browser
Click the browser icon to open th6 browser. ln the browser, you
can open the page by the following methods:
'1. Click on the browser address bar, input for the open web
site. Click.
2. Touch the menu key-> bookmarks, choose need to open the
bookmarks or click on the most visited/history iecords label
page to choose open other web pages.
4.2 Enail
Enter E-mail address and login password, choose
communication protocol, Selectdataaccount[Editwireless
local area network or SIM card to connect to the E-mail
networki, Sotting receiving server and send server address,
Edit user name Iusername need to use th€ name generate
itselfl, and save Settings, onter the mailbox options to write
and receive mails.
4.3 Setting
4.3.1 SIM management
lSll\4 information: Choose SIM card enabled or disabled.
lDefault: Set up voice call, messaging and daia connection
use the default SIM card
aGeneral setting: Set the SIM card roaming and contacts &
stM.
4.3.2 Wireless&netwoaks
lAirplane mode: Disable all wjr6less connoction.
lWi-Fi: sele6t on or off.
IWi-Fi settings: Set up and management wireless access
points, etc.
IWi-Fi Direct settings: Set up and management WLAN Direct.
lBluetooth: 0pen/cIose Bluetooth.
IBluetooth settings: Management connection, setting dovice
name and can detect the sex, etc.
lTethering & portable hotspot: Will you move data connection
through cell phone USB or as a portable WLAN hot share.
IVPN settings: Setup and manage virtual private letwork.
IMobile networks: Check the mobile data usage, set access
point name and network operators.
!GPRS transfer prefor: Will you move data connection
through cell phone USB to share.
4.3.3 Call settingg
IVoice call
llP call
lOther settings:
,{.3.4 Audio profiles
IGeneral
lSilent
IMeeting
IOutdoor
4.3.5 Dlsplay
lWallpaper: Set up the wali paper of mobile phones
lBrightness: Set tho brightness ofth6 phone d:splay
lAuto-rotate screen: Set up ifopen automatically rotating
screen.
lAnimationi Display window animalion Settings.
IScreen timeout: Automatic adjustment screen lock the dolay
time before.
,1.3.6 Location
lUse wireless network: The use of mobile network in
application check position.
IUse GPS satellites: Accurate location to street level.
IGPS EPO assistance: Use GPS auxiliary malerial (EPO) to
accel6rate the GPS positioning.
IEPP settings: View the modified EPO configuration
information
lA-GPS: Use auxiliary dala can accelerate the GPS
positioning.
IA-GPS: View the modified A-GPS Settings
4.3.7 Socurity
lScreen unlock: Use design, PIN or password lock screen.
lSlM card lock: Can open/close lock a SIM card and the SIM
card PIN change.
lPasswords: Enter the password can s6g of characters.
lDevice admlnistration: Add or d€letg dEvice manag6r.
lCredential storagg:Allows the application to accsss s6curity
vouchers end olher documents-
alnstall from SD ca.d: F.om the SD card installed encryption
certificat€.
lSet password: Sel or modify the documents stored
password.
I Cl6ar Btorage: Remove all of the contents of the documents
slored and rcsetihe password.
4.3.8 Appllcatlons
llJnknown sources: Setting is allowed to inslall the electronic
mark6t to provido application.
lManage applications: Managemgnt and delete installation
applicatlons.
lRunning seruices: Check and control the currently running
services.
lStorage use: Ch6ckthe applicalion ofstorage space.
IBattery use: Check lhe power consumption.
IDevelopment Selthe appli@tion developfrenl options! set
USB debugging, keep sensei state and allow simulation place
Settings.
i|.3.9 Accounts & $ync
lBackground data:Applications can always synchronization,
send and r€cgivE data,
IAuto-8ynci Applicaiionsto be aulomatic synchronous data.
i1.3.10 Privacy
lFactory data reset: Remove all data on mobile phon€s.
4.3.'ll Storage
ISD card: view SD card lotal space and availablespa@.
lMount SD card:Afterunloading SD @rd SO erd will not
display.
lEraso SD card: Removethe SD card all thedata.
tlnternal storage: Display size available space.
4.3,12 Languago E koyborrd
aLanguage settings: can sel€ct language and ussrdictionary.
lKeyboard $nings: choos€ lhe Android keyboard, or oth€r
input method.
llnput method: Ch@se input m€thod way.
il.3.t3 Yolo lnput t output
lTen-tespe*h settings: set to Listen to an example, always
u* my *tling.
loefault ettings: setto Default Engine, install voice dala,
Spedr Ete, and language.
lEngin6: Pi@TTS senings.
[email protected]
Ac6ibility: set 0pen/c lose.
Pow6a bulton 6nds @ll: Press power key words will end the
€ll. not shut dorn th6 scr66n.
Quic* b@t: $tOpen/close.
4.3.15D.t tdm.
lAutooatic: Use networks ofter a tim6 and date.
lset dat6: Manuallyedit date.
lSelettime zone: Manually choose time zone.
lsetlime: Manual set a time.
lUse 2+hou, fomat: sel Open/close.
lselect date fomat: Choose the date the formatofthe show
a-3-16 Schsdul. pou.r orroft
Each 6me, including theliming olthe setup time and r6peat
way @ntenl. $t up @mplets and checksd opEn the alarm
d@t ched( box, when the corresponding sgtting tlme, will be
set a@rdinE tothe switch machine operation and executive
b@t orshuldown aclion.
il.3.l7About phono
ISFt6m updates
lstafus: Checkthe current state ofthe mobile phone.
lAbout batGry: View power consumption situation
lL69al infomation: check the open source license
lAbout vecion: Display model.
a.,a Cana.a
1. During the view-llnding mode, adlust th€ lEns to allow what
is boing photographed to app6ar in the viewfinder.
2, After framing the picture you wish lo take, koep the camera
steady and press"I"to take plctures.
3. After taklng photos. Click th9 pholo preview on the bottom
right, you can appear ln the menu for the following operation:
L You can share the photo via [rMS, E-mail or Bluetooth, etc.
2. Click tho photo for more operation, such as deleting
4.5 Music
1. Click on the artist/albums/songs,/ library, find you need to
play music files.
2. Clickon the musicfiles startplaying.
4,6 File m.nagel
ln the main menu click on file management can enter to file
management list, memory card shows all ofth6 fil€. Root
directory of the docum€nt according to the mEnu button can be
now folder, folders and files to copy, view, cut, d€lele, rename,
share and details.
11

Other chinavasion Cell Phone manuals

chinavasion CVZV-M378-WHITE User manual

chinavasion

chinavasion CVZV-M378-WHITE User manual

chinavasion CVFD-M310-Black-2GEN User manual

chinavasion

chinavasion CVFD-M310-Black-2GEN User manual

chinavasion CVXK-G419 User manual

chinavasion

chinavasion CVXK-G419 User manual

chinavasion CVFD-M213 User manual

chinavasion

chinavasion CVFD-M213 User manual

chinavasion G99 User manual

chinavasion

chinavasion G99 User manual

chinavasion CVSED-A3801 User manual

chinavasion

chinavasion CVSED-A3801 User manual

chinavasion CVFD-M180 User manual

chinavasion

chinavasion CVFD-M180 User manual

chinavasion CVSL-112 User manual

chinavasion

chinavasion CVSL-112 User manual

chinavasion CVFD-M46 User manual

chinavasion

chinavasion CVFD-M46 User manual

chinavasion CVWN-M303 User manual

chinavasion

chinavasion CVWN-M303 User manual

chinavasion CVSL-114-BLACK User manual

chinavasion

chinavasion CVSL-114-BLACK User manual

chinavasion CVSDW-9802 User manual

chinavasion

chinavasion CVSDW-9802 User manual

chinavasion CVCY-M09-Silver User manual

chinavasion

chinavasion CVCY-M09-Silver User manual

chinavasion CVSC-M28 User manual

chinavasion

chinavasion CVSC-M28 User manual

chinavasion CVFD-M310 User manual

chinavasion

chinavasion CVFD-M310 User manual

chinavasion CVSC-237 User manual

chinavasion

chinavasion CVSC-237 User manual

chinavasion CVCY-M09 User manual

chinavasion

chinavasion CVCY-M09 User manual

chinavasion Smart Series User manual

chinavasion

chinavasion Smart Series User manual

chinavasion CVVB-M296 User manual

chinavasion

chinavasion CVVB-M296 User manual

chinavasion CVSL-104 User manual

chinavasion

chinavasion CVSL-104 User manual

chinavasion CVXT M495 User manual

chinavasion

chinavasion CVXT M495 User manual

chinavasion CVEM-M274 User manual

chinavasion

chinavasion CVEM-M274 User manual

chinavasion CVZG M499 User manual

chinavasion

chinavasion CVZG M499 User manual

chinavasion CVFD-M348 User manual

chinavasion

chinavasion CVFD-M348 User manual

Popular Cell Phone manuals by other brands

Nokia N75 user guide

Nokia

Nokia N75 user guide

Nokia C22 user guide

Nokia

Nokia C22 user guide

Lenovo A328 quick start guide

Lenovo

Lenovo A328 quick start guide

LG PM-325 Phone guide

LG

LG PM-325 Phone guide

Nokia 6681 - Cell Phone 8 MB user guide

Nokia

Nokia 6681 - Cell Phone 8 MB user guide

Nokia Lumia 1020 Disassemble guide

Nokia

Nokia Lumia 1020 Disassemble guide

Motorola TIMEPORT 280 user guide

Motorola

Motorola TIMEPORT 280 user guide

LG LG-E410g user guide

LG

LG LG-E410g user guide

Samsung Galaxy S4 user guide

Samsung

Samsung Galaxy S4 user guide

Motorola Moto E4 Plus Read me

Motorola

Motorola Moto E4 Plus Read me

Plum Sync  X210 user manual

Plum

Plum Sync X210 user manual

Panasonic X88 operating instructions

Panasonic

Panasonic X88 operating instructions

LG C570 user manual

LG

LG C570 user manual

ALIGATOR S4090 Duo quick guide

ALIGATOR

ALIGATOR S4090 Duo quick guide

Gionee M4 user manual

Gionee

Gionee M4 user manual

Samsung SGH-i320 user guide

Samsung

Samsung SGH-i320 user guide

Sanyo SCP-85H operating guide

Sanyo

Sanyo SCP-85H operating guide

Zte Merit user manual

Zte

Zte Merit user manual

manuals.online logo
manuals.online logoBrands
  • About & Mission
  • Contact us
  • Privacy Policy
  • Terms and Conditions

Copyright 2025 Manuals.Online. All Rights Reserved.