manuals.online logo
Brands
  1. Home
  2. •
  3. Brands
  4. •
  5. Chinavision
  6. •
  7. Cell Phone
  8. •
  9. Chinavision CVVX-M286 User manual

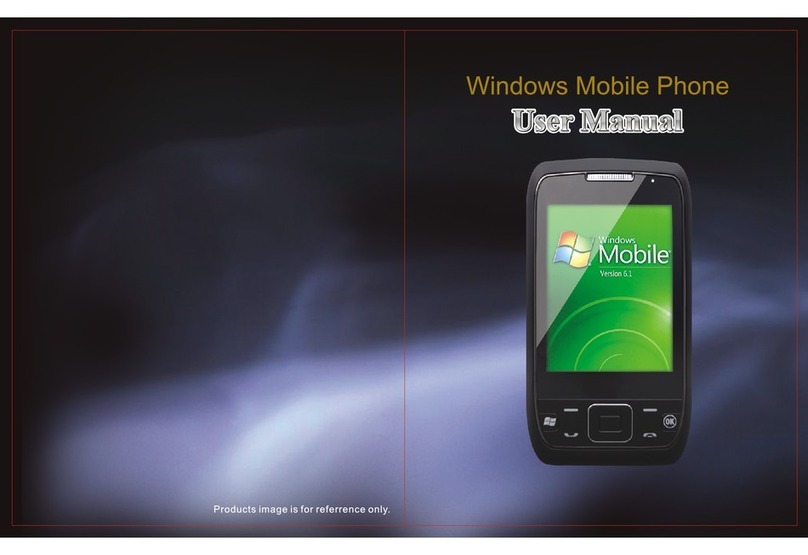
Chinavision CVVX-M286 User manual

User Manual
User Manual
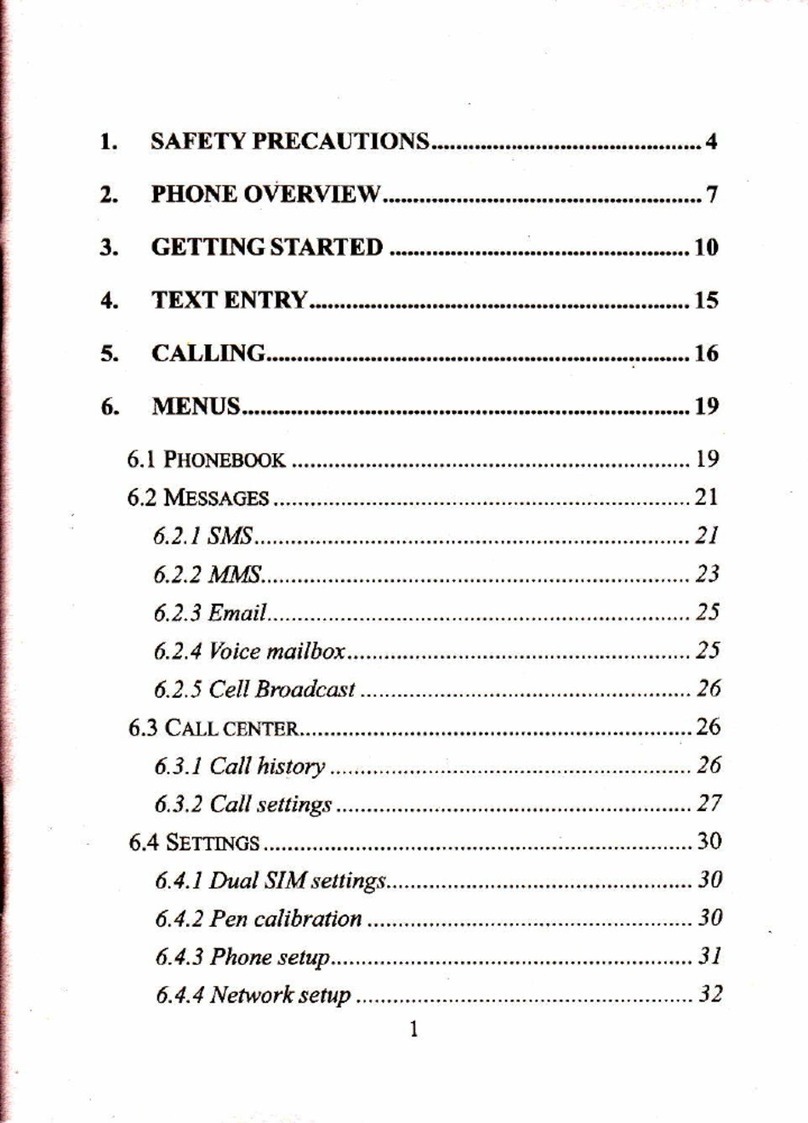
Contents
1.&pE&rcelnoKevpmoPEMTloNs-'.- -'- -.. " '_ - - '.. - - - - _ 3
2.UsrNcMiloRYCARDNUDlsK-----..-..''- _.-'-"" ---_--__ _-'4
User Manual
4. BLUErcOTH
10 RECOSER.".--,,- .15
.16
11.CLOCK.".
17. FM Rsro
home aPress this button 10 return home frcm any appli@tion or
int6rface.
a Press ii to staf the menu, which allows you to perform
actions in the current inlerface or ootions' m6nu
a Pr*s fr to open the phone s m€nu, then you @uld
<h@F to l@k the screen, tum off the phone, or set it to
the silent mode .
up a Pae$ [ lo rncrease ue volume
. Pre$ it to tum the phone to vibmtion mode frcm th6 sitenl
a Press it to decrease the volume.
Proximity
sensor aCover it, and th6n lhe phone's backlightwill tum off.
a Entering the 6mera interface, swfrchd to the front €me€
2, Using Memory Card as U Disk
lfyouwant to send music, pictur6s orotherfilesto the phone's memorycard
frcm lhe @mpdea, you should set memory €rd as u disk fr61.
Sel memory Ed as u disk
l)Conned the phone to the @mput6r wfrh USB cble. The noff€tion icon will
appearin the sbtus box.
2)Open lhe notffi@lion pan6l.
3)ln the noff€tion panel, louch USB is @nnecbd , ben touch'Open the USB
tu€ge Devie".
User lvlanual
3. Wifi
Wi-Fi povides as far as 300feet (100M) Enge ofwiretess neMork a@ess. lf
you use @ll phone to @nnedwifi, you should connecttolhe wi€less arcess
pointor lhotspobl .
. Noti@s, Theavailabilityand @veEgeof WiFi signat dep6nd on the numbet
infrastruture and oh6r objecb penetmt€d by he signat.
Opon WLf and b @nnecl to the wireloss neMork
1)Press home>menu, then louch setings>wif and internel
2)Sel€ctlhe wlf bx, to open WLFi. Phone dll automatj@lly s€n foravaitabte
s)Touch Wi-Fi setings. Then a tist ofWLFi netuo* frl show the founded
netuo* name and security setings- (open netuork or WEP. WpA/vvpA2 with
password).lf yo@ableffe notif@tion in WLF|setings, The sbtus box will
show this i@n (A)when open avaitabte ilretess neNork tounded.
4)Touch one ofbe Wi'Fi choices to connectthe netuork. ffien you choose
opon netoo*, phone frll@nned to itautomatically. tf you ch@s WEp,
WPA/wPtr wilh pasilod. you should type the passwd frst, hen louch to
. Notices: when Ss phone is @nn€ded b the wireless neMork,
The sbtus boxwillshowhisWi-Fii@n (F) , and Se apprcximate
signalshngh€n (the numberof lit ba6).lf huch he connded
netuo*, fflldisplay the name of Wi-Fi netuork, shtus, speed, signal,
strengrh. s6cudly, infomation and lP address.
lf you want to delete the wk€less setings, please touch "not r6seNe'
as in th6 right pidure. lf you wantto @nned tofris neturk, you
should re-enterthese
Touch USB is
Connsted in the
mtifiGtion will
appearon lhe
rightone
. Notices: lfyou @nnect your phoneto the @mputerthen choose open the
USB devie, the phone @n't @ad lhe memory @rd. You temporadlycan not
use some appli€lions, such as €meaa
. Uninshll the U Diskfrom @miut€r
Unless you ch@so nol to reserue the ne&ork, othetuiso, ffere is no noed to
ae-enterthe @rospo.ding password when neflime conf,edjng to the
previouslyencrypted wleless ne&ork. WLFj witl search automaticaly that is,
5
lJser Manual
l)Press home>m6nu>setings*ireless and inbmelBluet@th setings.
2) ln the lisi of Bluebb quipment, touch or bp and hold the connected
hand-free hadst.
3)PEss aM sdd'@ncelthe Fidng'.
. Bluetooth proximity sen$r
Afrer pairing the tuo deviG,you €n tesl out the signal is shng or weak by th6
Bluebth prcximity sensor devi@
5. uan
5.1 Gmail
. Create an eledrcnic mail ac@unt
Seiect maiF seflings. You en adivate or edfr existing e-mail a@unb as well
as create a new +mailamunt
a.Seled mil, Gmgle a@unt $ffng intefte apFa6. Then buch'n6{ step'>
@ab a@unbenler name, last name and emil ac6unt.
b.Google*re6 debminewhe$erthe nam6en b used, if so, nil int€ft@
app€aB pomplirE ilhr Fsrcrd, then iudge th6 password' s@dty, u$re
do d@snt met the BquiEmsb ned to l€qbr S6 passrcrd,
c, SuGsfully register a nil Gmail a@nt a rcgng€r c€ated
aubmati@lly for leding.
. L@ding mail a@unt
a. Op€n Gmailskip inrcdudon @n>l@ding inbrfa@ app€dE >$led losd
b, Enl$ name, passwod hen l@d
E-nail a@unt htraliatlon ,pompling "login su@asfuf Al cmgl6 a@unb
will b€ syndrcntsed.
. Ceating and sending ,mails
When crmting mails, select mail > @ating mails Enbr the addressl@ipient),
lheme and @bnb. Pisss MENU you @dd'apFnd', 'Add Cc/Bcc', seled
s6nd or dis€rded.
phone needn't to perfom additional steF to @nn€dWiFi netuo*s.
. Notic:
Unless you chooe not to 6erye the nefuon wfrh password, offeMise, there
is no need b re+nterlhe orespnding passwod when nexl time onnding
to the previously encryptad wkeless neMlk. WiFi wills€rch automatiGltl
lhai is, phone needn'tto perfom additonat sleps to connedWj-Fi 6eMrks.
. Conned b olher WLFi netuorks
1)ln ihe interfa@ ofwiEless and neMork, touch Wi-Fi seffngs. The founded
WLFi netuo.ks will show on the WLF| n6tuo* tist.
2)Touch other Wi-Fi netuo*s, and then you can @nned to his netuolk.
. Noti@s, in additon, you can surf the intemel via GPRS. We def,autt that the
GPRS in SlMl is openod aflersbded, usere 6n seled manoatty,the specific
lo@tion is'sflingsrykeless and intemeEdah @nndion', touch "SIMJ-
SlM2. no dah @nnedion', when he dot tums green: it's atready orend.
4. Bluetooth
Tum on Biuebo$ or set the phone €n be delected
1)Pess homs>msnu,6e buch sefrings.
2)Touch wireless and intemet, lhon chGe Bluet@th box to open the gluoboth
fundion. Af,€r staned, the sbtus box will show this ion 18). touch "wn for
devies'hg it sbG to s€n lor all devices within rang6.
3)Toud Bluet@lh stings, all S6 devices founded dtt disptay in the list undor
( selst the bx "Gn be detected", set it to h dsisted, the other Bluetooth
devics will be able b find fie phone. ,
impotunt: the mdimum detding tme of be phone is 2 minules.
. Pairing and onnedion oi Blueb$ h@dsel
I ) Pros home>menu, then touch sfrings.
2)Toud wiEless and inbmeFBluehth seflings, then sted Btuet@th box,
h€n your phone will s@n for tha B,uetooth devi6 within €nge ,and shN the
founded devi@s in lhe listundeilhe i@F.
. lim:
a. lf fre list €n1 fhd your equipmont, touch s@nning equipment b re-scan it.
b.Make sure 6at lhe devi€s wantod aE under the deteded mode.
3)Touci headst in the equipment listb finish lhe @nnedion.
. Noti@s: geneElly Bluet@th devi@s n*d password lo b paiEd, often use
i00001 as the default password.4)The Fidng and @nn6dng #tus witl show
under lhe head$l in he Bluebth devi€s list Wh€n 6e headset @nn*t€d to
your phone, se Mtus boxwillshowthis iM(E!)fieahs @nneded. Then you
€n u& be headsetb makeor6@iv€ 6llings..
User:Miin@l
There islonefor new maits, in the shtus boxwitt showthis bulon 8,, p..*
Ilrenu >'refresh', refresh and updatehe numb$of the unGad mails in a proper
. Delete mails
When loading a mail acmunt, if you want to delete it, you need 6 resto.e faclory
setrngs , When loading a second one. you 6uld press the menu bufun b
delEte it.
Nodces: many [undons depend on Gmait Ac@unt, for orempte: Etedron;c
Market. GoogleTalk. Syncconbdand Catendar
5,2 Email
. Load Email
Enler lhe @n6ct address and Fssword >setrngs cotred pod and pop seaei
check the serv€r sefrings automatietty.
Set the coned SMTP seruei check the majls seile/s sending and re@iving
settings, th6n enter the specifed a@unt namo and disptayed namo on the-
outinge-mail.> Finish.
. Creale and send mails
When creating mails, seled mails > create mails. Enter the addre$(reipient).
lheme and @nten6. Press MENU you @utd ,append', ,Add Cc/B@,, seted
send ordis@rded or save as drafr.
6. Dialling
When the i@n of internet servsr appeaB in the screen, you could dial or
re@ive @llings- The signal bar on the top dght@rn6rshowS6 saengs of
neMoft signal (the maximum with 4 sjgnat baB) .
. Shd dialing
Opbn application's main m€nu>dial. You @uld choos€ SlMl or StM2 io dothe
dialing. rc
:*;t3.....,. e.
. lfiating
At Ihe interfu@ of "diale/, entorthe phone number, and S€n click the diating
kq , ai6r tha!,you should choce one StM crd or intsrnet call. tf n€eded to @lt
he etrension,you could click lhe "diat pad" in the bofrom of lhe screen to open
8
ss Inteface or?ra$ meM keyb stect :delay , aecondgl.adlh:eii blallhe i
numberoftheextension. i:irJ.!.i:ri:j-:.lt',i,.,rr:rl'.
. Telephone calls in ihe call log i,,- r'..:.:, rrr.i,i,i: "i .
Every telephohe:nuhbs taild ddd beeir€d in{SHI irslfr{2,wiil r6*todil:id ,,r J
phore's menu of @lltog. On the bp tefrd*ery dtrecord wiltshw"StMl or
91.Mr" .
All numbers in the calt tog cn be dialed by cticking thqbu(onidja[pn the righi ]
sjdegftlegore€n. ...,: ..t, ,,;..-,,,,.:i ,:,1.;::i:jr;ii:.,,.r,..-,,-.j. .,1 -
When numb€r list appearjng. dick I b.cabh dehits, pr6 n rq; bng io; cquld-.
dial via'Sl[41 orSlM 2,,, ma4w'hit+Jpq,S?Ir,edihde]gte,.aretbee;b";tdo;
otherop6€tions.
. Receive calings " !ir!i'i 'ril,r1-rl-r.:lr.:
Wien elling @meq.(tap lefi wiflEhd *mrwhbh EIM cadD,preis*oswqtmd. r
slide lowads right until ire niddte buton, then vou can receiv€ calinos.
. Proxrdty sensor
Aeording to the disEnce beMeen pione and huril body, it wil adiusr
automatiellytheswitchofthebachiqht.':)l'
During the calt, ctose the phone lo th; ear lhe backtight wiil tum off
aubmaficzlly. whrch coutd save batedes ano p.event rnadve^enlty touchinq.
. Refuse lo answerthe ohone
l)Already exisl a catt in the phone ;;
2)Click"Add calis", diai anothercati'l
open "cali waiting"
3) selecf@mbaneell,-.you cn @mbine foo calls into one way
phone defaull
User Manual
4r.afrer mutuFrty €n onnecled . you coutd separate rne Glls or hang up one
olhem vbte smail afiow of conference cal
. Telepn@ r@rding
turhgfre dl, more>sbd re@d, you @uld record he diatog of the clt.
1, eff.€p*t oherfunctions of he €il in the diating setrngs; tor emmpre,
Cd T6der- affer alt the seftings f nished and turned on, you sutd tan;rer
lrE €llto a @fuin numbe[
2_) lne$ngs>drahng setings >other diating setirgs. open .,cail waiting.,.After
umd on . you can re@iv€ another €Jl when at.eady exist one. Tne an;wedno
ad rejediig functions arejust hke he odinary pho;
. Only in 73 plafform
yvhen you use vide @ll,ensuro to insbll 3G SIM @rd. in the dialing
htetra@-enter numbers .rhen press the symbot E ,so tnat comptete me
W@€ll.
7. M6saging
I lr@9"t, t" r."""Se tide orthis phon6 is he phone number. wiil be
resed4 in s simitar for of diatq. instgad of he usuat fotdgr studure.
Me$ages Mth blue backgrcund are hos Imivd. anC mesages wU wnire
background are those sent
. Send SMS to etuin phone number
I )Pres home>me$aging, touch.new messges..
2)ln the inteface of.6dit'
a- .Click lecipient,box to sbd input method, you @n atso ctick"entefbox to
sbd input methcd, in that way you en onter dar&teB.
b.^ ClictSe bunon of-send from SiMl or StM2to shn sending.
. Send MMS to @roin ohone number
Whencreating message. it was defauned as SMS. it wiil be tumed to MMS
wien folwing operatons were done. you can send w|US via cticfrng:seni;
afler editing.
'l)ln the inlerfa@ of "edit,, Ctick the buton of "Menu":
User Manual
??li:]:'append', yo-u @n sFnd the foltowing ffichmenb, then it wi[ be tum6d
to MMS
n6 second way lo use video
Open the menu of apptictions>conkcts, press one conhd of the
@nE6.then press long fre phone numberand seled th6..video call..
Notices:
a, lf you Mnt send MMS wrth m.ny pase, you
should seld "app€nd pr" in the .append,,
b, You €n append 10 pidur6, wth the form of
GtErPE6.
q Click "adding them€s", the boxof "rheme" witl
appea. under the box of "recipient", meanwhjte
it isturhed to MMs automaticily
g!,.",..
$q'.p,**
i!u**
s.",',.".*
! *,"
USer Mantat
Enter multiple numbers in the box otenteing, ech nmb€r is dividgd by tb
comma in English.
. Noti@s: FotnowthisphonB€n massmssagesto almost2o numbeE,.thd
corect number depends on the chaEcters, you cn only 6ntei 312 charecters
in the box ofrecipient'. , l
When a message is sent or seni agad. a rinb yettow bner wil appear The
number 1 or2 on the leter referB to SlMl or StM2.
when editing
W's
..,..';'. , .,., - .,i '
:,i...r,::ri . ...lt::a-r.i..r,r,::
:-"
:
-i ,.... t;5;";*;;
1 ) coniacl$Menu>new contact>
Seled Save conlacts lo phone or SIM card ,then into the inietrace ofediling
Yiu can ed il the contacts picture, name, phone n! mbei e-ma i!, posbl add ress,
lhen:oLcn frnrsh'.
2) co,rhLts>Menf sedrcner
a FnGr nunDers or re[ers.if match with co4bcE ,hey witt he drsptayeo in lhe
searchresults. . a ,'
b. lfthere is no search to match the c6nbob,te intedace wiil be,no malchinq
.onld,.lq'
3) contaci>Menu>delete cont6cls
a \bu cdn selecl dil. ctict ihe detere ouhon lo detete a I coltacts, tnc.uding rne
contacb of phone and SIM card
b. You can selecl one or more individuat contact, clici Oetee, Celete al tne
ar rolGcls>MenL>g-o ps
a. default !roup includetViessooim6te,friends,FamilyCo{oiker
D. SelectAod Grnup< edir r1e rex group rarc and go,o lhe roilact iFaro
nredace. you cal ddo rne q,oup L olracl
5) contacb>menu>speed dial
a. Voicemail
b \o.2-gnurbers chck"Tap ro add soeed dail_ sete.t a conLact ds a speed
dail.Afret successfuily se{ling the dialer intedace, long press the number kbys,
vou can did he contaci number
d. clici mporue\Dod.ln lhe loca. phone. S.M Gro dnr SD card rhree mpies of
eaah oiherlo achievd conlactlnformali6n.You €n select'Copy Source. and
then select Next, seiectihe contacts to copy so shd @mpteie the copy Of
b. Dispay options,can selectthe whole or pais coflkcts in 'Onty contacts with
phones ","Phone Conlacb "o/SlMs ConEcts"
c. Accounts,can choose lhe"Backgroup data"and"Auio-sync'.
13
User ManUal
FreI
kmJ
ti:ir r;.1
8. Contacts
. Open the menu ofappli€lions>conbcE
Default disp,ay phone contacts and SIM €rd coniaits, iofr @nlaats byfrel
lener of alphabet. ;w
ts&esi&d
A r!, rli_- I
m.
&,.ittt
ry*
reer
User Manual
d. Share Visible @nb6,d ot ttre mnb6 @n tE impofl €d into the SD
@rd,or sharing via Blueboth ,Tefr messageor Gmail.
. Add @mmon @nbd lo he @llection inbrfa@.
1 ) T@ch contad Eb.
2 ) Touch the @nbd fr at you want b add to fr 6 mllodon (@nbcb resNed
on the SIM €d €n nol be addd) .
3 ) ln he debild infomataon of conbcE, touch fi is i@n X&l besides the
@nbd,
4 ) P6s tor long the @nhd in the pop-up menu to add it to the @lledion.
User Manual
. Functionsofmenu
1)MenPBackwad
ffier brcwsing lhDugh multipl€ pages, will retum to the previous page the
current page.
After brcwsing thrcugh mulliple pages, will move to a web Fgs affer lhe curent
page.
You can view all open windows b the cur6nt.
4)Menu>B@kma*s
a.Click the'Bookmafu'to makethe cufient URLa6 a bookmark saved,
b.Click the b@kma* under be bookmarks list,Sll oFn lhe URL.
5)MenDMore
a.Add bookmarks,save be current uRLas bookmark.
b.Find on page,search ffiat you ne6d in curent page.
c. Sdd b(,in the te{, click and drag to seted a piece of te{.
d.Page info,display page address and other information ofthe curent
brcwsing.
e.Share pagqsledbe Bluet@th or SMS b share the curent psge.
i Downloads,show all Se 6nEnt domlod€d.
g. Hisbry, Show your brosing history ad dew he most vasated pages of
intomation.
h.Ssfrng.conEinE a vadety of brcr stngs.
10. Recorder
Re@rder can re@ad voi@, and send it quidly Ua Btuet@b or MMS as weil as
make it as ring tone.
. Noti@s: recodercan only savethe audiofil6s asAMR fomat.
1) Click lhe recorder applieton.
2) Keep the phone's micrcphme nearlhe voi@ sou@.
3) Click re@rder to recod voices ,and click to Sop or plavback.
a Ents the firet lefier of the
matched @nbd.
bEnler the fiEt nuhbor in the searching box to find @nbds
named under numbe6.
c Enter the exactly matched numbere with @nb6 in th6 sarching bx, lhen
pre$ the _searcl' bfron.
d lf there is no matching conbd, Sen the interfa@ will appear "no @nbd
founded"
9. lnternet Explorsr
lntemet exploEr
1 )ln the inbrfa@ of intemet explo€n touch address filed and enter the URL.
2)Use k€ypad to enler URL. The apprcpflate web sit€s will appearon the
screen. You can touch it dhedly go to the Fge or cdtinue to enter URL.
. HomeFs
Sel6d 'homepaod, you @uld l@d in ihe st hom6page. lf you do not set it, you
will use the vendo/s pre-set sites.
or lerer) lo f nd the
Arr reco;ijliriia'sav€i'in ;nl i;;;;hg ioidblitrihd derauit miusii piSdam'
,l,Clock.
O*" *" *"", "t "0, "",'." ", "ml
User Manual
1)Bightness contrcl, touch itto sel
the brightness of the interface.
2)Alam: touch alam to enter fre interface
3)PPT' touch itb shufre th6 pictures
4)Home: go back to the interface ofldle
Atier tundions set, phone will arives in the seftng tim6 to ale( you by df,ging or
vibrating to achieve it's function. Press Menu lo add alarm, you can also add il
fom the adding inbrface. You couid set be alam a@rding to your needs. tn
the interface ofalarm will show throe closed alams (fuo alarm cl@ks are
[4onday to Fdday 8:30,9:00 ) .
Edit
You cn edit the curentalarm, you could editlime. ringing tones. vibration,
repeatfom and bbs.
Press for long fre fme stoph6ahm.changealarmsotings.Gn@l
tsc
alarm. ln the inlerfa@ of alam setings, you @uld perlom the operations of
changingtime, r€peat , dngtones, vibration, bbs, etc.
'I 2,Caculator
lhisfundion @n tum your phono into €l@lalor, iten do some simple
'Touch the numberkeys lo mak6 it app€ar in th€ blank box.
ln lh€ intedace ofclculatoi press MENU buton or hold down th6 screen to the
lefl, ihen lhe senior panel aprears.
User Manual
13. Camera
'13.1 camera
. Prior preparaton
lnsbll memorycad before using the €meE orvideo camera, All your photos
or videos laken by the phone are stored in memory card,
. Open camera
Press home, louch menu, selectcamera. Choosethe video mode afyou wantto
make videos, The scrcen will aubmatically swjlch to landscape mode,
. Take pictures
1 ) Aim your objedwilh the screen.
2) Touch ihe "shutre/ buton on the screen.
3) Arlertaking, pholos will save to the €meE's galloyfolderwith the name of
bking time.
4 ) You @n view the photos by touching lhe preview box buton.
5) Camera seflings
You can louch the bufron of "sefting Menu' in the interfa@ of emem to do the
Under€mem vieffindermode, press l\,,lenu, you can switch to video or photos'
gallery
On the lop right of camem viMnder mode, display the previewolthe p.evious
picture. Touch preview box, th€ photo display on full screen and you cn
enlarge itlo viewdebils.
User Manual
Camera setings: bu(on 1: EV
bunon 2, S@ne mode.
buton 3: Picture Size.
buflon 4: white balan@.
bufion 5: lmage adjustment.
Touch "sei" bu(on, you €n do seftngs in the €meE.
13.2 Video camera
lnslall memory card before using lfie €meE orvids €me€, All your photos
orvideos bken by the phone are stored in memory €d.
Press home, touch menu, selecl camera. Choose video @mera mode. The
screen will automatically swatch lo landscape mode.
1 ) Aim yourobject with the screen.
2 ToLch the "shuned bunon on lhe screen.
3 ) Afrer laking , photos will save io the camera's galley folder with the name of
takinq time.
4 ) You €n view lhe videos by touching the preview box bdon.
5) Vid@ cameB sefiings
You €n touch the buton of "set" in the interface of @mera lo do the senings
Under @mera viewfinder mode, press M6nu, you @n switch to vidm or photos,
gallery
On ihe bp dght of emem viewfinder mode, disptay the peview of th6 previous
video. Touch previsw box, the vidm will display on futt screen and you @n
touch the play butun to view it.
User Mahual
. Open images
Prss home, touch label of appli@tions, then toud photos'gaIoy
ln fre inteaface ot €me6, Pre$ manu to open it, thon touch to operate.
[e;,w'l *
[::::::1*'Y-ad'
- ilr:::::l:gdl
. Use images
Afr6r taking pituEs, you €n vigw them and share ihem wilh your f.iends.
1) ln the pidure inbrfae. tud phob alb{m b d6w iroges.
2)Toud S€ humbnailb viil pi&res on fultsm.
You €n tue b display smdl d large thumbmits. Hold dom lhe sre6n
tMds he lefr side to viil tu ned phob o. towaids right b view the pEvious
ln be photo album or list, pcss and hold dom the pidre towards tefr to view
be nei pdure. ortoMrds dghl to view the pEvious on6.
. Crop ima$s
ln fre phobs'gallery pre$ the photo you want b crop, ch@se menu,
'md6'and'crop', then lhe instrumenb of copping ffll appmr
a. To adjust hs hmmer size, press and hold the edge of cufrng tool. Afrer the
tdmmer amw appea6, dEg yourfngoafum the @nter inward or oufuard,
then you @n adjusl the size,
b. To k€p fre ato of the timmer, please pre$ ily one of he four @me6,.
c. To move lhe timm€r b ofr€r aEas of he pifure, hold diln th6 @nter of
@ting devi@, then d6g yd. lings to @tuin positon.
b.& tun$. ru
Video €mera settings buton 1: EV
bufun 2: S6ne mod€.
buton 3, Whit6 balan@.
bu(on4. ElS.
bullons: lmage adjustment.
Tdch "sef buton, you can do sefrings in the @mera.
,4. lmages
User Manual User Manual
Seled one album, then lhe songs in it will be played-
. Sond images via mails
1 )'ln the images gallery pres lhe wanted photo, choose menu, then touch
share. Touch Gmail when tips appea. Pidurowill be automatimily akched to
e-mail. Edit the mail, then louch send-
. Send images via m€ssages
1) ln th6 images gallery pre$ lhe wanted photo, choose menu, then touch
shae. Touch Gmail when tips appeal Pidure will be automati€lly atuchd to
m€ssage. Editthe mail, and then touch send.
Aftervadeo bken, you @n view itor share it with yourfiends.
1) ln the interfa@ of photc'gallery buch videos album. You €n watch movies
affer touching lhe wantd vids.
2) Touch the sdeen. then the play confol keys appear
15. Music
The phone can play digibl audio fles in memory €rd-The following fomab
aro available :AMR, M4A, MlDl, MPs, WAV, OGG
Press home, louch the label ofappli€tions, touch music. Then Se inteface of
l\,,lusic Media appears.
Your music frles are classifrsd aGording to the following four categoiles ' Afrisb,
albums, songs and play lisis. Touch one ofthese €tegories; you cn view lhe
lisl inside.
Continue the operations, until yourwanted music appears. Such as. if you
chooseAfrists a list of afrisb soded by the numbers in English will appear
Choose any on lo open lhe last, then all the albums and songs will appear
-ta:arY*:l
i;;;d
'- r1!
i r&5-d,"r!.6.r!d.i
..-t,f ,.iv?l: i$'. 6 ie.,
Eaiara l
. nps: You €n play all offre songs in the interfa@ of music media, in
random sequene . Press [,,lenu, and then louch he Pany Shume. Then will
stad playing thef6i song randomly selected . To closehe Pady Shume, press
Menu, then touch to turn ofithe Party Shuffie.
23
22
User Manual
. Create a play list
1 ) Touch any €tegory of music media on Se scrcen.
2) ln tre list, you can press and slide up and down the screen to b.owse the
adist, album orsong thal you wdtto add to the play list.
3) Press the adist, album orsong, and theo touch the optionsmenu in tre play
list.
4) ln the interfa@ of adding to he play list window, touch the new play list.
5) Enlerthe new name of the play list, and then touch to save.
. Manage the play list
Enter the interface of music media heh touch the play list.
1) To play songs ofthe play list, touch the name of play list-
2)To delete a play lisl, press and hold lhe Play list, and then louch Remove.
3)To refresh fr6 list ofsongs orremovesongs, hold down the play list, and then
touch the options menu in lhe editor
4) To delete th€ list ofsongs, hold down lhe songs, and then touch play list lo
delete il.
5) To rename a play list, press and hold the play list, ften touch Options menu
renamed. Enterthe new play list name, and then louch'save"-
6) lf you wanl to set the song to the ring tones, and lhen louch the song as a
ring tone. The song will be set as the defauli ing tone.
7)ifyou wantto use the song as noti@ ringtono,you €n prcss menu and touch
the song as ringtone-and lhen touch the Notice dngtone.ThB song will be set as
the noiice ingtone.
8)ityou wantto cutthe song to the ringtone,you can p.6ss the menu and seled
the song as dngtone,and lhen touch lhe cut ringtone.As shown,ycu 6a chocse
the 6tadtime and lhe end lime,at last touch the'save'-frwill be saved to
ringtone-lt €n be set 10 the default tingtoie,€n be assigned to lhe @nbd as
the ingtone of the conbcts.
16. Calender
Enter the calender application
Load Goggles a@ounb, ente.the appli€tion, ln lhe inteda@ ofmonh orweek
will use grayto highlightthe day Display defaultth6 date on the curent month.
ln the interface. press menu, 4 display mdes frll appear,
1) Schedule lntrfa@ shows a etuin schedule(click on the initial time and view
foMad.chck the final time to view backwaros )
2)day loteface displays a day's schedule (lastclicked date),Stid6 around to
tum Ege ac@ring day
3) week interfa@ displays a wek's schedule (,ast clicked date),Stide
around to tum paqo acoring week.
4) tday lntefa@ displays a days schedule, ln the interfa@ of month or week
use gEy to highlightlhe day.
5) monx,l ntedace displays a month's schedule (ast cticked date) Slide
arcuod to tum Fge a@ing monlh_
1)Pres menu more < touch new actv{ies.
2)Enterhe name ofadvity in he advities'box.
Notces: Such as special @sions such as bifrhday or a day with evenb, set
the all{ayopton to Yes.Ithe a6/ity is ata etuin tme pedd, slectthe shi
time and end tme.
3)Enterlhe event loeton, dedpton, gu6b, rereat, remind tme.
4) Click fioish to relum to €landar
User Manual
rercry
:ryrEm
!:l!f:::-: ixr*;!tri.!i!*
t*;|!*i.{*tre*r x.-,.,....,,,,
,&t,
3a..-.,".*- i}I!a:i*x&*
Notices: AlLday events appear in the €lendar heading.lt wil not shM ihe
period ofGlendar.
. Pre$ the menu,you will see below
09e0 or
c1os6 the
Yoic?
sel8ct the
sl.rep tiee
s"itch inFui:ile
6p*alir o! rired
headset
pre$ for long to delete the activity.
re
tr.Gry
:i
t l"ar::'.,:::r::rt li: i
;i
17. FM Radio
FM Radio
Through lhis prcgEm, you may listen to FM Edio on the deUce, FM radio use
the whod headselas an antenna to receive signals, before opening ihis
program ,you can inslall the odginal oquipmenfheadphonbs, Men listening,
you cn switch it manually to speakers or lhe mode with wked headphones.
. Open FM radio
Toud this label ffi to open tne apptication ofFI\, Edio.
Click the Back buflon, the radio progEm move to fre background, and you can
still continue to lislen to programs and olher applicatons run at the same time.
mt
Pressmenuandclick M toextraoio.
26
. Colledthe channel you are fuffi
Press the menu bufron in the FM iEfedct tu 's6d|&se' ,and then
view the channel list,pre$ lmg m d# ,#'ffi b Fffi.b Iwre
the channel.
cLarel s
18. Settings
Your seNice p.ovider may default somo defu sflirEs, I )ol n€y d be aM
to chanoe lhes setinos
. slu er manaoe E
1) Touch fr to choos or to disable the StM card, the erd is grry#en disbted,
theflight mode displays on sbtus bar
2) The default SIM @d ,you @n choose Voice @il,Video €lt,Messaging,Dab
. wiretess ana intemeltr
1)Flight mode Touch lo open or dose.
2)wLFi and WLFisstrnss roucn wir& r openM. OFn WLF| ,it €n
s€arch for available nefuofu auiomdi@lly, nefuorks without Fsswd can be
used dt6dy otheB ne6d lo sbr the password fret.
Notc6: Open Wi-Fi fien the iight hode, WLFi #[ dos automatiely, Oren
flight mde then @nned Wi-Fi, iten be usd nmally.
WPS @nnedion,wireless AP and mobite phone?r6 n4ded to suppofr
AOSS,you can directy @nnd Mthodenbdng a key
3)Bluetoolh and Bluet@th se$ng.
4)Tehedng&F&ble hobpoi Shae purdigtut d# via USB
s)Mdual Pdvate NeMorks(VPN) s.etings.
6)Mobile n€tuo* enbr'mobile netudsettingsldlich include, a Dah
rcaming bA@s pintname! Netuork opsmtora;
7)GPRS dah pdodty mode
. Catting sefringE
1 )Voie Call
a.Voi@ mail,in lhe voice s€flings,you @n enterthe voi@ mail number
b.Call foNard,You can setAways foruard,FoMard when busyFoMard when
unan$eiFoMard when unrcachable.
c.Call bafrng
d.Addtrngal *flings,Call lD and Call waitng
2)Video CaU
a.Pidre for replacing l@lvid@,s6t a pitrre b disptay when €meE off use.
b- Enable ba* €mem,a%ilable b ilitrh @meEs if tum off.
c. Per Uds bigger than lml W@,kun on to make reer vid6o bjgger han
l@lvide
d.Lo@lvid€o disply,to mak6 outgoing vids cattdin@ming video @ll.
e.Oher seflings,include @ll fotuard,cll bafr ng,additional sefrings.
3)lntemet Call
Can add a@ub
4)Other setings
a-Fixed Dialing NumbeB
b.CallGt
c.C6ll broadca$
d.Minute reminder
e.Phone seflings
f. TTY sefrnqs tt
. Audion prcfleE
ftjs option gives he ptu C slairyE Eh-6dE*iE*s
notifi€tion. lncludire. frdn & Efg !E nT G rfri, d
fedback (Buton op€rdhf #Sqrd 5€E&, M) -To
adapt every envion@
1)Sel*t "Standad / MG, Ctu/k. Td the Wt on tu dght,
when turns green,ilre.
2)Volume: lncludiretu digtudamffietrngs, you €n manually
slide to s6l6d.
oi"pr"J
a. Brightne$ Adjust he bdghhess b. Aub r@ting screen Roht6 phone to
change didbn
c-Animation Choose to display animafions d. Scen Im@ut Adjustbe
delay before the screen automatcally locks
. b*tb"E
1 )Use wireless Use wkeless to frnd lo€tions in be app,i€{on ( Google map ) .
Tou* itto open orclose
2)men using he GPSetellile Fsitooing, set a@racyto sreetlevel(€n@tit
lodilto@trtu
3)eS ffi dlrc.eGre Slrcdd(EPoltospd uocPS
pd1b6g
a)ffi kal#y&6*8turedcPs Fsiloning.
Opeo il?!!lld Fntr@ Grc lktuEogMPS-
.*F
1) Setuprenk tEaE6- HN6fMblocthes@n-
a.Toud'iftged, tutuhkd E asrnde ffi insffisand
examples, dick 'ne{ st+'b tu h qHe tu undiry ire".
b. lou€h PIN EnbPlN nffi biffituffi
c.Touchpasswod SetFMbl#hffi.
d. Touch 'no" Stop this appli€tu.
2) SetupSlMcadlo* Enter (&tfur HXbgtudcrSlM.
SIM @rd PIN (PeEonalldeniifietion NumB) b b Fffiffi @
of SIM @ds.PlN @de prcvidd wffi SlM. tu * prwkdEtu ffi
Change a blockd PIN @de. you nd b op€n tuSlM Lod'. tia gob
Change Passwod screen, fre phone illlaulomat€lv Funpt#tu #
PIN code and asked to enler a new PIN cde &i@,fnally he ptw wBl prffipt
that change Se code suc@$fully. lf you enter the PIN wilh e@ to. he tiIE,
SIM €rd PIN codes will be automati€lly locked, PUK codes is u$dy sumlid
wilh SIM €rd. lf no, you should go to the servi@ prcviderfor he des-
lfyou enter l0tmeswmrE PUKcode, the StM erd wilt be pemanentytocked.
3) Password Usible Passwod visibte wfien enter jt
4) Seled devi@ administaton tud or deteb device manager.
5) Use seudty credentals Allw appli€tion Usit secuit credentiats or other
qedentals.
6) Inshllftom SD @d lnshll the encrypted cedifiete from SD €d.
7) set password Sel or change Cedifi€te store password
8) clear sto€ge Clear all the @ntents of be enifele store and reset thei.
. nPPr;etion$
I ) Unknown sou@s Allow to inshll non€lecbnic ma*et appli€tions
2) Manage appli€tions Manage and deletethe insbtled applietions_
3) Running seNices Touch any of the seMces listed in> pop up ,1o stop the
seryi@? lwGbutun opeEtion box, touch the'Stop the service is stopped, and
disappearfrom the "running seM@s- list.
4)Storage use you can view the prcgEm of downtoaded,atl,on d €rd or
running hw many memoryspace Sey o@py
s)Banery use you en see the usi.g pMer situation of @llStndybyphono
idle.Display and Browsr
6)dryelopment a. USB debug: USB debug only appty in lhe develop process.
This tunction allows @pydab in computerand mobile devi@s_
. rccouns ano syncnronizJE
1) Backgrcund dab Applications using the backgrcund daE
synchroniation atanylime, send and reeive dab, disable Se backgrcund
dala e{end baterylifeand reducedab usage. Howevei some appil€tions wiil
uso the background dah forfre mnnedion.
2)Automatic sFchrcniation tum on/of Aubmatic sy.drcniaton, appli€tions
Automat_rli synchonizedab or asyncfircnous d&
. pru".E
l)Rese$ng-lgfadory Setings Ctear all dab slod on the phore.
. oo.o" I
1)Mew SD Card and Phone Memory
2) Uninstall or Formal SD Card.
. Languases ano xeytoao E
1) Selecting Language Distdd lndude all lhe tanguagos on the phone and
toblly amountof 12 kinds.
2) Custom Dictionary Add words to cuslom dictionary or detete.
3) Keltoard Setings VibBting men bunons a.e pressed. ptaying sound when
butons are presed, Capiblizing automdi€lly Speech tnput(by mimphone
on the keyboad), lnpufrng words(speoch cn be altered by sliding finger on
30
space key), Displaying tF{# ffi ffi c F a?a*t
Auto-Tox(Adomat€lly ipl@fu @ tuE* E 6d
keys)
4) lnput methd you 6 #ffi ff rliqE qh igr
methd.
. sp@ch lnput d o.in "** I
Teslto-Spech Co.nE$ sq
a.Lisbnloan exarueEE.5M !@ Cqyh*
b.Always us ry *!!&f 6t ffi d +g.i:&n dir€s
c.Default Engh * h lter q4k rfE b E g te sp*s te{
d.lnshll vtu d& .gE* e qil b$d ryft*
e.Speed@Sdl# tuH 6@b
i Language * E EEq?st* |l:ttusg*a H
s. Pi@ TTS
.mx;firyrmI
1)Endup*EturgErta ff
2)Oud b6.
. k"dr*E
1)ffi redhF#byk
2)Sdr€D* afr '+'d'-'!s&-
3)SSEtrzdE SATmha#iretoufierepuare. For
Cth pb *'GIIT{:m. tu S&d Ime'.
4)SdhgTm TM't'adl"bsettme.
5) tb 24 turfim Fomd ON/OFF
6)SddDate Fomat There are 3 kinds offomab you @n choose frcm:
Month-Dey-Yeai Day-Monh-Year and Year-Month-Day among wh'ch
Year-Mon$"Day is lhs dofautr sefring.
. scuaute pweronror El
You can settime ofb@t orshuhown by touching it. You may also seled to
r€oeat it ora cetuin dav dudno a weel
,E-
. About phonJl
You Gn ched be inbffiton on sblus bar and remaining power
19. Notices for the u* of phone
Your phone is a pddof WkGign and cE(smanship and should be
feated with @€. tu dhirE $gFbns en hetp you @mply wi6 he
tems of repak krb, b# h re dtrpbile phone.
1 )Place the mobile phdE d M Frs ard msenb od of reach oI small
dildren.
I )Keep lhe phone dry d. hr:idtt rd d ty$ of liquds which mnbin
31
User Manual
mineals will @Me ele@nc crrcurb,
2)Don1 toudr the phone dth wet hands when charging, it will €u* eleddc
shd ordamage lhe phone.
3)Avoid pla@ the devi@ in high temp€Eture envircnment. TemFEtuH will
shoftn tho life of eledronic devi@s, damage bateries, and waD or melt
@tuin plastic.
4)Avoid plae the devi@ in too low tempemlure environment. When the
Emp€rature dses, lhe phone frll prcdu@ water vapor that may damage
el€donac circuit.
s)Avoid pla@ the phone in dusty, difty pla@s, otheMise patu may be
damaged,
6)T0 avoid the phone in a lit cigaret!€, near open flame orany hatsouJ@.
7)Do nol op€n the devi@. non-prctussional approaci will do damage b the
phone.
8)Do not throwt lrom height, knock or shake se phone, rcugh handling en
damag€ intemal circuil tuds.
g)Do not paintthe phone, bMusethe Fintwill block headphones,
mimphones or other €movable pafu, and lead it nol rc*.
10) Use clean, sofl, drydolh b cleanthe camera, lights6nsd lenss. Prohibit
lhe u* oft€mful chemicals and cleaning agenb, cleaning fuidsto cl6an the
phone
11) lf mobiie phone, batery chargei or mobilo phone a@s&dss aB
defedive, snd b tho neared qualifred seNi@ @nterfor inspedon.
12) I f ne$ary seNice centre shff will assisl you and wil! aGnge brphon€
reFi6.

Other Chinavision Cell Phone manuals

Chinavision CVDQ-M299-2GEN User manual

Chinavision

Chinavision CVDQ-M299-2GEN User manual

Chinavision CVVB-M294-N1 User manual

Chinavision

Chinavision CVVB-M294-N1 User manual

Chinavision CVFD-THL-W11 User manual

Chinavision

Chinavision CVFD-THL-W11 User manual

Chinavision CVFD-M410 User manual

Chinavision

Chinavision CVFD-M410 User manual

Chinavision CVFD-M230 User manual

Chinavision

Chinavision CVFD-M230 User manual

Chinavision CVIN-M40 User manual

Chinavision

Chinavision CVIN-M40 User manual

Chinavision CVEM-M253 User manual

Chinavision

Chinavision CVEM-M253 User manual

Chinavision CVAAK-M402 User manual

Chinavision

Chinavision CVAAK-M402 User manual

Chinavision CVEM-M223 User manual

Chinavision

Chinavision CVEM-M223 User manual

Chinavision CVXQ-M290-2GEN User manual

Chinavision

Chinavision CVXQ-M290-2GEN User manual

Chinavision CVFD-M330 User manual

Chinavision

Chinavision CVFD-M330 User manual

Chinavision CVVB-M297-N1 User manual

Chinavision

Chinavision CVVB-M297-N1 User manual

Chinavision CVXT-M411 User manual

Chinavision

Chinavision CVXT-M411 User manual

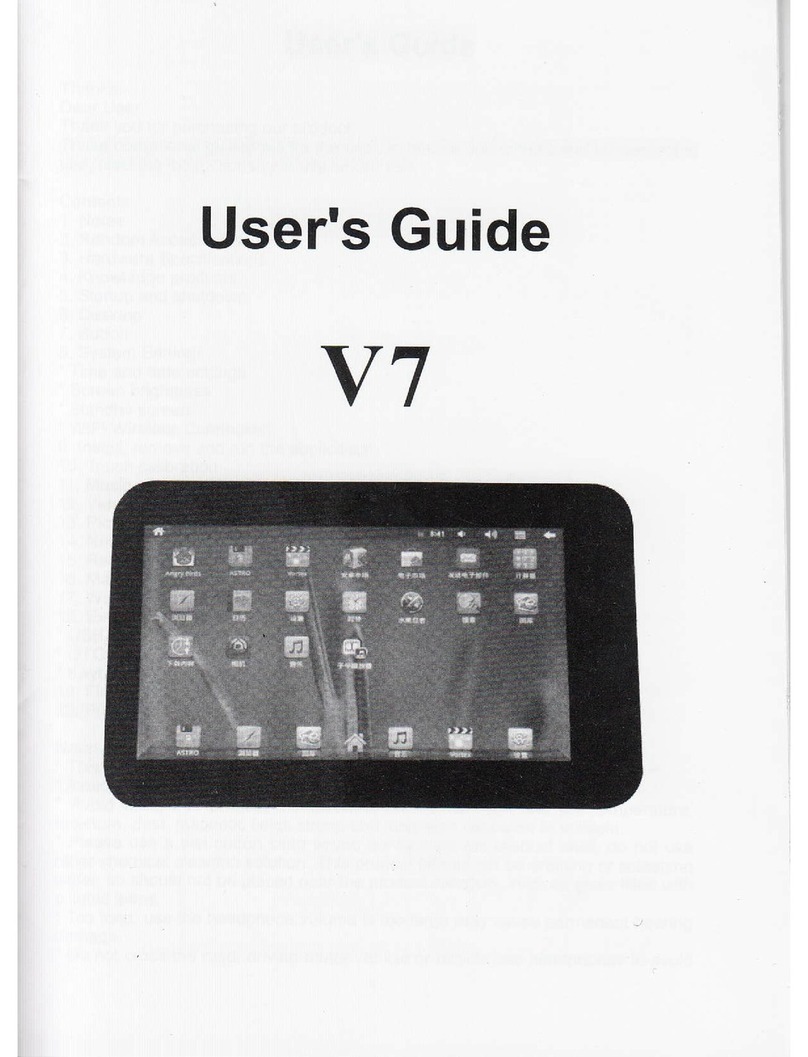
Chinavision V7 User manual

Chinavision

Chinavision V7 User manual

Chinavision CVVX-M209 User manual

Chinavision

Chinavision CVVX-M209 User manual

Chinavision CVYZ-M361 User manual

Chinavision

Chinavision CVYZ-M361 User manual

Chinavision CVSL-M117-2GEN User manual

Chinavision

Chinavision CVSL-M117-2GEN User manual

Chinavision CVXT-M312 User manual

Chinavision

Chinavision CVXT-M312 User manual

Chinavision CVWB-M256-2GEN User manual

Chinavision

Chinavision CVWB-M256-2GEN User manual

Chinavision CVYZ-M361 User manual

Chinavision

Chinavision CVYZ-M361 User manual

Chinavision CVFD-THL-4400 User manual

Chinavision

Chinavision CVFD-THL-4400 User manual

Chinavision CVEM-M266 User manual

Chinavision

Chinavision CVEM-M266 User manual

Chinavision CVDQ-M304 User manual

Chinavision

Chinavision CVDQ-M304 User manual

Popular Cell Phone manuals by other brands

Palm Tungsten Tungsten W Start here

Palm

Palm Tungsten Tungsten W Start here

Sony LT22i user guide

Sony

Sony LT22i user guide

Doro PHONEEASY 520X user guide

Doro

Doro PHONEEASY 520X user guide

Nokia 130 2017 user guide

Nokia

Nokia 130 2017 user guide

Samsung SGH-2200 user manual

Samsung

Samsung SGH-2200 user manual

LG Renoir KC910 manual

LG

LG Renoir KC910 manual

Samsung SCH-A220 user guide

Samsung

Samsung SCH-A220 user guide

DMP Electronics 463C Installation sheet

DMP Electronics

DMP Electronics 463C Installation sheet

AU AQUOS SHV31 Basic Manual

AU

AU AQUOS SHV31 Basic Manual

Samsung Anycall S8300H user manual

Samsung

Samsung Anycall S8300H user manual

Motorola MOTORAZR2 V9 quick start guide

Motorola

Motorola MOTORAZR2 V9 quick start guide

Overmax VERTIS famy user manual

Overmax

Overmax VERTIS famy user manual

Samsung Galaxy Ace 2 user manual

Samsung

Samsung Galaxy Ace 2 user manual

Majestic SILENO 52FLIP user manual

Majestic

Majestic SILENO 52FLIP user manual

PHICOMM Energy L E653lwEU user manual

PHICOMM

PHICOMM Energy L E653lwEU user manual

Zte Z331 user guide

Zte

Zte Z331 user guide

Samsung SGH-E958 user guide

Samsung

Samsung SGH-E958 user guide

Nokia 6 user guide

Nokia

Nokia 6 user guide

manuals.online logo
manuals.online logoBrands
  • About & Mission
  • Contact us
  • Privacy Policy
  • Terms and Conditions

Copyright 2025 Manuals.Online. All Rights Reserved.