User Manual
phon€ needn't to perform additional steps to @nned WLFi netuorks.
. Notices,
Unlsss you choce not b ro*rye the neMoft wilh Fssword, olhoNise, there
is no ned to re+nter the @rEsponding password when netrtime conneding
lo the previously encrypt€d wirelss netuork. WLF| will search aulomati@lly,
that is, phone oeedn't to pedom additional steps to connectWLFi netuorks.
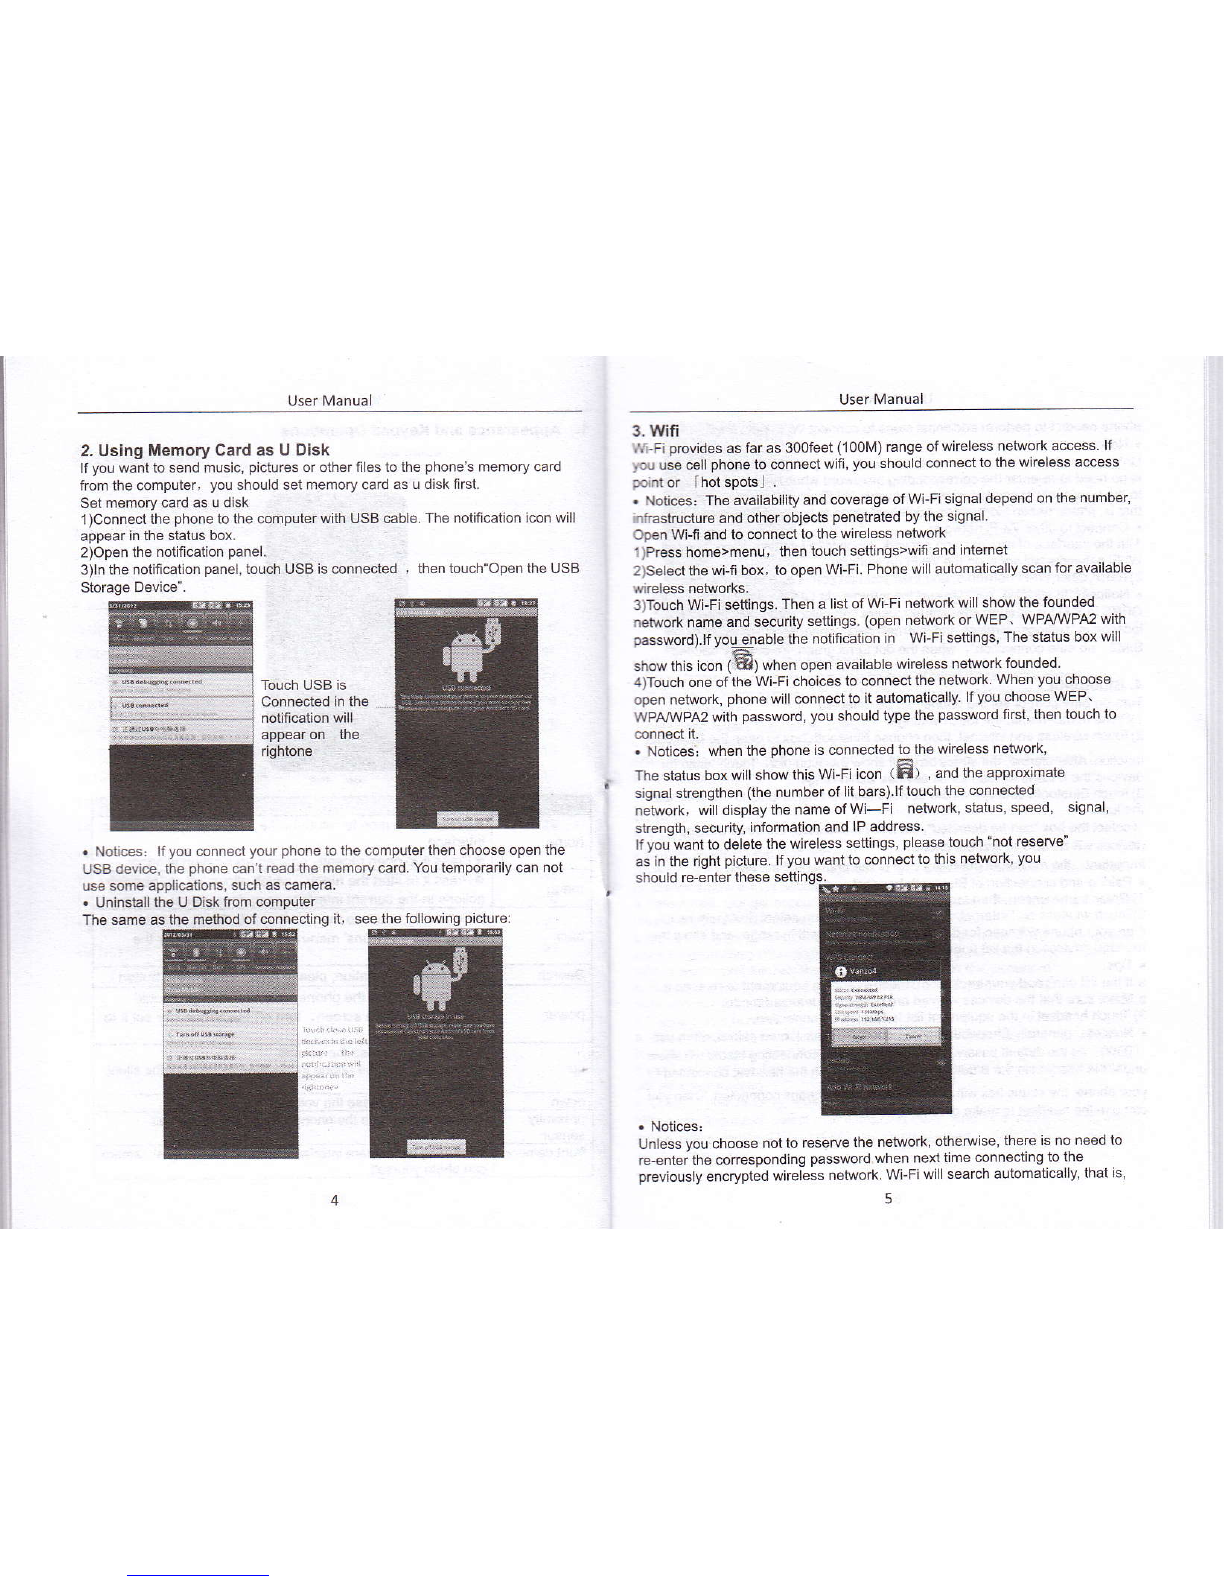
. Conned to other WLFi netuo*s
1)ln the interfacg ofwirelBs and netuork, touch WiF, setings. The founded
Wi-Fi netuo*s will show on lhe WLFi neMo* list.
2)Touch oherw-Fi nefoorks, and then you can conned to this neko*.
. Noti@s: in addfrion, you €n surf the internet via GPRS. We default thathe
GPRS in SlMl is openod aflersbded, usere €n seted manually,the specific
loction is 'seting*wireless and intemeFdaE connedion", touch 'SlMl.
SlM2, no dab @nnedion', when the dotturns green, ifs alreadyopened.
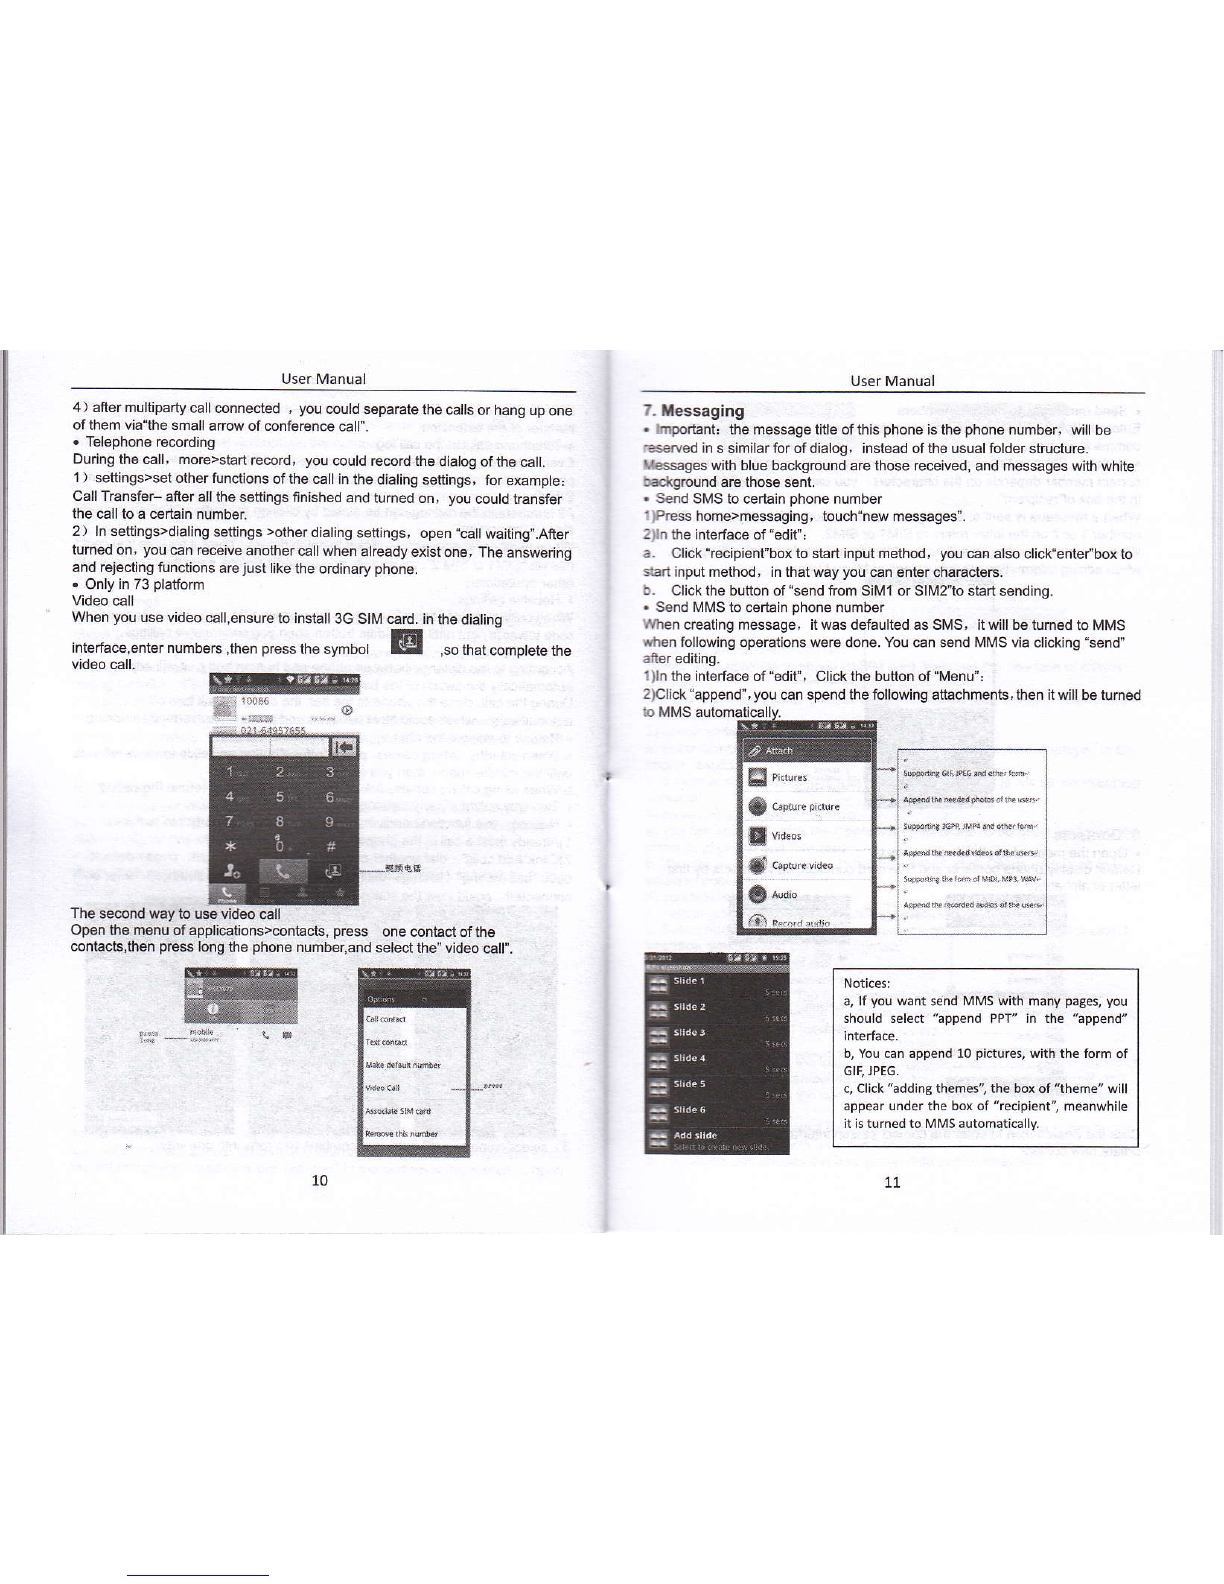
4. Bluetooth
Turn on Bluet@th or sel the phone €n be deteded
1)PEss home>menu, lhe touch sefrings-
2)Toud wheless and intemet, then choce Eluetooth bx to open the Btuetooth
fundion.Afrer shded, the status boxwill showthis i@n (8). Touch "sGn for
devi@s"the itsbb to s€n for all devices frthin range.
3)Toud Bluetootr se6ngs, all he devices foundd will display in the tist under
( s# Se bx "@n be d6tedd". *t fr to be detdd, the other Bluetooth
deG *ll b Sle to fnd Se phme. )
,ntffi: k @imum detdre tme of the ptune is 2 minutes.
. kidrig d ffffi of Blebth hadst
1) P6 ture>m, tuntuafi Sjngs. _
2)Toud ffrele$ and int€mebBlueMh $flings, hen select Bluel@th box,
then your phone frllwn brthe Bluebth dovic6s within 6nge .and show the
founded devi@s in the list underthe i@n.
a.lf the list cn'tfind yourequipment, touch s€nning quipmenl to rssGn it_
b. Make sure that the devi@s Mnied are under fte deteded mode.
3)Touch headset in the equipment listtofnish Se @nnedion.
. Notices: geneElly Bluetooth d€vices need password to b6 paired, oflen use
100001 asthe defaultpassword.4)Th6 paidng and @nneding statuswill show
underlhe headset in he Blusl@th devi@s list. When bo headset connected to
your phone, the sbtus box will show this icon(EI)m@ns conneded. Then you
can use the headsel to make or re@ive 6llings,.
Tre
. Cut the connedon to the Bluetooth
1)Pre$ home>menDsefrings>wireless and intemot>Bluetoo$ sefr ngs.
2)ln 6e lisl of Bluetooth equipment, touch or bp and hold the connoded
handj@ headset.
3)Press and seled'@ncel the paidng".
. Bluoboth proximity sensor
ffier pailing the tuo device,you can test out the signal is saong or weak by the
Bluet@th proximity sensor device
5. uait
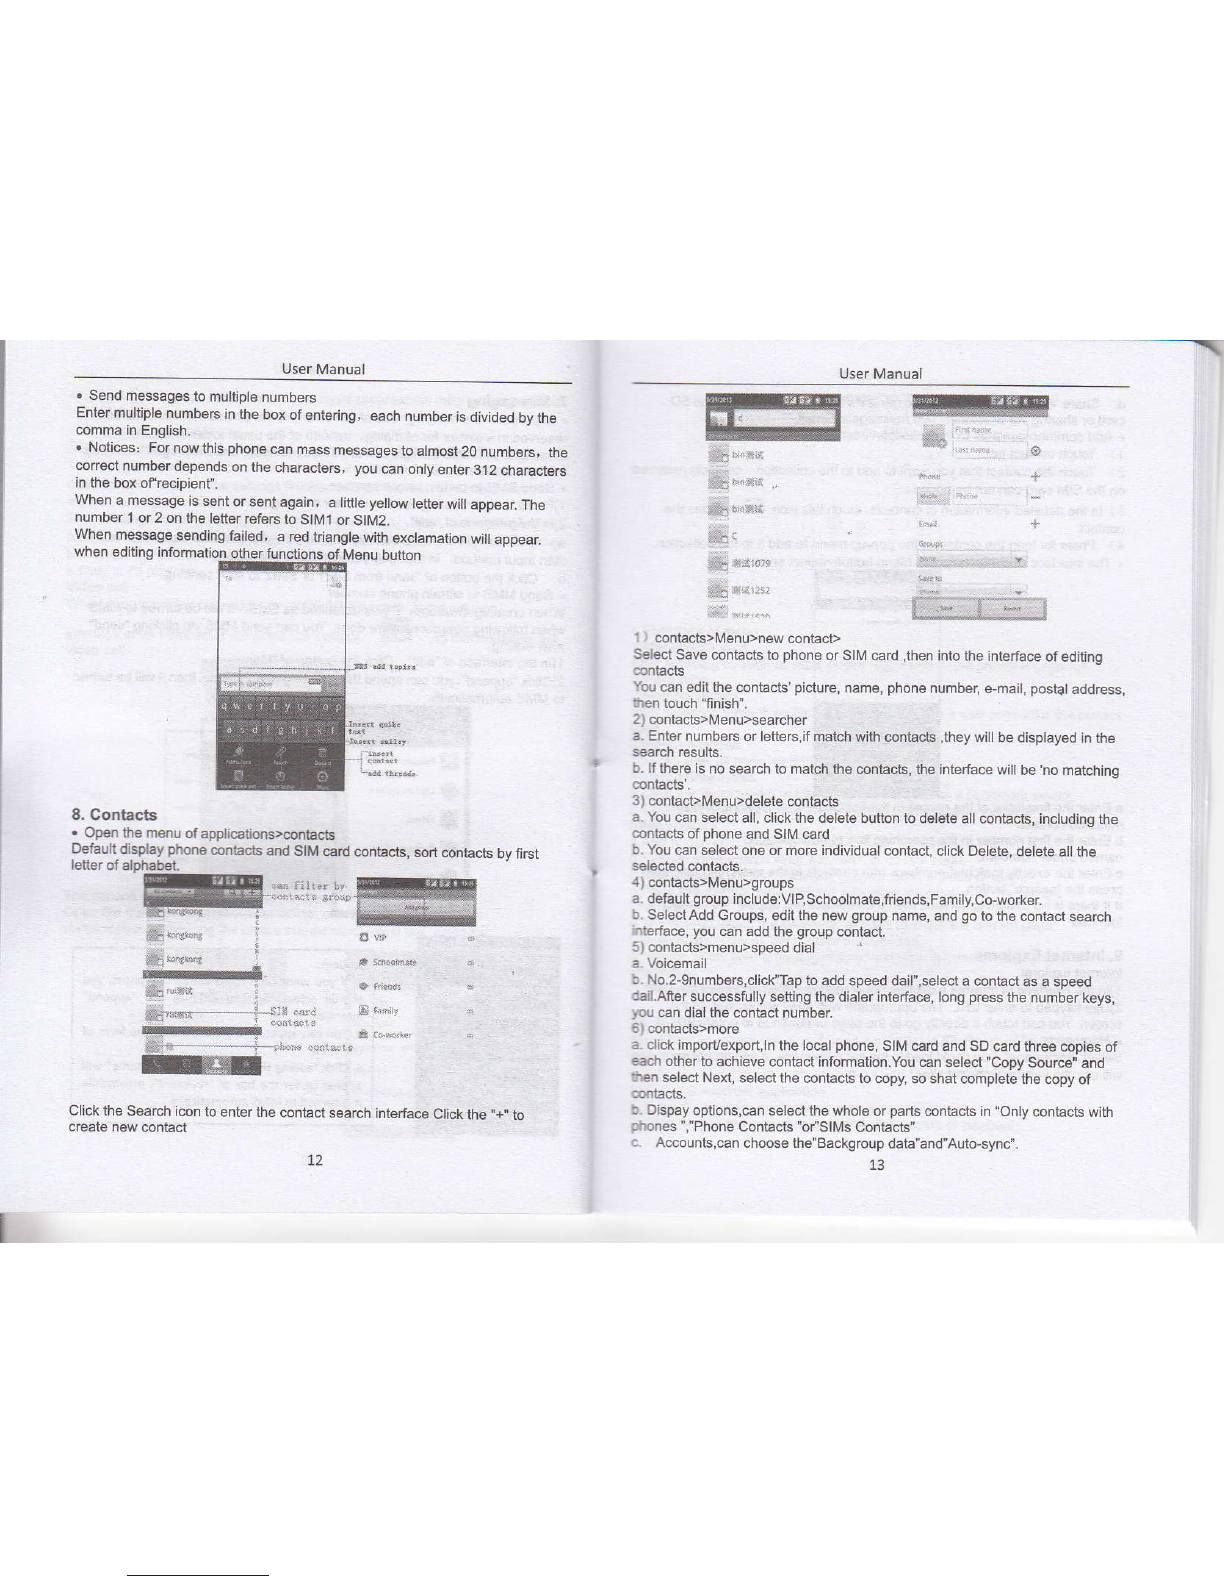
5.1 Gmall
. Creale an electrcnic mail amunt
Seled mail> setings. You €f, activate oreditexisting e-mail aeounb as well
as creale a new e-mail acmunl.
a.Selet mail, Google a@untsetrng interface appears. Then touch next step'>
s€te acmunb€nter name, last name and email amount.
b.G@gle seNe6detemine whetherthe name can be used, ifso, new interfa@
areaE prcmpting enter password, then judge fre password' se@dty, use6
fr d@sn't meet the requirmenb need to re-enler the mssword,
c. Su@ssfully register a new Gmail ac@unt, a messenger creaied
dmati€lly for tesling.
. LGdinS mailac@unt
a. OFn Gmail skip inboduction scren>loading inteface app€6 >*led load
b. Enter name, passwod hen l@d
E.mil acount initialiation,prompting "lqin successful" All Google ac@unb
Slbe sFchonizd.
. CMing and sending ,mails
ffien cHtng mails, selet mail> ceating mails. Enterlhe address(redpient),
llr€re and @ntents. Pres MENU you 6uld append'. 'Add CdBcc', select
ssd ordisGrded-