manuals.online logo
Brands
  1. Home
  2. •
  3. Brands
  4. •
  5. Cisco
  6. •
  7. IP Phone
  8. •
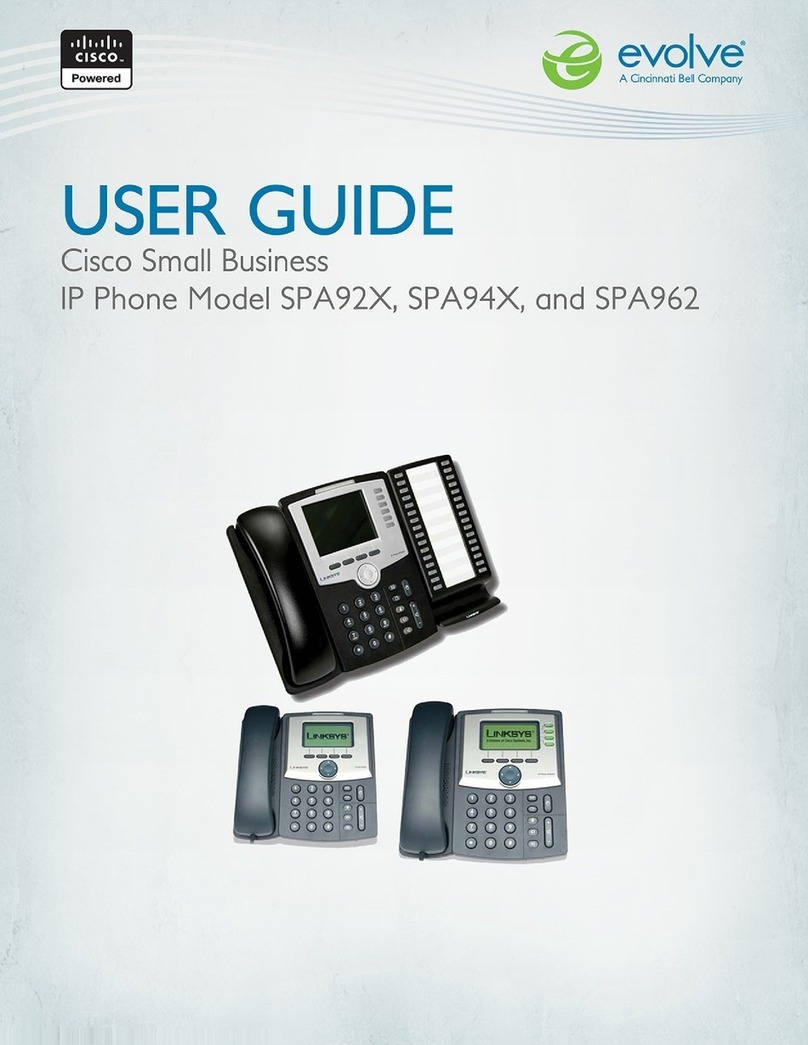
  9. Cisco LINKSYS SPA922 User manual

Cisco LINKSYS SPA922 User manual

Model No.
Quick Reference
Model Nos.
Receiving Calls
1. Multiple Calls on a Single Line
(For SPA921 and SPA922)
• Caller information will display on the LCD
screen.
• To access more than one simultaneous
call, use the hold or conference feature.
2. Multiple Calls on a Multiple Lines
(For SPA941, SPA942 and SPA962)
• Calls will come in on the first available
line.
• Call information will display on the LCD
screen.
Muting a Call
• Mute the call by pressing the mute button.
• Press the mute button again to cancel.
Placing a Call on Hold
• Press the hold button to put the active call
on hold. If there is another incoming call,
you can now answer the 2nd call or line.
• For multiple lines (SPA941, SPA942 and
SPA962), the call’s line will flash red.
• Resumethe1
st call by pressing the line
button associated with the 1st call.
•Ifthe2
nd call is still in progress it will
automatically go on hold.
To End a Call
• From a handset, hang up.
• From a speaker call, press the speaker
button.
• From a headset call, press the headset
button.
In this display, more choices are available by
pressing the right navigation button.
Soft Buttons
Press to activate a soft button feature.
Navigation button
Use to move up, down, left or right through soft
button features.
Lines
(SPA 941, SPA942 and SPA962 only)
Use to access additional extensions.
The SPA941 and SPA942 have four lines, the
SPA962 has six lines.
Making a Telephone Call
Call using one of three devices:
• Lift the handset and dial, or
•Connect the headset (port is on right side of
phone), press the headset button and dial, or
• Press the speaker button and dial.
Switching Devices During a Call
Only one device at a time can be used.
• Press the button for the device.
• Adjust volume as needed.
Dialing a Stored Number
• To redial the last number called, press the soft
button below redial twice.
• To view directory choices, press the soft button
under dir. Use the navigation button to highlight
your choice. Press dial to call.
• To dial the number of the last call the phone
received, press the soft button under lcr.
•
Speed Dialing
Speed dial numbers must already be programmed into the
phone (see Setup Shortcuts)
• Dial the speed dial number and then lift the hand-
set, or
• lift the handset and dial the speed dial number,
followed by the # button on the phone,
• the entry in the speed dial list will be dialed
automatically.
LCD Screen Overview
• Top line displays date, time, phone number
• main area displays call information
• bottom lines display soft button options
• right side displays extension numbers, if available.
• The SPA962 has a 320 x 240 pixel color display
Soft Button Features
Shows available features.
As shown above, by pressing the soft button below
the feature, you could:
redial: view redial list
dir: view directory options
cfwd: forward your calls
dnd: choose do not disturb.
SPA921, SPA922, SPA941, SPA942, SPA962
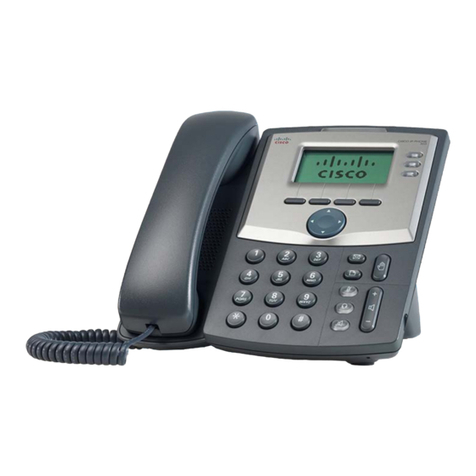
SPA IP Phone
1. Handset
2. LCD screen (SPA962 in color)
3. Voice mail indicator light
4. Lines (SPA941, SPA942 and
SPA962)
5. Soft buttons
6. Navigation button
7. Mailbox button
8. Hold button
9. Setup button
10. Volume adjustment bar
11. Headset button
12. Speaker button
13. Mute button
14. Dial pad
Phone Basics The LCD Screen
IP Phone SPA942
Navigation button
(left, right, up, down)
Soft buttons
Soft button
features
Lines
LCD screen
Voice
15. Phone password
To setup a phone password: Setup, 15
16. LCD Contrast
To adjust the LCD screen contrast:
Setup, 16
17. Call Park Status
To view the status of a call that has been
parked: Setup, 17
18. Login
To login to phone: Setup, 18
(use only if a phone password is in use)
For detailed information on these or any
other features in this Quick Reference guide,
please see the SPA IP Phone User Guide.
Accessing Voice Mail
Voice mail service must be available on your network
• Press the mailbox button, or
• Press the setup button then, 8 or
• Dial the voice mail extension.
Initiating Three Way Conference Calls
1. Press the soft button under conf during an active
call.
2. The first call is placed on hold. You will hear a dial
tone. Dial the telephone number to conference in.
3. Press the soft button under conf again. The
conference call will now include you and the other
two parties.
4. Hanging up disconnects all parties.
Attended Transfer
1. Press the soft button under xfer during an active
call.
2. The first call goes on hold and there will be a dial
tone. Dial the second telephone number.
3. When the second person answers, you can have a
private conversation without the first person hear-
ing it.
4. To connect the call to the second person, press the
soft button under xfer again to complete the
transfer.
5. You will be disconnected from the call.
Unattended Transfer
1. Press the soft button under xfer during an active
call.
2. The first call is placed on hold. There will be a dial
tone. Dial the second telephone number.
3. When the phone rings, press the soft button under
xfer again to complete the transfer.
4. You will be disconnected from the call.
Feature Use to:
< < or > > move left or right through an entry without deleting characters
add add an entry
alpha, IP, num toggle through choices to enter a number, URL or IP address
cancel to cancel any changes you have made (press before ok or save)
cfwd access call forwarding options (see Setup Shortcuts)
change change a ring tone feature
clear clear an entire entry
copy copy an existing directory entry
delChr delete the last character entered
delete delete an stored entry
dial place a call to the number highlighted on the LCD screen
dir access the phone’s directory (see Setup Shortcuts)
dnd enable do not disturb (see Setup Shortcuts)
edit edit a stored entry
grPick pickup a call from an extension outside your group
lcr dial the last call received
ok or save confirm your choice when entering new information
park park a call (see SPA IP User Guide for more detail)
paste paste the copied information into your personal directory
pickup pickup a call from another phone in your group
play listen to ringtones before choosing
redial redial recently called numbers
select choose an item to review or change
unpark pick up a parked call
Setup Shortcuts
Note: Press buttons in sequence
1. Directory
To add a new entry: Setup, 1,1
To view a corporate directory: Setup, 1, 2
To use a personal directory: Setup, 1,3
2. Speed Dial
To add/edit a speed dial number: Setup, 2
3. Call History
To view redial list: Setup, 3, 1
To view answered calls list: Setup, 3,2
To view missed calls list: Setup, 3,3
4. Ring Tones
To change a ring tone: Setup, 4
5. Preferences
To block your caller ID: Setup: 5, 1
To block anonymous callers: Setup: 5, 2
To enable Do Not Disturb, Setup: 5, 3
To enable Secure Call, Setup: 5, 4
To enable Dial Assistance, Setup: 5, 5
To choose Preferred Audio Device, Setup: 5, 6
6. Call Forward
To forward all calls to one number: Setup, 6, 1
To forward calls when your phone is busy:
Setup, 6,2
To forward calls when there is no answer at your
phone: Setup, 6, 3
To forward calls after a time delay: Setup, 6, 3,
then Setup 6, 4
7. Time/Date
To change the time and/or date: Setup, 7
8. Accessing Voice Mail
To access voice mail: Setup, 8
(or the mailbox button)
Model No.
Phone Buttons
mailbox
setup
mute
(illuminates when on)
headset
(illuminates when on)
speaker
(illuminates when on)
hold
volume adjustment
bar
Setup Shortcuts
For additional information or troubleshooting
help, refer to the User Guide on the Linksys
website.
Website
http://www.linksys.com
Linksys is a registered trademark or trademark of
Cisco Systems, Inc. and/or its affiliates in the U.S.
and certain other countries. Copyright © 2006
Cisco Systems, Inc. All rights reserved.
SPA921,922,941.942, 962 QR-60921NC DF
Soft Button Features List
NOTE: 9 through 14 are Network settings -
check with your Phone Administrator before
using
Good to Know
This manual suits for next models

4

Other Cisco IP Phone manuals

Cisco 7962G - Unified IP Phone VoIP User manual

Cisco

Cisco 7962G - Unified IP Phone VoIP User manual

Cisco 8800 Series User manual

Cisco

Cisco 8800 Series User manual

Cisco 8841 User manual

Cisco

Cisco 8841 User manual

Cisco 7912 User manual

Cisco

Cisco 7912 User manual

Cisco DATAVOX 7941 Reference guide

Cisco

Cisco DATAVOX 7941 Reference guide

Cisco 8945 Setup guide

Cisco

Cisco 8945 Setup guide

Cisco SPA 303 Series User manual

Cisco

Cisco SPA 303 Series User manual

Cisco 7841 User manual

Cisco

Cisco 7841 User manual

Cisco 7945 Series User manual

Cisco

Cisco 7945 Series User manual

Cisco 6961 - Unified IP Phone Standard VoIP Guide

Cisco

Cisco 6961 - Unified IP Phone Standard VoIP Guide

Cisco UNIFIED 9971 Quick reference guide

Cisco

Cisco UNIFIED 9971 Quick reference guide

Cisco DATAVOX 7941 Administrator Guide

Cisco

Cisco DATAVOX 7941 Administrator Guide

Cisco 7941G - Unified IP Phone VoIP User manual

Cisco

Cisco 7941G - Unified IP Phone VoIP User manual

Cisco 7841 User manual

Cisco

Cisco 7841 User manual

Cisco 7921G - Unified Wireless IP Phone VoIP User manual

Cisco

Cisco 7921G - Unified Wireless IP Phone VoIP User manual

Cisco 7905 User manual

Cisco

Cisco 7905 User manual

Cisco 8831 User manual

Cisco

Cisco 8831 User manual

Cisco 7920 - Unified Wireless IP Phone VoIP Instruction Manual

Cisco

Cisco 7920 - Unified Wireless IP Phone VoIP Instruction Manual

Cisco Cisco 7960 User manual

Cisco

Cisco Cisco 7960 User manual

Cisco 7931G - Unified IP Phone VoIP Instruction Manual

Cisco

Cisco 7931G - Unified IP Phone VoIP Instruction Manual

Cisco 7921G - Unified Wireless IP Phone VoIP User manual

Cisco

Cisco 7921G - Unified Wireless IP Phone VoIP User manual

Cisco Meraki MC74 User manual

Cisco

Cisco Meraki MC74 User manual

Cisco 7941G - Unified IP Phone VoIP User manual

Cisco

Cisco 7941G - Unified IP Phone VoIP User manual

Cisco Cisco 7960 User manual

Cisco

Cisco Cisco 7960 User manual

Popular IP Phone manuals by other brands

Poly VVX 150 setup sheet

Poly

Poly VVX 150 setup sheet

Yealink SIP-CP920 user guide

Yealink

Yealink SIP-CP920 user guide

Alcatel-Lucent ENTERPRISE 4018 user guide

Alcatel-Lucent

Alcatel-Lucent ENTERPRISE 4018 user guide

Yealink Yealink SIP-T46G quick start guide

Yealink

Yealink Yealink SIP-T46G quick start guide

Aastra 55I IP PHONE - RELEASE 2.0 user guide

Aastra

Aastra 55I IP PHONE - RELEASE 2.0 user guide

Htek UC601 user guide

Htek

Htek UC601 user guide

Mitel MiVOICE 6920 Quick reference guide

Mitel

Mitel MiVOICE 6920 Quick reference guide

Funkwerk IP 50 operating instructions

Funkwerk

Funkwerk IP 50 operating instructions

Panasonic KX-TDA0350 Quick reference guide

Panasonic

Panasonic KX-TDA0350 Quick reference guide

Grandstream Networks GXP-285 Configuration guide

Grandstream Networks

Grandstream Networks GXP-285 Configuration guide

Interquartz 9339HS Quick start user guide

Interquartz

Interquartz 9339HS Quick start user guide

Nortel IP Phone 1110 Quick reference card

Nortel

Nortel IP Phone 1110 Quick reference card

Unity AVAYA 9504 user guide

Unity

Unity AVAYA 9504 user guide

Polycom 1725-11530-310 Administrator's guide

Polycom

Polycom 1725-11530-310 Administrator's guide

Polycom Poly VVX150 user guide

Polycom

Polycom Poly VVX150 user guide

Polycom Soundpoint IP550 quick start guide

Polycom

Polycom Soundpoint IP550 quick start guide

CenturyLink Poly VVX 35x Series Quick reference guide

CenturyLink

CenturyLink Poly VVX 35x Series Quick reference guide

Grandstream Networks GXV3240 user guide

Grandstream Networks

Grandstream Networks GXV3240 user guide

manuals.online logo
manuals.online logoBrands
  • About & Mission
  • Contact us
  • Privacy Policy
  • Terms and Conditions

Copyright 2025 Manuals.Online. All Rights Reserved.