manuals.online logo
Brands
  1. Home
  2. •
  3. Brands
  4. •
  5. Clarke
  6. •
  7. Indoor Furnishing
  8. •
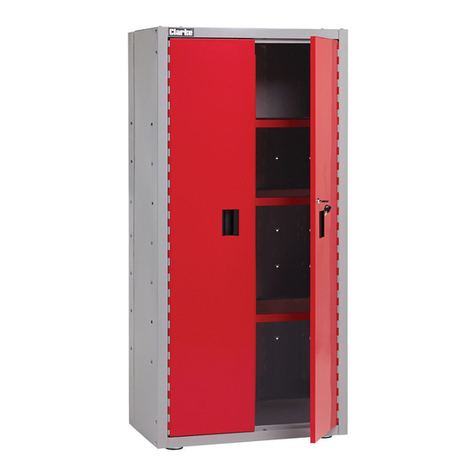
  9. Clarke CWC50P User manual

Clarke CWC50P User manual

CWC50P
Part Number: 4501595
Assembly Instructions
0205
1. Back Panel x 3
2. Centre Panel x 1
2a. Centre Panel x 1
3. Bottom Panel x 1
3a. Top Panel x 1
4. Side Panel x 2
5. Door x 3
5a Middle Door
3
6. Hanger x 2
7. Shelf x 4
8. Long Hook x 5
9. Medium Hook x 5
10. Short Hook x 5
Polythene bag containing nuts,
screws and washers etc.
Contents
18
9
2
10
2a
1
61
4
6
5
4
5
5a
7
3
3a
Please note that the details and specifications contained herein are correct at the time of going to print.
However CLARKE International reserve the right to change specifications at any time without prior notice.
SAFETY PRECAUTIONS
ALWAYS seek assistance when lifting heavy items.
ALWAYS keep children and animals away from tools and work area.
ALWAYS keep work area clean and free from oil spills etc.
ASSEMBLY
Before attempting to assemble the cabinet, carefully unpack/unwrap and lay out all components,
check off against the list of contents on front page, notify your Clarke dealer ASAP of any shortages
and/or damage.
Tools required:
Cordless drill and drill bits (4mm and 5mm). (Due to manufacturing tolerances, some holes may
not line up accurately and may require opening up in order to fit securing screws).
1 x Medium flat bladed screwdriver.
1 x 8mm ring or combination spanner.
Assemble as follows:
Fig. 1
Before commencing with the assembly, observe
the door opening directions (Fig. 2), also note
the difference between the two centre panels,
i.e. the door stops on the front edge of panel.
Panel No 2 has twin stops whilst panel No 2a has
a single stop only.
Key slots all facing upwards
Fig. 2
Note: items in brackets refer to the contents
list on front page.
When assembling the back panels to the side
bottom panel, ensure the key slots are all
facing the same way (Fig. 1).
22a
Twin Stops Single Stop
Assemble As Follows:
1. Loosely attach the rear panels (1) to the
centre panels (2 & 2a) using M5x8
screws nuts and lock washers (Fig. 3),
DO NOT fit the top and bottom screws
at this time.
2. Attach the above assembly to the base
panel (3) using M5x8 screws etc, DO
NOT fit the two end screws in the two
outer panels at this time.
3. Attach the two end panels (4), this time
all securing screws etc around the base
can be loosely fitted.
Centre Panel
Left Rear Panel
Middle Rear Panel
Fig. 3
Viewed From The Back
Fitting the Doors and door locks
IMPORTANT
Ensure the key remains in the locks until they are fully fitted.
NOTE: the middle door is a little wider than the two outer doors.
1a. Fit door locks to all three doors by removing the securing clip and passing the locking lever
through the hole in the door front.
1b. Ensure the locking lever is in the locked position when the key is turned fully clockwise and
secure in position with the clip removed in 1a.
2a. Fit spacing washer to the bottom hinge pin and locate hinge pin in relevant hole in the base
panel.
2b. Close door and lock in position to prevent from falling out when fitting the upper panel (3a).
2c. Repeat steps 2a & 2b for other two doors.
Hinge Pin
Fig. 3
Upper Panel
Fitting Upper Panel
1. Carefully fit the upper panel (3a) by sliding
it on from the front, ensure the lip slots into
the cut outs in the end panels whilst lining
the upper door hinge pins. The upper panel
should fit over the assembly with the right
angled lip fitting right over the back.
2. Loosely fit all securing screws including
those omitted in earlier steps.
3. Check the doors are square and can be
opened without binding.
4. Proceed to tighten all screws and nuts etc,
starting in the centre of the assembly and
progressively work outwards until all the
securing screws are tight. DO NOT
overtighten.
Fitting Hangers
The hangers should be fitted in the upper corners
of the unit using screws M4x8, lock washers and
nuts.
Fig. 4 Fig. 4a
Side View
Rear View
Your wall cabinet is now ready to be hung on the wall using suitable fixings (not supplied).
Finally fit the four shelves with the ‘U’ shaped edge to the front of the cabinet.
Back Panel
Hanger
PARTS & SERVICE TEL: 020 8988 7400
or e-mail as follows:
PARTS: [email protected]
SERVICE: [email protected]

This manual suits for next models

1

Other Clarke Indoor Furnishing manuals

Clarke CS4701 User manual

Clarke

Clarke CS4701 User manual

Clarke CSR5265 User manual

Clarke

Clarke CSR5265 User manual

Clarke CSR5150 User manual

Clarke

Clarke CSR5150 User manual

Clarke HDT855 User manual

Clarke

Clarke HDT855 User manual

Clarke CC76 Quick start guide

Clarke

Clarke CC76 Quick start guide

Clarke CSP520 User manual

Clarke

Clarke CSP520 User manual

Clarke CC1800P User manual

Clarke

Clarke CC1800P User manual

Clarke CSR5100BL User manual

Clarke

Clarke CSR5100BL User manual

Clarke CSR5450BP User manual

Clarke

Clarke CSR5450BP User manual

Clarke CSM5100 User manual

Clarke

Clarke CSM5100 User manual

Clarke CSM5265 User manual

Clarke

Clarke CSM5265 User manual

Clarke CS5500 User manual

Clarke

Clarke CS5500 User manual

Clarke CS5501 User manual

Clarke

Clarke CS5501 User manual

Clarke CSR5175 Series Quick start guide

Clarke

Clarke CSR5175 Series Quick start guide

Clarke CSR450 Series User manual

Clarke

Clarke CSR450 Series User manual
Clarke HDT855 User manual

Clarke

Clarke HDT855 User manual

Clarke CS330 User manual

Clarke

Clarke CS330 User manual

Clarke CSR450 Series User manual

Clarke

Clarke CSR450 Series User manual

Clarke CSR4350LG User manual

Clarke

Clarke CSR4350LG User manual

Clarke CS4700 User manual

Clarke

Clarke CS4700 User manual

Clarke CSM5150 User manual

Clarke

Clarke CSM5150 User manual

Clarke CMS2 User manual

Clarke

Clarke CMS2 User manual
Clarke CS4600BO User manual

Clarke

Clarke CS4600BO User manual
Clarke GMS23SS User manual

Clarke

Clarke GMS23SS User manual
Popular Indoor Furnishing manuals by other brands

Furniture of America CM-AC6941 Assembly instructions

Furniture of America

Furniture of America CM-AC6941 Assembly instructions

Safavieh Furniture MED5709 manual

Safavieh Furniture

Safavieh Furniture MED5709 manual

Furniture of America CM6940-LV Assembly instructions

Furniture of America

Furniture of America CM6940-LV Assembly instructions

FMD Furniture JONNY 1 613-001 Assembly instructions

FMD Furniture

FMD Furniture JONNY 1 613-001 Assembly instructions

Next LINCOLN CORNER TV 851304 Assembly instructions

Next

Next LINCOLN CORNER TV 851304 Assembly instructions

Amart Furniture DAYTON 73853 Assembly instruction

Amart Furniture

Amart Furniture DAYTON 73853 Assembly instruction

Tech Craft HBL60 Assembly instruction

Tech Craft

Tech Craft HBL60 Assembly instruction

Micasa INDUS 407559600000 manual

Micasa

Micasa INDUS 407559600000 manual

Highland P140 -4PC instruction manual

Highland

Highland P140 -4PC instruction manual

Madison Park Cirque 26" Stool Assembly instructions

Madison Park

Madison Park Cirque 26" Stool Assembly instructions

Lightolier Coffaire DB/HP90 DL Brochure & specs

Lightolier

Lightolier Coffaire DB/HP90 DL Brochure & specs

Southern Enterprises Cadman MS872500TX Assembly instruction

Southern Enterprises

Southern Enterprises Cadman MS872500TX Assembly instruction

Forte HVKK721 Assembling Instruction

Forte

Forte HVKK721 Assembling Instruction

Mayer 2430 manual

Mayer

Mayer 2430 manual

Salvatori DRITTO Assembly instructions

Salvatori

Salvatori DRITTO Assembly instructions

Royo GO ON 90 manual

Royo

Royo GO ON 90 manual

Rauch M2266 Assembly instructions

Rauch

Rauch M2266 Assembly instructions

Homecare 37602 Assembly instructions

Homecare

Homecare 37602 Assembly instructions

manuals.online logo
manuals.online logoBrands
  • About & Mission
  • Contact us
  • Privacy Policy
  • Terms and Conditions

Copyright 2025 Manuals.Online. All Rights Reserved.