1
Advisories
Must be installed by a licensed professional.
Lace will wear:
• Routinely check for wear or damage.
• Look for broken fibers around areas of high wear.
• Replace lace if a significant amount of fibers are broken.
• Proactively replace lace every 6 months.
• Loss of suspension can occur if lace fails.
• Keep lace away from open flame and sharp edges.
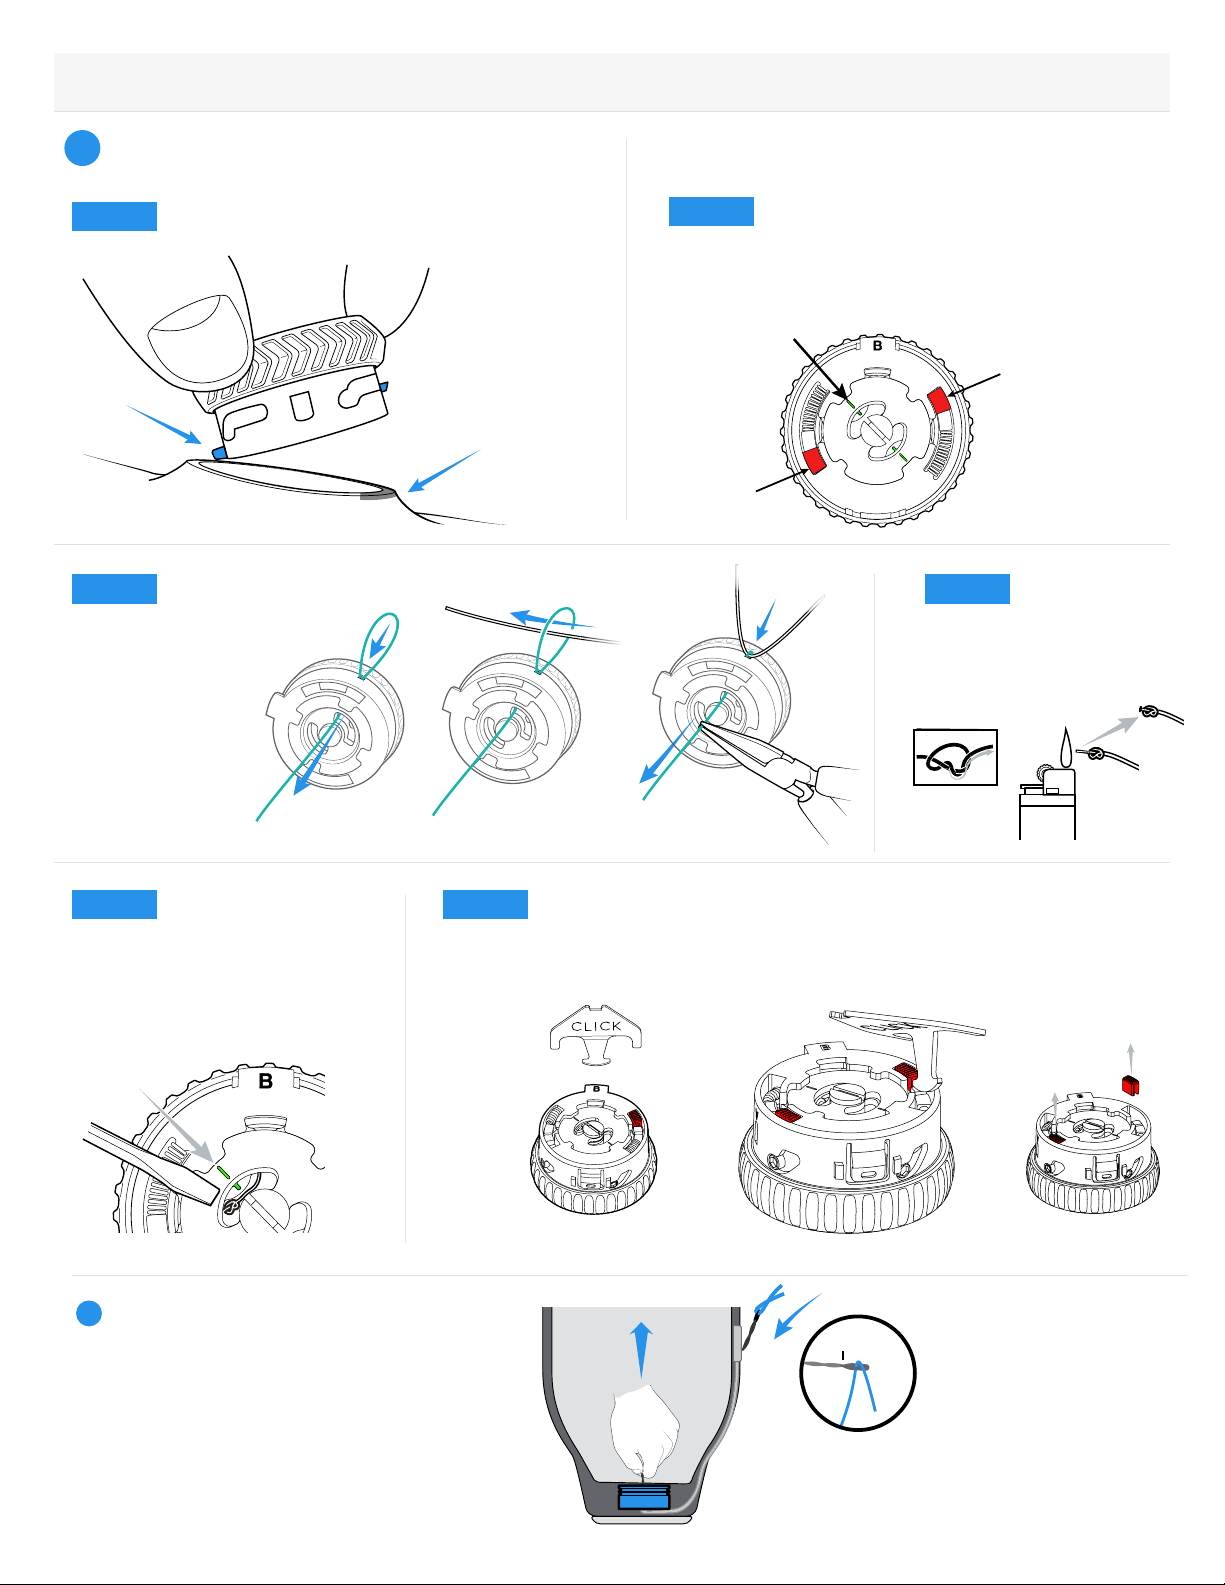
Secure threaded insert to liner with medium thread lock.
Secure snap to threaded insert before tensioning system.
Weight limit: 300lbs/135kg
See instructions in other languages: clickmedical.co/instructions
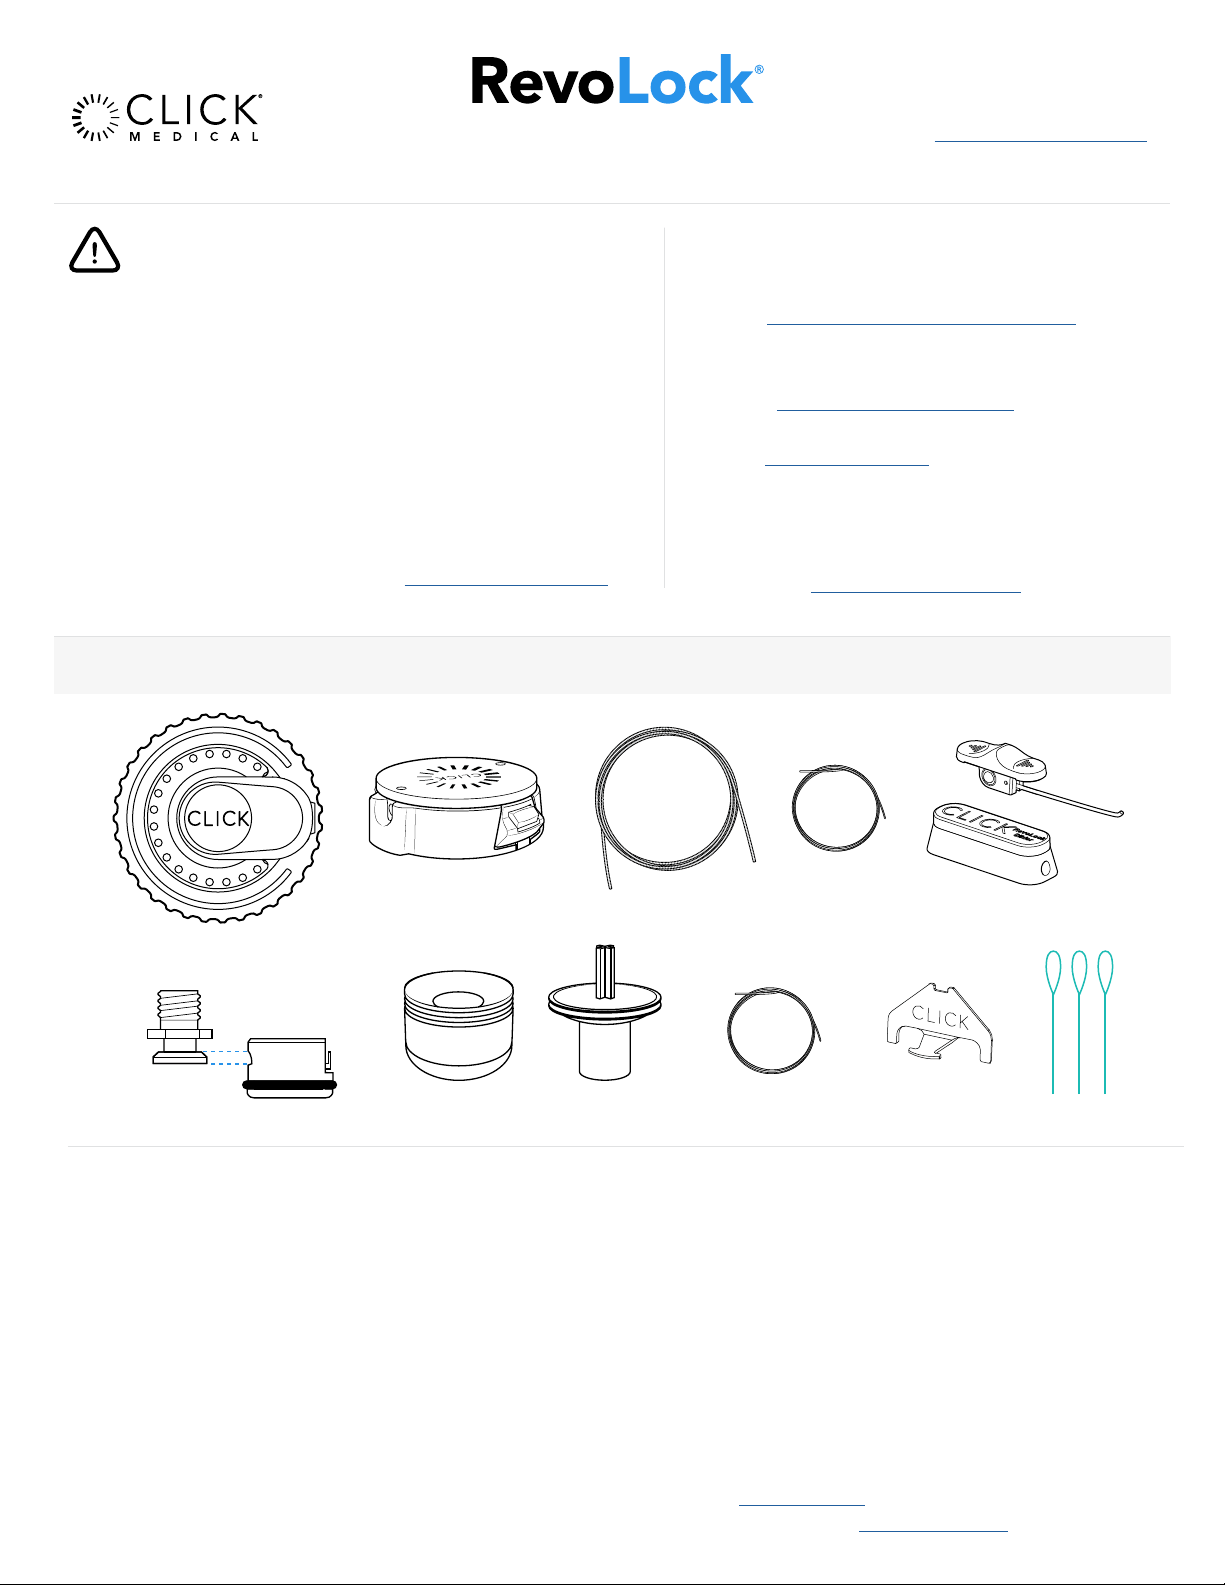
RevoLock Align Kit Contents:
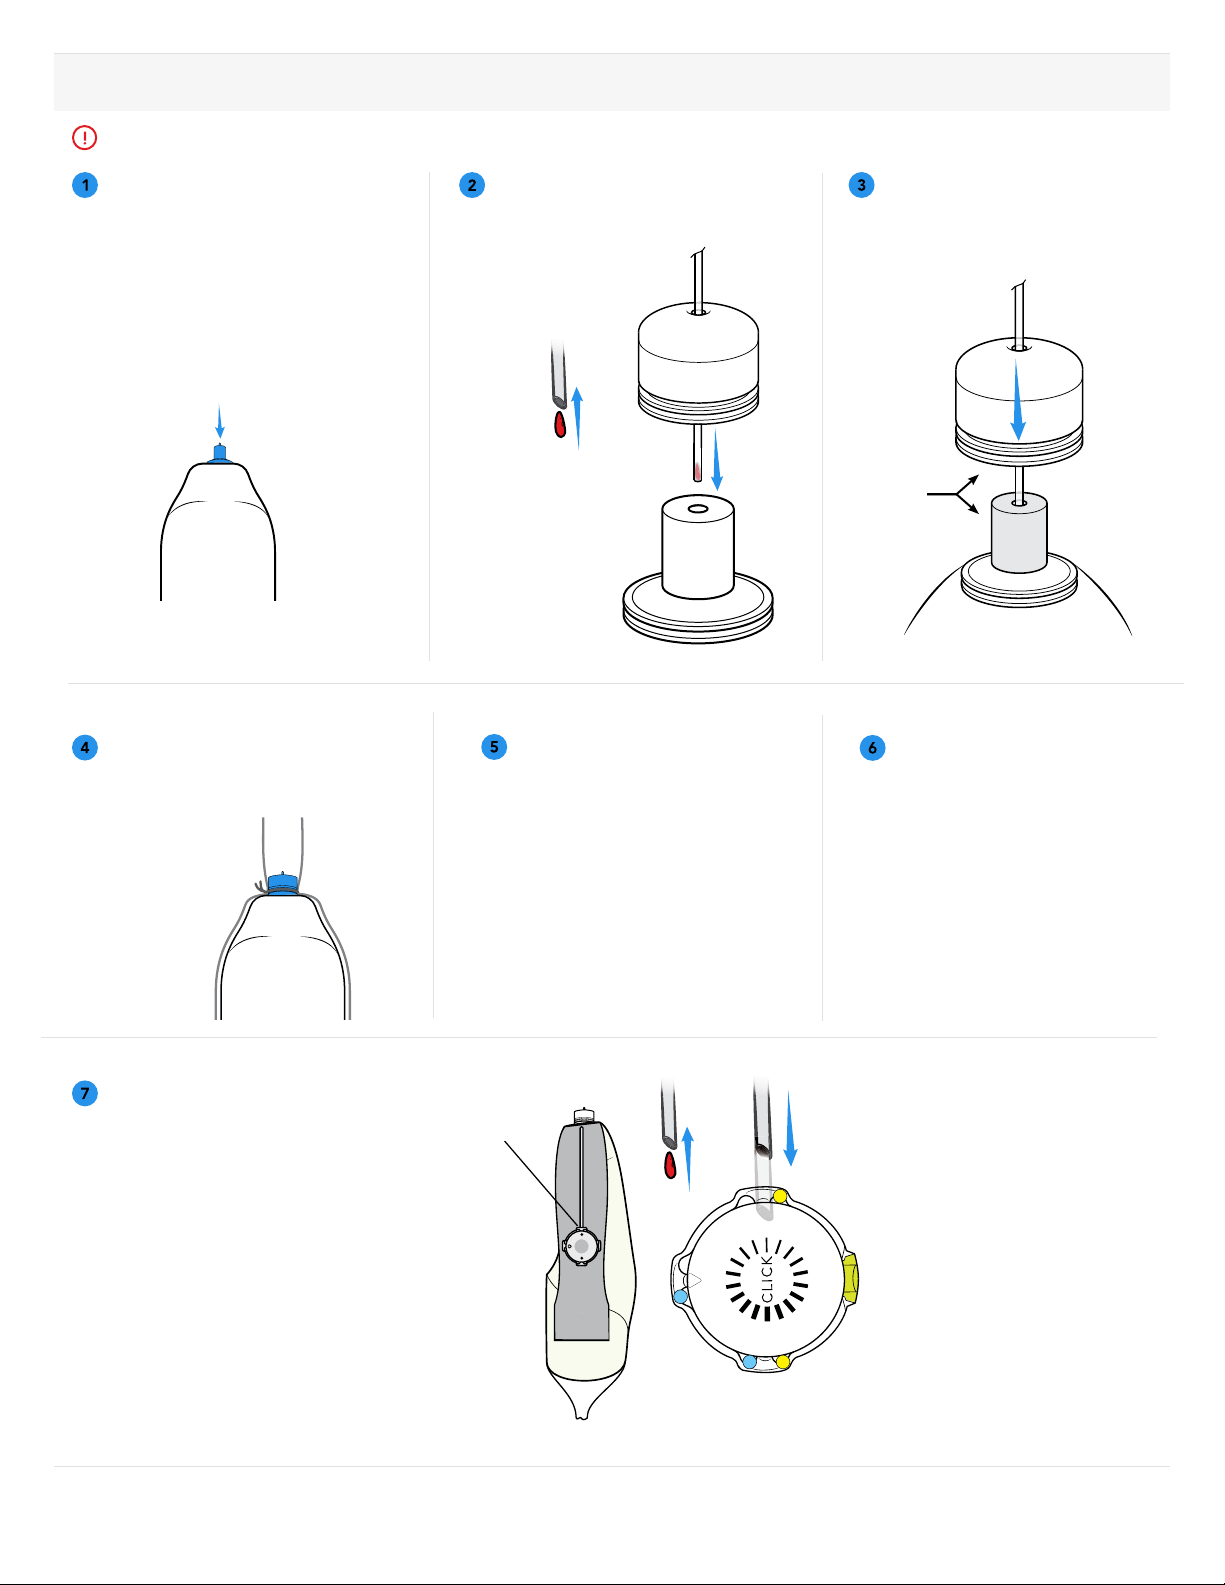
Fabrication Overview:
1. Secure lamination post to model.
2. Slide align housing over tube, then insert tube
end onto distal end of fabrication post.
3. Slide align housing onto fabrication post.
4. Apply PVA bag.
5. Apply inner fabric layers.
6. Place tube and collar in desired location.
7. Apply outer fabric layers.
8. Perform 1st lamination.
For material suggestions and guidelines, please refer to the Material Data Sheet:clickmedical.co/mds
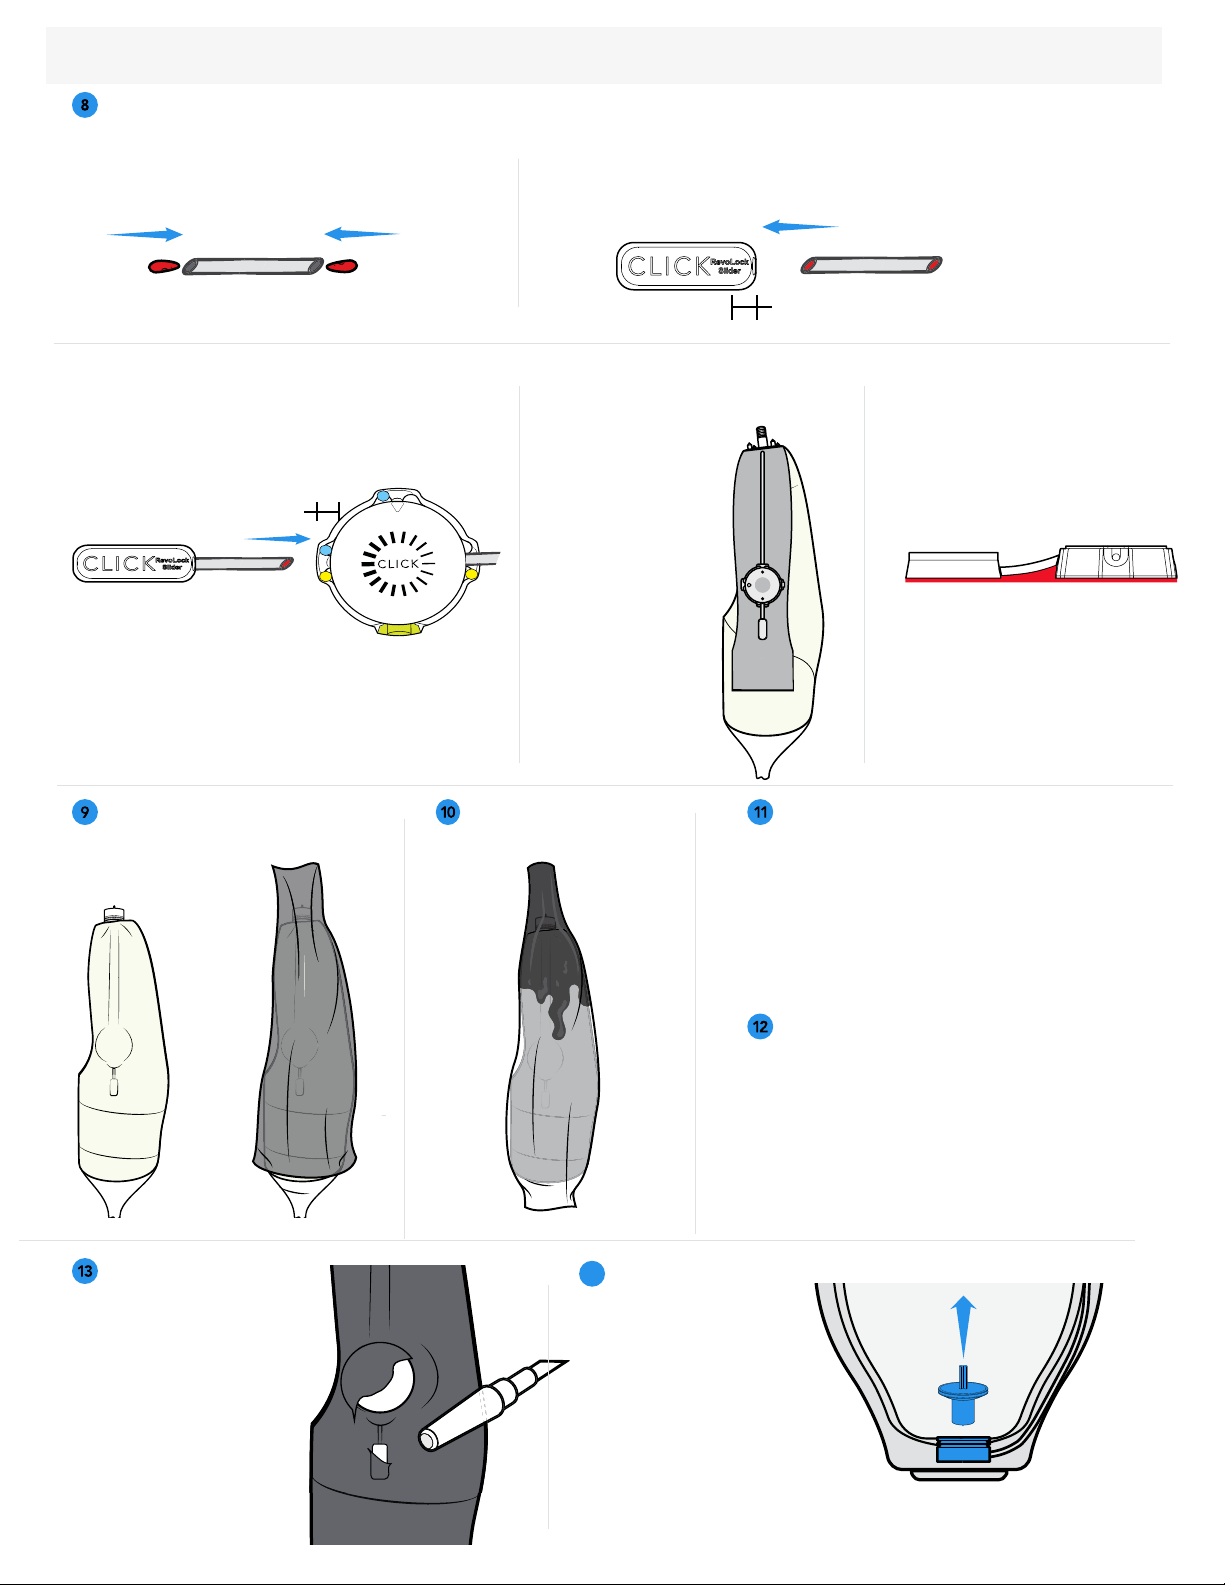
9. Transfer alignment (if making socket adjustable, add RevoFit®kit now).
10. Perform 2nd lamination.
11. Remove model.
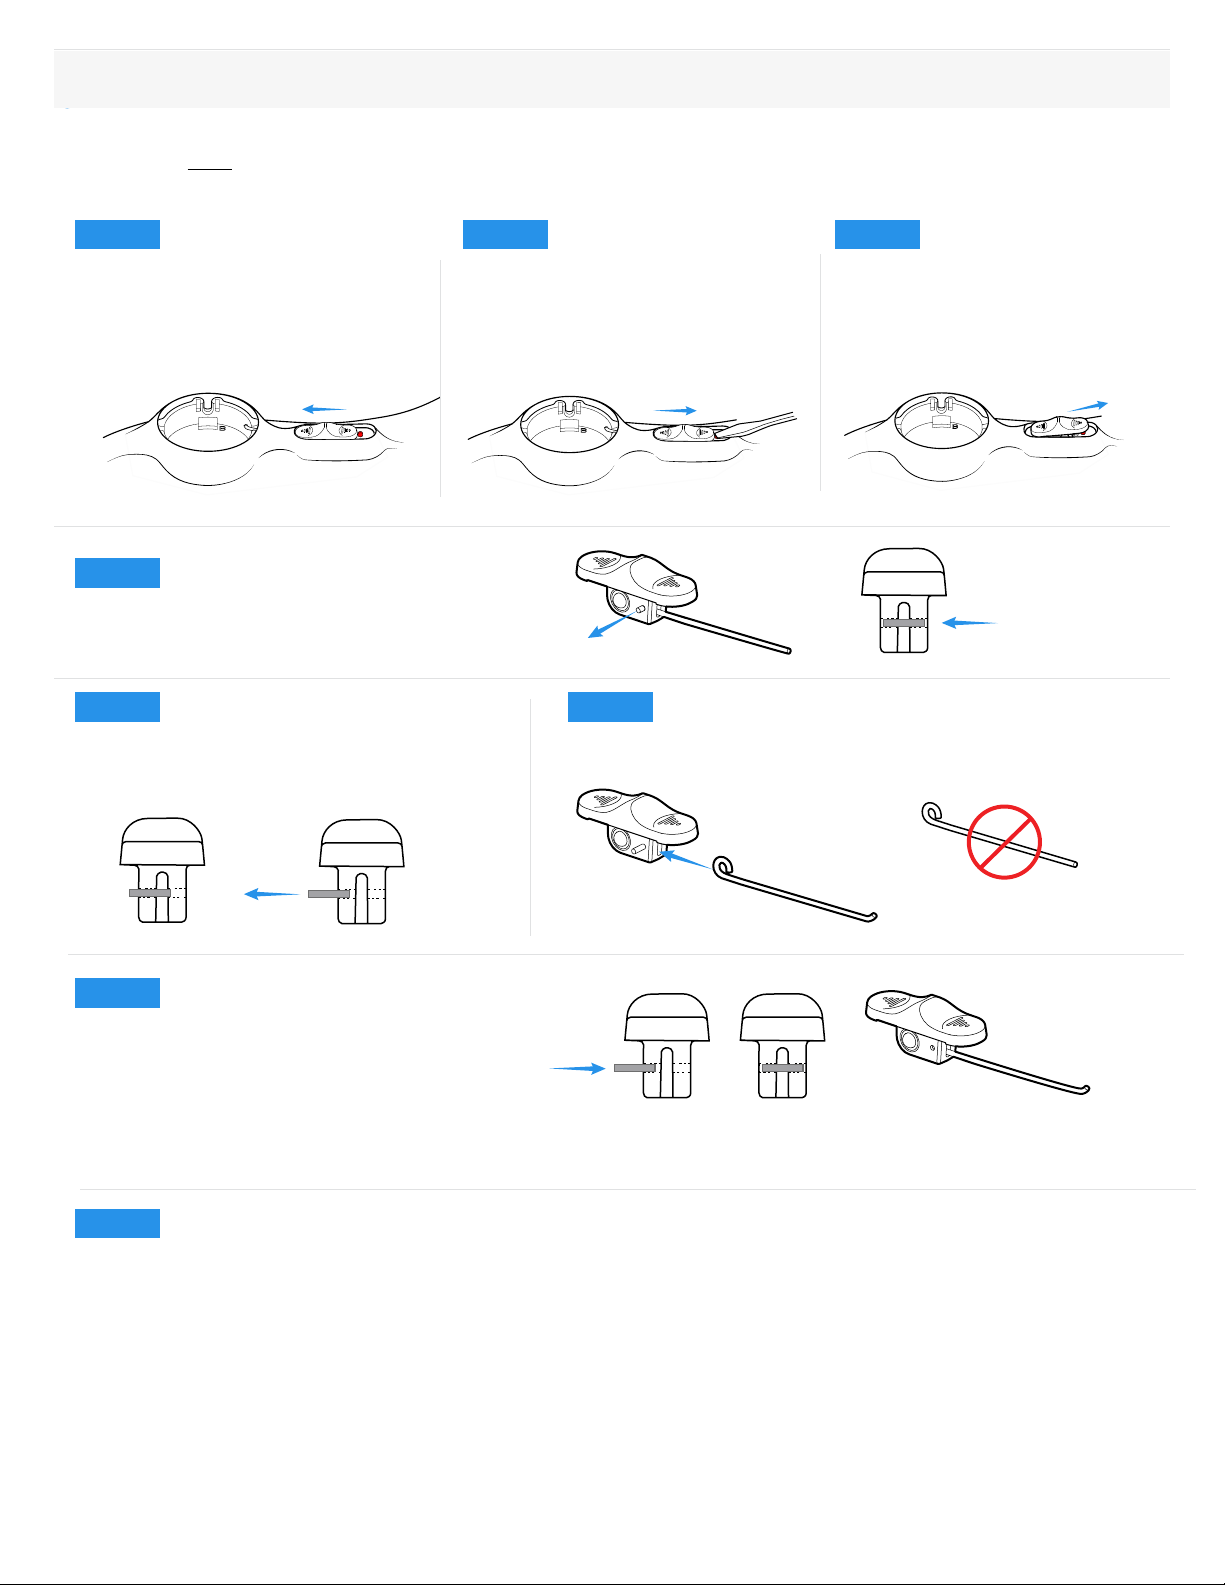
12. Lace socket.
13. Attach lace to both the snap and the Click Reel.
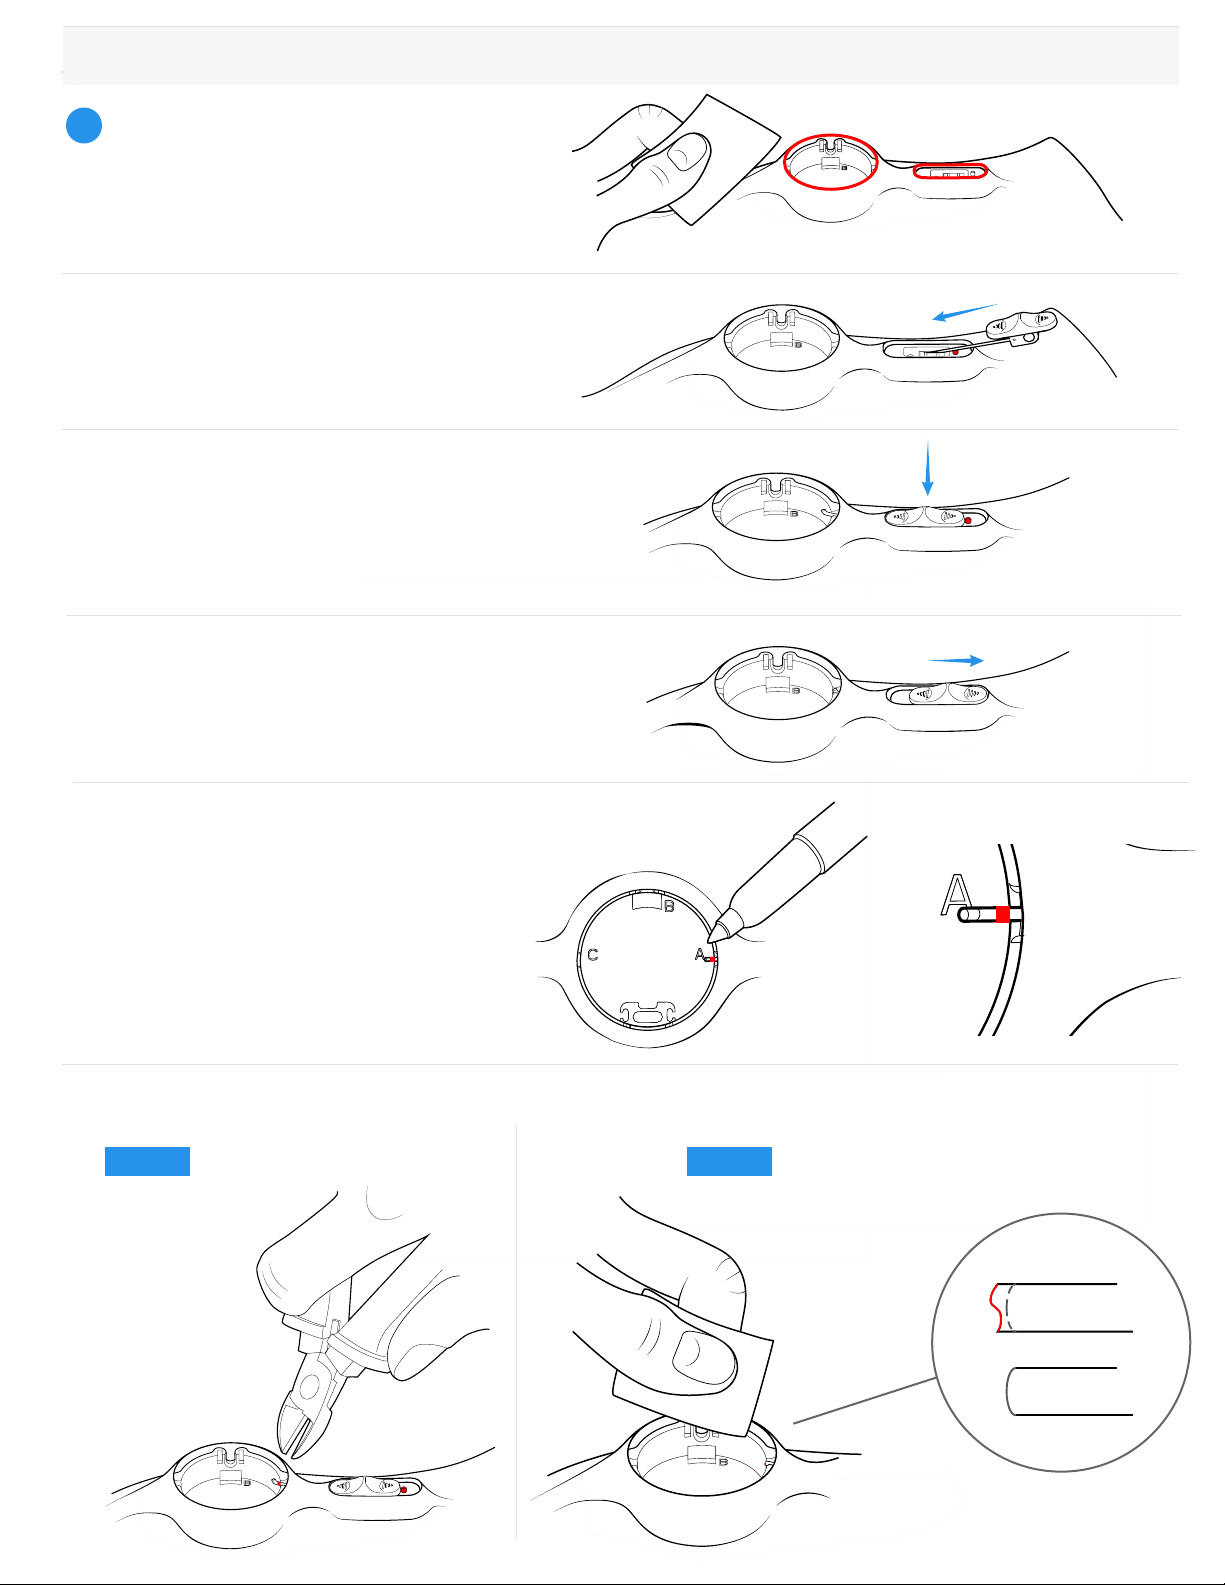
14. Attach snap insert to liner.
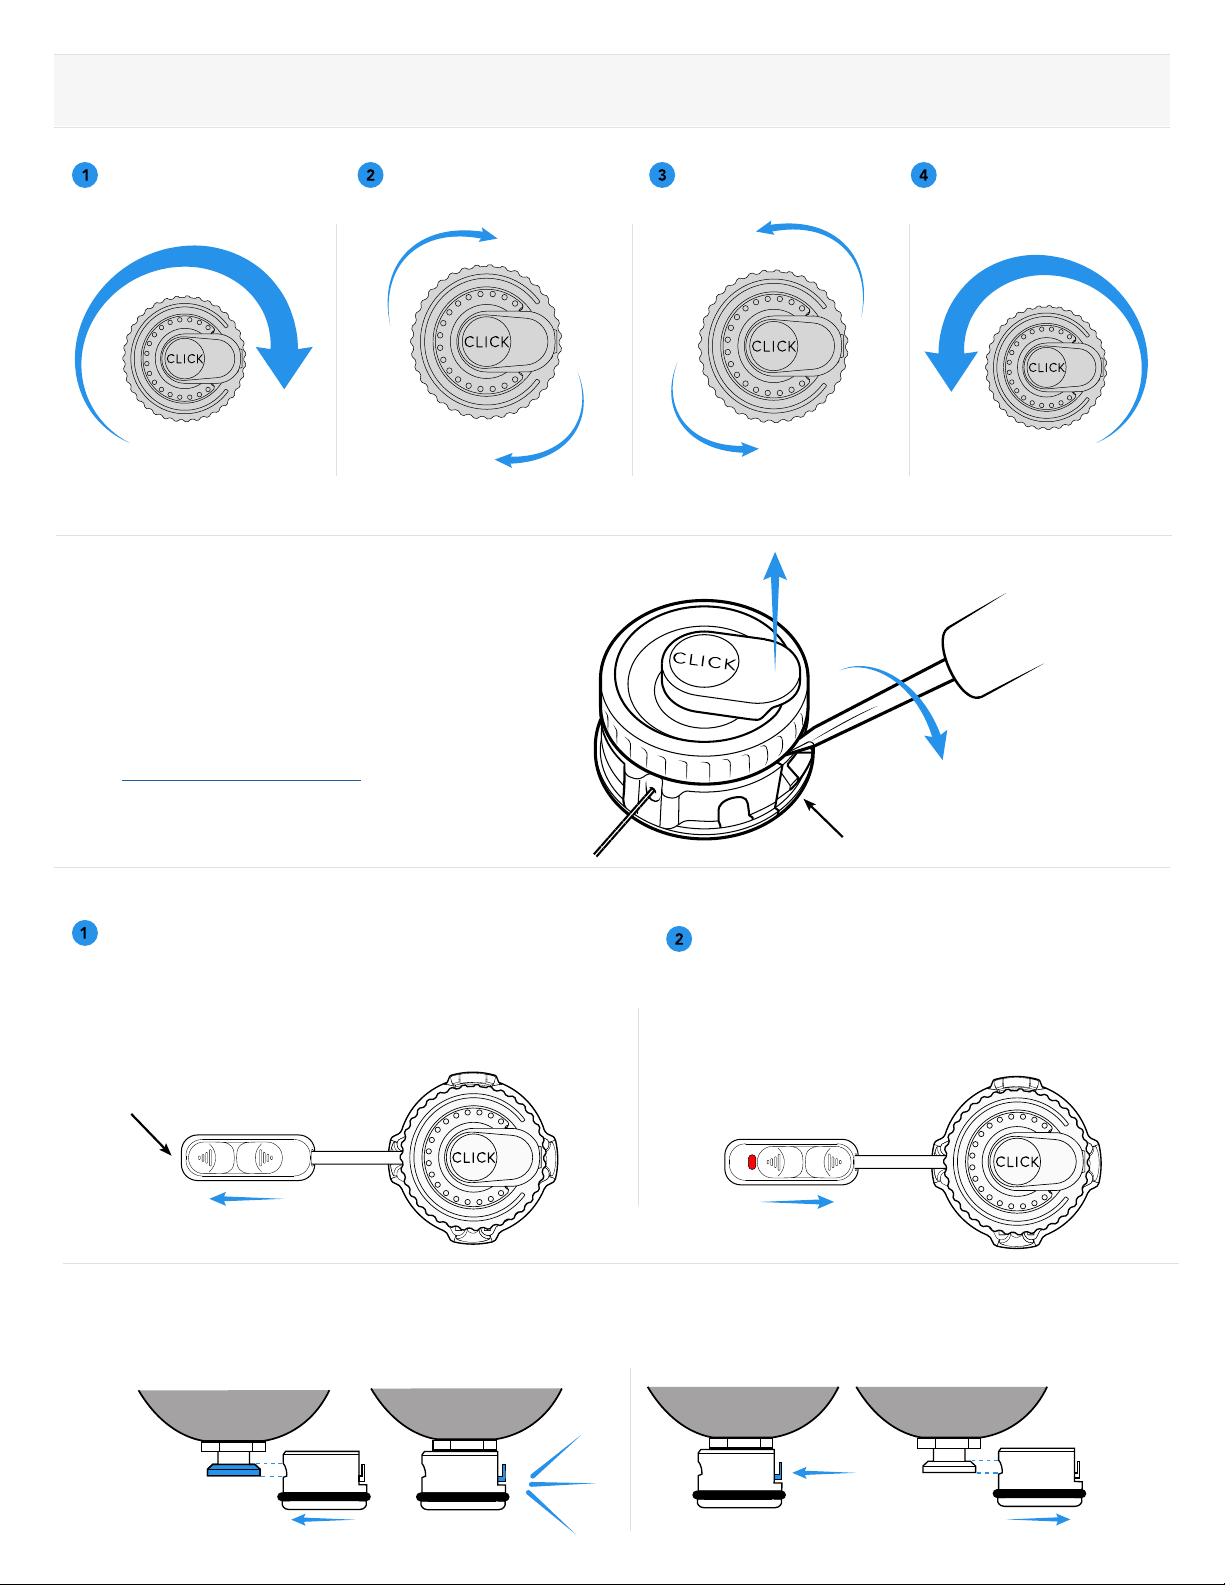
15. Install Click Reel into collar.
16. Attach threaded insert to snap and test for function.
Click Reel
0.5m
Lamination Tube
Metal Lace FeederAlign Housing & Fabrication Post
2.0m
HC Lace
Lamination Collar &
Dummy
To learn more about fabricating RevoLock, enroll in ClickAcademy.co
Reel Tool
LE Quick
Connect Insert Plastic Lace
Feeder x 3
LE Quick
Connect Snap
RevoLock Slider
GUARANTEE
The Click Reel is guaranteed to last the life of the device
into which it is originally installed. Registration of the Click
Reel is required at the time of original device delivery. To
register: clickmedical.co/contact-us/cr-registration/
WARRANTY
For warranty information on all of Click Medical’s
products: clickmedical.co/terms/#warranty
U.S. Customers:
Contact Help@ClickMedical.co
Tel: +1-970-670-7012
International Customers:
Please contact your local distributor.
Click Medical products are patent protected.
For full list see www.clickmedical.co/patents
RL-301-07-01
For more resources visit:
clickmedical.co/knowledge-base
Align Kit with Click®Reel