NO!
OK!
OK!
OK!
NO!
NO!
OK!
NO!
ENGLISH
The instruction manual for this device consists of general and specific
instructions, both must be carefully read and understood before use.
Attention! This leaflet shows the specific instruction only.
SPECIFIC INSTRUCTIONS EN 567:2013 / 12278:2007.
This note contains the necessary information for a correct use of the
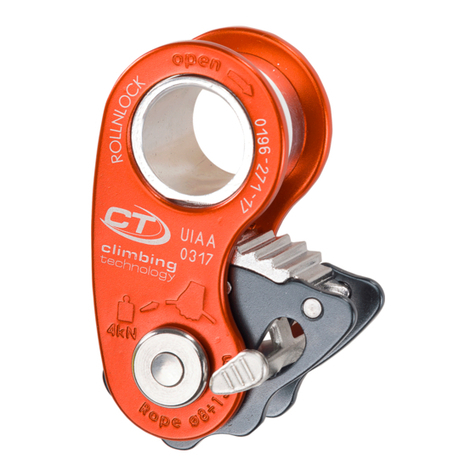
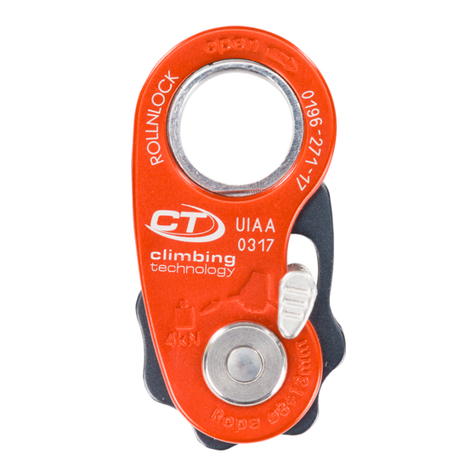
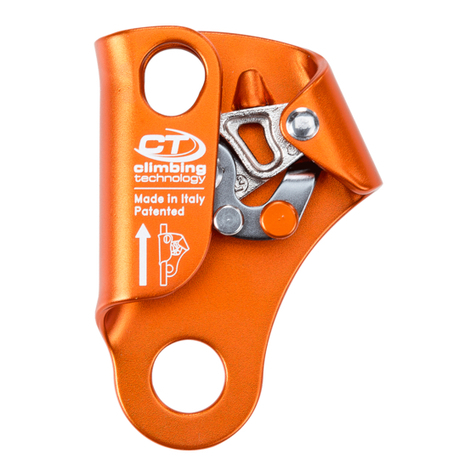
following product/s: pulley/rope clamp Rollnlock.
1) FIELD OF APPLICATION.
EN 567:2013 - Mountaineering equipment: rope clamps. EN
12278:2007 - Mountaineering equipment. This product is a person-
al protective device (P.P.E.). It is compliant with the Regulation (EU)
2016/425.
1.1 - Intended uses. The equipment is designed for the following
applications: protection against falls from a height (EN 12278); pre-
vention of falls from a height and protection against moderate falls
from a height (EN 567). Attention! The equipment, used as device to
adjust the lanyard length, does no prevent nor protect from the risks
listed above.
2) NOTIFIED BODIES.
Refer to the legend in the general instructions (paragraph 9 / table
D): M1; M6; N1.
3) NOMENCLATURE.
(Fig. 2.1). A) Mobile side plate. B) Fixed side plate. C) Bushing. D)
Connector hole. E) Locking cam. F) Sheave position lever. G) Pulley.
H) Sheave position pin.
WARNINGS.
10.1 10.2
FALL
FACTOR
< 1
FALL
FACTOR
> 1
10.3 10.6
10.4 10.7
10.5 10.8
-22÷+104°F -30÷+40°C
10.9
10
Example of use: self-ascending from a crevasse, crevasse rescue in case the alpinist is able to cooperate, crevasse rescue of an alpinist that is unable to cooperate.
9.1 9.3 9.5
9.2 9.4 9.6
9HAULING PULLEY MODE
EXAMPLE OF USE
4) MARKING.
Numbers/letters without caption: refer to the legend in the general
instructions (paragraph 5).
4.1 - General (Fig. 2.2-2.3). Indications:1; 4; 6; 7; 8; 11; 12; 13;
30) Pictogram showing the maximum load in kN, in pulley mode;
31) Correct way of opening; 32) Diametre range of the usable
ropes; 33) Pictogram showing the maximum load in kN, in rope
clamp mode; 34) Correct way of use.
4.2 - Traceability (Fig. 2.2-2.3). Indications: T1; T3; T8.
5) CHECKS.
Further to the checks listed below, comply with what indicated in the
general instructions (paragraph 3).
Before each use, verify that: the cam rotates freely, without jamming
and the spring of the cam snaps it in the rope locking position;
all teeth of the cam are present and without any sign of wear; the
connector chosen for fixing the equipment works in a symmetrical
manner (Fig. 10.3÷10.5); the karabiner, placed in the device at-
tachment hole, rotates freely.
During each use: always verify the correct placement of the rope in-
side the device; the pulley and the rope must not lean against or get
in touch with cutting edges and abrasive materials (Fig. 10.7-10.8);
ensure the rope is always in tension to avoid possible free-falls;
avoid having slack rope between the anchor and the attachment
on the harness.
6) COMPATIBILITY.
This product can only be used in combination with CE-marked
equipment: work or mountaineering equipment such as connectors
(EN 362 / EN 12275), harnesses (EN 12277 / EN 358 / EN 813),
ropes (EN 1891 / EN 892) etc.
6.1 - Ropes. Must be used with ropes (core + sheath) static or
semi-static (EN 1891) or dynamic (EN 892) Ø 8÷13 mm. Atten-
tion! Do not use on metal cables. Attention! In exceptional cases,
you can use the device also with 10÷16 mm webbing (refer to pa-
ragraph 11).
6.2 - Connettors. To connect the device to the anchor point, use
only connectors provided with locking gate.
7) ISTRUCTIONS FOR USE.
The device is designed for use in various modes: rope clamp mode
- ideal for ascending a rope (Fig. 3-4); hauling pulley mode -
ideal for hauling loads or rescuing persons (e.g. bags of material,
crevasse rescue) (Fig. 5-6-9); simple pulley mode - the rope runs
freely in both directions (Fig. 7).
7.1 - Warnings. The device has been designed to be used in weath-
er conditions that can normally be withstood by humans (operating
temperature range between -30°C and +40°C). For user safety, it is
essential that the device or the anchor point are always positioned
correctly and the work carried out in such a way as to minimize the
risk of falling and the height of fall.
8) LOCKING MODE.
8.1 - Installation. Raise the mobile side plate and turn 180° to
open it out (Fig. 3.1). Feed the rope through in the correct direction
(Fig. 3.2), then turn the side plate to the closed position (Fig. 3.3).
Attention! Check that the side plate couples perfectly with the bush-
ing (Fig. 3.4). Insert the connector in the hole and connect it to the
harness (Fig. 3.5). Check that the device operates correctly and the
rope is in the right direction. (Fig. 3.6).Attention! To remove the
rope, the operations from Fig. 3.1 to Fig. 3.5 must be carried out in
the opposite order.
8.2 - Use. This device slides freely upwards and locks in position.
To ascend a rope, pull downwards parallel to the rope (Fig. 4.2). Be
careful when approaching the anchor and/or fraction points. In no
case should the rope clamp be used when the potential fall factor is
greater than 1 (Fig. 10.2), i.e. the user must stay at all time below the
device and/or the anchor point (Fig.10.1). Attention! A fall factor
greater than 1 may cause the rope to break. Attention! In order to
ascend on a vertical rope, Rollnlock must be used in combination
with another rope clamp device connected to the harness. Atten-
tion! This device is not designed for use during descents but it can
be used for short sections as follows: relieve the load from the device
to partially open the cam (1), move the rope clamp down (2) and
reapply the load (Fig. 4.3).
9) HAULING PULLEY MODE.
Follow the instructions under point 8.1, Installation, and connect the
connector to the anchor point (refer to drawings 5.1-5.6).
9.1 - Use. The device connected to the anchor point allows the rope
to slide in one direction (Fig. 6.1-6.2), and locks in the opposite
direction (Fig. 6.3). With Rollnlock you can create a single rescue
or rescue hoists. The images show some examples of use: self-as-
cending from a crevasse (Fig. 9.1-9.2); crevasse rescue in case the
alpinist is able to cooperate (Fig. 9.3-9.4); crevasse rescue of an
alpinist that is unable to cooperate, using one (Fig. 9.5-9.7) or two
Rollnlock (Fig. 9.6).
10) SIMPLE PULLEY MODE.
If you wish to switch from hauling pulley mode to simple pulley
mode, move the sheave position lever until it engages the pin “8”
(Fig. 7.1-7.4). Attention! When doing this, hold the rope from the
device with one hand. To shift from simple pulley to hauling pulley,
release the lever from the pin (8).
10.1 - Use. With the cam locked in the open position, the device
allows the rope to run freely in either direction (Fig. 7.5). Make sure
the device works properly. (Fig. 7.6): Safe working load. (Fig. 7.7):
Breaking load.
11) SLING ADJUSTMENT MODE.
The Rollnlock can be employed for the length adjustment of a lan-
yard (Fig. 8.1) or a daisy chain (Fig. 8.2), connected to the harness
by means of a knot. Attention! Exceptional application, not covered
by the EN 567 standard: not to be used for the protection against
falls from a height. Attention! In case of use of a webbing loop,
the free edge must be linked to a connector by means of a knot that
prevents the sliding of the two parts of the loop (for ex. a clove hitch,
etc). Attention! To be used only with webbings having a width be-
tween 10 and 16 mm. Danger of death! While using a tape sling,
never connect the equipment to one side of the loop only (Fig. 8.4).
12) SYMBOLS.
Refer to the legend in the general instructions (paragraph 15): F1;
F2; F3; F9.
