manuals.online logo
Brands
  1. Home
  2. •
  3. Brands
  4. •
  5. CODELOCKS
  6. •
  7. Lock
  8. •
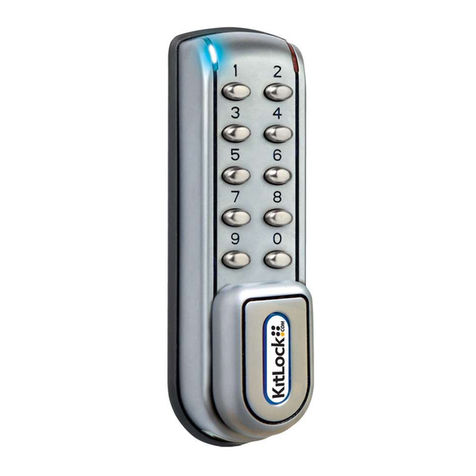
  9. CODELOCKS KitLock Slam Latch User manual

CODELOCKS KitLock Slam Latch User manual

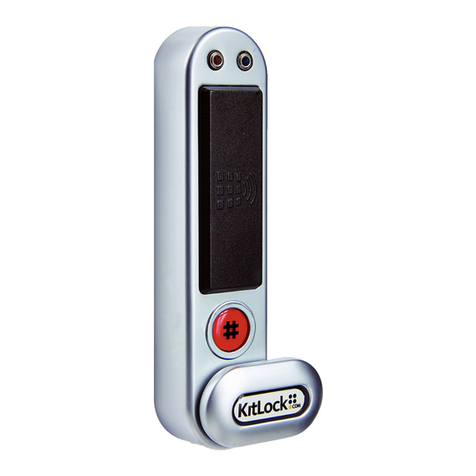
Go Keyless. Go KitLock.
C
O
D
E
L
O
C
K
S
.
C
O
M
C
O
D
E
L
O
C
K
S
.
C
O
M
1
2
3
4
5
8
9
10
6
7
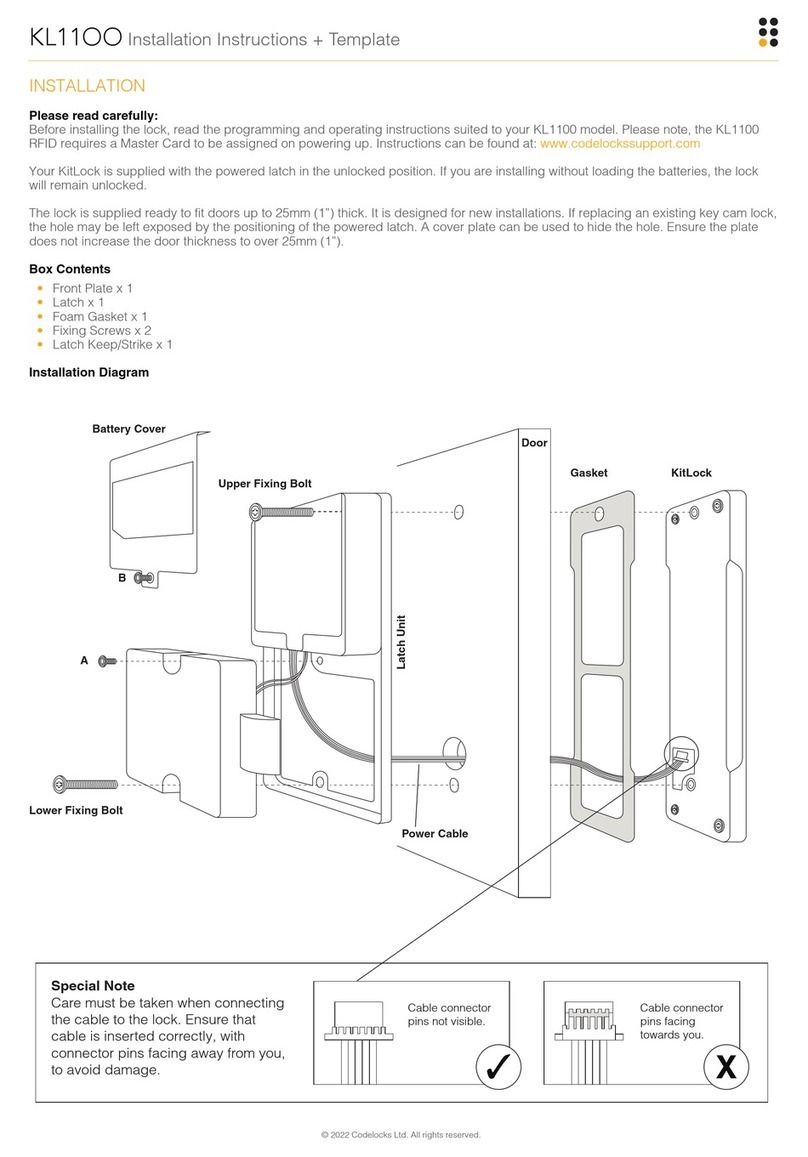
1 Mounting late x 1
2 acking pieces x 2
3 Slam Latch x 1
4 Strike late x 1
5 anhead fixing bolt x 2
6 Countersunk fixing bolt x 3 (1 spare)
7 Spindles x 2 (30mm and 40mm)
8 Countersunk screws x 4 (for Slam Latch if fixing plate not used)
9 Countersunk wood screws x 2 (for Strike late if used)
10 Fixing bolts x 4 (Allen key provided)
Box contents
SLAMLATCH
Fitting
Instructions
CODELOCKS INC US
Tel: +1 714 979 2900
Fax: +1 714 979 2902
[email protected]
KitLock is a Codelocks Ltd brand
CODELOCKS LTD UK
Tel: +44 (0) 1635 239645
Fax: +44 (0) 1635 239644
[email protected]
II-KLSL-v1:0213
s am 6pp inst. artwork_Layout 1 20/02/2013 11:30 Page 1
Optional
strike plate
Cutting points
Slam Latch can be fitted
for left or right closing
6. Fix the KitLock to the door, passing the panhead bolt
(5) through the top hole and the countersunk bolt (6)
through the bottom hole of the mounting plate. Ensure the
spindle (7) passes through the centre of the spindle hole
in the mounting plate.
7. Fit the Slam Latch (3) to the mounting plate using the four
fixing bolts (10). Enter your master or user code and turn the
handle to retract the latch. Release the handle and make sure
the latch springs back.
8. If required, strike plate (4) can be mounted on door frame to
receive the latch. Fit accurately ensuring that the latch enters
the strike aperture easily. If required packing pieces (2) can be
used to align the latch with the strike.
1. Remove the mounting plate (1) from the Slam Latch (3) by
removing the 4 fixing bolts (10).
2. Using the mounting plate as a template for the latch position,
place on the inside face of the door as dictated by the door frame
surrounding. Mark spindle hole and top and bottom fixing holes.
lease note there are two positions for the lower fixing hole; the
upper being used for the KL1500 and the lower for the KL1200.
When choosing the position of your Slam Latch, take into account
any rebate or frame that the door closes against. The Slam Latch
should be positioned between 2mm (5/64”) and 4mm (5/32”) back
from the edge of the door or rebate, or any striking plate mounted
to the door frame or rebate.
3. Drill the 13mm (½”) spindle fixing hole and the two 6mm (¼”) holes.
Before installation familiarise yourself with the operation
and programming of the KitLock being fitted to the
Slam Latch and check the Slam Latch box contents.
Specia Notes
S am Latch tting instructions 4. Cut pan head bolt for upper fixing hole and countersunk bolt for
lower fixing hole. Length of bolts should be the thickness of the
door plus 10mm (3/8”), or 1 to 2 break off sections. Cut the bolts
at one of the cutting points to avoid damaging the thread. Use
pliers cutting jaws to crimp around the cutting point several
times. The surplus should now easily break off.
5. Choose the spindle to suit your door thickness. For doors 3mm
(1/8”) to 18mm (3/4”), use the shorter 30mm (11/8”) spindle, for
doors 18mm (3/4”) to 28mm (11/16”) use the longer 40mm (1½”)
spindle. Screw the spindle with the 9mm (3/8”) end into the
socket in the KitLock using the countersunk fixing bolt (6).
Cut one section off the bolt if using a shorter spindle.
acking pieces (optional)
Fitting instructions WITHOUT mounting p ate
1. As previous.
2. As previous step 2. But also mark around outside edge of
square section of mounting plate.
3. As previous.
4. Using the guide marks made using the mounting plate template
place one of the packing pieces on the inside of the door and
mark the 4 corner fixing holes.
5. Fit the KitLock to the door using two panhead bolts (5) and fit
the spindle to the KitLock with the countersunk fixing bolt (6).
If not countersinking the bottom fixing bolt, use one of the
packing pieces to allow clearance.
6. lace the Slam Latch (3) over the spindle and secure with the
four screws (8) provided. Enter your master or user code and
turn the handle to retract the latch. Release the handle and
make sure the latch springs back.
1
5
6
6
7
3
4
10
10
2
KL1500
KL1200
s am 6pp inst. artwork_Layout 1 20/02/2013 11:30 Page 4
Other CODELOCKS Lock manuals

CODELOCKS CL50 User manual

CODELOCKS

CODELOCKS CL50 User manual

CODELOCKS CL100 User manual

CODELOCKS

CODELOCKS CL100 User manual

CODELOCKS CL5500 SERIES User manual

CODELOCKS

CODELOCKS CL5500 SERIES User manual

CODELOCKS CL210 User manual

CODELOCKS

CODELOCKS CL210 User manual

CODELOCKS Kit-Lock KL1100 User manual

CODELOCKS

CODELOCKS Kit-Lock KL1100 User manual

CODELOCKS CL2000 User manual

CODELOCKS

CODELOCKS CL2000 User manual

CODELOCKS CL4510 User manual

CODELOCKS

CODELOCKS CL4510 User manual

CODELOCKS Pushbutton 500 Series Quick start guide

CODELOCKS

CODELOCKS Pushbutton 500 Series Quick start guide

CODELOCKS CL500 User manual

CODELOCKS

CODELOCKS CL500 User manual

CODELOCKS CL400 User manual

CODELOCKS

CODELOCKS CL400 User manual

CODELOCKS CL6010 User manual

CODELOCKS

CODELOCKS CL6010 User manual

CODELOCKS CL200 User manual

CODELOCKS

CODELOCKS CL200 User manual

CODELOCKS CL4510 User manual

CODELOCKS

CODELOCKS CL4510 User manual

CODELOCKS CL5020 User manual

CODELOCKS

CODELOCKS CL5020 User manual

CODELOCKS CL500 Operating and maintenance instructions

CODELOCKS

CODELOCKS CL500 Operating and maintenance instructions

CODELOCKS CL300 User manual

CODELOCKS

CODELOCKS CL300 User manual

CODELOCKS KL1050 C2 User manual

CODELOCKS

CODELOCKS KL1050 C2 User manual

CODELOCKS KL1050 User manual

CODELOCKS

CODELOCKS KL1050 User manual

CODELOCKS CL5510 User manual

CODELOCKS

CODELOCKS CL5510 User manual

CODELOCKS 4000 Series User manual

CODELOCKS

CODELOCKS 4000 Series User manual

CODELOCKS KL1000 NetCode User manual

CODELOCKS

CODELOCKS KL1000 NetCode User manual

CODELOCKS CL250 Administrator guide

CODELOCKS

CODELOCKS CL250 Administrator guide

CODELOCKS CL5000 User manual

CODELOCKS

CODELOCKS CL5000 User manual

CODELOCKS CL4500 User manual

CODELOCKS

CODELOCKS CL4500 User manual

Popular Lock manuals by other brands

BRINKS ARRAY smart deadbolt installation instructions

BRINKS

BRINKS ARRAY smart deadbolt installation instructions

Gate House G27D01 installation guide

Gate House

Gate House G27D01 installation guide

Perko 1094 Series Mounting instructions

Perko

Perko 1094 Series Mounting instructions

COMPX National D150CB instruction sheet

COMPX

COMPX National D150CB instruction sheet

nvent CADDY TSR1220 instruction sheet

nvent

nvent CADDY TSR1220 instruction sheet

EUCHNER EKS manual

EUCHNER

EUCHNER EKS manual

YLI YM-750 manual

YLI

YLI YM-750 manual

KAWAJUN KZ Installation

KAWAJUN

KAWAJUN KZ Installation

schmersal AZM 415-11/11 14H Series operating instructions

schmersal

schmersal AZM 415-11/11 14H Series operating instructions

Quantum Plus 1401 installation guide

Quantum Plus

Quantum Plus 1401 installation guide

M-LOCKS EuroLine MODULAR Series Technical manual

M-LOCKS

M-LOCKS EuroLine MODULAR Series Technical manual

Dorma EM 7500-D AM quick guide

Dorma

Dorma EM 7500-D AM quick guide

HES 8500 series installation instructions

HES

HES 8500 series installation instructions

BKT Elektronik BKT AL200 user manual

BKT Elektronik

BKT Elektronik BKT AL200 user manual

SECO-LARM SD-997A-DQ installation manual

SECO-LARM

SECO-LARM SD-997A-DQ installation manual

Assa Abloy OneSystem N7 Series Quick manual

Assa Abloy

Assa Abloy OneSystem N7 Series Quick manual

Clippasafe 71/5 Instructions for installation and use

Clippasafe

Clippasafe 71/5 Instructions for installation and use

COMPX Stock Locks C4153 Dimensional drawing

COMPX

COMPX Stock Locks C4153 Dimensional drawing

manuals.online logo
manuals.online logoBrands
  • About & Mission
  • Contact us
  • Privacy Policy
  • Terms and Conditions

Copyright 2025 Manuals.Online. All Rights Reserved.