COHU 7420HD series User manual

Cohu Helios Products
INSTALLATION and OPERATION MANUAL Series
7420HD
Cohu Electronics • 12367 Crosthwaite Circle • Poway, CA 92064
Factory default IP address is
192.168.2.150
Phone: 858-277-6700
Fax: 858-277-0221
www.cohu-cameras.com
March 15, 2012
Technical Manual 6X-1099Z1
Phone: 858-277-6700
Fax: 858-277-0221
www.cohu-cameras.com
March 15, 2012
Technical Manual 6X-1099Z1

6X-1099Z12
Table of Contents
About this document 3
Additional information and documents related to the Camera 3
Copyright/Intellectual property rights statement 3
FCC compliance 3
Support services 3
Returns 4
Safety instructions 5
1.0 Introduction 6
1.1 Product Description 6
1.2 Equipment Supplied 6
2.0 Installation 7
2.1 Power over Ethernet (PoE) 7
2.2 Ethernet 802.3 PoE Connector 7
3.0 Mounting Methods 9
3.1 Installation Procedure 9
3.1.1 Prepare the Mounting Location 9
3.1.2 Prepare the Camera for Installation 10
3.1.3 Mounting the Dome Base 10
3.1.4 Aim the Camera towards the Desired Direction: 11
3.1.5 Focus the Lens 11
3.1.6 Install the Dome Top 11
4.0 Quick Check 13
4.1 Recommended Computer Requirements 13
4.2 IP Control and Viewing of Camera 13
4.3 Factory Default IPAddress and Settings. Assigning the new Camera IP Address 13
4.4 Using the Helios CohuONVIFDiscovery Software to Discover the Camera 14
4.5 Checkout Procedure 15
5.0 Operation 16
5.1 Assigning the Static IPAddress 16
5.2 Accessing the Camera Using the Helios Web Interface 18
5.3 Helios Web Interface Home Page Overview 20
5.3.1 Video Control Area 21
5.3.2 Live Video and Recording Controls 21
5.3.3 LED Indicators 21
5.3.4 Text Overlay (On Screen Text Display) 21
5.4 Camera Setup Control 22
5.4.1Conguration 22
5.4.1.1 Communications 23
5.4.1.2 Stream 1 24
5.4.1.3 Stream 2 25
5.4.1.4 OSD (On Screen Display) 26
5.4.1.5 Logo 26
5.4.1.6 User Settings 27
5.4.2 Change Password 29
5.4.3 Camera Properties 30
5.4.3.1 Settings Tab 30
5.4.3.2 Functions Tab 31
5.4.4 Upgrade 33
5.4.4.1 Firmware Upgrade 34
5.4.4.2 Web Interface Upgrade 35
5.5 Current Stream 36
5.6ZoomMagnication 36
5.7 Playing Back Recorded Video 37
5.7.1 Viewing Snapshots 37
Appendix 1: Security Settings Setup to Allow ActiveX Controls to Run 38
6.0 Warranty 42

3
6X-1099Z1
About this document
This manual contains information on the installation and maintenance of the 7420HD HDTV H.264 indoor
xedpositiondomecamerasystem.Pleasereadthismanualcarefullypriortoinstallationtopreventany
accidental damage or misuse. The manual is shipped with the Camera or available from the Cohu website
at www.cohu-cameras.com/products/7420hd.html.
The information in this manual is subject to change without notice. Please refer to the above website for
the latest information.
NOTE:All graphics contained within this document, including screenshots and other displays, are for refer-
ence use only and are subject to change.
Additional information and documents related to the Camera
Forinformationonthecamerasystemoperationandconguration,pleaseseeOperationmanual6x-1090.
Manual is available at the Cohu website:
www.cohu-cameras.com/products/7420hd.html
Copyright/Intellectual property rights statement
Copyright 2012 by Cohu Inc., Electronics Division. Cohu has intellectual property rights to technology em-
bodied in the product described in this manual.
FCC compliance
This equipment has been tested and found to comply with the limits for a Class A digital device pursuant
to Part 15 of the FCC Rules. These limits are designed to provide reasonable protection against harmful
interference when the equipment is operated in a commercial environment. This equipment generates,
uses, and can radiate radio frequency energy and, if not installed and used in accordance with the instruc-
tion manual, may cause harmful interference to radio communications. Operation of this equipment in a
residential area is likely to cause harmful interference in which case the user will be required to correct the
interference at his own expense.
This device complies with Part 15 of the FCC Rules. Operation is subject to the following two conditions:
(1) this device may not cause harmful interference, and (2) this device must accept any interference re-
ceived,includinginterferencethatmaycauseundesiredoperation.Changesormodicationstothisdevice
can void the user’s warranty.
Support services
Please contact the Customer Service Department for technical assistance at :

6X-1099Z14
Returns
This item was thoroughly tested and carefully packed at the factory prior to shipping. Upon acceptance by
the carrier, the carrier assumes responsibility for the item’s safe arrival. Should you receive the item in a
damaged condition, apparent or concealed, a claim for damage must be made to the carrier.
If a visual inspection shows damage upon receipt of this shipment, it must be noted on the freight bill or
express receipt and the notation signed by the carrier’s agent. Failure to do this can result in the carrier
refusing to honor the claim.
When the damage is not apparent until the unit is unpacked, a claim for concealed damage must be made.
Make a mail or phone request to the carrier for inspection immediately upon discovery of the concealed
damage. Keep all cartons and packing materials.
To return the product to the factory for service, please contact the Customer Service Department for a Re-
turn Material Authorization (RMA) Number:
Prominently display the RMA number on the outside of the shipping container(s) and on paperwork con-
tained inside. Give a brief description of why the equipment is being returned and list the symptoms of any
problems being experienced with the equipment.
For shipment, send package with enough foam padding or other packing material to prevent damage that
can occur during shipping. The original shipping carton is a good container if it has not been damaged. For
shipping to the factory by Common Carrier, use the following address:
Attn: RMA ____________
Cohu Electronics
12367 Crosthwaite Circle
Dock 5
Poway, CA 92064

5
6X-1099Z1
• Installationshouldbedoneonlybyqualiedinstallersandconformtoalllocalcodes.
• It is the user’s responsibility to ensure that the mounting methods are safe and adequate for the
location.
• Use appropriate hardware to fasten the mount to an indoor surface.
• All servicing should be performed by qualied service personnel. Procedures in this
manual do not require entry into the housing of the camera positioning system. The unit contains
sensitive devices that can be damaged by static discharge. To reduce the risk of damage to the
unit by static discharge do not perform any servicing other than described in these instructions. If
the unit is defective, please contact the Customer Service Department for technical assistance at:
• Liability: It is the sole responsibility of the installer to provide proper installation in compliance with
all local codes and regulations.
Safety instructions
WARNING:
PoE (Power over Ethernet) injectors used with this Camera may operate from 90-240 V AC. These volt-
ages are dangerous. Use extreme care working with equipment connected to these voltages.
CAUTION:
InordertoavoiddeteriorationofthecolorlteroftheCCDandpotentialdiscolorationoftheimage
avoid pointing the Camera directly toward the sun or other bright source.
WARNING:
Voltages that present a shock hazard may exist on Power over Ethernet circuits. Use caution to avoid
direct contact with exposed, bare Ethernet circuit conductors or connector contacts.
CAUTION:
Electrostatic sensitive electronic equipment is inside. Observe precautions for handling ESD (Electro-
static Sensitive Devices).

6X-1099Z16
1.0 Introduction
The 7420HD series camera system is a digital high denition day/night indoor
xedpositiondomecamerasystem.Thecamerasupports1080p30resolution
and H.264 and Motion JPEG (M-JPEG) standards for video compression.
The 7420HD series camera system is IP (Internet Protocol) based with a full func-
tion built-in web server. Operator functions and administrative features are con-
trolled from the standard Internet browser window.
The camera system has built-in Power over Ethernet (PoE) in accordance with
IEEE 802.3af PoE standard. Power can come from a power supply within a PoE-
enabled networking device such as an Ethernet switch or from a midspan injector. Please refer to section
2.1 for additional information.
OptionalashmemorySDHCClass6cardswithcapacityof8,16,and32GBareavailableforinternal
video recording/storage. (Future option.)
The camera system has programmable input/output lines. The lines can be used for alarms or other user
denedcontrols.(Futureoption.)
Three mounting holes allow the Camera to be mounted on the surface.
For more information on 7420HD specications and a datasheet, please refer to the Cohu website:
www.cohu-cameras.com/products/7420hd.html.
1.1 Product Description
1.2 Equipment Supplied
• Mounting Plate. Qty - 1.
• 3mm Allen Wrench. Qty - 1.
• Template for locating the mounting holes and cable access hole. Qty - 1.
Side cable
access hole
Back cable
access hole
Four posts
Dome base
Mounting plate
Dome top

7
6X-1099Z1
2.0 Installation
NOTE:All graphics contained within this document, including screenshots and other displays, are for refer-
ence use only and are subject to change.
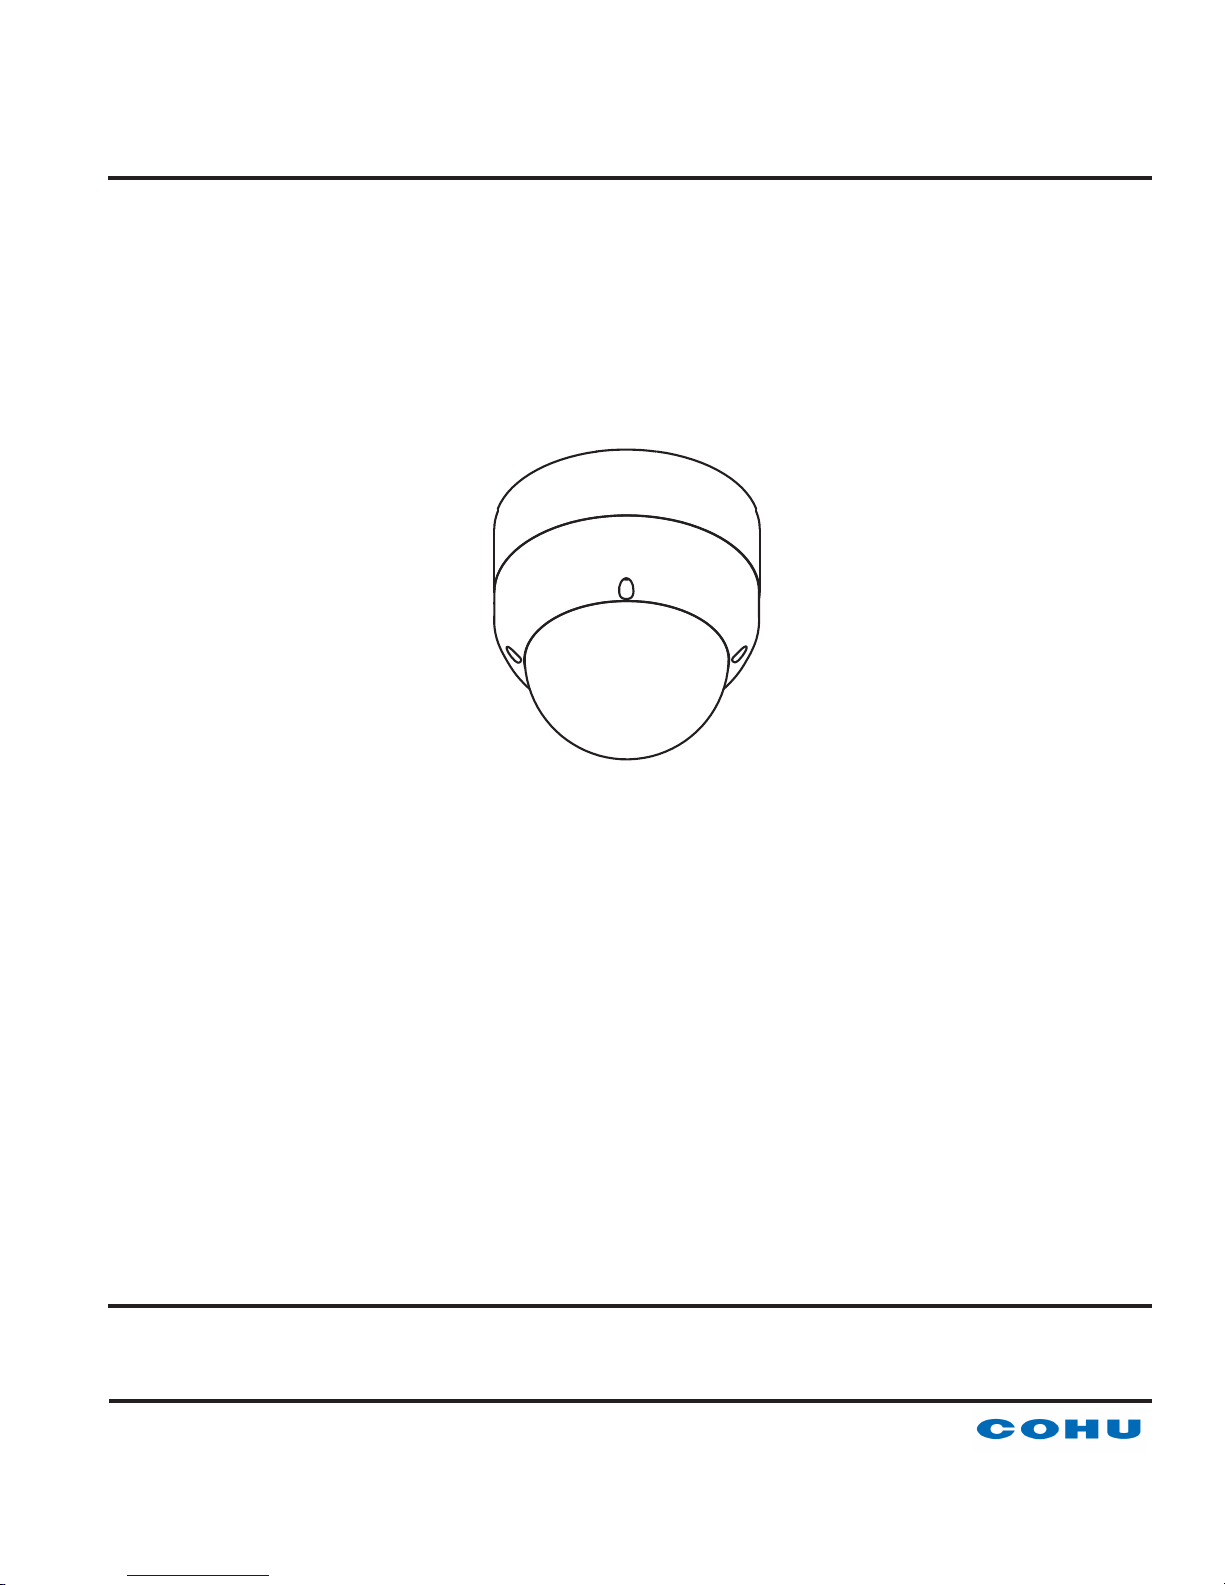
This chapter covers the general installation and cable requirements of the 7420HD series.
Before starting installation:
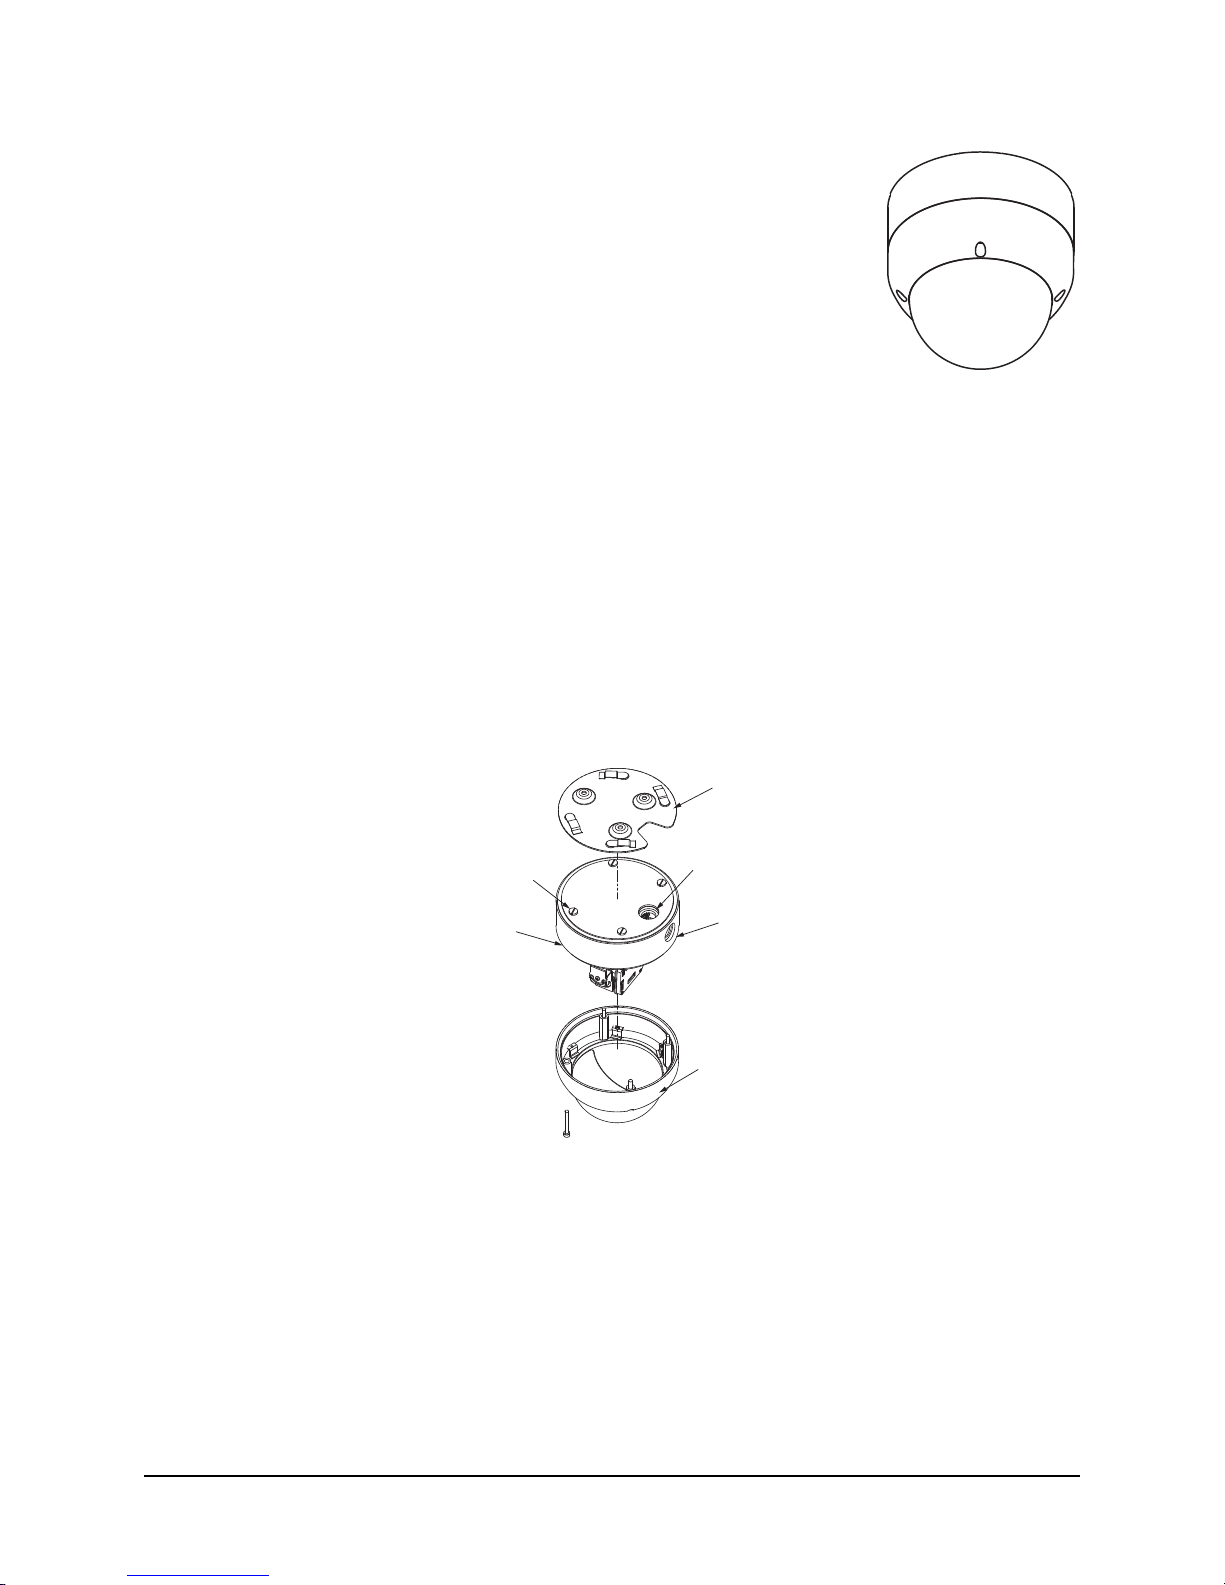
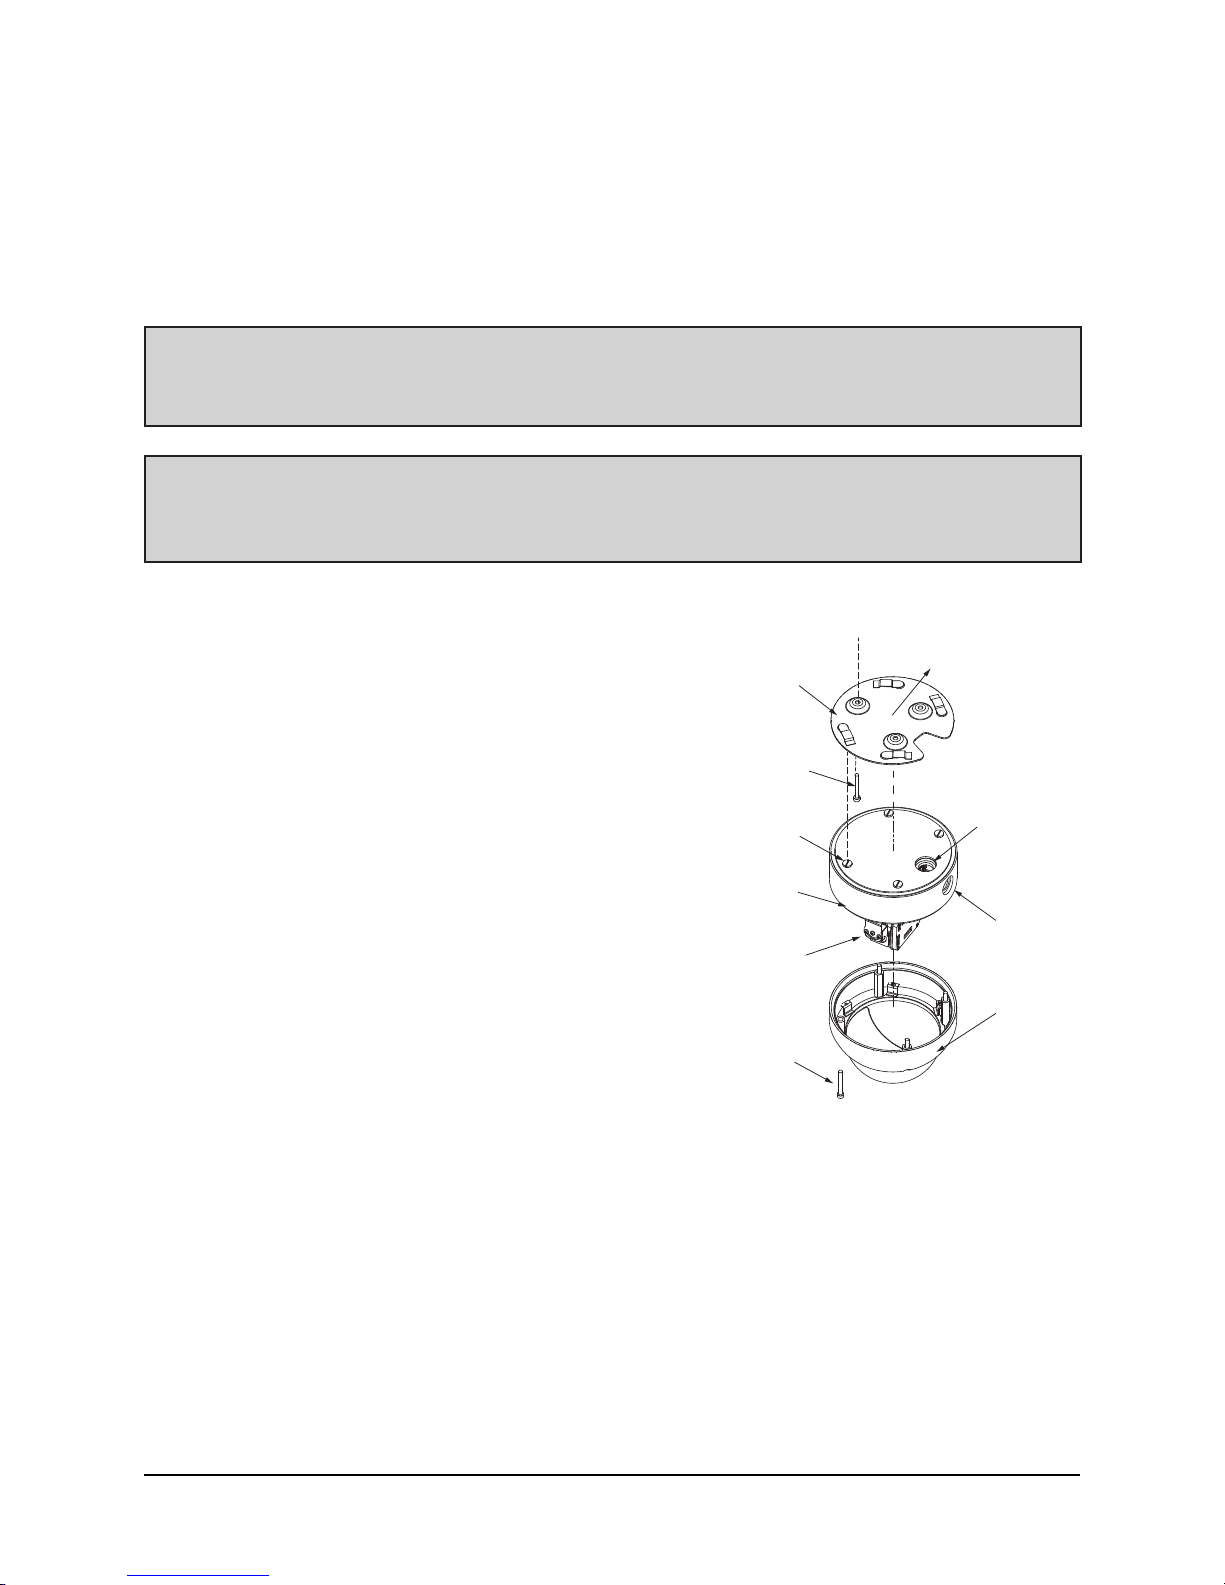
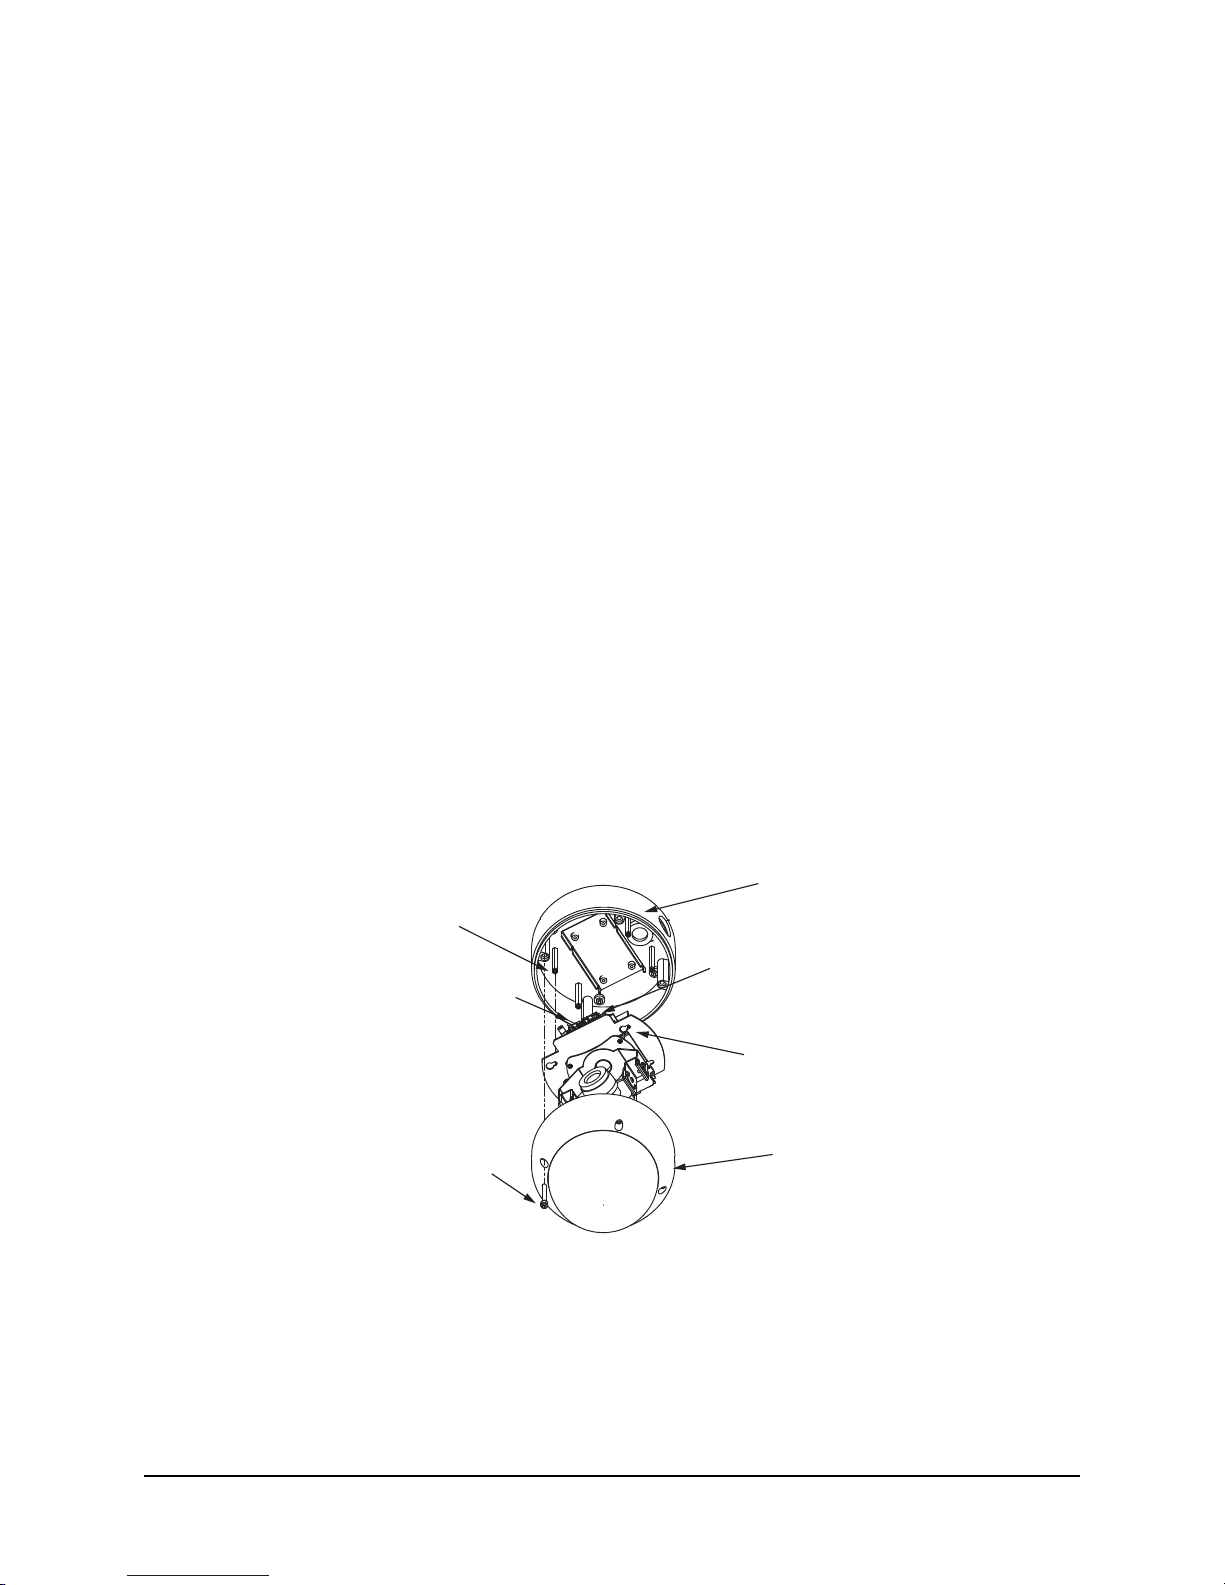
• Choose the installation mounting method. See chapter 3 of this manual.
• Verify that the cables can be routed to the location of the mounting assembly.
• Installationshouldbedoneonlybyqualiedpersonnel.
This assumes that the other end of the cable is properly connected to a source of power and any other
required equipment.
See section 3.1 for details on the installation procedure.
2.1 Power over Ethernet (PoE)
The 7420HD Camera is compliant with IEEE 802.3af standard. Power to the Camera is supplied through the
network.TwotypesofPoEimplementationsarespeciedbythestandard:
• Endspan PoE - power is applied directly by the switch to the Camera. This method requires the
deployment of a PoE-enabled switch.
• Midspan PoE - power is supplied by an injector placed between an existing non-PoE switch and
the Camera.
The PoE injector is supplied with the Camera when the 7425-xxxx option is ordered. Please refer to the
Cohu web page www.cohu-cameras.com/products/74200hd.html for ordering information. The PoE injector
selected for use with 7420HD should meet the following requirement:
• be compatible with IEEE 802.3af standard
Figures 1 and 2 show interconnection diagrams for 7420HD:
• Figure 1 shows a setup of the Camera with PoE-enabled switch.
• Figure 2 shows a typical set up interconnection diagram for the Camera using the PoE injector with
non-PoE switch.
These diagrams give some idea of a typical installation. Each installation site will have its own unique re-
quirements.
2.2 Ethernet 802.3 PoE Connector
For Ethernet: CAT5e or better cable is recommended. For distances up to a maximum of 100 meters (328
feet), use CAT5e cable with four pairs of copper wire, 24 AWG.
When wiring to the Ethernet pins, be sure to consider whether they should be wired for the NIC (network
interface card) in a PC or for system connections to a hub, switch, router, or similar device.
All Ethernet wiring should be done in accordance with TIA/EIA568-C standards set.

6X-1099Z18
Network
Switch
Router/Switch
WAN
CAT5e
Cable Router/PoE Switch
LAN
Figure 1. Interconnection Diagram with PoE-enabled switch
NOTE: PoE injector is supplied with the 7425-xxxx option. Please refer to the Cohu web page
www.cohu-cameras.com/products/7420hd.html in the 7420HDseriesspecicationssectionfor
ordering information.
Network
Switch
Power
Router/Switch
CAT5e
Cable
Router/
non-PoE Switch
PoE Injector
100-240 V AC
WAN
LAN
In
Out
Figure 2. Interconnection Diagram with non-PoE Switch

9
6X-1099Z1
3.0 Mounting Methods
The 7420HD isdesignedforindoorinstallation.Thecameracanbemountedtoaatsurfacesuchasawall
or ceiling. Ashort CAT5 pigtail is pre-installed through the back of the dome base for cable routing through
the mounting surface. Use appropriate bolts for the ceiling/wall materials to secure the camera. Each site
will have its own unique requirements.
3.1 Installation Procedure
The sequence of installation can vary from site to site.
3.1.1 Prepare the Mounting Location
• Identify the mounting location so that the area of
interest can be viewed by the camera/lens combi-
nation.
• Determine the cable routing method. Two cable
routing methods are available:
• Routing the pre-installed cable through the
back cable access hole and through the
mounting surface.
• Routing the customer system cable into
the dome base through the side cable ac-
cess hole.
• Use the provided template to drill the mounting
holes for the mounting plate.
IMPORTANT: The camera system is a xed position camera system. Therefore, camera direction will
be determined by the orientation of the mounting plate. The camera has a lateral adjustment range of
+/- 50° from the reference arrow (camera direction) on the template. Be sure that the desired areas of inter-
est can be reached within this adjustment range. See Mounting Plate Dimensions.
• Install the mounting plate to the mounting surface using appropriate fasteners (not supplied) and
run the system cable to the mounting location.
WARNING:
It is the user’s responsibility to ensure that the mounting methods are safe and adequate for the location.
CAUTION:
Electrostatic sensitive electronic equipment is inside. Observe precautions for handling ESD (Electro-
static Sensitive Devices).
Side cable
access hole
Back cable
access hole
Four posts
Dome base
Mounting plate
Dome top
Four Allen
screws
Electronics
package
Camera direction
(+/- 50°)
Three mounting
screws
(not supplied)

6X-1099Z110
3.1.2 Prepare the Camera for Installation
• Detach the dome top from the dome base by removing the fourAllen screws with the provided 3mm
Allen wrench. Keep the rubber gasket with the dome top.
CAUTION: The electronics package is sensitive to damage from electrostatic discharge. Do not touch any
of the circuit boards or electronic components in the electronics module.
• If the back cable access hole with pre-installed CAT5 pigtail is used, then the camera is ready for
mounting.
• If the side cable access hole in the dome base is used then the camera electronics package
should be removed to access the internal RJ45 connector:
• Remove the four M4 Phillips head screws and slide the electronics package to remove it
from the dome base. Disconnect the internal CAT5 pigtail cable.
3.1.3 Mounting the Dome Base
• Connect the customer cable to the CAT5 pigtail end (if the back cable access hole is used).
• Engage the posts on the dome base with the holes in the mounting plate and rotate the dome base
clockwise to lock the posts into the mounting plate.
• If the camera electronics package has been removed (if the side cable access hole is used):
• Run the customer system cable into the dome base and connect to the internal RJ45
connector on the electronics package.
• Tuck the cable into the dome base.
• Place the electronics package into the dome base and tighten the four M4 Phillips head
screws.
Connector RJ45 for
Ethernet connection
Connector for
optional alarm
connection
Four Allen
screws
Four M3 Phillips
head screws
Keyhole mounting
holes
Dome base
Dome Top

11
6X-1099Z1
Pivot camera
around this point
Grab camera
here to pivot
Slightly loosen locking
screws on each side to
move the camera up
and down
Adjust focus manually
by turning the focus
adjustment ring
3.1.4 Aim the Camera towards the Desired Direction:
• Loosen the locking screws slightly on each side of the bracket.
• Move the camera up and down and rotate the camera to the desired position. NOTE: Do not over
rotate.
• Tighten the locking screws.
3.1.5 Focus the Lens
• Apply power to the camera.
• View the camera image using a Web browser.
• Adjust focus manually by turning the focus adjustment ring.
• Adjust focus further using the settings in the Web interface.
3.1.6 Install the Dome Top
• Ensure that rubber gasket is installed inside the dome cover. Push the dome top into the dome
base.
• Tighten four Allen screws to secure the dome top to the dome base.
• View the camera image using the Web interface.

6X-1099Z112
5.77
(147.32)
Ø5.53
(140.46)
7420HD Overall Dimensions, in(mm)
with Mounting Plate
Ø.22
(5.5)
2.51
( 63.75)
Camera
direction
2.16
(54.86)
1.083
(27.50)
Mounting Plate Dimensions, in(mm)
Ø.22
(5.5)

13
6X-1099Z1
4.0 Quick Check
NOTE: Manual snapshots for 7410HD and 7420HD camera systems are interchangeable unless otherwise
indicated.
In order to test the Camera you need the following items:
• laptop or desktop computer (for recommended computer requirements see section 4.1 of this chap-
ter)
• 100/1000BASE-T network card installed in your computer
• Microsoft Internet Explorer, version 8
• 100/1000BASE-T network switch
• Ethernet CAT5e cable
4.1 Recommended Computer Requirements
• Operating System: Windows XP Service Pack 3 (SP3)
• CPU: Intel i7-860S 2.53 GHz or better
• Memory: 4GB DDR3@1066MHz or better
• HardDrive:7200rpm-minimumspeedwithsufcientfreespace
• Video Card: NVIDIA® GeForce® 9800 GTX+ with 512 MB RAM or better, or high-end ATI Rad-
eon™ HD series
• Monitor: LCD monitor with 1920 x 1080 or better resolution
• Web Browser: Web Interface was only tested with Microsoft Internet Explorer version 8
4.2 IP Control and Viewing of Camera
Installation and testing of the Camera can be performed with the built-in Helios Web Interface application.
The Helios Web Interface was designed to work with Internet Explorer (IE) 8. MicrosoftActiveX® is required
to view and control video in the web interface.
• Allow the Camera to install Signed ActiveX® control before connecting to the Camera.
For more information on ActiveX® control installation see section 5.2 and Appendix 1 of this manual.
4.3 Factory Default IP Address and Settings. Assigning the new Camera IP Address
The camera is shipped with:
• IPAddress - 192.168.2.150
• Subnet mask - 255.255.0.0
• Gateway - 192.168.2.1
No two devices on a single Ethernet network can have the same IP address. Use the following steps to
change a Camera IP address before a second camera is added to the subnet.
• Set your computer IP address to the same subnet as the Camera IP address. See section 5.1.
IMPORTANT:InordertomakechangesinCameracongurationtheusershouldbeloggedinasAdmin-
istrator.

6X-1099Z114
• Change the Camera address. The Camera address can be changed manually or through a Dy-
namic Host Conguration Protocol (DHCP) server. See the operation manual 6x-1090, section
5.4.1.1.
• Click the Camera Setup button.
• ClicktheCongurationbutton.
• Click the Communication tab.
TheCommunications tabisused forperforming network congurationof theCamera.Changes tothis
tab can only be made by the “Admin” account. Care should be taken when modifying parameters on this
page as the changes might make the Camera inaccessible through the network. Consult with your network
administratorbeforestartingtoassignnewnetworksettingstoensurethatyourcamerawon’tconictwith
other devices.
• WritedownthenewCameraaddresstomakethecameraeasytondlater.IfthecameraIPad-
dress becomes lost, use the CohuONVIFDiscovery software to nd the camera on a network.
The software is available as a free download at http://www.cohu-cameras.com/tech/techndx.html.
Under Software & Protocol Downloads see Setup & Test Applications.At Helios ONVIF Discovery
Tool click “download here.”
4.4 Using the Helios CohuONVIFDiscovery Software to Discover the Camera
• Download the software from the link below: http://www.cohu-cameras.com/tech/techndx.html. Un-
der Software & Protocol Downloads see Setup & Test Applications. At Helios ONVIF Discovery
Tool click “download here.”
• RuntheCohuONVIFDiscovery.exele.Clicktostartit.
• The CohuONVIFDiscovery window will be displayed.
NOTE: Auto discovery feature uses network multicast packets and may not work through network
routers.

15
6X-1099Z1
• Click on the “Start Discovery” button. A list of Cameras will be automatically displayed.
• Select your camera network settings.
NOTE: UsetheMACAddresstoidentifyCohucameras.“00-09-f2”identiescamerasasCohucameras.
4.5 Checkout Procedure
When the power is applied to the Camera the initialization process begins. All Cohu Cameras initialize on
power-up using stored default parameters within the camera’s non-volatile memory. The default IP address
assigned to the Cameras at the factory is 192.168.2.150. For information on accessing the Camera using
the Helios Web Interface see section 5.2.
If the Camera does not operate when the power is applied, check for:
• Proper input voltage
• Proper cable connections
After communication with the Camera has been established and video stream has been started, various
functions should be tested to verify proper operation.
Contact the Customer Service Department for technical assistance:

6X-1099Z116
5.0 Operation
NOTE: Manual snapshots for 7410HD and 7420HD camera systems are interchangeable unless otherwise
indicated.
5.1 Assigning the Static IP Address
IMPORTANT: In order to make changes in network settings and install ActiveX® controls in the local ma-
chine the user should be logged in as administrator. Please contact your local IT department if you do not
have Admin privileges.
Set your computer IP address to the same subnet as the Camera IP address.
• Go Start > Control Panel > Network connections > Local Area Connection.
1. You will see the “Local Area Connection” dialog box. Click “Properties.”
Click “Properties”
2. You will see the “Local Area Connections Properties” dialog box. In the General tab, highlight
the “Internet Protocol (TCP/IP) line. Click “Properties.”
General Tab
Click “Properties”
Highlight
the “Internet Protocol (TCP/IP)”

17
6X-1099Z1
3. You will see the “Internet Protocol (TCP/IP) dialog box. In the “General” tab the “Use the
following IP address” button should be selected. Enter IP address: the IP address range is
192.168.2.1 through 192.168.2.254 except the IP address that already is used by the Camera.
The subnet mask should be 255.255.0.0. Click “OK” to close the “Internet Protocol (TCP/IP).
4. Click “OK” to close the the “Local Area Connections Properties” dialog box and click “Close” to
close the “Local Area Connection” dialog box.
General Tab “Use the following IP address”
button is selected
Enter an IP address which is not used
by the Camera. The IP address range is
192.168.2.1 through 192.168.2.254
except 192.168.2.150*
Enter subnet mask: 255.255.0.0
Click “OK”
Click “Close”
Click “OK”
NOTE: * Since the subnet mask is 255.255.0.0 the IP address can be 192.168.0.1 through
192.168.255.254 except 192.168.2.150 (the default) address that has been assigned to the Cam-
era).

6X-1099Z118
5.2 Accessing the Camera Using the Helios Web Interface
The Helios Web Interface was designed to work with Internet Explorer (IE) 8. MicrosoftActiveX® is required
to view and control video in the Helios Web Interface.
Upondelivery,thersttimeyouaccesstheCameraforstartingavideostreamtakethefollowingsteps:
• Start a browser, Microsoft Internet Explorer, version 8.
• Log in as a local administrator on your computer.
NOTE: You may need to set security level in IE and add the Camera as a trusted site in order to
run a video. See Appendix 1.
• Enter the Camera IP address in the browser address box. The default address is
http://192.168.2.150.
• The Camera will attempt to install an ActiveX control on your PC. Allow the Camera to install Ac-
tiveX Control by clicking on the prompt “This website wants to install the following add-on: ‘Cohu-
RTPControl.cab” from ‘Cohu Inc’.” Click “Install thisAdd-on” from the submenu.
• Click “Install” in the Security Warning window box.

19
6X-1099Z1
• The Home page will be displayed.
• Press the Start Live Video button ( ) to start the video stream.
Password Protection
If the Camera is password-protected, a dialog box to enter the user name and password will be displayed.
• Type the user name and password.
• Click OK.
Authentication
Fourusers’accountsaredenedintheHeliosWebInterfacetoallowdifferentlevelsofaccess.Thoseac-
counts are:
• Guest
• User
• Privileged User (Priv)
• Administrator (Admin)
For more information see sections 5.4.1.6 and 5.4.2 .
IMPORTANT:
Upondelivery,thersttimeyouaccessthecamerayouareloggedinasanAdministratorandhave
unrestrictedaccesstotheCamera’scongurationandoperation.Allauthenticationsareturnedoff
and administrator rights are granted to anyone accessing the camera without need to log in. For se-
curity reasons, it is recommended that authentication be established. See section 5.6.1.6.

6X-1099Z120
5.3 Helios Web Interface Home Page Overview
The main window provides information about the user type, name of the Camera, software revision and
accesstoconguration/controlfunctions.
Control area:
1. The current user level logged into the Camera. See sections 5.4.1.6 and 5.4.2.
2. The series number of the Camera.
3. Cameraconguration/controlpanelmenu.Seesections5.4-5.7.
4. Logout.
Video area:
5. Display window for live and recorded video streams. See section 5.3.1.
6. Live video and recording controls. See section 5.3.2.
7. Video recording progress bar.
8. LED indicators. See section 5.3.3.
8
4
5
1
7
6
2
3
Table of contents
Other COHU Security Camera manuals

COHU
COHU 2740 SERIES User manual

COHU
COHU 3920HD series User manual

COHU
COHU 7100 SERIES User manual

COHU
COHU 3920 SERIES User manual

COHU
COHU iDOME 3920 Series User manual

COHU
COHU 3950 SERIES iVIEW User manual

COHU
COHU 2900 Series User manual

COHU
COHU 2100 Series User manual

COHU
COHU 3940 Analog iDome User manual

COHU
COHU 7510HD SERIES User manual
Popular Security Camera manuals by other brands

Speco
Speco O4iB2M quick start guide

Eneo
Eneo PXB-080Z03B Installation and operation manual

Hanwha Techwin
Hanwha Techwin Wisenet PNP-9200RH quick guide

Vivotek
Vivotek Network Camera FD7141(V) user manual

Samsung
Samsung SDC-7340BC Specifications

Covert Systems
Covert Systems Wireless Air Purifier Camera user manual