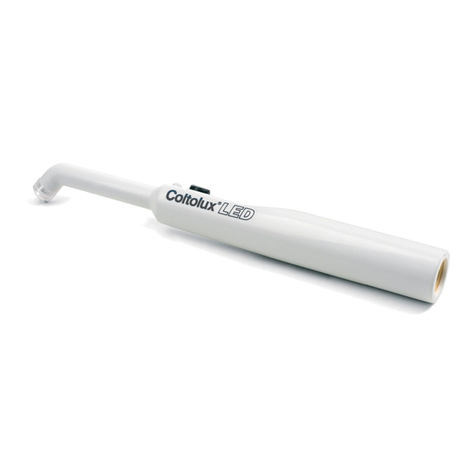
Coltene Coltolux LED User manual

Curing Light
Owner’s Guide ................3
Benutzerhandbuch ............11
Guide de l’utilisateur ...........20
Guía del propietario............29
Guida per l’utente .............38
Gebruikershandleiding..........47
Bruksanvisning ...............55
Brugsanvisning ...............63
Käyttöohjeet .................71
Brukerhåndbok ...............79
Manual do utilizador ...........87
Εγχειρίδιο χρήσης .............95
用户指南.......................................104


Owner’s Guide 3
CAUTION: Federal law restricts this device to sale by or on the
order of a licensed healthcare practitioner.
Congratulations...
…on your purchase of the Coltolux®LED Curing Light. The
Coltolux®LED combines a slim curing probe with high output in a
cordless lightweight pen-style design. The Coltolux®LED’s heat sink
technology reduces the amount of heat emission and eliminates the
need for a fan. LED light output matches the absorbtion spectrum
of Camphorquinone (CQ) photoinitiators.
Indications for Use
The Coltolux®LED is indicated for the polymerization of intra and
extra oral restorations fabricated from materials (commonly referred
to as visible light cured dental restoratives and/or composites and/or
dental adhesives) that contain Camphorquinone as the photoinitiator.
See Figure 1and Figure 2for component recognition.
Fig. 1.
a. Handpiece
b. Handpiece Charger Base
c. Activation Button
Fig. 2.
d. Voltage/Serial Number Label
e. Power Cord with Power Supply
f. Plug Adapters (Export Only)
g. Light Shield
h. Test Block,
i. Barrier Sleeves
j. Light Lenses
Please take special note of the safety precautions below.
I. SAFETY PRECAUTIONS
A. Observe the following precautionary procedures before and
whenever using the Coltolux®LED Curing Light.
WARNING
Before connecting, read all instructions.
Persons having a history of photosensitive
reactions or who are using photosensitizing
drugs should not be exposed to light from
this unit.
Explosion hazard. Do not use in the presen-
ce of flammable anesthetics.
Do not operate the Coltolux®LED without
the light lens in place and fully seated on the
unit (Fig 4) as this may impair patient safety..
WARNING
Never modify the power cord. Modifications
to the power cord may result in an electric
shock hazard.
CAUTION
Do not refrigerate or put in freezer to cool.
This may result in damage to the unit.
Use of a power supply other than that listed
in section XIV. Accessories may result in
increased electromagnetic emissions and/or
decreased electromagnetic immunity.
B. All high intensity lights may cause retinal damage with
prolonged exposure to the eyes, therefore we urge you observe
these cautionary statements:
WARNING
Never look directly into the light emitted from
the light lens or reflected from tooth or other
surfaces as retinal damage may occur.
• Patients, operators and dental technicians should always
use proper eye protection.
• Always use light shields (Cat. No. C7990) available for light
curing or use eye protection goggles (Cat. No. C7988) that
block light in the blue spectral range. Sunglasses are not
adequate protection.
• A barrier sleeve should be used for every patient (Cat. No.
C7957). Slide the barrier sleeve over the handpiece and
then attach the light shield.
• Before each use, inspect the light lens (Section IX).
C. The Coltolux®LED is an electrical appliance requiring proper
disposal according to local laws and regulations.
II. UNPACKING
• Before unpacking, examine the carton for external damage,
and if severe, contact your shipper/carrier.
• Open carton and carefully remove the unit and accessories.
Make sure supply voltage is within the range specified on
the power supply (Fig. 3). If not, do not operate this unit;
contact your dealer or Coltène/Whaledent Inc.
III. SET-UP AND ASSEMBLY
• Coltolux®LED is designed as a cordless handpiece unit
with a separate charger base. Place the charger base on a
smooth flat surface in an area that is dry and free of dust,
is convenient and has an outlet within easy reach of the
supplied power cord. Export units include additional plug
adapters (Fig. 2F). Install the appropriate plug adapter onto
the power supply (Fig. 3).
• Remove the protective insert by first sliding the release but-
ton in the direction indicated by the arrow. Hold the button
in this position while removing the insert from the supply.
• Angle the top of the new adapter into the recess of the sup-
ply. Slide the release button in the direction indicated while
simultaneously pressing the new adapter into place.
Please Note: Additional plug adapters are not supplied for
Australian and New Zealand markets. Plug the power cord into
the wall outlet and then into the charger base. A green light
on the charger base indicates power is available to charge the
handpiece.
• Insert the handpiece into the charger base. When the han-
dpiece is being charged, the light on the charger base will
be orange. When the handpiece is fully charged and ready,
the orange light on the charger base will turn green.
The initial charging of the handpiece will require approxima-
tely 3hours to fully charge.
• When the handpiece is removed from the charger base the
small light above the On/O button on the handpiece will be
green, indicating the unit is ready for use. If the light does
not light up green, see Section VII Troubleshooting.

4 Owner’s Guide
IV. FUNCTION CHECK
A. Activate/Deactivate Light
Depressing the On/O button on the handpiece activates or
deactivates the curing light (Fig. 1c). Do not hold the button
continuously throughout the curing cycle. During operation an
audible beep will be emitted every 10seconds. The unit shuts
o automatically after 20seconds.
B. Measuring the Light’s Eectiveness
To ensure complete polymerization at all times, it is critical to
periodically test the light intensity output.
C. Radiometer Display
A reading of 300mW/cm2or higher indicates that the light
output is acceptable for the polymerization of material up to
a 2.0mm depth. Follow the dental material manufacturer’s
instructions for recommended exposure time, and check using
the supplied test block. A reading below 300mW/cm2, or a
reduction of intensity of the light output in comparison to the
original value, indicates that corrective action should be taken.
(See Section VII, D Troubleshooting.)
V. INDICATORS
A. Ready Mode
When the unit is charged and ready for use the handpiece
indicator will light green.
B. Sleep Mode
If the handpiece is left out of the charger base for more than
15minutes the unit will enter sleep mode. During sleep mode
the handpiece indicator light will not be lit. Activating the unit
or placing the unit into the charger base will wake it from sleep
mode. If the indicator light is not lit, and the unit does not
respond to On/O button presses, the battery may need to be
charged. Place the unit into the charger base and check that
the charger base indicator light turns orange. If the light does
not turn orange see section VII. Troubleshooting.
C. Thermal Protection Mode
WARNING
The red indicator light on the handpiece indi-
cates the unit has entered thermal protection
mode. Action must be taken to allow the unit
to cool.
The Coltolux®LED incorporates thermal protection circuitry de-
signed to inactivate the unit if operating temperatures become
too high. If this happens, the handpiece indicator light will turn
red until the unit cools. Once the handpiece has suciently
cooled (approximately 10minutes) the indicator light will return
to green indicating the unit is ready for use. If the indicator light
does not return to green within 20minutes contact your dealer
or Coltène/Whaledent Inc. for service.
If a problem with the unit is suspected, the following functio-
nality test should be used to determine if there is an issue with
your Coltolux®LED Curing Light:
1. Fully charge the unit.
2. Activate the unit allowing it to complete the entire 20se-
cond cycle.
3. Repeat step 2immediately. Continue until the unit will no
longer activate.
The unit should be able to perform a minimum of 18complete
twenty-second cycles before it enters thermal protection mode.
If this is the case, the unit is operating as designed and meets
Coltène/Whaledent Inc.’s test specifications.
To reinforce confidence in the LED’s operation, always test
restorative materials utilizing the provided Test Block. Only by
testing materials with the test block can true depth of cure and
necessary curing times be determined.
D. Low Battery
When the unit’s battery has reached a low level the handpiece
indicator light will blink green. The unit may still activate once
it has reached the low battery state, however, few activation
cycles remain and it is recommended the unit is placed on the
charger to fully recharge the battery.
If the unit detects a low battery condition while in thermal pro-
tection mode the handpiece indicator will blink red. Once the
unit has suciently cooled the indicator may return to blinking
green and, depending on remaining battery charge, the unit
may still activate, however, few activation cycles remain and
it is recommended the unit is placed on the charger to fully
recharge the battery.
E. Fault Mode
If a fault is detected by the unit the handpiece indicator will turn
solid orange and activating the unit will result in an error sound.
See section VII. Troubleshooting.
VI. CLINICAL APPLICATION
WARNING
Always test restorative materials with this
LED light by using the supplied test block.
Failure to do so may result in uncured ma-
terial.
• Polymerization: Determine the exposure time in accordance
with the dental material manufacturer’s instructions using
the test block provided.
• Remove the charged handpiece from the charger base; po-
sition the light shield; slide the barrier sleeve over the light;
attach the light shield; direct the tip of the light lens as close
to the restorative material as possible without touching.
• Activate Coltolux®LED with a momentary push of the
button. Avoid contact with un-polymerized restorative ma-
terial, glass ionomer, liquid resin or bonding agent because
direct contact will cause these materials to adhere to the
light lens. This will block the light transmission and result in
improper polymerization.
VII. TROUBLESHOOTING
A. If the light on the charger base does not illuminate:
• Check to see that the power cord is securely plugged into
the charger base and the wall outlet.
• Ensure the wall outlet has power by plugging a lamp into it.
B. If the On/O button on the handpiece does not activate the
blue LED curing light and the green light on the handpiece is
not lit (and handpiece is not in base):
• The unit may be discharged and needs charging. Replace
handpiece in the charger base. If the charger base LED is
orange, handpiece is being charged. If the charger base
Owner’s Guide 5
LED is green and the handpiece indicator light remains unlit,
the unit requires service. Contact your dealer or Coltène/
Whaledent Inc.
C. If the On/O button on the handpiece does not activate the
curing light and the green light above the button is illuminated,
unit requires service. Contact your dealer or Coltène/Whaledent
Inc.
D. If your light registers a reading below 300mW/cm2on a light
meter, take the following steps:
• Check the light lens. The light lens should be checked
daily. Replace lens with Coltène/Whaledent Inc. Light Lens
(Cat. No. C7972) if material has cured to the lens or if it is
otherwise obstructed.
• If the intensity of the light output is still under 300mW/cm2,
extend the curing time according to the material’s manu-
facturer recommendation until the Coltolux®LED light can
be serviced. Contact your dealer or Coltène/Whaledent Inc.
for service.
E. If activating the unit results in an error sound and the indicator
is solid orange:
• The unit requires service. Contact your dealer or Coltène/
Whaledent Inc.
VIII. REPLACING THE LIGHT LENS
IMPORTANT: The Coltolux®LED Light Lens is easily scratched
and must be handled with care at all times.
WARNING
Never look directly into the light emitted from
the light lens or reflected from tooth or other
surfaces. Retinal damage may occur.
CAUTION
Only use Coltène/Whaledent’s Light Lens
(Cat. No. C7972). Do not use other manu-
facturer’s light lens with this product as this
will impair performance
Do not touch the LED or reflector (Fig. 4)
under the light lens as hand oil contaminates
these components and can compromise
performance.
• Remove the handpiece from the charger base before
attempting to replace the light lens. Do not activate the
handpiece.
• Remove the light lens by firmly pulling it from the reflector
(Fig. 4).
IX. INSPECTING THE LIGHT LENS
• Inspect the light lens before each use to insure that restora-
tive material has not accidentally cured to the lens. Replace
lens if material has cured to the lens or if it is otherwise
obstructed.
WARNING
Never look directly into the light emitted from
the light lens or reflected from tooth or other
surfaces. Retinal damage may occur.
X. INSPECTING THE CHARGER BASE POWER CORD
• Periodically inspect the charger base power cord for frayed
areas or broken insulation.
XI. CLEANING
CAUTION
Do not immerse the unit in liquid, damage to
the unit will occur.
Do not attempt to clean the reflective surface
or the LED under the light lens as this will
cause damage to the unit or impair its
performance.
Do not saturate the light lens with cleaning so-
lution or disinfectant. Do not allow solution to
remain on the light lens for an extended period
of time as this may impair performance.
Do not use petroleum-based solvents, io-
dophors, or phenolic-based products on the
handpiece or charger base. (Iodophors and
phenolics can stain the surface of the unit
and damage the plastic housing.)
• All external components may be cleaned by wiping with
a soft cloth moistened with a diluted (≤70%) solution of
isopropyl alcohol.
XII. INFECTION CONTROL
CAUTION
Do not autoclave the unit, damage to the
unit will occur.
• To comply with infection control procedures, slide the
barrier sleeve over the handpiece and then attach the
light shield. A new barrier sleeve should be used for each
patient.
• The light shield should be cleaned and sterilized after each
use. Prior to use, inspect for damage. If damage is found,
discard and replace.
XIII. SPECIFICATIONS
A. Electrical Safety
Coltolux®LED is a tested and listed device complying with
relevant performance, safety, and electromagnetic compatibility
requirements.
B. Electromagnetic Compatibility
See section XVI.
C. Dimensions (approximate)
Handpiece
Length: 22.1cm / 8.7”
Probe Dia: 1.22cm / 0.48”
Grip Dia: 2.5cm / 1.00”
Charger Base
Height: 7.4cm / 2.9”
Width: 6.4cm / 2.5”
Depth: 8.9cm / 3.5”

6 Owner’s Guide
D. Operating Voltage/Power
Power Supply Model
GT-41076-0609-0.5
Model
EMSA050120
Input
100 - 240VAC
50 - 60Hz
0.3A
Output 5.5VDC 5VDC
1.09A 1.2A
Class: II
Handpiece
Operating Voltage: 4.2 – 3.0VDC
E. Environmental Conditions
Coltolux®LED is designed to operate in ambient temperatures
from 50 °F – 104 °F (10 °C – 40 °C), relative humidity 80% at
77 °F (25 °C) and a maximum altitude of 6600feet (2000m).
WARNING
To maximize patient comfort, do not operate
handpiece for more than one minute conti-
nuously if the ambient temperature is above
86 °F (30 °C).
F. Classifications & Symbols
Coltolux®LED is classified as IEC60601-1Class II, Type BF,
for protection against electric shock and IPX0for protection
against ingress of fluids.
Attention: Consult accompanying documents
Type BF Applied Part
Class II Equipment
Attention: Non-Ionizing Radiation
Recyclable
Keep Dry
Fragile, handle with care
Temperature limitation for transportation and
storage
i
Consult Instructions for Use
Do not treat as household waste
Do not look directly into light emitted from LED
Manufacturer
Dangerous Voltage
Direct Current
XIV. Ordering Information
ONLY USE AUTHORIZED Coltène/Whaledent Accessories
Product Description Catalog Number
Coltolux®LED Curing Light 100/115V C7970100115
Coltolux®LED Curing Light 100/115V, Pink C7970100115P
Coltolux®LED Curing Light 230/240V C7970230240
Snap-on Light Shields (25ea.) C7990
Light Lenses (25ea.) C7972
Barrier Sleeves (1000ea.) C7957
Goggles C7988
Universal Input AC/DC Power Supply 40004593
Test Block 60014441
XV. WARRANTY INFORMATION
Our products are carefully manufactured to meet stringent quality
assurance requirements. Our products are manufactured from new
parts or new and serviceable used parts. Regardless, our warranty
terms apply. This product has been developed specifically for use
in dentistry and is intended to be operated only by qualified dental
professionals in accordance with the instructions contained in this
guide. However, notwithstanding anything contained herein to the
contrary, the user shall at all times be solely responsible for deter-
mining the suitability of the product for the intended purpose and
the method of its use. Any guidance on application technology
oered by or on behalf of the manufacturer, whether written, verbal
or by demonstration, shall not relieve the dental professional of his/
her obligation to control the product and to make all professional
judgments regarding its use.
Our products are warranted in accordance with the terms of a
written Certificate of Limited Warranty accompanying each product.
Except for the warranties specifically set forth in the Certificate of
Limited Warranty, Coltène/Whaledent Inc. provides no warranties or
guarantees of any kind covering the product, expressed or implied,
including, without limitation, any warranties as to merchantability or
fitness for a particular purpose.
The purchaser/user is referred to the Certificate of Limited
Warranty for all of the terms, conditions and limitations of the
warranty covering this product. This Section of the user manual is
not intended to in any way modify or add to the warranty provided
in the Certificate of Limited Warranty.
Any claim for damage or breakage to the product in transit should
be made to the carrier promptly upon discovery. C/W does not
warrant the product against shipping damage.

Owner’s Guide 7
XVI. The following are guidance and manufacturers declarations regarding electromagnetic compatibility for Coltolux®LED.
1.1EN/IEC 60601-1-2Table 1
Guidance and Manufacturers Declaration -- Electromagnetic Emissions
The Coltolux®LED is intended for use in the electromagnetic environment specified below. The customer or end
user of the Coltolux®LED should assure that it is used in such an environment.
Emissions Test Compliance Electromagnetic environment guidance
RF emissions CISPR 11:2004 Group 1 The Coltolux®LED uses RF energy for its internal fun-
ction. Therefore, its RF emissions are very low and are
not likely to cause any interference in nearby electronic
equipment.
RF emissions CISPR 11:2004 Class B The Coltolux®LED unit is suitable for use in all establish-
ments other than domestic and may be used in dome-
stic establishments and those directly connected to the
public low-voltage power supply network that supplied
buildings for domestic purposes, provided the following
warning is heeded:
WARNING: This equipment is intended for use by
healthcare professionals only. This equipment may
cause radio interference or may disrupt the operation
of nearby equipment. It may be necessary to take
mitigation measures such as reorienting or relocating
the Coltolux®LED unit or shield the location.
Harmonic emissions
IEC61000-3-2
Class A
Voltage flucuations/Flicker emis-
sions IEC 61000-3-3
Complies

8 Owner’s Guide
1.2EN/IEC 60601-1-2Table 2
Guidance and manufacturers Declaration - Electromagnetic Immunity
The Coltolux®LED unit is intended for use in the electromagnetic environment specified below. The customer
or end user of the Coltolux®LED unit should assure it is used only in such an environment.
Immunity Test IEC60601test level Compliance Level Intended Electromagnetic Envi-
ronment
Electromagnetic
Discharge (ESD)
IEC61000-4-2
+/- 6kV Contact
+/- 8kV Air
+/- 6kV Contact
+/- 8kV Air
Floors should be wood, concrete
or ceramic tile. If the floors are
covered with a synthetic material,
the relative humidity should be at
least 30%
Electrical fast
transcient/burst
IEC 61000-4-4
+/- 2kV for power
supply lines
+/- 1kV for input/
output lines
+/- 2kV for power supply
lines
+/- 1kV for input/output
lines
Mains power quality should be
that of a typical commercial or
hospital environment.
Surge IEC61000-4-5 +/- 1kV dierential
mode (line-line)
+/- 2kV common
mode (line-earth)
+/- 1kV dierential mode
(line-line)
+/- 2kV common mode
(line-earth)
Mains power quality should be
that of a typical commercial or
hospital environment.
Voltage dips, short
interruptions and
voltage variations on
power supply input
lines IEC61000-4-11
<5% UT (>95% dip in
UT) for 0.5cycle.
40% UT (60% dip in
UT) for 5cycles.
70% UT (30% dip in
UT) for 25cycles
<5% UT (>95% dip in
UT) for 5seconds.
<5% UT (>95% dip in UT)
for 0.5cycle.
40% UT (60% dip in UT)
for 5cycles.
70% UT (30% dip in UT)
for 25cycles
<5% UT (>95% dip in UT)
for 5seconds.
Mains power quality should be
that of a typical commercial or
hospital environment. If the user
of the Coltolux®LED unit requires
continued operation during power
mains interruptions, it is recom-
mended that the Coltolux®LED
unit be powered from an unin-
terruptable supply with sucient
capacity to run the unit for the
maximum required time of the
interruption.
Power Frequency
(50/60Hx) magnetic
field IEC61000-4-8
3A/m 3A/m Power frequency magnetic fields
should be at levels characteristic
of a typical location in a typical
commercial or hospital environ-
ment.
Note UT is the a.c. mains voltage prior to the application of the test level.

Owner’s Guide 9
1.3EN/IEC60601-1-2:2007Sub-clause 5.2.2.2Table 4
Guidance and manufacturers Declaration - Electromagnetic Immunity
The Coltolux®LED unit is intended for use in the electromagnetic environment specified below. The customer or end user of
the Coltolux®LED unit should assure it is used only in such an environment.
Immunity Test IEC60601Test Level Compliance Level Intended Electromagnetic Environment
Conducted RF
IEC61000-4-6
Radiated RF
IEC61000-4-3
3V rms 150kHz to 80MHz
3V/m\
80MHz to 2.5GHz
3V rms 150kHz to 80MHz
3V/m\
80MHz to 2.5GHz
Portable and RF communications
equipment should be used no closer
to any part of the Coltolux®LED unit,
including cables, than the recommended
separation distance calculated from the
equation applicable to the frequency of
the transmitter.
Recommended separation distance
d = 1.2√P
d = 1.2√P 80MHz to 8000Mhz
d = 1.2√P 800Mz to 2.5GHz
Where P is the maximum output power
rating of the transmitter in watts (W)
according to the transmitter manufactu-
rer and d is the recommended minimum
separation distance in meters (m).
Field strengths from fixed RF transmit-
ters, as determined by an electroma-
gnetic site survey, should be less than
the compliance level in each frequency
range.
Interference may occur in the vicinity of
equipment marked with the following
symbol:
NOTE 1 At 80MHz and 8000MHz, the higher frequency range applies.
NOTE 2 These guidelines may not apply in all situations. Electromagnetic propagation is aected by absorbtion and
reflection from objects, structures and people.
Field charge from fixed transmitters, such as base station for radio (cellular/cordless) telephones and land mobile radios,
amature radio, AM and FM radio broadcast cannot be predicted theoretically with accuracy. To access the electromagnetic
environment due to fixed RF transmitters, an electromagnetic site survey should be considered. If the measured field stren-
gth in which the location of the Coltolux®LED unit is used exceeds the application RF compliance level above, the Coltolux®
LED unit should be observed to verify normal operation. If abnormal performance is observed, additional measures may be
necessary, such as re-orienting or re-locating the Coltolux®LED unit.
Over the frequency range 150kHz to 80Mhz, field strengths should be less than 3V/m.

10 Owner’s Guide
1.4EN/IEC60601-1-2:2007sub-clause 5.2.2.2Table 6
Recommended separation distances between portable and mobile RF communications equipment and the Coltolux®LED
unit.
The Coltolux®LED unit is intended for use in an electromagnetic environment in which radiated RF disturbances are con-
trolled. The customer or the user of the Coltolux®LED unit can help prevent electromagnetic interference by maintaining a
minimum distance between the portable and mobile RF communications equipment (transmitters) and the Coltolux®LED
unit as recommended below, according to the maximum output power of the communications equipment.
Rated maximum output
power of transmitter in watts
(W)
Separation distance according to frequency of transmitter in meters (m)
150kHz to 80MHz
d =
1.2√
P
80MHz to 8000Mhz
d =
1.2√
P
800Mz to 2.5GHz
d =
1.2√
P
0.01 .12 .12 .23
0.1 .38 .38 .73
1.0 1.2 1.2 2.3
10 3.8 3.8 7.3
10 12 12 23
For transmitters rated at a maximum output power not listed above the recommended separation distance d in meters (m)
can be estimated using the equation applicable to the frequency of the transmitter, where P is the maximum output power
rating of the transmitter in watts (W) according to the transmitter manufacturer.
NOTE 1 At 80Mhz and 800MHz, the separation distance for the higher frequency range applies.
NOTE 2 These guidelines may not apply in all situations. Electromagnetic propagation is aected by absorbtion from
reflection from structures, objects and people.

Benutzerhandbuch 11
ACHTUNG: Laut Bundesgesetzt darf dieses Gerät nur an zuge-
lassenes medizinisches Fachpersonal oder auf dessen Anord-
nung verkauft werden.
Herzlichen Glückwunsch...
...zum Kauf Ihrer Coltolux®LED-Polymerisationslampe. Die
Coltolux®LED verbindet eine schlanke Polymerisationssonde mit
hoher Leistung in einem schnurlosen und leichten Stiftdesign. Die
Kühlkörpertechnologie der Coltolux®LED reduziert die Wärmeab-
gabe und macht einen Ventilator überflüssig. Die LED-Lichtabgabe
entspricht dem Absorptionsspektrum von Campherchinon (CQ)
Photoinitiatoren.
Indikationen für die Nutzung
Die Coltolux®LED ist für die Polymerisation intra- und extraoraler
Versorgungen aus Materialien (allgemein als mit sichtbarem Licht
härtbare Dentalversorgungen und/oder Komposite und/oder Adhäs-
ive genannt), welche Campherchinon als Photoinitiator enthalten,
indiziert.
Beschreibungen der Komponenten finden Sie in den Abbildungen
1 und 2.
Abb. 1.
a. Handstück
b. Ladestation des Handstücks
c. Aktivierungstaste
Abb. 2.
d. Etikett mit Spannungsinformationen/Seriennummer
e. Netzkabel mit Stromversorgung
f. Steckeradapter (nur Export)
g. Blende
h. Testblock
i. Arretierungshülsen
j. Lichtlinsen
Beachten Sie auch die nachfolgenden Sicherheitshinweise.
I. SICHERHEITSHINWEISE
A. Beachten Sie vor und bei der Verwendung der Coltolux®LED-
Polymerisationslampe die folgenden Sicherheitshinweise:
WARNUNG
Lesen Sie alle Anweisungen, bevor Sie das
Gerät anschließen.
Personen, bei denen photosensitive Reaktio-
nen bekannt sind oder die photosensibilisie-
rende Medikamente einnehmen, dürfen dem
Licht dieses Geräts nicht ausgesetzt werden.
Explosionsgefahr. Verwenden Sie das Gerät
nicht in der Nähe entflammbarer Narkose-
mittel.
Verwenden Sie die Coltolux®LED nicht ohne
aufgesetzte und vollständig befestigte Licht-
linse (Abb. 4), da dies die Patientensicherheit
beeinträchtigen kann.
WARNUNG
Das Netzkabel darf nicht verändert werden.
Veränderungen am Netzkabel können zur
Gefahr von Stromschlägen führen.
ACHTUNG
Frieren Sie das Gerät nicht ein und legen Sie
es nicht zum Abkühlen in den Kühlschrank.
Dies kann zu Schäden am Gerät führen.
Die Verwendung einer anderen Stromversor-
gung als im Abschnitt XIV. Zubehör genannt,
kann zu erhöhten elektromagnetischen
Emissionen und/oder verminderter elektro-
magnetischer Immunität führen.
B. Intensiv helles Licht kann bei längerer Einwirkung zu
Netzhautschäden führen. Beachten Sie daher unbedingt die
folgenden Vorsichtsmaßnahmen:
WARNUNG
Blicken Sie niemals direkt in das von der
Linse ausgesandte oder vom Zahn oder
anderen Oberflächen ausgesandte Licht, da
dies zu Netzhautschäden führen kann.
• Patienten, Operateure und Zahntechniker müssen stets eine
angemessene Schutzbrille tragen.
• Verwenden Sie stets die Blenden (Kat.-Nr. C7990)
zur Lichtbehandlung oder tragen Sie eine Schutzbrille
(Kat.-Nr. C7988), um das Licht im blauen Spektralbereich
abzublocken. Sonnenbrillen bieten keinen angemessenen
Schutz.
• Für jeden Patienten ist eine neue Arretierungshülse zu
verwenden (Kat.-Nr. C7957). Schieben Sie die Arretierungs-
hülse über das Handstück und schließen Sie dann die
Blende an.
• Prüfen Sie vor jeder Behandlung die Linse (Abschnitt IX).
C. Die Coltolux®LED ist ein Elektrogerät, das gemäß der örtlichen
Gesetze und Vorschriften entsorgt werden muss.
II. AUSPACKEN
• Prüfen Sie den Karton vor dem Auspacken auf äußere
Schäden. Bei starken Beschädigungen wenden Sie sich an
Ihren Zusteller/Spediteur.
• Önen Sie den Karton und nehmen Sie das Gerät und
das Zubehör vorsichtig heraus. Stellen Sie sicher, dass die
Netzspannung dem auf der Stromversorgung angegebenen
Spannungsbereich entspricht (Abb. 3). Ist dies nicht der
Fall, nehmen Sie das Gerät nicht in Betrieb. Wenden Sie
sich an Ihren Händler oder an Coltène/Whaledent Inc.
III. INSTALLATION UND MONTAGE
• Coltolux®LED wurde als schnurloses Handstück mit se-
parater Ladestation entwickelt. Stellen Sie den Sockel des
Ladegeräts auf eine ebene Oberfläche. Diese muss sich in
einem trockenen und staubfreien Bereich befinden, leicht
zugänglich sein und innerhalb der Reichweite des Netzka-
bels eine Netzsteckdose aufweisen. Exportgeräte werden
mit zusätzlichen Steckeradaptern ausgeliefert (Abb. 2F).
Bringen Sie den passenden Steckeradapter an der Strom-
versorgung an (Abb. 3).
• Entfernen Sie den Schutzeinsatz, indem Sie die Entriege-
lungstaste in Pfeilrichtung schieben. Halten Sie die Taste in
dieser Position und entfernen Sie gleichzeitig den Einsatz
von der Versorgung.

12 Benutzerhandbuch
• Setzen Sie den oberen Teil des neuen Adapters in die
Vertiefung an der Stromversorgung ein. Schieben Sie die
Entriegelungstaste in die angezeigte Richtung und drücken
Sie den neuen Adapter dabei solange ein, bis er einrastet.
Beachten Sie: Für Australien und Neuseeland liegen keine wei-
teren Steckeradapter bei. Verbinden Sie das Netzkabel zunächst
mit der Netzsteckdose und dann mit der Ladestation. Eine grüne
Leuchte an der Ladestation zeigt an, dass das Handstück mit
Strom versorgt werden kann.
• Setzen Sie das Handstück in die Ladestation ein. Wenn
das Handstück aufgeladen wird, leuchtet die Leuchte auf
der Ladestation orange. Ist das Handstück vollständig
aufgeladen und betriebsbereit, leuchtet die Leuchte an der
Ladestation grün.
Die vollständige Erstladung des Handstücks dauert rund
drei Stunden.
• Wenn Sie das Handstück aus der Ladestation entfernen,
leuchtet die kleine Leuchte oberhalb der Ein-/Aus-Taste des
Handstücks grün, und zeigt, dass das Gerät betriebsbereit
ist. Siehe Abschnitt VII. (Fehlerbehebung), falls die Leuchte
nicht grün leuchtet.
IV. FUNKTIONSPRÜFUNG
A. Aktivieren/Deaktivieren der Leuchte
Wenn Sie die Ein-/Aus-Taste am Handstück drücken, wird
die Polymerisationslampe aktiviert, bzw. deaktiviert (Abb. 1c).
Halten Sie die Taste während der Behandlung nicht gedrückt.
Während des Betriebs ertönt alle zehn Sekunden ein deutlich
hörbares Piepen. Das Gerät wird nach 20 Sekunden automa-
tisch ausgeschaltet.
B. Messen der Lichtezienz
Zur konstanten Gewährleistung der vollständigen Polymerisa-
tion muss die Intensität des vom Gerät abgegebenen Lichts in
regelmäßigen Abständen geprüft werden.
C. Radiometeranzeige
Ein Wert von 300 mW/cm² oder mehr steht für eine akzep-
table Ausgabeleistung für die Polymerisation von Material mit
einer Stärke bis 2,0 mm. Befolgen Sie die Anweisungen des
Materialherstellers bezüglich der empfohlenen Belichtungszeit
und überprüfen Sie diese anhand des mitgelieferten Testblocks.
Ein Wert von weniger als 300 mW/cm² bzw. eine im Vergleich
zum Originalwert geringere Lichtleistung weist darauf hin, dass
Korrekturmaßnahmen erforderlich sind. (Siehe Abschnitt VII,
D Fehlerbehebung.)
V. ANZEIGEN
A. Betriebsmodus
Wenn das Gerät geladen und betriebsbereit ist, leuchtet das
Anzeigelicht des Handstücks grün.
B. Ruhemodus
Wenn sich das Handstück länger als 15 Minuten außerhalb der
Ladestation befindet, wechselt das Gerät in den Ruhemodus.
Im Ruhemodus leuchtet die Anzeigeleuchte des Handstücks
nicht. Wenn Sie das Gerät aktivieren oder in den Sockel der
Ladestation stellen, wird der Ruhemodus beendet. Wenn
das Anzeigelicht nicht leuchtet und das Gerät beim Drücken
der Ein-/Aus-Taste nicht reagiert, muss eventuell der Akku
neu aufgeladen werden. Setzen Sie das Gerät in den Sockel
der Ladestation und überprüfen Sie, ob das Anzeigelicht des
Sockels orange leuchtet. Lesen Sie Abschnitt VII. (Fehlerbehe-
bung) wenn die Leuchte nicht orange leuchtet.
C. Thermischer Überlastungsschutz
WARNUNG
Das rote Anzeigelicht auf dem Handstück
weist darauf hin, dass der thermische Über-
lastungsschutz des Geräts aktiviert wurde.
Das Gerät muss in diesem Fall abkühlen
können.
Die Coltolux®LED verfügt über einen thermischen Überlas-
tungsschutz, der das Gerät deaktiviert, wenn die Betriebstem-
peratur zu hoch wird. In diesem Fall leuchtet die Anzeige des
Handstücks rot, bis das Gerät abgekühlt ist. Nachdem das
Gerät ausreichend abgekühlt ist (nach ca. 10 Minuten) leuchtet
das Anzeigelicht wieder grün und zeigt an, dass das Gerät be-
triebsbereit ist. Leuchtet das Anzeigelicht auch nach 20 Minu-
ten noch nicht wieder grün, wenden Sie sich an Ihren Händler
oder an Coltène/Whaledent Inc.
Wenn Sie vermuten, dass ein Problem mit dem Gerät vorliegt,
führen Sie den folgenden Funktionstest durch. Sie können
auf diese Weise ermitteln, ob ein Problem mit der Coltolux®
LED-Polymerisationslampe aufgetreten ist:
1. Laden Sie das Gerät vollständig auf.
2. Aktivieren Sie das Gerät und warten Sie, bis es einen kom-
pletten Zyklus von 20 Sekunden durchlaufen hat.
3. Wiederholen Sie Schritt 2 sofort. Fahren Sie so lange fort,
bis das Gerät nicht mehr aktiviert werden kann.
Das Gerät muss mindestens 18 vollständige Zyklen von 20 Se-
kunden durchlaufen, bevor der thermische Überlastungsschutz
anspricht. Ist dies der Fall, ist das Gerät im Sinne der Testspezi-
fikationen von Coltène/Whaledent Inc.betriebsbereit.
Damit Sie sich besser auf den LED-Betrieb verlassen können,
wird empfohlen, Restaurationsmaterialien stets mit dem beilie-
genden Testblock zu prüfen. Nur mit dem Testblock können Sie
die tatsächliche Aushärtungstiefe und die erforderliche Behand-
lungszeit eines Materials ermitteln.
D. Akku beinahe leer
Wenn der Akku des Geräts beinahe entladen ist, beginnt das
Anzeigelicht des Handstücks grün zu blinken. Bei niedrigem
Ladestand des Akkus kann das Gerät zwar aktiviert werden, es
sind jedoch nur noch wenige Aktivierungszyklen möglich. Da-
her wird in diesem Fall empfohlen, das Gerät in die Ladestation
zu stellen, um den Akku vollständig aufzuladen.
Wenn das Gerät bei aktiviertem thermischem Überlastungs-
schutz einen niedrigen Ladestand des Akkus feststellt, beginnt
das Anzeigelicht des Handstücks rot zu blinken. Nachdem das
Gerät ausreichend abgekühlt ist, kehrt die Anzeige wieder zum
grünen Blinklicht zurück. Abhängig von der Akku-Restladung
kann das Gerät eventuell nur noch für wenige Aktivierungszyk-
len aktiviert werden. Daher sollte das Gerät in die Ladestation
gestellt werden, um den Akku vollständig aufzuladen.
E. Fehlermodus
Wird ein Fehler des Handstücks festgestellt, leuchtet die Anzei-
ge des Handstücks durchgehend orange und beim Aktivieren
des Geräts ertönt ein Fehlersignal. Siehe Abschnitt VII. Fehler-
behebung.

Benutzerhandbuch 13
IV. KLINISCHE ANWENDUNG
WARNUNG
Testen Sie die mit diesem LED-Licht zu be-
arbeitenden Restaurationsmaterialien zuvor
mit dem beiliegenden Testblock. Andernfalls
kann dies zu nicht vollständig gehärteten
Materialien führen.
• Polymerisation: Ermitteln Sie die Belichtungszeit anhand
der Anweisungen des Materialherstellers mit Hilfe des im
Lieferumfang enthaltenen Testblocks.
• Nehmen Sie das aufgeladene Handstück aus der Ladesta-
tion und positionieren Sie die Blende. Schieben Sie die
Arretierungshülse über die Leuchte und befestigen Sie die
Blende. Führen Sie die Linsenspitze so nahe wie möglich
an das zu bearbeitende Material heran, ohne dieses zu
berühren.
• Aktivieren Sie die Coltolux®LED durch kurzes Drücken der
Ein-/Aus-Taste. Vermeiden Sie den Kontakt mit nicht poly-
merisiertem Material, Glas-Ionomer, Flüssigkeitsresten oder
Bindemitteln, da diese Stoe an der Linse haften können.
Dadurch wird die Lichtübertragung blockiert und die Poly-
merisation erfolgt nur unzureichend.
VII. FEHLERBEHEBUNG
A. Die Leuchte an der Ladestation leuchtet nicht:
• Prüfen Sie, ob das Netzkabel sicher mit der Ladestation
und der Netzsteckdose verbunden ist.
• Stellen Sie sicher, dass die Netzsteckdose funktioniert,
indem Sie eine Lampe anschließen.
B. Die blaue LED-Polymerisationslampe lässt sich nicht durch
Drücken der Ein-/Aus-Taste auf dem Handstück aktivieren und
das grüne Licht auf dem Handstück leuchtet nicht (und das
Handstück befindet sich nicht in der Ladestation):
• Das Gerät ist möglicherweise entladen und muss neu auf-
geladen werden. Setzen Sie das Handstück in die Ladesta-
tion. Leuchtet die LED der Ladestation orange, wird das
Handstück geladen. Wenn die LED an der Ladestation grün
leuchtet, nicht jedoch die Leuchte am Handstück, muss
das System gewartet werden. Wenden Sie sich an Ihren
Händler oder an Coltène/Whaledent Inc.
C. Wird die Polymerisationslampe durch Drücken der Ein-/Aus-
Taste nicht aktiviert und leuchtet die grüne Leuchte über der
Taste, muss das Gerät gewartet werden. Wenden Sie sich an
Ihren Händler oder an Coltène/Whaledent Inc.
D. Zeigt das Gerät auf einem Lichtmesser einen Wert unter
300 mW/cm² an, gehen Sie wie folgt vor:
• Prüfen Sie die Linse. Die Linse muss täglich geprüft werden.
Tauschen Sie die Linse ggf. gegen eine Linse von Coltène/
Whaledent Inc. (Kat.-Nr. C7972) aus, wenn Material an der
Linse haftet oder sie andere Beschädigungen aufweist.
• Beträgt die Lichtleistung immer noch weniger als 300 mW/
cm², verlängern Sie die Behandlungszeit entsprechend
der Anweisungen des Materialherstellers, bis die Coltolux®
LED-Behandlungsleuchte gewartet werden kann. Wenden
Sie sich bei Servicefragen an Ihren Händler oder an Coltè-
ne/Whaledent Inc.
E: Bei Aktivierung des Geräts ertönt ein Fehlersignal und das
Anzeigelicht leuchtet durchgehend orange:
• Das Gerät muss gewartet werden. Wenden Sie sich an
Ihren Händler oder an Coltène/Whaledent Inc.
VIII. AUSTAUSCHEN DER LINSE
WICHTIG: Die Coltolux®LED-Linse kann leicht verkratzt werden
und ist daher stets vorsichtig zu behandeln.
WARNUNG
Blicken Sie niemals direkt in das von der
Linse ausgesandte oder vom Zahn oder an-
deren Oberflächen reflektierte Licht. Andern-
falls kann es zu Schädigungen der Netzhaut
kommen.
ACHTUNG
Verwenden Sie nur Linsen von Coltène/
Whaledent (Kat.-Nr. C7972). Verwenden
Sie für dieses Produkt keine Linsen anderer
Hersteller, da dies die Leistung beeinträchti-
gen kann.
Berühren Sie die LED oder den Reflektor
(Abb. 4) unter der Linse nicht, da Talg von
der Hand diese Komponenten kontaminiert
und die Leistung beeinträchtigen kann.
• Nehmen Sie das Handstück aus der Ladestation, bevor Sie
die Linse austauschen. Aktivieren Sie das Handstück nicht.
• Entfernen Sie die Lichtlinse, indem Sie sie kräftig vom Re-
flektor abziehen (Abb. 4).
IX. PRÜFEN DER LINSE
• Prüfen Sie die Linse vor jeder Anwendung, um sicherzustel-
len, dass kein Material an der Linse haftet. Tauschen Sie die
Linse aus, wenn Material an ihr haftet oder sie anderweitig
beschädigt ist.
WARNUNG
Blicken Sie niemals direkt in das von der
Linse ausgesandte oder vom Zahn oder an-
deren Oberflächen reflektierte Licht. Andern-
falls kann es zu Schädigungen der Netzhaut
kommen.
X. PRÜFEN DES NETZKABELS DER LADESTATION
• Prüfen Sie das Netzkabel der Ladestation regelmäßig auf
Risse oder brüchige Isolierung.

14 Benutzerhandbuch
XI. REINIGEN
ACHTUNG
Das Gerät darf nicht in Flüssigkeiten getaucht
werden, da dies zu Schäden führen kann.
Versuchen Sie nicht, die reflektierende Ober-
fläche oder die LED unter der Linse zu rei-
nigen, da dies zu Schäden am Gerät führen
und dessen Leistung beeinträchtigen kann.
Die Lichtlinse darf nicht mit Reinigungs-
lösung oder Desinfektionsmittel gesättigt
werden. Die Lösung darf nicht über einen
längeren Zeitraum auf die Linse einwirken, da
dies deren Leistung beeinträchtigen kann.
Verwenden Sie zum Reinigen von Handstück
und Ladegerät weder Lösungsmittel auf Ba-
sis von Petroleum, noch Iodophore oder phe-
nolhaltige Produkte. (Iodophore und Phenole
können die Oberfläche des Geräts abnutzen
und das Kunststogehäuse beschädigen.)
• Alle äußeren Komponenten dürfen mit einem weichen Tuch
gereinigt werden, das mit einer verdünnten (≤70 %) Isopro-
pylalkohol-Lösung befeuchtet ist.
XII. INFEKTIONSKONTROLLE
ACHTUNG
Das Gerät darf nicht autoklaviert werden, da
dies zu Schäden führen kann.
• Gemäß den Richtlinien zur Infektionskontrolle muss zu-
nächst die Arretierungshülse über das Handstück gescho-
ben und die Blende angeschlossen werden. Für jeden Pati-
enten muss eine neue Arretierungshülse verwendet werden.
• Die Blende muss nach jeder Verwendung gereinigt und
sterilisiert werden. Prüfen Sie sie vor jeder Verwendung
auf Schäden. Wenn die Blende beschädigt ist, muss sie
entsorgt und ersetzt werden.
XIII. SPEZIFIKATIONEN
A. Elektrische Sicherheit
Coltolux®LED ist ein geprüftes und gelistetes Gerät, das die
relevanten Anforderungen in Bezug auf Leistung, Sicherheit
und elektromagnetische Verträglichkeit erfüllt.
B. Elektromagnetische Verträglichkeit
Siehe Abschnitt XVI.
C. Ungefähre Abmessungen
Handstück
Länge: 22,1 cm
Sondendurchmesser: 1,22 cm
Gridurchmesser: 2,5 cm
Ladestation
Höhe: 7,4 cm
Breite: 6,4 cm
Tiefe: 8,9 cm
D. Betriebsspannung/Leistung
Strom-
versorgung:
Modell
GT-41076-0609-0.5
Modell
EMSA050120
Eingang
100 - 240 VAC
50 - 60 Hz
0,3 A
Ausgang 5,5 VDC 5 VDC
1,09 A 1,2 A
Klasse: II
Handstück
Betriebsspannung: 4,2 - 3,0 VDC
E. Umgebungsbedingungen
Coltolux®LED kann bei Umgebungstemperaturen von 10 °C
bis 40 °C, sowie bei einer relativen Luftfeuchtigkeit von 80 %
bei 25 °C und einer maximalen Höhe von 2.000 m betrieben
werden.
WARNUNG
Um maximalen Komfort für den Patienten zu
gewährleisten, verwenden Sie das Hand-
stück nicht länger als eine Minute, wenn die
Umgebungstemperatur höher als 30 °C ist.
F. Klassifizierung und Symbole
Coltolux®LED wurde in die elektrischen Schutzklassen
IEC 60601-1 Klasse II, Typ BF zum Schutz vor Stromschlägen
und IPX0 zum Schutz gegen das Eindringen von Flüssigkeiten
eingestuft.
Achtung: Begleitende Dokumente beachten
Angewandtes Teil Typ BF
Gerät der Klasse II
Achtung: Nicht-ionisierende Strahlung
Recycelbar
Vor Nässe schützen
Zerbrechlich - sorgfältig behandeln
Temperaturbeschränkung für Transport und
Lagerung
i
Benutzerhandbuch beachten
Nicht im Hausmüll entsorgen

Benutzerhandbuch 15
Nicht direkt in das von der LED emittierte Licht
blicken
Hersteller
Gefährliche Spannung
Gleichstrom
XIV. Bestellinformationen
VERWENDEN SIE NUR ZUGELASSENE ZUBEHÖRKOMPONENTEN
VON Coltène/Whaledent
Produktbeschreibung Katalog-Nr.
Coltolux®LED-Polymerisationslampe
100/115V
C7970100115
Coltolux®LED-Polymerisationslampe
100/115V, rosa
C7970100115P
Coltolux®LED-Polymerisationslampe
230/240V
C7970230240
Aufsteckblenden (25 Stück) C7990
Lichtlinsen (25 Stück) C7972
Arretierungshülsen (1.000 Stück) C7957
Schutzbrille C7988
Universaleingang für Versorgung mit Gleich-
strom/Wechselstrom
40004593
Testblock 60014441
XV. GEWÄHRLEISTUNGSINFORMATIONEN
Unsere Produkte werden mit äußerster Sorgfalt gefertigt, um die
strengen Anforderungen der Qualitätssicherung zu erfüllen. Zur
Fertigung unserer Produkte verwenden wir neue Teile oder neue
und funktionsfähige gebrauchte Teile. Unsere Garantiebedingungen
gelten in beiden Fällen. Dieses Produkt wurde speziell zur Verwen-
dung in der Zahnheilkunde entwickelt und darf nur von qualifiziertem
zahnmedizinischem Fachpersonal und gemäß den Anweisungen in
dieser Bedienungsanleitung verwendet werden. Unbeschadet aller
anderslautenden Bestimmungen hierin ist der Anwender stets allein
dafür verantwortlich, die Eignung des Produkts für den geplanten
Zweck und die Anwendungsmethode zu bestimmen. Ungeachtet
der Anleitungen oder Anwendungstechniken, die vom Hersteller
oder in dessen Namen schriftlich, mündlich oder durch Vorführun-
gen zur Verfügung gestellt oder demonstriert werden, ist das zahn-
medizinische Fachpersonal verpflichtet, das Produkt zu kontrollieren
und seinen Einsatz umfassend und fachmännisch zu beurteilen.
Für die von uns gewährte Produktgarantie sind die in der schriftli-
chen Bescheinigung über die Eingeschränkte Garantie (die jedem
Produkt beiliegt) enthaltenen Bedingungen maßgebend. Neben den
speziell in der Bescheinigung über die Eingeschränkte Garantie ge-
nannten Garantien gewährt Coltène/Whaledent Inc. keine sonstigen
ausdrücklichen oder stillschweigenden Garantien oder Gewährleis-
tungen für das Produkt, einschließlich unter anderem Zusicherungen
zur Marktfähigkeit oder Eignung für einen bestimmten Zweck.
Der Käufer/Anwender wird auf die in der Bescheinigung über
die Eingeschränkte Garantie enthaltenen Bedingungen, Be-
stimmungen und Garantiebeschränkungen für dieses Produkt
verwiesen. Die in der Bescheinigung über die Eingeschränkte
Garantie beschriebene Garantie wird durch diesen Abschnitt des
Benutzerhandbuches in keiner Weise geändert oder ergänzt.
Ansprüche aufgrund von Schäden oder Bruchschäden am Produkt,
die auf dem Transportweg entstanden sind, sollten unmittelbar nach
ihrem Entdecken dem Transportunternehmen gemeldet werden.
C/W haftet nicht für Versandschäden am Produkt.

16 Benutzerhandbuch
XVI. Im folgenden finden Sie Richtlinien und die Herstellererklärung zur elektromagnetischen Verträglichkeit der Coltolux®LED.
1.1 EN/IEC 60601-1-2 – Tabelle 1
Richtlinie und Erklärung des Herstellers über elektromagnetische Emissionen
Die Coltolux®LED ist für die Verwendung in der unten angegebenen elektromagnetischen Umgebung vorgese-
hen. Der Kunde bzw. Benutzer der Coltolux®LED muss sicherstellen, dass das Gerät in einer solchen Umgebung
verwendet wird.
Emissionstest Compliance Elektromagnetische Umgebung – Richtlinie
HF-Emissionen CISPR 11:2004 Gruppe 1 Die Coltolux®LED verwendet für die interne Funktion
ausschließlich hochfrequente Energie. Daher sind ihre
HF-Emissionen sehr gering und es ist unwahrscheinlich,
dass benachbarte elektronische Geräte gestört werden.
HF-Emissionen CISPR 11:2004 Klasse B Die Coltolux®LED ist für den Einsatz in allen Einrichtun-
gen, mit Ausnahme häuslicher Umgebungen, geeignet.
In häuslichen Umgebungen und Einrichtungen, die
an das öentliche Niederspannungs-Versorgungsnetz
angeschlossen sind, über das private Haushalte versorgt
werden, darf sie unter Beachtung des folgenden Warn-
hinweises benutzt werden:
WARNUNG: Dieses Gerät darf nur von medizinischem
Fachpersonal verwendet werden. Dieses Gerät kann
Funkstörungen verursachen oder den Betrieb von
Geräten in der Umgebung stören. Es kann notwen-
dig sein, Abhilfemaßnahmen wie dei Neuausrichtung
oder Umsetzung der Coltolux®LED-Einheit oder die
Abschirmung des Standorts zu ergreifen.
Oberschwingungsströme
IEC 61000-3-2
Klasse A
Spannungsschwankungen/
Flimmeremissionen IEC 61000-3-3
Entspricht der
Norm

Benutzerhandbuch 17
1.2 EN/IEC 60601-1-2 – Tabelle 2
Richtlinie und Erklärung des Herstellers zur elektromagnetischen Störfestigkeit
Die Coltolux®LED ist für die Verwendung in der unten angegebenen elektromagnetischen Umgebung vorgese-
hen. Der Kunde bzw. Benutzer der Coltolux®LED muss sicherstellen, dass das Gerät in einer solchen Umgebung
verwendet wird.
Prüfung der
Störfestigkeit
IEC 60601 Teststufe Compliance-Niveau Vorgesehene elektromagnetische
Umgebung
Elektrostatische
Entladung (ESD)
IEC 61000-4-2
+/- 6 kV Kontakt
+/- 8 kV Luft
+/- 6 kV Kontakt
+/- 8 kV Luft
Fußböden sollten aus Holz oder
Beton bestehen oder mit Kera-
mikfliesen versehen sein. Wenn
der Fußboden mit synthetischem
Material versehen ist, muss die
relative Luftfeuchte mindestens
30 % betragen.
Transiente/schnelle
transiente Störgrößen
IEC 61000-4-4
+/- 2 kV für Strom-
versorgungsleitungen
+/- 1 kV für Eingangs-/
Ausgangsleitungen
+/- 2 kV für Strom-
versorgungsleitungen
+/- 1 kV für Eingangs-/
Ausgangsleitungen
Die Qualität der Stromversorgung
muss der einer normalen Gewer-
be- bzw. Krankenhausumgebung
entsprechen.
Stoßspannungen
(Surge)
IEC 61000-4-5
+/- 1 kV Gegentakt
(Leitung/Leitung)
+/- 2 kV Gleichtakt
(Leitung/Erde)
+/- 1 kV Gegentakt
(Leitung/Leitung)
+/- 2 kV Gleichtakt
(Leitung/Erde)
Die Qualität der Stromversorgung
muss der einer normalen Gewer-
be- bzw. Krankenhausumgebung
entsprechen.
Spannungseinbrü-
che, Kurzzeitunter-
brechungen und
Spannungsschwan-
kungen der Strom-
versorgungsleitungen
IEC 61000-4-11
<5 % Ut (>95 % Einbruch
in Ut) für 0,5 Zyklen.
40 % Ut (60 % Einbruch
in Ut) für 5 Zyklen.
70 % Ut (30 % Einbruch
in Ut) für 25 Zyklen
<5 % Ut (>95 % Einbruch
in Ut) für 5 Sekunden
<5 % Ut (>95 % Einbruch
in Ut) für 0,5 Zyklen.
40 % Ut (60 % Einbruch
in Ut) für 5 Zyklen.
70 % Ut (30 % Einbruch
in Ut) für 25 Zyklen
<5 % Ut (>95 % Einbruch
in Ut) für 5 Sekunden
Die Qualität der Stromversorgung
muss der einer normalen Gewer-
be- bzw. Krankenhausumgebung
entsprechen. Wenn der Benutzer
der Coltolux®LED-Einheit selbst
bei Unterbrechungen der Netz-
stromversorgung den ununter-
brochenen Betrieb sicherstellen
möchte, empfiehlt es sich, die
Coltolux®LED-Einheit an eine
unterbrechungsfreie Stromversor-
gung mit ausreichender Kapazität
anzuschließen, um die Einheit für
die maximal benötigte Zeit der
Unterbrechung zu betreiben.
Magnetfelder mit
energietechni-
schen Frequen-
zen (50/60 Hz)
IEC 61000-4-8
3 A/m 3 A/m Magnetfelder mit energietechni-
schen Frequenzen sollten sich auf
einem für normale Gewerbe- bzw.
Krankenhausumgebungen typi-
schen Niveau befinden.
Ut bezeichnet die Wechselspannung des Netzes vor Anwendung der Teststufe.

18 Benutzerhandbuch
1.3 EN/IEC 60601-1-2:2007 Unterabschnitt 5.2.2.2 – Tabelle 4
Richtlinie und Erklärung des Herstellers zur elektromagnetischen Störfestigkeit
Die Coltolux®LED ist für die Verwendung in der unten angegebenen elektromagnetischen Umgebung vorgesehen. Der Kunde bzw.
Benutzer der Coltolux®LED muss sicherstellen, dass das Gerät in einer solchen Umgebung verwendet wird.
Prüfung der Störfestigkeit IEC 60601 Teststufe Compliance-Niveau Vorgesehene elektromagnetische
Umgebung
Geleitete HF IEC 61000-4-6
Gestrahlte HF
IEC 61000-4-3
3 Vrms 150 kHz bis 80 MHz
3 V/m\
80 MHz bis 2,5 GHz
3 Vrms 150 kHz bis 80 MHz
3 V/m\
80 MHz bis 2,5 GHz
Tragbare und mobile HF-Geräte zur
Kommunikation sollten nicht näher an
die Coltolux®LED-Einheit (einschließlich
der Kabel) geführt werden, als nach-
folgend empfohlen. Der empfohlene
Mindestabstand kann anhand einer
Gleichung berechnet werden, die auf der
Senderfrequenz basiert.
Empfohlener Mindestabstand
d = 1,2√P
d = 1,2√P 80 MHz bis 8.000 MHz
d = 1,2√P 800 MHz bis 2,5 GHz
Dabei bezeichnet P die maximale Nenn-
ausgangsleistung des Senders in Watt
(W) gemäß den Angaben des Sender-
herstellers und d ist der empfohlene Min-
dest-Schutzabstand in Metern (m).
Die Feldstärken stationärer HF-Sender
sollten – wie in einem elektromagneti-
schen Gutachten zum Standort definiert
– niedriger als das Compliance-Niveau
der einzelnen Frequenzbereiche sein.
In der Nähe von Geräten, die mit dem
folgenden Symbol gekennzeichnet sind,
können Interferenzen auftreten:
HINWEIS 1: Bei 80 MHz und 8.000 MHz ist der jeweils höhere Frequenzbereich zu verwenden.
HINWEIS 2: Diese Richtlinien können nicht auf alle Situationen angewendet werden. Die elektromagnetische Ausbreitung wird durch
die Absorption und Reflexion der umgebenden Strukturen, Objekte und Personen beeinflusst.
Die Feldstärke stationärer Sender wie Basisstationen für Funktelefone (Mobiltelefone/schnurlose Telefone) sowie Landmobilfunk, Ama-
teurfunk, MW- und UKW-Radiosendern und Fernsehsendern kann nicht mit Sicherheit theoretisch vorhergesagt werden. Zur Beurtei-
lung der elektromagnetischen Umgebung stationärer HF-Sender sollte unter Umständen ein elektromagnetisches Standortgutachten
durchgeführt werden. Überschreitet die gemessene Feldstärke am Standort, an dem die Coltolux®LED-Einheit verwendet wird, das
entsprechende HF-Compliance-Niveau, muss das Coltolux®LED-Gerät auf normale Betriebstätigkeit hin kontrolliert werden. Zeigt
das Gerät ungewöhnliche Leistungen, sind eventuell zusätzliche Maßnahmen wie eine Neuausrichtung bzw. Umstellung der Coltolux®
LED-Einheit notwendig.
Im Frequenzbereich zwischen 150 kHz und 80 MHz sollten die Feldstärken weniger als 3 V/m betragen.

Benutzerhandbuch 19
1.4 EN/IEC 60601-1-2:2007 Unterabschnitt 5.2.2.2 – Tabelle 6
Empfohlener Mindestabstand zwischen tragbaren/mobilen HF-Kommunikationsgeräten und der Coltolux®LED-Einheit.
Die Coltolux®LED-Einheit ist für die Verwendung in einer elektromagnetischen Umgebung vorgesehen, in der HF-Stör-
strahlen kontrolliert werden. Der Kunde bzw. Benutzer der Coltolux®LED-Einheit kann dazu beitragen, elektromagnetische
Störungen zu vermeiden, indem er den Mindestabstand zwischen tragbaren und mobilen HF-Kommunikationsgeräten
(Sendern) und der Coltolux®LED-Einheit so wählt, wie nachfolgend aufgeführt. Dabei ist die maximale Ausgangsleistung der
Kommunikationsgeräte zu beachten.
Maximale Ausgangsnennleis-
tung des Senders (W)
Empfohlener Mindestabstand nach Frequenz des Senders in Metern (m)
150 kHz bis 80 MHz
d =
1,2√
P
80 MHz bis 8.000 MHz
d =
1,2√
P
800 MHz bis 2,5 GHz
d =
1,2√
P
0,01 0,12 0,12 0,23
0,1 0,38 0,38 0,73
1,0 1,2 1,2 2,3
10 3,8 3,8 7,3
10 12 12 23
Bei Sendern, deren maximale Nennausgangsleistung nicht in der obigen Tabelle aufgeführt ist, kann der empfohlene Min-
destabstand d in Metern (m) anhand der Gleichung ermittelt werden, die zur Bestimmung der Senderfrequenz angewendet
wird, wobei P die maximale Nennausgangsleistung des Senders in Watt (W) bezeichnet, gemäß den Angaben des Sender-
herstellers.
HINWEIS 1: Bei 80 MHz und 800 MHz ist der Mindestabstand für höhere Frequenzbereiche zu verwenden.
HINWEIS 2: Diese Richtlinien können nicht auf alle Situationen angewendet werden. Die elektromagnetische Ausbreitung
wird durch die Absorption und Reflexion der umgebenden Strukturen, Objekte und Personen beeinflusst.

20 Guide de l’utilisateur
ATTENTION: La loi fédérale limite la vente de ce dispositif par ou
sur commande d’un professionnel de la santé habilité.
Nous vous félicitons...
…d’avoir fait l’acquisition de la lampe à photopolymériser Coltolux®
LED. La lampe à photopolymériser Coltolux®LED associe une
fine sonde de photopolymérisation à puissance de sortie élevée
dans une unité de type stylo, légère et sans fil. La technologie
d’absorption de la chaleur dégagée de la lampe à photopolymé-
riser Coltolux®LED réduit les émissions de chaleur et rend inutile
le recours à un ventilateur. La puissance lumineuse de la LED
correspond au spectre d’absorption des photo-initiateurs de type
camphorquinone (CQ).
Indications d’utilisation
La lampe à photopolymériser Coltolux®LED est indiquée pour la
polymérisation des restaurations intra et extra-buccales fabriquées
à partir de matériaux qui contiennent de la camphorquinone comme
photo-initiateur (couramment désignées comme restaurations den-
taires et/ou composites et/ou résines de scellement polymérisables
par rayonnement visible).
Reportez-vous aux figures1et 2pour identifier les composants.
Fig.1.
a. Pièce à main
b. Chargeur de la pièce à main
c. Bouton d’activation
Fig.2.
d. Étiquette de la tension/du numéro de série
e. Cordon d’alimentation avec alimentation
f. Adaptateurs (export uniquement)
g. Écran protecteur
h. Bloc de test
i. Gaines de protection
j. Lentilles lumineuses
Veuillez tenir particulièrement compte des consignes de sécurité
ci-après.
I. CONSIGNES DE SÉCURITÉ
A. Respectez les précautions suivantes avant et durant toute
utilisation de la lampe à photopolymériser Coltolux®LED.
AVERTIS-
SEMENT
Avant d’eectuer le branchement, lisez l’in-
tégralité des instructions.
Les personnes ayant des antécédents de
réactions photosensibles ne doivent pas être
exposées à la lumière de cette unité.
Risque d’explosion. L’unité ne doit pas être
utilisée en présence d’anesthésiques inflam-
mables.
Ne faites pas fonctionner la Coltolux®LED
sans que la lentille lumineuse soit correc-
tement mise en place dans l’unité (fig.4),
sous peine de porter atteinte à la sécurité du
patient.
AVERTIS-
SEMENT
Ne modifiez jamais le cordon d’alimenta-
tion, sous peine de créer un risque de choc
électrique.
ATTEN-
TION
Ne mettez pas l’unité au réfrigérateur ou au
congélateur pour la refroidir, sous peine de
l’endommager.
Utilisation d’une alimentation autre que
celles répertoriées à la sectionXIV. Les
accessoires peuvent provoquer des émis-
sions électromagnétiques accrues et/ou une
moindre immunité électromagnétique.
B. Toutes les lumières à intensité élevée peuvent provoquer des
lésions rétiniennes en cas d’exposition prolongée des yeux. Il
est fondamental de respecter les précautions suivantes:
AVERTIS-
SEMENT
Ne regardez jamais directement la lumière
émise par la lentille ou reflétée par les dents
ou d’autres surfaces, sous peine d’entraîner
des lésions rétiniennes.
• Patients, opérateurs et techniciens dentaires doivent systé-
matiquement porter une protection oculaire appropriée.
• Utilisez systématiquement des écrans protecteurs (cat.
n°C7990) prévus pour la photopolymérisation ou des lu-
nettes de protection (cat. n°C7988) qui bloquent la lumière
dans la plage spectrale du bleu. Les lunettes de soleil ne
sont pas une protection adéquate.
• Une gaine de protection doit être utilisée pour chaque
patient (cat. n° C7957). Faites glisser la gaine de protection
sur la pièce à main, puis fixez l’écran protecteur.
• Avant chaque utilisation, inspectez la lentille lumineuse
(sectionIX).
c. La lampe Coltolux®LED est un appareil électrique nécessitant
une mise au rebut appropriée conformément à la législation et
aux réglementations locales.
II. DÉBALLAGE
• Avant de déballer l’unité, examinez que l’extérieur du carton
n’est pas abîmé et, si tel est le cas, contactez l’expéditeur/
le transporteur.
• Ouvrez le carton et sortez-en soigneusement l’unité et les
accessoires. Veillez à ce que la tension soit dans la plage
spécifiée sur l’alimentation (fig.3). Si tel n’est pas le cas, ne
faites pas fonctionner l’unité; contactez le représentant ou
Coltène/Whaledent Inc.
III. PRÉPARATION ET ASSEMBLAGE
• La Coltolux®LED est conçue comme une pièce à main
sans fil avec un chargeur distinct. Placez le chargeur sur
une surface lisse et plane dans un lieu qui ne présente ni
humidité ni poussière, soit pratique et dispose d’une prise
électrique facile d’accès pour le cordon d’alimentation four-
ni. Les unités destinées à l’exportation comprennent des
adaptateurs supplémentaires (fig.2F). Installez l’adaptateur
correspondant sur l’alimentation (fig.3).
• Retirez l’insert de protection en faisant d’abord glisser le
bouton de libération dans le sens indiqué par la flèche.
Maintenez le bouton dans cette position tout en retirant
l’insert de l’alimentation.
Other manuals for Coltolux LED
1
Table of contents
Languages:
Other Coltene Dental Equipment manuals

Coltene
Coltene STATCLAVE User manual

Coltene
Coltene DIATECH Z-Rex Diamond User manual

Coltene
Coltene CanalPro CL User manual

Coltene
Coltene CanalPro Jeni User manual

Coltene
Coltene CanalPro CL2 User manual

Coltene
Coltene CanalPro User manual

Coltene
Coltene CanalPro Apex Locator Compact User manual

Coltene
Coltene Coltolux LED User manual

Coltene
Coltene ParaPost XT P-680T User manual

Coltene
Coltene SciCan STATIM B G4+ User manual