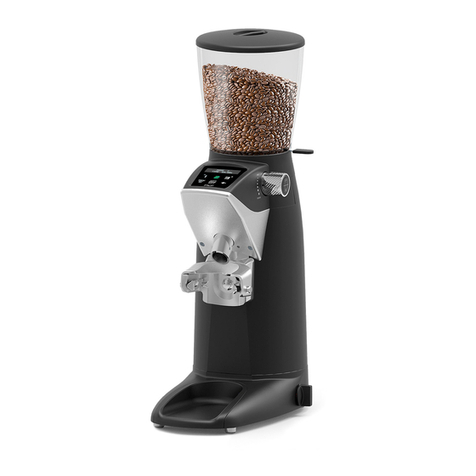
Compak BOLT User manual

USER MANUAL
COFFEE GRINDER
B O LT

2K09650H00 | PROC-CAL/002/03 USER MANUAL | V. 06/04/2022

3
K09650H00 | PROC-CAL/002/03 USER MANUAL | V. 06/04/2022
B O LT
COFFEE GRINDER
. SAFETY 4
. DESCRIPTION 6
. INSTRUCTIONS 6
. IDENTIFICATION 7
. TECHNICAL CHARACTERISTICS 7
. EXTERNAL COMPONENTS 8
. INSTALLATION 9
. ADJUSTMENT 10
. OPERATION 12
. SETTINGS 14
. CLEANING 23
. MAINTENANCE 25
. DECLARATION OF CONFORMITY 29
CONTENTS

4K09650H00 | PROC-CAL/002/03 USER MANUAL | V. 06/04/2022
1. SAFETY
This coee grinder
should only be used
for the function
for which it was designed:
grinding coee beans.
Do not use the
grinder to grind
other types of
foods such as nuts or to
grind finer granulated foods
such as sugar and others.
This device may be
used by children
aged 8 years and
over, by people with
reduced physical, sensory
or mental capacities and
by people without prior
experience/knowledge,
provided they have received
supervision or instructions
on the safe use of the
device and understand the
associated risks.
Children should not
play with the device.
Cleaning and
maintenance of the
device should not be
carried out by children without
supervision.
Do not allowing
liquids to come
into contact with
internal or external surfaces
while the appliance is on or
o, except for those parts
expressly mentioned in the
“CLEANING” section.
If, for any reason, this happens,
disconnect the power supply
immediately and dry all
surfaces carefully.
ADDITIONAL SAFETY MEASURES BUILTIN
TO OUR GRINDERS:
• Special screw to keep the hopper fixed.
• Safety current cut-o by microswitch to access
the grinding unit

5
K09650H00 | PROC-CAL/002/03 USER MANUAL | V. 06/04/2022
1. SAFETY
If it is necessary to
access the interior,
where the electrical
components are located, go to
the nearest technical service
In the event of
any component
breaking, or for
any intervention we
recommend contacting
a technical services
centre, who will carry out
the repair or replacement,
guaranteeing that safety
standards are adhered to.
Only an authorised
supplier may
replace the main
cable of any grinder.
USERS SHOULD PAY
SPECIAL ATTENTION TO,
AND SCRUPULOUSLY
OBEY THE FOLLOWING
SAFETY INSTRUCTIONS
Any other use will be
considered improper
and dangerous.
NOTE: The manufacturer will not be liable for damage caused either by the
improper use of the device or by not following the stated safety measures.

6K09650H00 | PROC-CAL/002/03 USER MANUAL | V. 06/04/2022
2. DESCRIPTION
.. This manual is designed to
provide the necessary informa-
tion to correctly install, use and
maintain the grinder, as well as
to highlight precautions for users to keep in
mind.
To ensure the best operation of the coee
grinder, please follow the instructions as out-
lined in this manual.
This manual should be saved for the life of
the grinder, and should always be at the dis-
posal of the operator.
.. This manual uses some special terms,
such as:
• Text in bold to highlight the importance
of some terms.
• Numbers in parentheses after a word,
which match the numbering of the
items in the image to the side or in the
image of the external components.
3. INSTRUCTIONS
Information Warning
Example: ( ) - Hopper Lid.
Icons:
Your new grinder has been designed using
the most sophisticated technologies in exist-
ence. The result is a product of high qual-
ity that oers the assurance of the best
results possible. Our products are manu-
factured by hand, one by one, following the
strictest quality requirements. In the manu-
facturing process, we use only the highest
quality materials (aluminum, stainless steel,
etc.) especially designated for being in con-
tact with food stu.
For the optimum functionality of the grinder
models described in this user manual, the
maximum work cycles are as follows:
Model
Work cycle
ON OFF
BOLT 64 5 s 30 s
BOLT 83
SOUND LEVEL
The level of sound emitted is:
Sound level With coffee
BOLT 64
81 dB
BOLT 83

7
K09650H00 | PROC-CAL/002/03 USER MANUAL | V. 06/04/2022
The technical characteristics
plate is indelibly marked with
the following information:
4. IDENTIFICATION
.. SCOPE
The coee grinders are intended for
businesses and communities where ground
coee must be used, or in small shops
selling coee, but not for continuous mass
production of food.
This grinder should only be
used to grind coee beans.
Any other use is considered
improper and dangerous.
NOTE: The manufacturer reserves
the right to change the machine
components, according to the
requirements of each market, and
also for technological advances.
NOTE: The manufacturer is not
liable for damage to persons, goods
or the machine itself, if the safety
regulations given in this manual are
not followed, or the machine is used
incorrectly.
5. TECH. CHARACTERISTICS
.. TECHNICAL DATA
220 V
60 Hz
230 V
50 Hz
240 V
50 Hz
Electrical
Power 675 675 675 W
Rotational
velocity 1500 1290 1310 rpm
* Production based on a medium roast coee and Espresso grinding point.
Ø
Flat Burrs Production
50 Hz* Production
60 Hz* Time for one dose
(7g) 50Hz
BOLT 64 64 2.5 613 715 2,1
BOLT 83 83 3.3 15 33 17.5 38.5 1,6
mm in Kg/h lb/h Kg/h lb/h s
Time for one dose
(7 gr) 60Hz Hopper capacity Net weight Height
Width
Depth
BOLT 64 1,9
1,250 3.08
13.8 30.4 660
231
384
25.98
9.09
15.12
BOLT 83 1,45 14.2 31.3
sKg lb Kg lb mm in

8K09650H00 | PROC-CAL/002/03 USER MANUAL | V. 06/04/2022
1
2
10
15
5
14
8
12
11
6
7
6. EXTERNAL COMPONENTS
Position
indicator
TFT screen
Tamper
Exit chute
Dose button
Coee
collection tray
Break option
stepped grind
Hopper
lid
Coee bean
hopper
Grind
regulator
Lock
Load
System
Fork
adjustment
screw
4Hopper
shutter
3Hopper security screw
16
9
Portafilter holder
17
Nozzle
adjustment
wheel
18 Cleaning
cover
Switch
ON-OFF
13

9
K09650H00 | PROC-CAL/002/03 USER MANUAL | V. 06/04/2022
7. INSTALLATION
.. LEGAL NOTICES
The installer must read this instruction
manual carefully before installing the
machine.
The installation of the
device must be carried out
by qualified and authorised
personnel, obeying all the current safety
and hygiene regulations.
.. IMPORTANT WARNINGS
The operator must be a responsible
adult. Never a child nor someone without the
ability to accept that responsibility.
When handling the grinder, the following
precautions should be obeyed:
•When removing the grinder from
the packaging, always pull it by the
handles of the bag.
•Feet must not be bare.
•Hands and feet must be dry.
•Do not get the machine wet.
•Do not expose the machine to direct
sunlight or other atmospheric agents.
•Never insert any object into the coee
inlet or outlet while the appliance is
running. (Please remember that when
the grinder stops, the burrs will keep
turning for a short while).
•When unplugging the grinder, always
pull on the plug and never the power
cable to avoid a possible short circuit.
•Care is needed when handling cutting
burrs during cleaning.
.. WHERE TO USE IT
The appliance must be installed on a
solid and flat surface.
The minimum size for the
working space, to ensure you
get the best performance from
the machine, must be the following:
Height 680
26.77
mm
in
Width 251
9.88
mm
in
Depth 404
15.90
mm
in
•Install the grinders on tables that are
completely level and in areas free from
external vibrations
•Install the grinders in areas where
there are installations with a ground
connection.
•Avoid places where abrupt changes in
temperature, humidity or airflow may
occur.
.. INSTALLING THE COFFEE GRINDER
Before connecting the coee grinder, check
the following:
•The characteristics on the data plate
must match those of the electrical
mains network.
•The electrical connection plug
matches the socket into which it is to
be plugged.
•Ensure that the electrical power of
the facility is adequate for the power
consumed by the appliance.
•The point of connection to the electrical
mains network must be protected with
the appropriate electrical protection
device.
•The equipment must be correctly
connected to a ground connection
according to the current safety
regulations.
NOTE: This coee grinder should
not be installed in places (SUCH
AS INDUSTRIAL KITCHENS)
where are expected to be cleaned
using water jets.
10 K09650H00 | PROC-CAL/002/03 USER MANUAL | V. 06/04/2022
8. ADJUSTMENT
Remove the hopper lid ( ), fill the hopper
with coee ( ), and replace the lid on the
hopper ( ) (Fig. 3).
Fig. 3
Plug in the grinder, and press the main power
switch ( ) to ON position, and open the
bean trap ( ) to allow coee to pass into the
grind chamber (Fig. 4).
Fig. 4
.. GRINDER SET UP
Place the hopper ( ) on the grind regulator
() and make sure the bean trap ( ) is in
the closed position (Fig. 1).
Fig. 1
Lock the hopper ( ) in place using a phillips
head screw driver to gently tighten the
hopper security screw making it match to the
hole at the bean hopper collar ( ) (Fig. 2).
Fig. 2

11
K09650H00 | PROC-CAL/002/03 USER MANUAL | V. 06/04/2022
8. ADJUSTMENT
.. GRIND ADJUSTMENT SYSTEM
Rotate the grind regulator ( ) until reaching
the grind level desired.
Rotating the grind regulator clockwise will
result in a courser grind; turning the regulator
counterclockwise will result in a finer grinder
(Fig. 7).
Fig. 7
Once you reach the desired grinding point
(), you can fix the grinding regulation using
the regulation break ( ) (Fig. 8).
Fig. 8
.. ADJUSTING THE PORTAFILTER
SUPPORT
In order to ensure the proper distribution of
ground coee in the portafilter, it is possible
to adjust the height of the lower portafilter
support ( ) and move the nozzle back and
forth using the wheel to adjust it ( ).
To do this adjustment operation the height:
1. Loosen the screw ( ) by using the
Allen Key #4 included with your grinder.
2. Adjust the support ( ) to the desired
height using the portafilter as the point of
reference.
3. Tighten the screw ( ) with the Allen
Key #4 provided (Fig. 5).
Fig. 5
4.
To move the nozzle forth turn the wheel
() clockwise,
and back counterclockwise
(Fig. 6).
Fig. 6

12 K09650H00 | PROC-CAL/002/03 USER MANUAL | V. 06/04/2022
8. ADJUSTMENT
.. MAIN SWITCH
The main switch ( ) has the following
positions: OFF/ON (Fig. 4)
BOLT
The equipment’s electronic func-
tions are activated ON
Equipment o OFF
Fig. 4
.. UTILIZATION
Through the program menu (section 10.4.3),
it is possible to select three distinct functional
modes: PUSH, DETECTION and TOUCH.
.. PUSH MODE
In the PUSH mode, a pre-programmed single,
double or triple* dose can be set by simple
pressing the corresponding icon on the TFT
screen ( ).
The preselection of a single, double or triple*
dose will remain active until it is changed by
pressing one of the three numbered icons. This

preselection is reflected on the TFT screen
() with the icon of the active selection in the
secondary color, and the rest of the icons in the
principle color.
Dispensing the preselected dose by pressing
the lower pulse button ( ) one time. When the
grinding cycle begins, a timer countdown will
begin on the TFT screen ( ), which will count
down the timed dose cycle to zero.
9. OPERATION
NOTE: If the coee
throughput is very low, this
is because the coee is
being ground very fine. If
the throughput is very high,
this is because the coee is
being ground very coarse. A
perfect Espresso is produced
when the grinding gives an
infusion of 25 ml of coee in
25 seconds using about 7 g of
ground coee.
NOTE: It is recommended
that this operation be
performed, when changing
to a finer grinding, with the
motor running, to prevent
coee from building up
between the burrs and
blocking the grinder.
.. PREPARATION OF THE
PORTAFILTER DETECTOR OPTIONAL
1. Place the detector on the double portafilter
(Fig. 1).
2. Check that the detector ring tab is properly
closed (Fig. 2).
3. Make sure that the arrow is in the correct
position on the lower side (Fig. 3).
Fig. 1 Fig. 2 Fig. 3
*Triple dose only can be activated on FRESH MODE

13
K09650H00 | PROC-CAL/002/03 USER MANUAL | V. 06/04/2022
9. OPERATION
On FRESH MODE once the grind cycle is
initiated, it can be paused by pressing the lower
activation button ( ). The cycle will pause, and
will complete the timed grind cycle as long as the
lower activation button is pressed again within 10
seconds. After 10 seconds of inactivity, the grind
cycle will reset to the complete cycle time.
Grind pause can be activated or deactivated
by pressing the lower pulse button ( ). First,
set up by following these steps: MENU /
SETTINGS / GRIND PAUSE.
.. TOUCH MODE
In this mode of operation when making the
selection of single, double or triple* doses of
coee by pressing the appropriate numeric
TFT icon screen ( ) starts grinding the
selected dosis without the need to actuate
the lower dose button ( ).
The time set for that dose will decrease to
zero, at which point the dose ends.
On FRESH MODE once the cycle starts
grinding using the lower dose button ( )
and is pressed again, the grinding cycle will
stop. If within 10 seconds it is pressed again,
it will complete the remaining time of the
original dose time setting. After 10 seconds
of inactivity the grinder will return to standby
mode.
To pause by pressing the lower activation
button ( ), you can enable or disable,
accessing MENU / SETTINGS / GRIND
PAUSE .
On FRESH MODE , pause grinding may also
be performed by pressing the active icon on
the TFT display ( ). This pause cannot be
enabled or disabled via the MENU.
.. DETECTION MODE
In this operating mode, the grinder detects
the presence of the portafilter through
the movement of a fitted Tag. When the
portafilter with the mounted Tag comes
in range, the system identifies it and
automatically grinds DOSE 2 by pressing
the lower portafilter button ( ) once.
Once Dose 2 is detected, you have 5 seconds
to press the lower button ( ). If you want to
cancel the selection, you can press 1 or 3* (if
the Dose 3* is activated) on the TFT screen
(). If after 5 seconds, the lower button is
not pressed ( ), the grinder will return to the
standby mode.
.. TAMPER
9.6.1. Fixed Tamper (Optional)
Position the portafilter below the tamper and
push up to tamp the ground coee (Fig. 5).
Fig. 5
*Triple dose only can be activated on FRESH MODE

14 K09650H00 | PROC-CAL/002/03 USER MANUAL | V. 06/04/2022
PUSH
PREDOSE
10:20:59
LAST CUP
12
10. SETTINGS
.. DISPLAY ICON GUIDE
.. GRIND TIME CONFIGURATIONS
10.2.1. The grinding times can be
configured for automatic, preselection and
instantaneous operation modes, and when
modified in one of the three modes they are
updated for all modes simultaneously.
To modify 1 dose, push the Coee Bean icon
of the Home menu and the dose time
menu will be accessed.
PUSH
PREDOSE
10:20:59
LAST CUP
12
10.2.2. Within the dose time menu you can
choose to change the time of 1, 2 or 3 doses
(if it is active), by pressing the symbol that
is in each of them, thus going to the dose
time configuration menu. To access dose
3 you must scroll down so that the option
appears.
DOSE
DOSE 1
08.00 SEC
DOSE 2
16.00 SEC
DOSE 3
21.00 SEC
ACTIVE DOSE 3
* In the case of 3 dose activation
Time from last
coee served
Menu
Configuration
Dose 1 Dose 2
active
Grind button
Dose 3*
Active
mode
Grind Time
Configuration
PUSH
SEC
08.00
123
Active
mode
Grind Time
Configuration
Time of
active dose
Menu
Configuration
Dose 1
Dose 2
active
DISPLAY PREDOSE MODE DISPLAY FRESH MODE

15
K09650H00 | PROC-CAL/002/03 USER MANUAL | V. 06/04/2022
10. SETTINGS
10.2.3. Inside the dose time configuration
menu, this can be changed by sliding the
seconds and tenths of a second up or down
untilthedesiredtimeisobtainedandpressOK.
DOSE 1
02
03
01
02
00
01
SECONDS
00
GRINDING TIME
CANCEL
OK
10.2.4. When accepting, it will return to
the previous menu to be able to continue
changing more dose times or if the button
is pressed it will return to the Home
screen.
DOSE
DOSE 1
08.00 SEC
DOSE 2
16.00 SEC
DOSE 3
21.00 SEC
ACTIVE DOSE 3
.. ACCESS TO THE
CONFIGURATION MENU
10.3.1. Press
10.3.2. There are 5 options, use the horizontal
scroll to navigate between: Mode, Cleaning,
Statistics, Recipes and Settings.
PUSH
PREDOSE
10:20:59
LAST CUP
12
MENU
MODE CLEANING STATISTICS
MENU
SETTINGSSTATISTICSRECIPES
MENU
MODE CLEANING STATISTICS
MENU
SETTINGSSTATISTICSRECIPES

16 K09650H00 | PROC-CAL/002/03 USER MANUAL | V. 06/04/2022
10. SETTINGS
.. MODE MENU
10.4.1. Press in the configuration Menu
MENU
MODE CLEANING STATISTICS
10.4.2 There are two dierent options to
operate the grinder, Predose where the
doses are pre-grind before you ask for them
or Fresh where are grinded by demand.
MODE
PREDOSE
FRESH
By pressing the simbol in one of them you
will acess to the next menu where you will be
able to chose between the dierent working
modes.
10.4.3 Choose between the dierent working
modes: Push, Detection or Touch.
TOUCH MODE
PUSH MODE
DETECTION MODE
PREDOSE
.. CLEANING MENU
10.5.1. Press in the configuration menu
to activate the Cleaning Mode.
MENU
MODE CLEANING STATISTICS
In that mode the grinder opens the gates and
is possible to clean using a circular brush
opening the Cleaning cover () from the
top.

17
K09650H00 | PROC-CAL/002/03 USER MANUAL | V. 06/04/2022
10. SETTINGS
The screen will display the message “Doors
open, please clean with brush from the top”
and will remain in that state until you press
the OK to go back to working mode.
OK
DOORS OPEN, PLEASE
CLEAN WITH BRUSH
FROM THE TOP
CLEANING MODE
.. STATISTICS
10.6.1. Press
MENU
MODE CLEANING STATISTICS
10.6.2. The number of independent doses
for each selection is shown, either absolute
from the date of installation of the grinder, or
relative from a counter reset date. Burrs wear
can also be checked.
21 3
COFFEE STATISTICS
Relatives
Absoluts
5
4 3
RESET
Total:
12
10.6.3. Relative Statistics can be reset by
pressing the Reset Relative button and then
entering the Password.
Relatives
Absoluts
5
4 3
RESET
Total:
12
2
1
3
COFFEE STATISTICS

18 K09650H00 | PROC-CAL/002/03 USER MANUAL | V. 06/04/2022
10. SETTINGS
10.6.4. To access the Burrs wear graph, press
2
1
3
COFFEE STATISTICS
Relatives
Absoluts
5
4 3
RESET
Total:
12
10.6.4. There is a graphical view of the Burrs
wear in % as well as the Total ground Kg
and the Kg configured for the Burrs change
notice.
50
%
BURRS WEAR
Kg ALARM: 500 K
GROUND Kg: 250 K
.. RECIPES
10.7.1. Press
MENU
SETTINGSSTATISTICSRECIPES
1 0. 7. 2 There are two options, the first one
will access the menu to configure the dose
times, the second, activate or deactivate the
Grinding Pause (by default it is active).
RECIPES
DOSE
GRINDPAUSE
If you access the menu to configure dose
times, we can follow the steps in point 10.2.2
to configure the dose time. In the Fresh
mode you’ll be able to activate or deactivate
the grinding pause, press the button ,
if the grinding pause is active, or if it is
deactivated.

19
K09650H00 | PROC-CAL/002/03 USER MANUAL | V. 06/04/2022
.. SETTINGS MENU
10.8.1. Press in the configuration menu
MENU
SETTINGSSTATISTICSRECIPES
There are 4 Settings options. Use the horizontal
scroll to navigate between: Password,
Language, Date / Hour, and Sounds.
DATE/HOURLANGUAGEPASSWORD
GRINDER SETTINGS
GRINDER SETTINGS
.. PASSWORD
10.9.1. Press
DATE/HOURLANGUAGEPASSWORD
GRINDER SETTINGS
GRINDER SETTINGS
If the Password is active, enter the Default
one: 0000
PASSWORD
01234
5 7 8 96
10.9.2. Activate or deactivate the Password
by pressing . To modify the Password
press
PASSWORD
PASSWORD
NEWPASSWORD
10. SETTINGS
GRINDER SETTINGS
DOSE ALARMSOUNDSDATE/HOUR

20 K09650H00 | PROC-CAL/002/03 USER MANUAL | V. 06/04/2022
10.9.3. Enter a new 4 numbers Password.
Show or hide the numbers by pressing
or delete the numbers pressing
NEW PASSWORD
01234
5 7 8 96
.. LANGUAGE
10.10.1. Press
DATE/HOURLANGUAGEPASSWORD
GRINDER SETTINGS
GRINDER SETTINGS
10. SETTINGS
10.10.2. Choose between the dierent
languages available using the vertical scroll.
LANGUAGE
PORTUGUÊS
ITALIANO
DEUTSCH
ENGLISH
.. DATE/HOUR
10.11.1. Press
DATE/HOURLANGUAGEPASSWORD
GRINDER SETTINGS
GRINDER SETTINGS
Table of contents
Other Compak Coffee Grinder manuals

Compak
Compak K3 TOUCH User manual

Compak
Compak PKF User manual

Compak
Compak A-8 Automatic User manual

Compak
Compak PK 100 User manual

Compak
Compak E5 OD User manual

Compak
Compak PKF User manual

Compak
Compak FRESH ON DEMAND User manual

Compak
Compak K3 TOUCH User manual

Compak
Compak PK 100 SHOP User manual

Compak
Compak E6 OD User manual

Compak
Compak K3 TOUCH User manual

Compak
Compak K-5 User manual

Compak
Compak A-8 Automatic User manual

Compak
Compak PKE E6 User manual

Compak
Compak F10 Conic OD User manual

Compak
Compak K3 TOUCH User manual

Compak
Compak E6 OD User manual

Compak
Compak F10 Conic OD User manual

Compak
Compak K6 SILENZIO User manual

Compak
Compak PKE User manual