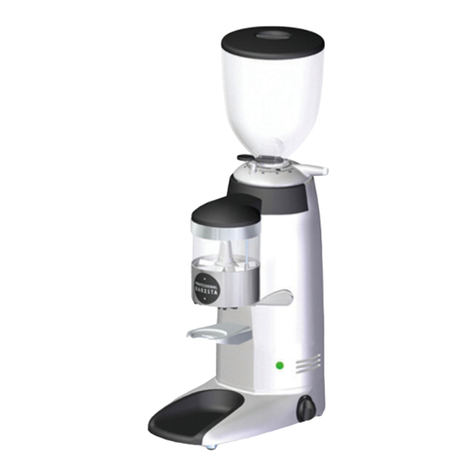
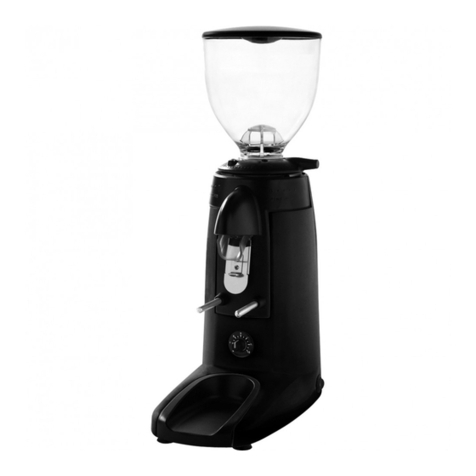
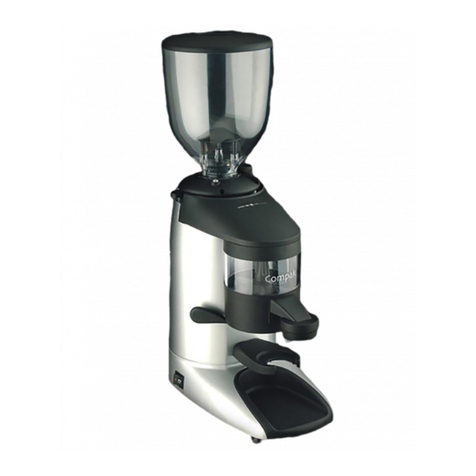
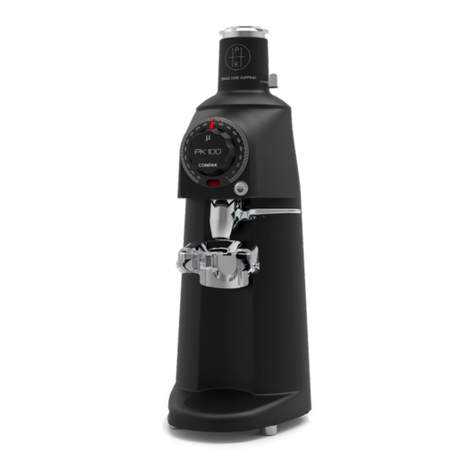
Compak PKF User manual

INSTRUCTIONS
MANUAL
COFFEE GRINDER
PKF
FRESH ON DEMAND

ORIGINAL INSTRUCTIONS | Ref. quality process 002/03 | v. 30/04/2019 | K07175
2

ORIGINAL INSTRUCTIONS | Ref. quality process 002/03 | v. 30/04/2019 | K07175
3
INDEX
COFFEE GRINDER
PKF
SAFETY MEASURES 4
DESCRIPTION 6
INSTRUCTIONS 7
IDENTIFICATION 8
TECHNICAL CHARACTERISTICS 9
EXTERNAL COMPONENTS 11
INSTALLATION 12
REGULATION 14
OPERATION 20
CONFIGURATION 24
CLEANING 28
MAINTENANCE 30
EC CONFORMITY 36

ORIGINAL INSTRUCTIONS | Ref. quality process 002/03 | v. 30/04/2019 | K07175
4
1. SAFETY MEASURES
The grinder should be used
exclusively for the function for
which it was designed: grinding
whole bean coffee.
Do not use this grinder to grind
other types of food products
such as dry fruit, sugar or
spices.
Keep the machine and the cord
out of the reach of children
under 8 years. Children
shouldn’t play with the machine. This
machine can be used by children from
8 years and by persons with reduced
physical, sensory or mental capabilities,
people with lack of experience or
knowledge of the operation of the device,
provided they are supervised or instructed
about the safe use of the machine and
understand the risks involved in its use.
Children should not play with
the device.
The cleaning and maintenance
of the machine shouldn’t be
carried out by children under 8
years old, they should always be
supervised by an adult.
Do not put liquids in contact
with internal or external parts
of this grinder while ON or
OFF, with the exception of parts expressly
outlined in the “CLEANING” section of
this manual. If liquids do come in contact
with the grinder, immediately disconnect
electrical connection and carefully clean
the affected areas.
If it is necessary to access the
interior parts of the grinder,
contact your local service
professional.
SAFETY MEASURES
INCORPORATED INTO OUR
GRINDERS:
• Special screw to maintain the
hopper xed in place.
• Access restrictor in the grind
group.

ORIGINAL INSTRUCTIONS | Ref. quality process 002/03 | v. 30/04/2019 | K07175
5
In case of any damage to
parts or components, we
recommend contacting your
local service professional to help with
repair or replacement of such parts,
thereby guaranteeing the maintenance of
the security standards of the grinder.
This machine has a ground
wire which may (depending by
country) require that a ground
terminal be xed properly to the back of
the body by an authorized technician. The
location of the installation is marked with
the connection symbol (5021 de la IEC
60417-1) on the body of the machine.
NOTE: The manufacturer will not be held responsible for any damages resulting from
improper use of the equipment, or for not following the safety measures as outlined below.
1. SAFETY MEASURES
PLEASE PAY CAREFUL
ATTENTION WITH THE
FOLLOWING INSTRUCTIONS
Any other use of the
machine will be considered
improper and dangerous.
If the supply cord is damaged,
it must be replaced by the
manufacturer, its service agent
or similarly qualied persons in order
to avoid a hazard. Only an authorized
distributor should replace the main power
cable of the grinder.

ORIGINAL INSTRUCTIONS | Ref. quality process 002/03 | v. 30/04/2019 | K07175
6
Your new grinder has been
designed using the most
sophisticated technologies in
existence.
The result is a product of high quality
that offers the assurance of the best
results possible.
Our products are manufactured by hand,
one by one, following the strictest quality
requirements.
In the manufacturing process, we
use only the highest quality materials
(aluminum, stainless steel, etc.)
especially designated for being in contact
with food stuff.
For the optimum functionality of the
grinder models described in this user
manual, the maximum work cycles are
as follows:
SOUND DECIBEL LEVEL
The level of sound emitted is:
Sound decibel level With coffee
PKF 67,8 dB
2. DESCRIPTION
Model
Working cycle
Function Stop
PKE 8 sec. 20 sec.

ORIGINAL INSTRUCTIONS | Ref. quality process 002/03 | v. 30/04/2019 | K07175
7
3. INSTRUCTIONS
3.1. This manual is designed to provide the
necessary information to correctly install,
use and maintain the grinder, as
well as to highlight precautions
for users to keep in mind.
To ensure the best operation of the coffee
grinder, please follow the instructions as
outlined in this manual.
This manual should be saved for the life
of the grinder, and should always be at the
disposal of the operator.
3.2. This manual contains special
terminology such as:
• Words in BOLD indicate important
points or terminology.
• Numbers in parenthese after a word,
indicate the location of this item in a
parts diagram.
Information Warning Equipotential
Example: ( ) - Hopper lid
Icons:

ORIGINAL INSTRUCTIONS | Ref. quality process 002/03 | v. 30/04/2019 | K07175
8
In the grinder information plaque
is the following manufacturing/
product information.
NOTE: The manufacturer reserves the right to change components/congurations of any
model, according to the different geographic market demands.
4. IDENTIFICATION

ORIGINAL INSTRUCTIONS | Ref. quality process 002/03 | v. 30/04/2019 | K07175
9
5.1. USAGE
The coffee grinders are intended for use on
commercial premises and facilities where
ground coffee is required, or in small stores
that sell coffee.
The grinder must only be used
to grind coffee beans.
Any use other than this will be considered
improper and dangerous.
NOTE: The manufacturer will not be held responsible for any damages resulting from
improper use of the equipment, or for not following the safety measures as outlined
below.
5. TECHNICAL CHARACTERISTICS

ORIGINAL INSTRUCTIONS | Ref. quality process 002/03 | v. 30/04/2019 | K07175
10
5. TECHNICAL CHARACTERISTICS
100 V
50 Hz 100 V
60 Hz 110 V
60 Hz 220 V
60 Hz 230 V
50 Hz 240 V
50 Hz 380 V
50 Hz
Electrical
Power 750 770 800 780 950 820 (W)
Spin
Speed 332,5 400 412,5 410 342,5 345 rpm
5.2. TECHNICAL DATA
Ø
Burrs Production
50 Hz* Production
60 Hz* Dose Time
(7gr) 50Hz
83 3.3 10 22 13 28 3
mm in Kg/h lb/h Kg/h lb/h sec
Dose
Time
(7 gr)
60Hz
Hopper capacity Mini Hopper capacity
(optional) Net weight
Height
Width
Depth
2.7 1,7 3.8 5,5 1.2 20,5 45.3
710
215
400
sec Kg lb Kg lb Kg lb mm
* Production based on a medium roast coffee and an Espresso grinding point.

ORIGINAL INSTRUCTIONS | Ref. quality process 002/03 | v. 30/04/2019 | K07175
11
6. EXTERNAL COMPONENTS
1Hopper lid
2Coffee bean
hopper
3Hand
protector
4Hopper
shutter
7Grind
regulator
10
Fork
adjustment
screw
9
Lower
portalter
holder
13 Switch 3
positions
14
Display
8
Rell
button
12
Exit chute
11
Dose
button
6
Coffee
collection
tray
5
Security
screw
16
Upper
portalter
holder
17
Rell
button

ORIGINAL INSTRUCTIONS | Ref. quality process 002/03 | v. 30/04/2019 | K07175
12
7. INSTALLATION
7.1. GENERAL WARNINGS
The person installing the grinder
should carefully read this instruction
manual before installation.
The installation of this machine should
be completed by qualied and authorized
personnel, and all norms of
safety and sanitation should be
followed.
7.2. IMPORTANT WARNINGS
The operator of the grinder should
be a responsible adult, and a never a minor
or person incapable of safely using such
equipment.
When using the grinder, the following
precautions should be followed:
• No bare feet.
• No wet hands or feet.
• Do not submerge in water.
• Do not expose the grinder to sun or
other atmospheric conditions.
• Do not place any type of object in
the coffee entrance or exit while
the grinder is running. (It should
be kept in mind that the cutting
burrs continue turning for a couple
revolutions after the grinder is
powered off).
• To disconnect the grinder, use the
main power switch and never the
power cable, to avoid a possible
short circuit.

ORIGINAL INSTRUCTIONS | Ref. quality process 002/03 | v. 30/04/2019 | K07175
13
7.3. WHERE TO USE
The grinder should be installed on a
flat, stable surface.
The minimum dimensions of
the work space should be as
follows:
7. INSTALLATION
NOTE: The grinder should be used in environments (SUCH AS INDUSTRIAL KITCHENS)
where cleaning is done with direct water spray cleaning.
Height 730
28.74
mm
in
Width 235
9.05
mm
in
Depth 420
16.75
mm
in
• 7.4. GRINDER INSTALLATION
Before grinder installation, the following
should be considered:
• The grinder information plaque data
coincides with the electrical system
on site.
• The electrical outlet coincides with
the grinder plug.
• The electric power at the location of
installation should meet the minimum
required to properly run the grinder.
• The installation site should have the
proper electrical overload protections.
• The grinder should be properly
grounded as specied by local code.
• This unit is provided with an
equipotential grounding connection
meeting current regulations, to
avoid electrostatic charges. The user
must proceed to connect it between
different equipment or directly to an
earthed line, through the terminal
marked with the symbol (according
to the standard UNE-EN 60335-2-
102:2016)

ORIGINAL INSTRUCTIONS | Ref. quality process 002/03 | v. 30/04/2019 | K07175
14
8.1. GRINDER SET UP
Before mounting the hopper, loosen the
hopper safety screw ( ). Insert the hopper
() in the upper part of the grinder, so that
the bean trap gate ( ) is positioned to the
right and in the closed position. Once the
hopper is introduced into the grinder, turn it
clockwise until it stops. Tighten the hopper
safety screw ( ) to lock it in position.
Pour beans inside the hopper and close
with the hopper lid ( ). When opening the
bean trap gate ( ) they will fall inside the
grind chamber and be ready to be ground.
Plug in the grinder, and position the main
switch ( ) to position I (AUTOMATIC
MODE).
8. REGULATION
Fig. 1
Security
screw

ORIGINAL INSTRUCTIONS | Ref. quality process 002/03 | v. 30/04/2019 | K07175
15
8. REGULATION
Coarse
Fine

ORIGINAL INSTRUCTIONS | Ref. quality process 002/03 | v. 30/04/2019 | K07175
16
8. REGULATION
8.2. ADJUSTING FORK PK
The serial conguration is valid for most
portalter on the market. However,
depending on the geometry of each
portalter, it is possible to proceed in the
following way for a correct adjustment:
1. Free portalter spring clamp, for it
must release the screw that secures
the fork with the help of a screwdriver
(Fig. 3).
2. Portalter spring clamp on the inside
has recorded an A and a B.
3. Once disassembled the portalter
spring clamp, mounted in the opposite
direction to which came installed, i.e.
the A B position and vice versa. In this
Assembly the portalter holder will enter
into the fork and will be xed.
NOTA: In the case of PKE model, the fork is not adjustable.
For portalter with diagonal wings, the
standard spring clamp must be replaced by
those supplied.
Engraving
indicating
the position
Serial conguration
Engraving
indicating
the position
Included with your
grinder

ORIGINAL INSTRUCTIONS | Ref. quality process 002/03 | v. 30/04/2019 | K07175
17
8. REGULATION
Screw
Portalter
spring
clamp
Fig. 3

ORIGINAL INSTRUCTIONS | Ref. quality process 002/03 | v. 30/04/2019 | K07175
18
Fig. 2
8.2.1. ADJUSTING THE LOWER
PORTAFILTER SUPPORT
In order to ensure the proper distribution
of ground coffee in the portalter, while
supporting the portalter in a hands-free
position during dosing, it is possible to
adjust the height of the lower portalter
support ( ).
To do this adjustment operation:
1. Loosen the screws ( ) of the fork
(), using an Allen wrench provided.
2. Adjust the desired height by using
the lter holder itself as a reference.
3. Tighten the fork screws ( ) ( ), con
la ayuda de una llave Allen H2 using an
Allen wrench supplied (Fig. 2).
NOTE: If the adjustment is
extreme (too high or too low),
difculties in operating the dosis
button might occur.
Usar
llave
Allen
8. REGULATION

ORIGINAL INSTRUCTIONS | Ref. quality process 002/03 | v. 30/04/2019 | K07175
19
8.3. GRIND ADJUSTMENT
SYSTEM
Place the portalter in the portalter holder
() and press the dose activation button (
) causing ground coffee to flow out of
the exit chute. ( ).
To adjust the grind point, turn the grind
adjustment knob ( ). Turning clockwise
we will obtain a ner grind and turning
counter clockwise will obtain a coarser
grind point.
NOTE: If the output is very slow, it could mean that the coffee is being ground too ne.
If the output is very fast, it could mean that the coffee is being ground too coarse. A
perfect espresso grind is found when the grind point gives an infusion of 25 ml of coffee
in 25 seconds using 7 grams of ground coffee.
In the automatic mode, a numeric graphical scale from 0 to 800 can be seen on the
grinder display ( ) which will mark the current point of the regulator at all times.
* It is recommended that the
motor be running when adjusting
to ner grind setting. This helps
to avoid jamming the burrs,
which can occur when coffee
beans are in the grind chamber,
and the grind regulator is
adjusted towards ne.
TIP : Our mills are calibrated for a medium
espresso grind point, which can vary depending
on the type of coffee, roast prole and volume
used.
PKF 50-120
Fig. 4
Grind
regulator
8. REGULATION

ORIGINAL INSTRUCTIONS | Ref. quality process 002/03 | v. 30/04/2019 | K07175
20
9. OPERATION
9.1. GENERAL SWITCH
The general switch ( ) has 3 positions of
use:
AUTOMATIC / OFF / MANUAL
9.2. UTILIZATION
Through the program menu (Fig. 5) , it is
possible to select three distinct functional
modes: AUTOMATIC MODE, PRESELECT
MODE AND INSTANT MODE.
The electronic functions of the
equipment act. AUTOMATIC
Equipment off. OFF
Manual mode of the equip-
ment. Security system that
allows to use the equipment
in case of failure of the power
board or keyboard.
MANUAL
Fig. 5
Other manuals for PKF
1
Table of contents
Other Compak Coffee Grinder manuals

Compak
Compak RETAIL R140 User manual

Compak
Compak K6 SILENZIO User manual

Compak
Compak E6 OD User manual

Compak
Compak PKF User manual

Compak
Compak K3 TOUCH User manual

Compak
Compak PK 100 SHOP User manual

Compak
Compak PK 100 User manual

Compak
Compak E5 OD User manual

Compak
Compak E6 OD User manual

Compak
Compak A-8 Automatic User manual

Compak
Compak BOLT User manual
Compak
Compak FRESH ON DEMAND User manual

Compak
Compak K-5 User manual

Compak
Compak K3 TOUCH User manual
Compak
Compak F10 Conic OD User manual

Compak
Compak F10 Conic OD User manual

Compak
Compak RETAIL R80 User manual

Compak
Compak K3 TOUCH User manual
Compak
Compak PKE User manual

Compak
Compak K3 TOUCH User manual