manuals.online logo
Brands
  1. Home
  2. •
  3. Brands
  4. •
  5. Compass
  6. •
  7. Automobile Accessories
  8. •
  9. Compass 238 280 User manual

Compass 238 280 User manual

Bedienungsanleitung
Compass art-nr. 238 280
instruCtion manual
Compass art-nr. 238 280
manuel d'utilisation
Compass art-nr. 238 280
Bedienungsanleitung_238280_Multi.indd 2-3 15.01.13 16:58
1. Eine Öffnung mit einem Durchmesser von 52 mm schneiden (II). Für den Einbau
des Messgerätes wird ein Mindestab stand von 55 mm hinter dem Armaturenbrett
benötigt.
2. Befestigungsring (I) abnehmen. Das Gehäuse des Messgerätes weist eine Ausrich-
tungszunge auf (III). Messgerät in die Öffnung des Armaturenbretts einsetzen und
die Lage der Ausrichtungszunge markieren, um das Messgerät richtig aus
richten zu können.
3. Verkabelung entsprechend der Anschlusshinweise ausführen. Das Messgerät kann
direkt an eine 12V/24V-Stromquelle angeschlossen werden.
4. Je nach der persönlichen Vorliebe entweder eine rote oder gelbe Hintergrundbe-
leuchtung auswählen.
5. Kabelbaum (IV) in den Anschluss auf der Rückseite des Messgeräts einsetzen.
6. Falls Sie einen Spannungsmesser erworben haben, bendet sich im Kabelbaum
kein schwarzes Kabel (# IV).
1. Cut a 52mm (2-1/16") diameter panel hole (II), place the gauge (# III) in panel hole
and mark corresponding gauge boss on the panel, in addition, to cut a small gap
(as # I I shows). make sure there is minimum clearance of 55mm(2-3/16") behind
the panel to x the gauge.
2. Put gauge body (# 111) inside panel(#11), then screw down xing ring (#1) tightly.
3. According to wiring instruction to do wire connection, Gauge can be directly con-
nected to 12/24V power supply.
4. Select either red or yellow as backlight by your fondness.
5. Insert wire harness (IV) into port at the back of the gauge.
6. The gauge begins to time when it‘s connected with power supply, there will be one
+0.1H calculated every other 6 minutes and Accumulative numerical value would
be automatically saved. the Max. display value: 99999.9H.
einBausCHritte
installation steps installation instruCtions
Étapes d'installation
1. Percer un trou de 52 mm (2 1/16) de diamètre dans le panneau (II). Un espace
libre de 55 mm (2 3/16) minimum doit être laissé derrière le panneau pour installer
l'appareil.
2. Retirer la bague de xation (I). Le corps de l'appareil (III) comporte un anneau
d'alignement. Placer l'appareil dans le trou percé dans le panneau et repérer la
position de cet anneau de sorte à aligner correctement l'appareil.
3. Effectuer les branchements en fonction des instructions de câblage. L'appareil peut
être directement raccordé à une alimentation 12/24 V.
4. Choisir entre le rétroéclairage rouge ou jaune, selon vos préférences.
5. Insérer le faisceau de câbles (IV) dans le port situé à l'arrière de l'appareil.
6. Le faisceau de câbles des voltmètres ne comporte pas de câble noir (# IV).
Bedienungsanleitung_238280_Multi.indd 4-5 15.01.13 16:58

Other Compass Automobile Accessories manuals

Compass TD2001G User manual

Compass

Compass TD2001G User manual

Compass ALU WIND User manual

Compass

Compass ALU WIND User manual

Compass 01 245 User manual

Compass

Compass 01 245 User manual

Compass 09 263 User manual

Compass

Compass 09 263 User manual

Compass ALU-HEAVY User manual

Compass

Compass ALU-HEAVY User manual

Compass E-BIKE 02 120 User manual

Compass

Compass E-BIKE 02 120 User manual

Compass TRIPLE 02 112 Quick setup guide

Compass

Compass TRIPLE 02 112 Quick setup guide

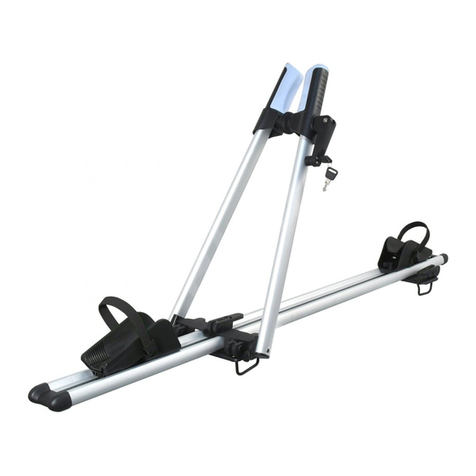
Compass 238 270 User manual

Compass

Compass 238 270 User manual

Compass ARROW User manual

Compass

Compass ARROW User manual

Compass 238 190 User manual

Compass

Compass 238 190 User manual

Compass DOLPHIN 4 User manual

Compass

Compass DOLPHIN 4 User manual

Compass ORCA User manual

Compass

Compass ORCA User manual

Compass 237 580 User manual

Compass

Compass 237 580 User manual

Popular Automobile Accessories manuals by other brands

BURY CL 1010 Installation and operation instruction manual

BURY

BURY CL 1010 Installation and operation instruction manual

Guardsman KIA NIRO #2 G1641 FITTING INSTRUCTION

Guardsman

Guardsman KIA NIRO #2 G1641 FITTING INSTRUCTION

Brodit ProClip 654877 installation instructions

Brodit

Brodit ProClip 654877 installation instructions

KAPSCH OBU-4040 user manual

KAPSCH

KAPSCH OBU-4040 user manual

Thule 2087 parts list

Thule

Thule 2087 parts list

Brink 6766 Fitting instructions

Brink

Brink 6766 Fitting instructions

Coast to Coast ALU STAR 400-04650 user manual

Coast to Coast

Coast to Coast ALU STAR 400-04650 user manual

curt 18087 installation instructions

curt

curt 18087 installation instructions

Cruz Evo Rack Alu A23-126 Assembly instructions

Cruz

Cruz Evo Rack Alu A23-126 Assembly instructions

Meritor Heavy-Duty P Series Maintenance manual

Meritor

Meritor Heavy-Duty P Series Maintenance manual

Brink 6473 Fitting instructions

Brink

Brink 6473 Fitting instructions

Trust HS-8100 manual

Trust

Trust HS-8100 manual

Cycle Country SNOW FORCE 18-0050 owner's manual

Cycle Country

Cycle Country SNOW FORCE 18-0050 owner's manual

Whispbar K055W Fitting instructions

Whispbar

Whispbar K055W Fitting instructions

ADS idatastart HC2351AC Product guide

ADS

ADS idatastart HC2351AC Product guide

Kuda-Phonebase 284400 Installation instruction

Kuda-Phonebase

Kuda-Phonebase 284400 Installation instruction

Tuff Tonneaus 413 FITTING INSTRUCTION

Tuff Tonneaus

Tuff Tonneaus 413 FITTING INSTRUCTION

Ozito PXCG-012 instruction manual

Ozito

Ozito PXCG-012 instruction manual

manuals.online logo
manuals.online logoBrands
  • About & Mission
  • Contact us
  • Privacy Policy
  • Terms and Conditions

Copyright 2025 Manuals.Online. All Rights Reserved.