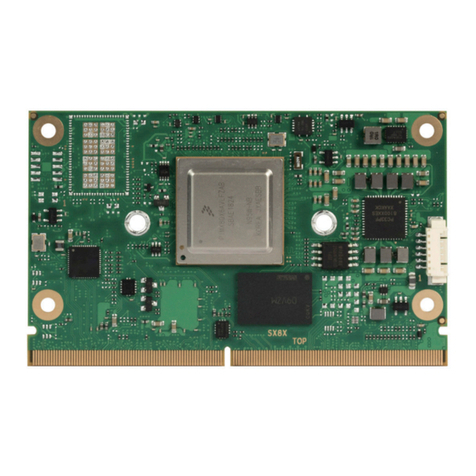
Congatec conga-QMX8X User manual

Copyright © 2019 congatec AG QX8X_SDS_q11 1/7
conga-QMX8-X (Revision Y.1)
Sample Distribution Set for congatec Qseven 2.0 Development
Quick Start Guide
Revision 1.1

Copyright © 2019 congatec AG QX8X_SDS_q11 2/7
Preface
This quick start guide provides information about the contents of the
conga-QMX8-X (Revision Y.0) sample distribution set and how to set it up.
Disclaimer
The information contained within this quick start guide, including but not
limited to any product specification, is subject to change without notice.
congatec AG provides no warranty with regard to this guide or any other
information contained herein and hereby expressly disclaims any implied
warranties of merchantability or fitness for any particular purpose with
regard to any of the foregoing. congatec AG assumes no liability for any
damages incurred directly or indirectly from any technical or typographical
errors or omissions contained herein or for discrepancies between the
product and this guide. In no event shall congatec AG be liable for any
incidental, consequential, special, or exemplary damages, whether based
on tort, contract or otherwise, arising out of or in connection with this guide
or any other information contained herein or the use thereof.
Intended Audience
This guide is intended for technically qualified personnel. It is not intended
for general audiences.
Lead-Free Designs (RoHS)
All congatec AG designs are created from lead-free components and are
completely RoHS compliant.
Electrostatic Sensitive Device
All congatec AG products are electrostatic sensitive devices. They are
enclosed in static shielding bags, and shipped enclosed in secondary
packaging (protective packaging). The secondary packaging does not
provide electrostatic protection.
Do not remove the device from the static shielding bag or handle it, except
at an electrostatic-free workstation. Also, do not ship or store electronic
devices near strong electrostatic, electromagnetic, magnetic, or radioactive
fields unless the device is contained within its original packaging. Be aware
that failure to comply with these guidelines will void the congatec AG
Limited Warranty.
Copyright Notice
Copyright © 2019, congatec AG. All rights reserved. All text, pictures and
graphics are protected by copyrights. No copying is permitted without
written permission from congatec AG.
congatec AG has made every attempt to ensure that the information in
this document is accurate yet the information contained within is supplied
“as-is”.
Trademarks
Product names, logos, brands, and other trademarks featured or referred
to within this guide, or the congatec website, are the property of their
respective trademark holders. These trademark holders are not affiliated
with congatec AG, our products, or our website.
Certification
congatec AG is certified to DIN EN ISO 9001 standard.
C
E
R
T
I
F
I
C
A
T
I
O
N
I
S
O
9
0
0
1
TM

Copyright © 2019 congatec AG QX8X_SDS_q11 3/7
Warranty
congatec AG makes no representation, warranty or guaranty, express or
implied regarding the products except its standard form of limited warranty
(“Limited Warranty”) per the terms and conditions of the congatec entity,
which the product is delivered from. These terms and conditions can
be downloaded from www.congatec.com. congatec AG may in its sole
discretion modify its Limited Warranty at any time and from time to time.
The products may include software. Use of the software is subject to the
terms and conditions set out in the respective owner’s license agreements,
which are available at www.congatec.com and/or upon request.
Beginning on the date of shipment to its direct customer and continuing for
the published warranty period, congatec AG represents that the products
are new and warrants that each product failing to function properly under
normal use, due to a defect in materials or workmanship or due to non
conformance to the agreed upon specifications, will be repaired or
exchanged, at congatec’s option and expense.
Customer will obtain a Return Material Authorization (“RMA”) number
from congatec AG prior to returning the non conforming product freight
prepaid. congatec AG will pay for transporting the repaired or exchanged
product to the customer.
Repaired, replaced or exchanged product will be warranted for the repair
warranty period in effect as of the date the repaired, exchanged or replaced
product is shipped by congatec, or the remainder of the original warranty,
whichever is longer. This Limited Warranty extends to congatec’s direct
customer only and is not assignable or transferable.
Except as set forth in writing in the Limited Warranty, congatec makes no
performance representations, warranties, or guarantees, either express or
implied, oral or written, with respect to the products, including without
limitation any implied warranty (a) of merchantability, (b) of fitness for a
particular purpose, or (c) arising from course of performance, course of
dealing, or usage of trade.
congatec AG shall in no event be liable to the end user for collateral or
consequential damages of any kind. congatec shall not otherwise be liable
for loss, damage or expense directly or indirectly arising from the use of the
product or from any other cause. The sole and exclusive remedy against
congatec, whether a claim sound in contract, warranty, tort or any other
legal theory, shall be repair or replacement of the product only.
Technical Support
congatec AG technicians and engineers are committed to providing the
best possible technical support for our customers so that our products can
be easily used and implemented. We request that you first visit our website
at www.congatec.com for the latest documentation, utilities and drivers,
which have been made available to assist you. If you still require assistance
after visiting our website then contact our technical support department by
Revision History
Revision Date (yyyy-mm-dd) Author Changes
1.0 2019-01-28 BEU First release for X.0
1.1 2020-11-18 BEU Update for Y.1

Copyright © 2019 congatec AG QX8X_SDS_q11 4/7
1 Hardware
1.1 Sample Distribution Set Contents
The contents of the conga-QMX8-X sample distribution set are listed
below:
Part # Rev. Name Description Qty
007005 B.5 conga-QEVAL/Qseven
2.0 ARM
Evaluation carrier board for standard
Qseven modules based on Qseven
Specification 2.0
1
016500 or
016503 or
016513
Y.1 conga-QMX8-X/
QXP-4G eMMC16 or
QXP-2G eMMC16 or
i-QXP-2G eMMC16
Qseven 2.0 engineering sample module
with NXP i.MX 8QuadXPlus applications
processor, 16 GB onboard HS400
eMMC, and 4GB or 2GB LPDDR4.
1
016453 X.1 conga-QMX8/HSP-T Standard heatspreader for Qseven
module conga-QMX8 with IHS CPU. All
stand-offs are bore hole 2.7 mm.
1
011115 B.0 conga-LDVI/EPI LVDS to DVI converter board for digital
flat panels with onboard EEPROM.
1
033331 A cab-LVDV-DAT-34-15 15 cm data cable LVDS to DVI adapter 1
052147 A cab-LVDV-PWR-10-15 15 cm power cable LVDS to DVI adapter 1
48000023 A RS232 adapter cable MOLEX 6-pin PicoBlade to 2x D-SUB 9
adapter
1
10000285 A MicroSDHC-Card UHS-I Kingston industrial SDCIT/EU Class 10
8 GB microSD card with SD card adapter
and preinstalled image.
1
N/A 1.1 Quick Start Guide conga-QMX8-X Sample Distribution Set
Quick Start Guide
1
1.2 conga-QMX8-X
The conga-QMX8-X (Revision Y.1) included in this sample distribution
set is a Qseven 2.0 engineering sample module featuring the NXP i.MX
8QuadXPlus applications processor, 16 GB HS400 onboard eMMC,
and 4GB or 2 GB LPDDR4 onboard memory.
For information about the Mass Production (MP) variants, refer to the
datasheet available at www.congatec.com.
1.2.1 Pinout Description
The conga-QMX8-X pinout description is available at the link below.
The pinout description lists which signals of the NXP i.MX 8QuadXPlus
applications processor are routed to the Qseven connector.
https://git.congatec.com/arm-nxp/imx8-family/doc/cgtimx8_pinlist/-/raw/
cgtqx8x_pinlist/cgtqx8x_pin_connection.xlsx
1.3 conga-QEVAL/Qseven 2.0 ARM
The conga-QEVAL/Qseven 2.0 ARM included in this sample distribution
set is an evaluation carrier board based on the Qseven Specification 2.0.
For information about the conga-QEVAL/Qseven 2.0 ARM, refer to the
User's Guide available at www.congatec.com.

Copyright © 2019 congatec AG QX8X_SDS_q11 5/7
1.4 Hardware Setup
Follow the steps below to assemble the hardware:
1. Ensure the hardware is protected from the effects of electrostatic
discharge (ESD).
2. On the module, select SPI as the boot source via DIP switch SW11:
SW1 Selected
Boot Source1
#4 #3 #2 #1
OFF OFF OFF OFF Boot from fuse
OFF OFF OFF ON Serial download
OFF OFF ON OFF eMMC0
OFF OFF ON ON SD1 boot
OFF ON ON OFF SPI
4. On the carrier board, set:
– jumper X29 to position 3-4 (AT mode)2
– jumper X43 to position 3-4 (PWGIN generated by AT/ATX power supply)
– DIP switch SW9 #1,2,3,4 as desired (USB ports configuration)2
5. Connect the RS232 adapter cable to the connector on the module.
6. Connect the USB 2.0 to Serial Adapter to the RS232 adapter cable port
labeled "CONSOLE".
7. Ensure the included microSD card is inside the slot of the module.
8. Mount the module and heatspreader onto the carrier board. (Final
torque: 0.4 Nm)
9. Connect the conga-LDVI/EPI as shown in the image on the right.
10. Connect a Power Supply Unit (PSU) to the carrier board.
11. To start the system, switch the PSU on.
Note
1. Boot source selection via DIP switch will not be implemented on Mass
Production (MP) variants. Fastboot is currently not supported.
2. USB 3.0 is only supported on port 0. USB ports 5, 6 and 7 are not supported.
For more information, refer to section 5.2.7 "Universal Serial Bus (USB)" of the
conga-QEVAL/Qseven 2.0 ARM User's Guide.
Con-
sole SW2
SW9 X29
X43

Copyright © 2019 congatec AG QX8X_SDS_q11 6/7
2 Software
2.1 Starting Up
The conga-QMX8-X uses U-Boot as standard bootloader. The bootloader
is GNU GPL open source software. A serial terminal connection is required
in order to display the boot process and to modify the boot behavior. The
boot behavior is controlled via environment variables.
The included RS232 adapter cable has two connectors. The RX/TX signals
are already crossed. Therefore, do NOT use a crossover-cable. Use the
connector labeled "Console" for the U-Boot console output. Use the
unlabeled connector for the System Controller Unit Firmware (SCFW)
debug output.
To establish a terminal connection, a terminal program such as TeraTerm
or Putty can be used.
Use the following communication parameters:
Baud rate:
Data:
Parity:
Stop:
Flow control:
115200
8 bit
none
1 bit
none
The following console output is displayed when the system is powered on:
2.2 Boot Process
The conga-QMX8-X boot process starts at Power On Reset (POR), where
the hardware reset logic forces the ARM core to begin execution. The on-
chip boot ROM loads the boot container which usually consists of SCFW,
Security Controller (SECO) firmware, ARM Trusted Firmware (ATF) and the
bootloader binary (U-Boot).
After SCFW loading, the bootloader is executed and performs basic system
initialization (serial console, etc.). Afterwards, the environment settings are
parsed and the system boot continues as specified.
Press any key during startup to stop autoboot and to get to U-Boot console.
At the U-Boot console, the environment settings can be displayed using
the “print” command. In addition, useful functionality is available (such as
memory dump, access to the SPI and the I2C system, etc.). The “help”
command will display any command supported by the U-Boot.
If autoboot is not interrupted by pressing a key, the boot process goes
ahead and the module will boot the Linux operating system that is installed
on the microSD card.
2.3 U-Boot Environment Variables
The U-Boot environment is located in SPI Flash (in microSD card for
prototypes and engineering samples). One of the benefits of the U-Boot
bootloader is the possibility to specify its run time configuration using
environment variables.
The environment variables of U-Boot can be displayed using the printenv
(or the print) command.
During the boot process, the bootloader evaluates the “bootcmd” variable
and executes it. The boot command tries to load a bootscript or a kernel
from the boot device. If this is successful, the script or kernel will be started,
otherwise a fallback to network boot is performed. The variable “mmcdev”
specifies the mmc boot device. Furthermore, the variable “mmcroot” is
passed to the kernel in order to specify the location of the root filesystem.

Copyright © 2019 congatec AG QX8X_SDS_q11 7/7
The following environment variables are predefined for conga-QMX8-X
(Revision Y.1):
Name Default value Description
bootcmd Defines the startup command of the bootloader, i.e.
how the system performs the boot process
fdt_file imx8qxp-cgtqx8x.dtb The device tree blob, might be exchanged in order to
enhance functionality
image Image The name of the kernel image file that is loaded
during boot process
ipaddr not specified Address of the system (used for network boot)
serverip not specified Address of the remote host (used for network boot)
netmask not specified Netmask of the network (used for network boot)
nfsroot not specified The location where the NFS root filesystem is stored
(used for network boot)
mmcdev "1" (onboard microSD card) The boot device number (used for mmcboot)
mmcpart "1" (first partition) The number of the bootpartiton on the bootdevice
(used for mmcboot)
mmcroot "/dev/mmcblk1p2 rootwait
rw" (2nd partition on device 1)
The root filesystem (used for mmcboot), might also
be used to extend the kernel command line
Following, some frequently used scripts:
Name Description
mmcboot Boots the system from mmc (with the specified parameters for mmcboot), i.e.
eMMC, SD card, microSD card
mmcargs Configures the bootargs for mmcboot
netboot Boots the system from network (with the specified parameters for network boot)
netargs Configures the bootargs for network boot
loadbootscript Used during boot, loads an eventually existing boot script
loadimage Used during boot, loads the kernel
loadfdt Used during boot, loads the device tree blob file
There are several commands to change the behavior of the bootloader and
to customize the boot process. The help command can be used to display
a list of all available commands.
2.4 Linux
By default, the bootloader loads the Linux operating system stored on the
microSD card. The operating system image is built by Yocto.
Booting to the Linux desktop may take some time. To speed up the boot
process significantly, install the root filesystem onto the onboard eMMC
device.
Note
In order to maintain the integrity of the file system, it is recommended to
always shut down the system by issuing the command “poweroff” in the
console terminal.
2.5 Additional Information
The software provided on the included microSD card is based on the Yocto
Project (www.yoctoproject.org) and i.MX 8QuadXPlus specific add-on layers
provided by NXP and congatec.
The conga-QMX8-X software documentation is available at:
https://wiki.congatec.com
The conga-QMX8-X sources required to build the root filesystem image,
kernel and bootloader are available at:
https://git.congatec.com/imx8x_early_access
Caution
Using the wrong source can cause damage to the hardware and/or loss of
data. For the conga-QMX8-X Revision Y.1, only use sources from branches
ending with "_cgtqx8x-Y1".
Note
Contact congatec technical support to get access to the sources on git.
Other manuals for conga-QMX8X
1
Table of contents
Other Congatec Control Unit manuals

Congatec
Congatec SMARC conga-SMX8-X User manual

Congatec
Congatec COM Express conga-TCA3 User manual

Congatec
Congatec Qseven conga-QMX6 User manual

Congatec
Congatec conga-SBM2C User manual

Congatec
Congatec Compact COM Express conga-CLX User manual

Congatec
Congatec COM Express conga-TR4 User manual

Congatec
Congatec COM Express conga-TCA5 User manual

Congatec
Congatec conga-QMX8X User manual

Congatec
Congatec COM Express conga-TS175 User manual

Congatec
Congatec XTX conga-XLX User manual