Manual for
CONTEC air suspension seatpost
„Nara Air Link+“
TO THIS MANUAL
• Read and observe the instructions.
• Keep the instructions in a safe place.
• Read and observe the safety instructions.
SAFETY INSTRUCTIONS
Risk of injury due to improper assembly!
• Do not change defective parts yourself.
• Assembly / repair may only be carried out by a bicycle mechanic.
Serious injuries due to disassembly of pressurized parts!
The seatpost is under high pressure.
• Sattelstütze nicht in Bestandteile zerlegen.
• Obere Schutzkappe der Sattelstütze nicht abschrauben.
• Sicherstellen, dass die Schutzkappe immer fest angezogen ist.
Risk of accident due to improperly attached accessories!
This may impair the function, lead to loss of function and result in falls,
accidents and injuries.
REQUIRED TOOLS
inside hexagon wrench, 5mm
ASSEMBLY
WARNING!
Warning!
Serious injuries due to slipping or failing seatpost. due to incorrect mounting!
• Observe the specications of the bicycle frame manufacturer.
• Do not exceed the permitted tightening torques under any circumstances.
Before mounting
The seatpost is only designed for the following inner diameters of the seat tube
designed: 27,2; 30,9; 31,6 (mm). The diameter is indicated on the product with laser
engraving.
• Ensure that the seatpost has the correct dimension.
1 − Prepare the bicycle frame
• Ensure that the inner diameter of the seat tube exactly matches the installation
dimension of the seatpost (observe technical data).
• Clean the inner wall of the seat tube. Remove any burrs from the edges of the seat
tube.
• Seat tubes made of metal (aluminum, steel): Use suitable assembly grease.
• Seat tubes made of carbon: Use suitable assembly paste.
2 − Mounting the seatpost
• Insert the seatpost (1) so far into the seat tube so far that the marking
of the minimum line (2) is covered by the seat tube. Observe the direction of travel.
• Tighten clamping screw (3).
Observe the tightening torque.
If necessary, use a torque wrench.
Nara Air Link+
Available in
27,2 mm Ø
30,9 mm Ø
31,6 mm Ø
RIDING DIRECTION
1
3
6–7 Nm
2
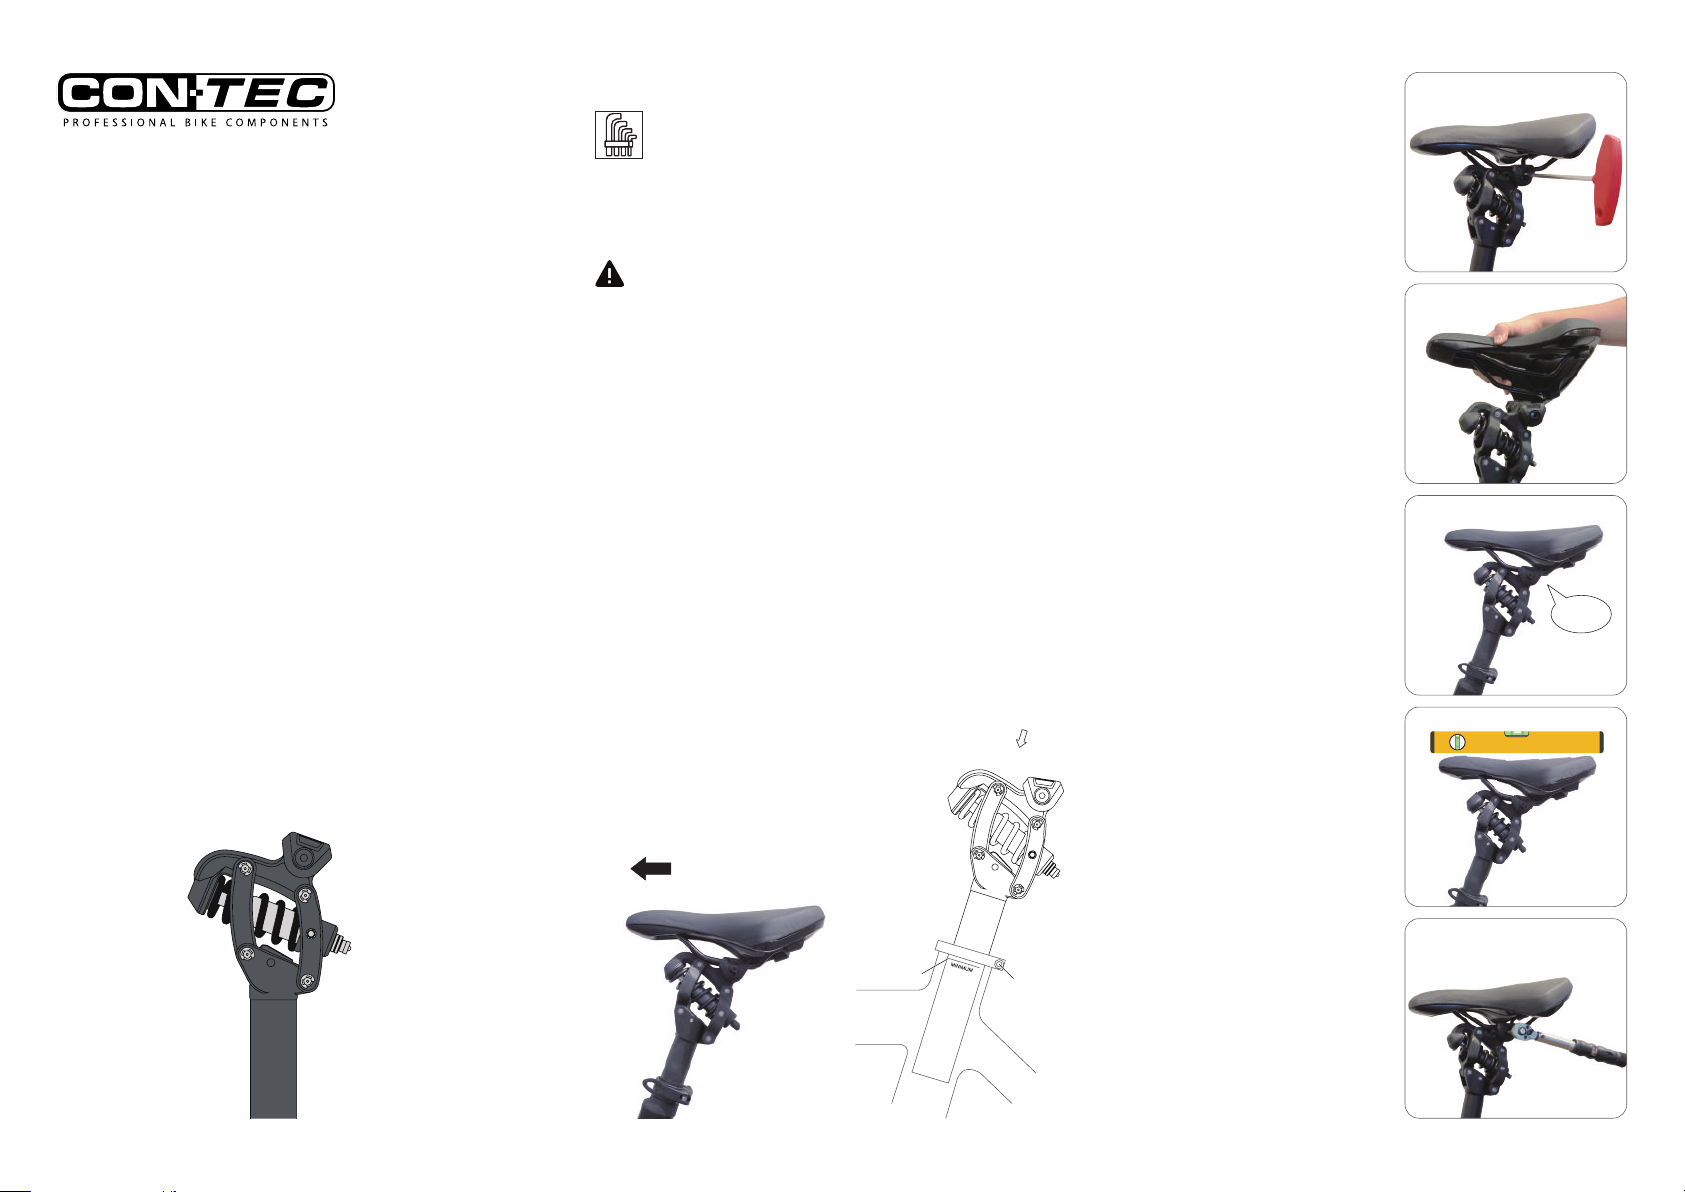
SADDLE MOUNTING
A. Loosen the screws on both sides
using a 5mm Allen key until the
rails of the saddle rail t into
them.
B. Now the saddle rails can be
carefully inserted.
C. Push the saddle in until it clicks
into place.
D. Adjust the saddle so that it is
horizontal. (Basic setting) See
illustration.
E. Tighten the two mounting
screws to 7-9Nm using a 5mm
Allen wrench.
click


