manuals.online logo
Brands
  1. Home
  2. •
  3. Brands
  4. •
  5. Cooper Lighting
  6. •
  7. Lighting Equipment
  8. •
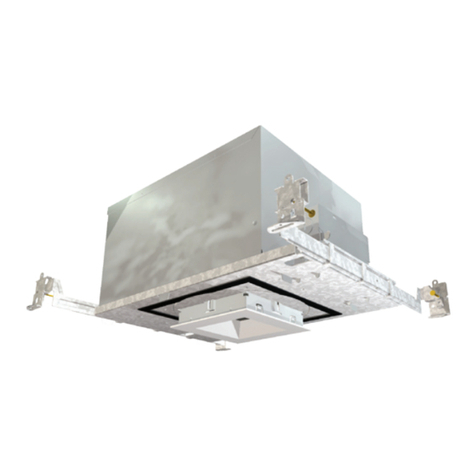
  9. Cooper Lighting PORTFOLIO CD61 Series User manual

Cooper Lighting PORTFOLIO CD61 Series User manual

Customer First Center 1121 Highway 74 South Peachtree City, GA 30269 770.486.4800 FAX 770.486.4801
INSTALLATION INSTRUCTIONS
IMPORTANT : READ CAREFULLY BEFORE INSTALLING FIXTURE. RETAIN FOR FUTURE REFERENCE
CD61*/CD62*/CD6S*
Commercial Recessed CFL
Rough-In Installation Instructions
705300-Rev. INS
08/29/2012 page 4 of 4
PORTFOLIO®
ADP121376
Cooper Lighting (The Company) warrants the
Portfolio CD61*/CD62*/CD6S* housings and
trims against defects in material or workmanship
for a period of three years from date of original
purchase, and agrees to repair or, at the
company's option, replace a defective product
without charge for either replacement parts or
labor during such time. This does not include
labor to remove or install xtures. This warranty
is extended only to the original purchaser of
the product. A purchasers receipt or other
proof of date of original purchase acceptable
to the Company is required before warranty
performance shall be rendered.
This warranty only covers product failure due
to defects in materials or workmanship which
occurs in normal use. It does not cover the
failure of product caused by accident, misuse,
abuse, lack of reasonable care, alteration, or
faulty installation, subjecting the product to any
but the specied electrical service or any other
failure not resulting from defects in materials or
workmanship. Damage to the product caused
by separately purchased, non-Company
supplied components and corrosion or
discoloration of components are not covered by
this warranty. There are no express warranties
except as described above.
THE COMPANY SHALL NOT BE LIABLE FOR
INCIDENTAL, SPECIAL OR CONSEQUENTIAL
DAMAGES RESULTING FROM THE USE OF
THE PRODUCT OR ARISING OUT OF ANY
BREACH OF THIS WARRANTY. ALL IMPLIED
WARRANTIES, IF ANY, INCLUDING IMPLIED
WARRANTS OF MERCHANTABILITY AND
FITNESS FOR A PARTICULAR PURPOSE, ARE
LIMITED IN DURATION TO THE DURATION OF
THIS EXPRESS WARRANTY.
Some states do not allow the exclusion
or limitation of incidental or consequential
damages, or limitations on how long an implied
warranty lasts, so the above exclusions or
limitations may not apply to you.
No other warranty, written or verbal, is
authorized by the Company. This warranty gives
you specic legal rights, and you may also have
other rights which vary from state to state.
To obtain warranty service, please write to
Cooper Lighting, 1121 Highway 74 South,
Peachtree City, Georgia 30269. Enclose
product model number and problems you
are experiencing, along with address and
telephone number. You will then be contacted
with a solution or a Return Goods Authorization
number and full instructions for returning
the product. All returned products must be
accompanied by a Return Goods Authorization
Number issued by the Company and must be
returned freight prepaid. Any product received
without a Return Goods Authorization Number
from the Company will be refused.
Cooper Lighting is not responsible for
merchandise damaged in transit. Repaired or
replaced products shall be subject to the terms
of this warranty and are inspected when packed.
Evident or concealed damage that is made in
transit should be reported at once to the carrier
making the delivery and a claim led with them.
3 YEAR PRODUCT LIMITED WARRANTY
Customer First Center 1121 Highway 74 South Peachtree City, GA 30269 770.486.4800 FAX 770.486.4801
INSTALLATION INSTRUCTIONS
IMPORTANT : READ CAREFULLY BEFORE INSTALLING FIXTURE. RETAIN FOR FUTURE REFERENCE
CD61*/CD62*/CD6S*
Commercial Recessed CFL
Rough-In Installation Instructions
705300-Rev. INS
08/29/2012 page 1 of 4
PORTFOLIO®
To Install Rough-In Section
NOTE: This xture should be supported by main runners or
other structure that is capable of supporting xture weight of 10 Ibs.
IMPORTANT SAFEGUARDS: When using electrical equipment, basic
safety precautions should always be followed, including the following:
READ AND FOLLOW ALL SAFETY INSTRUCTIONS
1 This unit is for recessed mounting only. Do not use in
hazardous locations nor near gas or electric heaters.
2 Do not use this equipment for other than the intended use.
3 Install only in accordance with National Electrical Code and local regulatory agencies' requirements.
Risk Of Electrical Shock
Disconnect power at fuse
or circuit breaker before
installing or servicing.
WARNING
!
Risk Of Fire
Do not install insulation
within 3 inches (76 mm) of
any part of the luminaire
xture or in a way that
may entrap heat.
WARNING
!
WARNING:
Installation and servicing to be performed only by qualied personnel, If not qualied, consult an electrician.
STEP 1 Install xture into ceiling cavity using 1/2˝ electrical
conduit. Use 3/4˝ channel, 1-1/2˝ channel,
1/8˝ x 1/2˝ bar stock, or T-bar fasteners as
mounting rails (furnished by others) by inserting
the through hanger brackets at both sides.
STEP 2 Adjust hanger adjustment screws so bottom of
plaster ring is ush with nished ceiling line. Hanger
bracket is reversible for total adjustment of 5˝.
STEP 3 Remove one of the junction box covers. Connect
supply lead wires to lead wires of ballast per wiring
diagram and in accordance with your local
electrical code(s) or N.E.C.
Aperture Ceiling
Cutout
CD61*/CD62*/CD6S* 6-3/8˝ 7-1/4˝
STEP 1-
FIXTURE ATTACHMENT
METHOD
STEP 2-
HANGER ADJUSTMENT SCREW(S)
STEP 3-
JUNCTION BOX COVERS
Customer First Center 1121 Highway 74 South Peachtree City, GA 30269 770.486.4800 FAX 770.486.4801
INSTALLATION INSTRUCTIONS
IMPORTANT : READ CAREFULLY BEFORE INSTALLING FIXTURE. RETAIN FOR FUTURE REFERENCE
CD61*/CD62*/CD6S*
Commercial Recessed CFL
Rough-In Installation Instructions
705300-Rev. INS
08/29/2012 page 2 of 4
PORTFOLIO®
Trim Cleaning
Trim Installation
Step 1. Attach trim to socket assembly with
(2) thumb nuts. Lockwasher to be placed
between reector and socket assembly.
Step 2. Attach trim assembly to center stud
with wing nut.
Step 1. Gently wipe with a soft, clean, dry lint-free cloth
to remove dust.
Step 2. Wipe with a mild detergent solution on a soft,
clean cloth to remove ngerprints and stains.
Step 3. Rinse with clean, soft water and dry with
lint-free cloth.
TRIM LAMP WATTAGE LAMP TYPE SETTING
6CLH226M* 2-13W DTT 1
2-18W DTT 1
2-26W DTT 2
6CLH142M* 1-13W DTT 1
1-18W DTT 1
1-26W DTT 2
1-26W TTT 1
1-32W TTT 1
1-42W TTT 2
6CH226W* 2-13W DTT 2
2-18W DTT 3
2-26W DTT 3
6CH142W* 1-13W DTT 2
1-18W DTT 2
1-32W TTT 2
1-26W DTT 3
1-26W TTT 2
1-26W DTT 3
1-42W TTT 3
Spring Setting Chart
TRIM LAMP WATTAGE LAMP TYPE SETTING
6CS142W* 1-13W DTT 1
1-18W DTT 1
1-26W DTT 1
1-26W TTT 1
1-32W TTT 1
1-42W TTT 1
6CS226W* 2-13W DTT 1
2-18W DTT 1
2-26W DTT 1
6CLS142* 1-13W DTT 1
1-18W DTT 1
1-26W DTT 1
1-26W TTT 1
1-32W TTT 1
1-42W TTT 1
6CLS226* 2-13W DTT 1
2-18W DTT 1
2-26W DTT 1
Customer First Center 1121 Highway 74 South Peachtree City, GA 30269 770.486.4800 FAX 770.486.4801
INSTALLATION INSTRUCTIONS
IMPORTANT : READ CAREFULLY BEFORE INSTALLING FIXTURE. RETAIN FOR FUTURE REFERENCE
CD61*/CD62*/CD6S*
Commercial Recessed CFL
Rough-In Installation Instructions
705300-Rev. INS
08/29/2012 page 3 of 4
PORTFOLIO®
Note for Wall Wash Installations
Electrical Wiring Diagrams
CAUTION: Make certain no bare wires are exposed outside of wire nut connectors.
Step 1. Provide electrical service according to the
“National Electrical Code” or your local
electrical code to the junction box (located
on the plasterframe). Supply wire insulation
must be rated for at least 90 C. The junction
box is rated for a maximum of 8 No. 12 AWG
Branch Circuit conductors and is also suitable
for at least 90 C.
Step 2. Remove junction box cover.
Step 3. Remove appropriate round pryout and connect conduit to junction
box with proper connector (not included).
Step 4. Connect supply lead wires to junction box lead wires (line, neutral
and ground) in the xture using properly sized wire nuts.
Be careful not to leave any bare conductors outside of the
wire nut connectors.
Step 5. Connect white to white, black to black, and green (from electrical service) on the supply side to the bare copper
wire in the junction box. Place all excess wiring and connections into the junction box and replace the cover.
BLACK LINE
WHITE NEUTRAL
GREEN/BARE COPPER GROUND
Electrical Connection
Housing is to be installed with one of (2) sides (A,B) facing the wall.
A B
BLACK
WHITE
RED
BLUE
BALLAST
RED
BLUE
YELLOW
YELLOW
HOT-BLACK
NEUTRAL-WHITE
RED
RED
BLUE
BLUE
BALLAST
1-LAMP 2-LAMPS

This manual suits for next models

2

Other Cooper Lighting Lighting Equipment manuals

Cooper Lighting HALO Series User manual

Cooper Lighting

Cooper Lighting HALO Series User manual

Cooper Lighting MS185R User manual

Cooper Lighting

Cooper Lighting MS185R User manual

Cooper Lighting HALO ALL-PRO AL3050LPC Series User manual

Cooper Lighting

Cooper Lighting HALO ALL-PRO AL3050LPC Series User manual

Cooper Lighting Sure-Lites LEM User manual

Cooper Lighting

Cooper Lighting Sure-Lites LEM User manual

Cooper Lighting ALL-PRO MST18920LES User manual

Cooper Lighting

Cooper Lighting ALL-PRO MST18920LES User manual

Cooper Lighting LZR102 User manual

Cooper Lighting

Cooper Lighting LZR102 User manual

Cooper Lighting Halo LZE800SL User manual

Cooper Lighting

Cooper Lighting Halo LZE800SL User manual

Cooper Lighting Halo LF603 User manual

Cooper Lighting

Cooper Lighting Halo LF603 User manual

Cooper Lighting IRIS MH4CFL42E User manual

Cooper Lighting

Cooper Lighting IRIS MH4CFL42E User manual

Cooper Lighting METALUX HBSPMS User manual

Cooper Lighting

Cooper Lighting METALUX HBSPMS User manual

Cooper Lighting Corelite Class R2R User manual

Cooper Lighting

Cooper Lighting Corelite Class R2R User manual

Cooper Lighting PROfile AR60T User manual

Cooper Lighting

Cooper Lighting PROfile AR60T User manual

Cooper Lighting FAIL-SAFE CFE-4 Series User manual

Cooper Lighting

Cooper Lighting FAIL-SAFE CFE-4 Series User manual

Cooper Lighting MIGHT LIGHT LED130 User manual

Cooper Lighting

Cooper Lighting MIGHT LIGHT LED130 User manual

Cooper Lighting McGraw-Edison Impact Elite LED User manual

Cooper Lighting

Cooper Lighting McGraw-Edison Impact Elite LED User manual

Cooper Lighting HALO miniLUME LA5300 User manual

Cooper Lighting

Cooper Lighting HALO miniLUME LA5300 User manual

Cooper Lighting ALL-PRO MST18920L User manual

Cooper Lighting

Cooper Lighting ALL-PRO MST18920L User manual

Cooper Lighting RFM300 User manual

Cooper Lighting

Cooper Lighting RFM300 User manual

Cooper Lighting HALO RL6 User manual

Cooper Lighting

Cooper Lighting HALO RL6 User manual

Cooper Lighting COMBOLIGHT CR220M70 User manual

Cooper Lighting

Cooper Lighting COMBOLIGHT CR220M70 User manual

Cooper Lighting Combolight Trimmed V90229-1T User manual

Cooper Lighting

Cooper Lighting Combolight Trimmed V90229-1T User manual

Cooper Lighting HALO MWP20FSUNVDBZ User manual

Cooper Lighting

Cooper Lighting HALO MWP20FSUNVDBZ User manual

Cooper Lighting Halo TGS3S401DSRB User manual

Cooper Lighting

Cooper Lighting Halo TGS3S401DSRB User manual

Cooper Lighting HALO Home MicroEdge HLB6 User manual

Cooper Lighting

Cooper Lighting HALO Home MicroEdge HLB6 User manual

Popular Lighting Equipment manuals by other brands

Olympus LG-LSLED instructions

Olympus

Olympus LG-LSLED instructions

Nicols PAR LED 1418 Z IP user manual

Nicols

Nicols PAR LED 1418 Z IP user manual

Larson Electronics IND-LP-SS-24-2X2-2L-UVC instruction manual

Larson Electronics

Larson Electronics IND-LP-SS-24-2X2-2L-UVC instruction manual

iHome iHL03 quick start guide

iHome

iHome iHL03 quick start guide

Quoizel PNT8306MBK installation guide

Quoizel

Quoizel PNT8306MBK installation guide

Somogyi Elektronic home DL 4/27 instruction manual

Somogyi Elektronic

Somogyi Elektronic home DL 4/27 instruction manual

OttLite B1FSB user manual

OttLite

OttLite B1FSB user manual

Fomei FY3415 user manual

Fomei

Fomei FY3415 user manual

Pontec PondoStar Set 30 operating instructions

Pontec

Pontec PondoStar Set 30 operating instructions

OCEM Multi Electric LRTH04 Instruction Manual for Use, Installation and Maintenance

OCEM

OCEM Multi Electric LRTH04 Instruction Manual for Use, Installation and Maintenance

Lightolier Lytecaster 302MRIC9X specification

Lightolier

Lightolier Lytecaster 302MRIC9X specification

Favero FULL-ARM-01 Technical instructions

Favero

Favero FULL-ARM-01 Technical instructions

Future light POS-12 LED TCL POWERSTICK user manual

Future light

Future light POS-12 LED TCL POWERSTICK user manual

Equinox Systems Gigabar MKII COB user manual

Equinox Systems

Equinox Systems Gigabar MKII COB user manual

Philip Payne Specto-XT Guide

Philip Payne

Philip Payne Specto-XT Guide

Gainsborough K419 quick start guide

Gainsborough

Gainsborough K419 quick start guide

Probrite PWRW50-PC-4K-BZ INSTALLATION, USAGE, & CARE GUIDE

Probrite

Probrite PWRW50-PC-4K-BZ INSTALLATION, USAGE, & CARE GUIDE

PARMIDA PLED-CSTR27K-5V-USB installation guide

PARMIDA

PARMIDA PLED-CSTR27K-5V-USB installation guide

manuals.online logo
manuals.online logoBrands
  • About & Mission
  • Contact us
  • Privacy Policy
  • Terms and Conditions

Copyright 2025 Manuals.Online. All Rights Reserved.