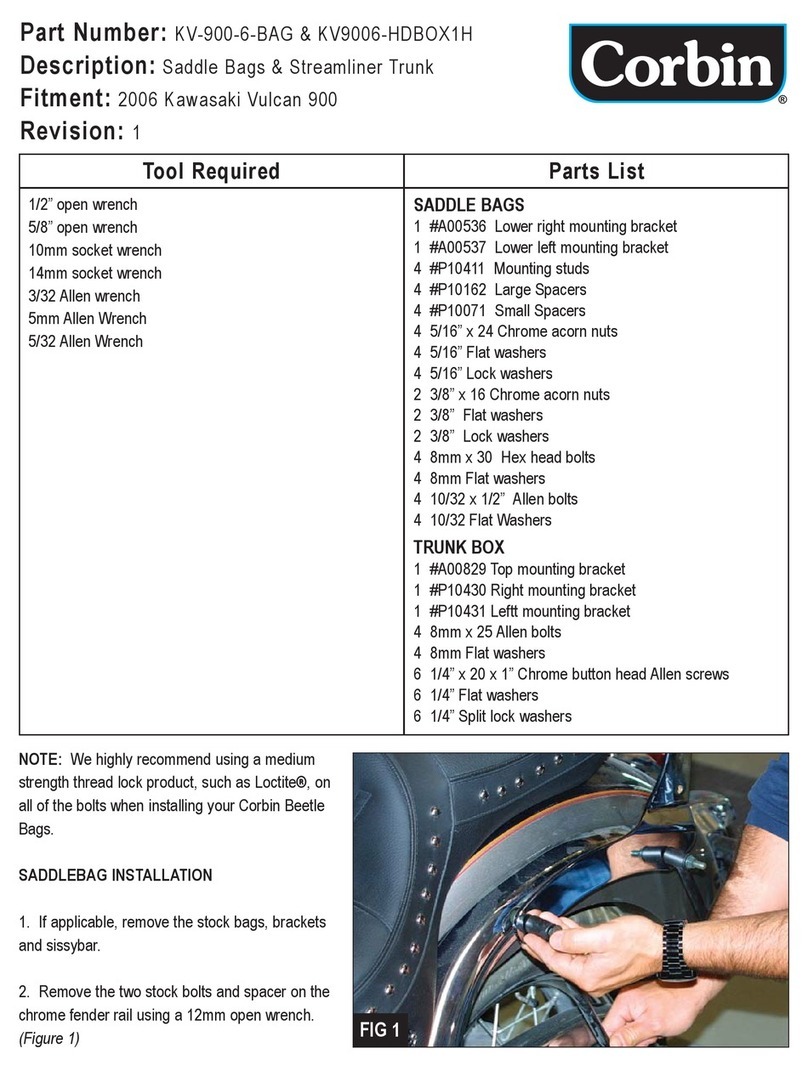
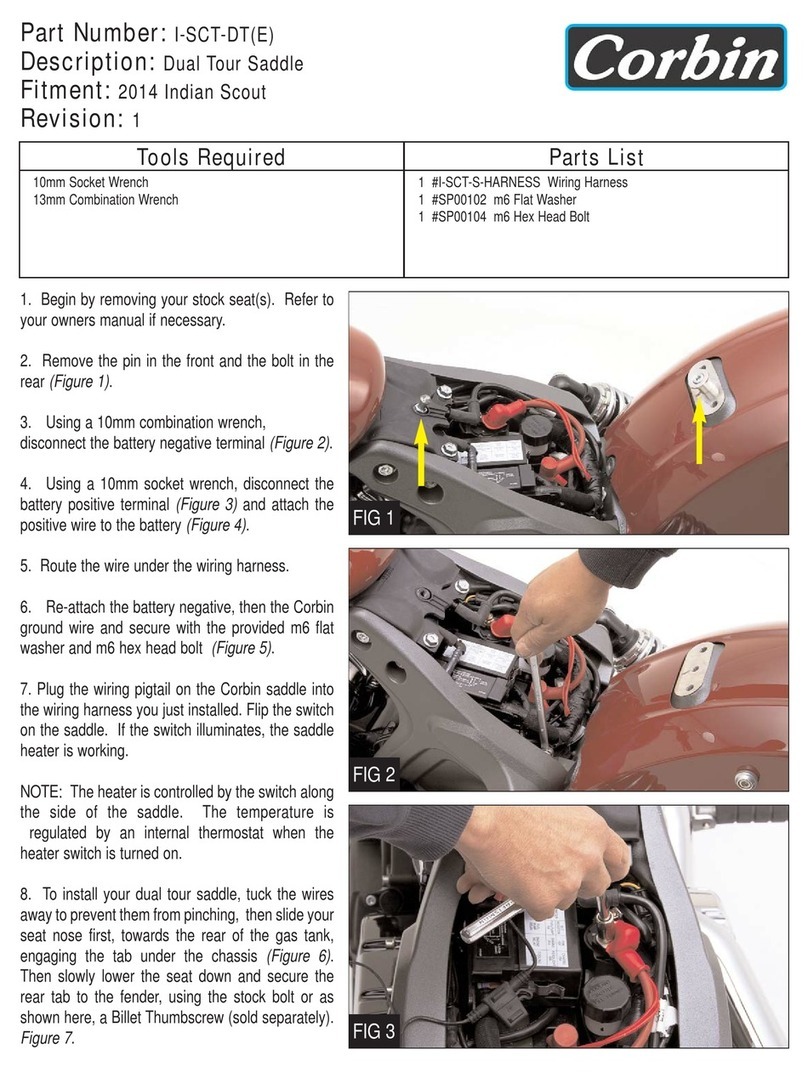
NOTE: Install the right passenger foot peg on the
left bracket #A00834 and the left passenger foot
peg on the right bracket #A00833.
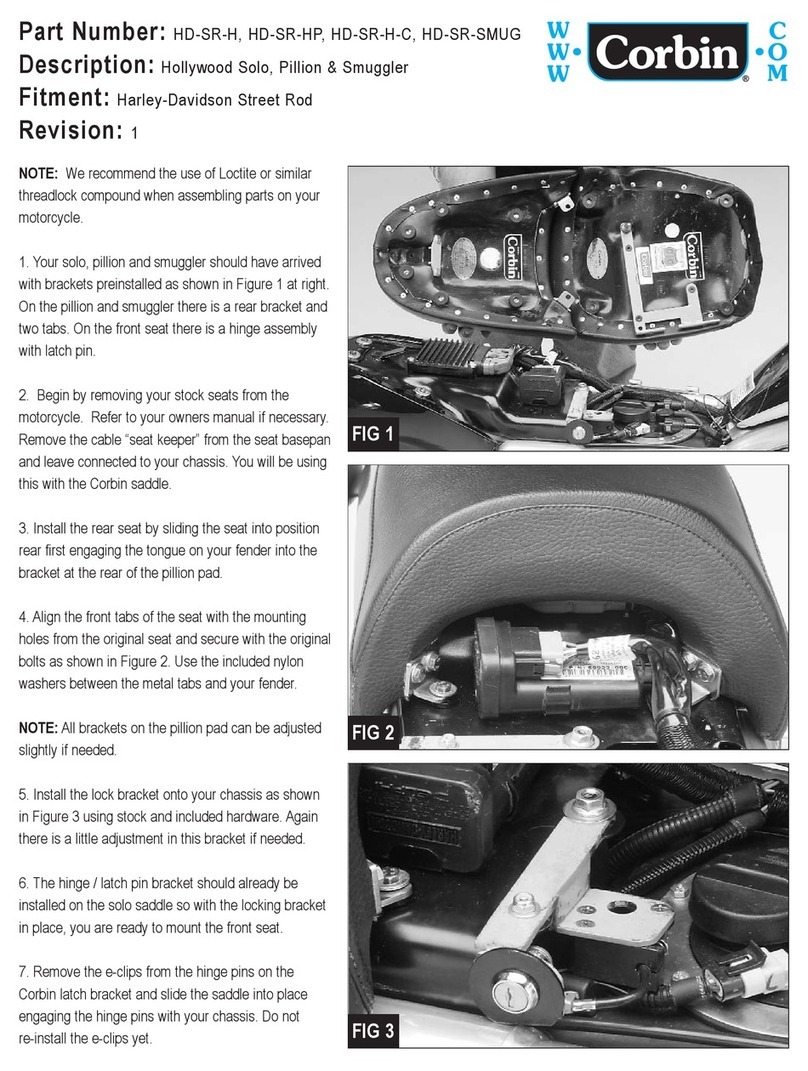
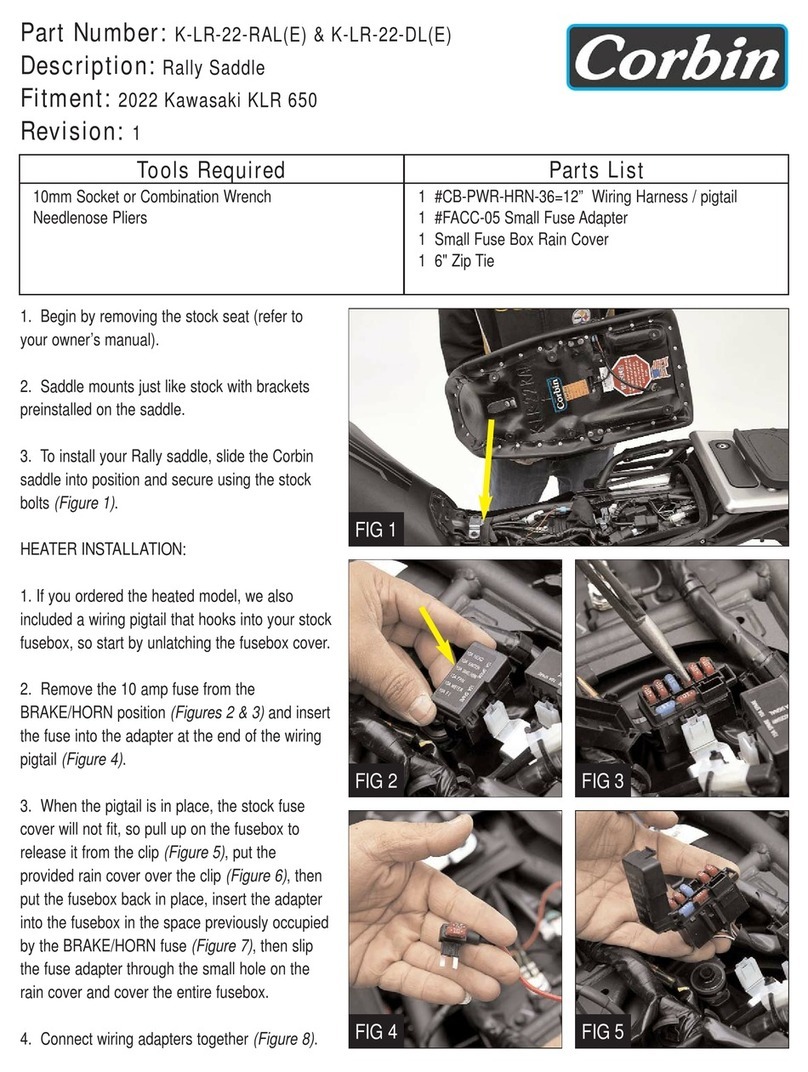
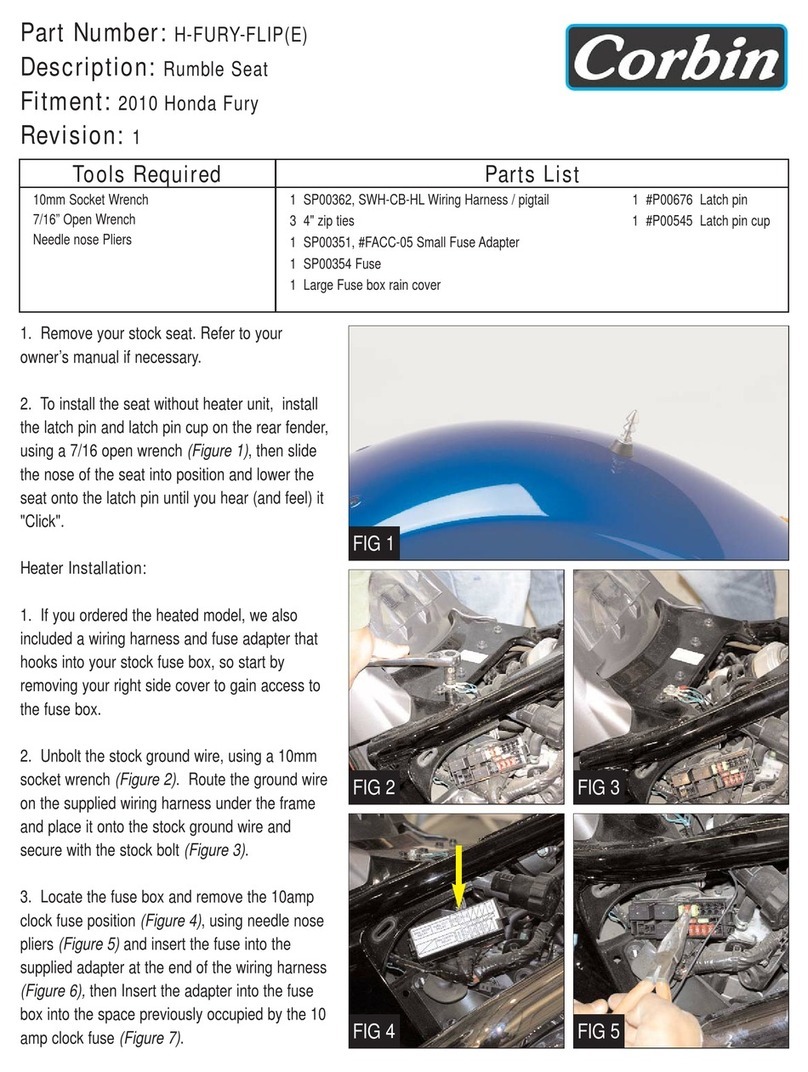
4.
Install the bottom mount bracket (#A00834 for
the left side and #A00833 for the right side), where
you removed the foot peg using the supplied 8mm
x 40 hex head bolts, 8mm flat washer, 8mm lock
washer and 8mm Nylock nut (Figure 4). Tighten to
12 ft. lbs. and don’t forget the Loctite®.
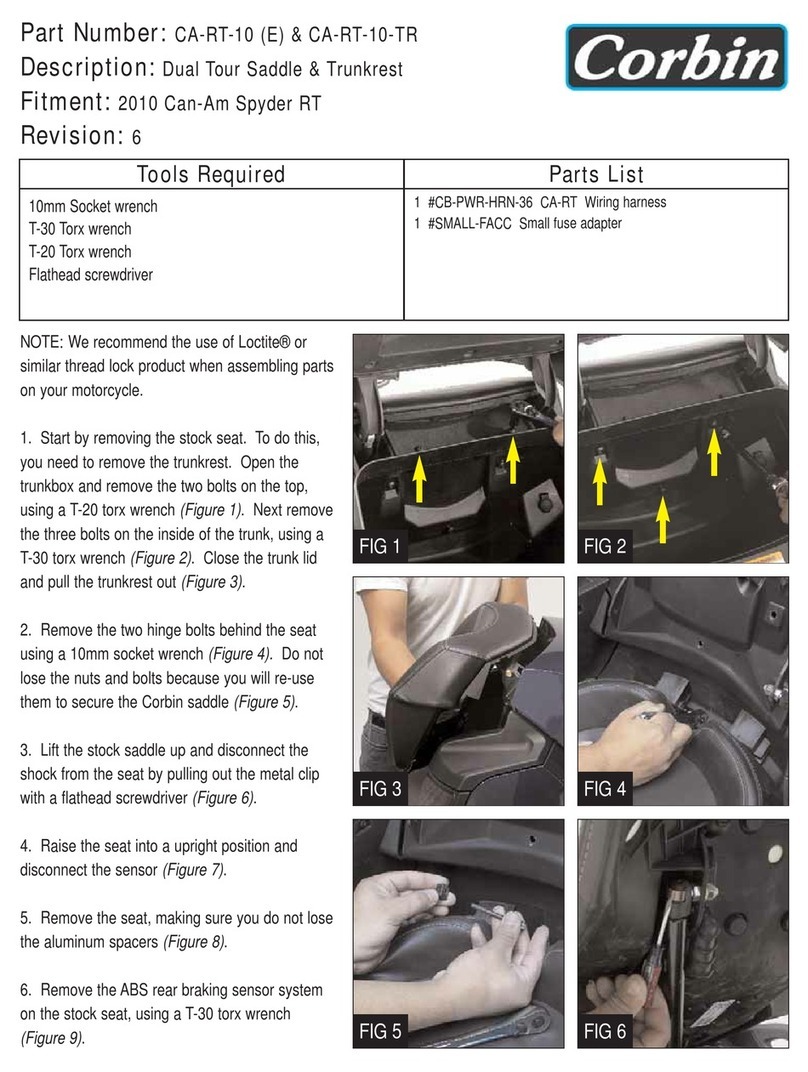
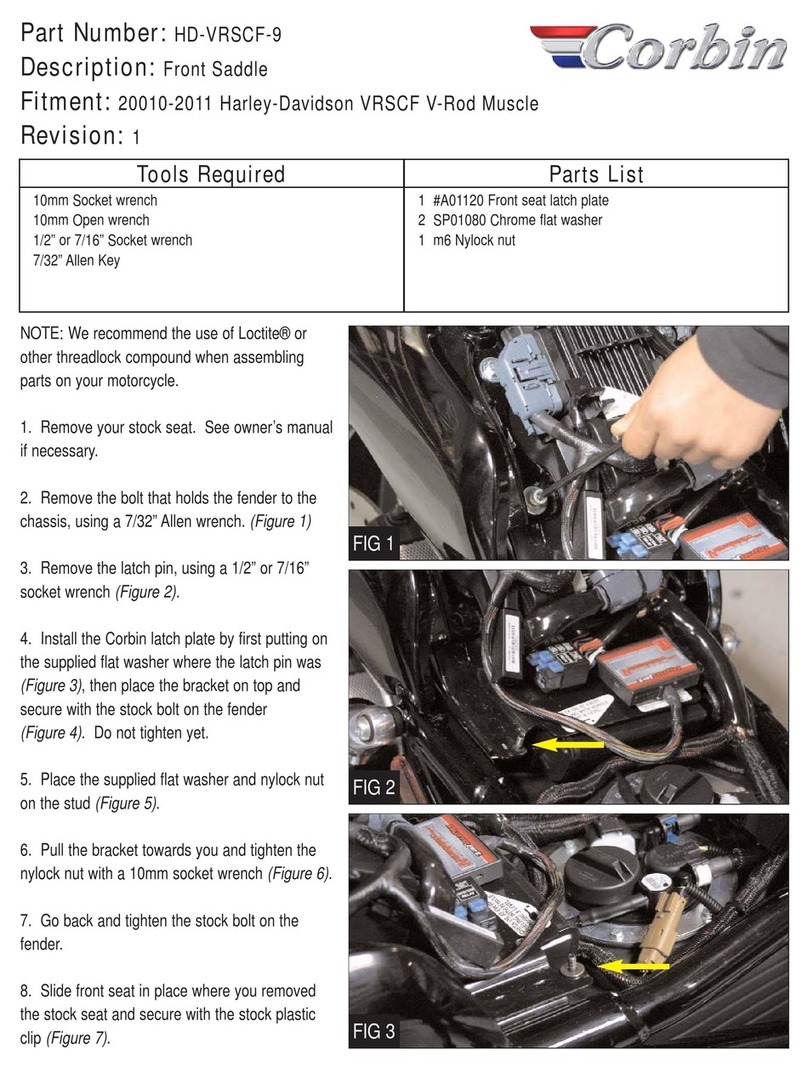
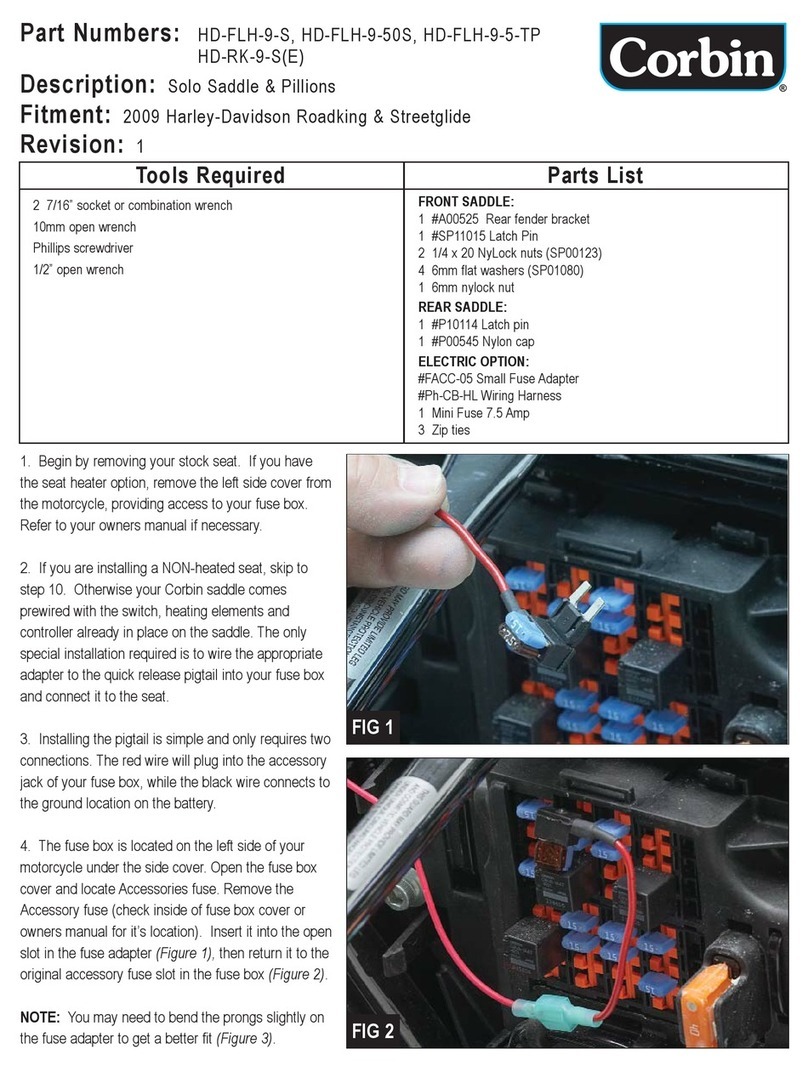
5. You are now ready to install the saddlebags.
Carefully align the bags with the three mounting
studs and secure them with a 3/8” lock washer,
flat washer and chrome acorn nut (Figure 5). Do
not tighten at this time.
6. Repeat on the other side.
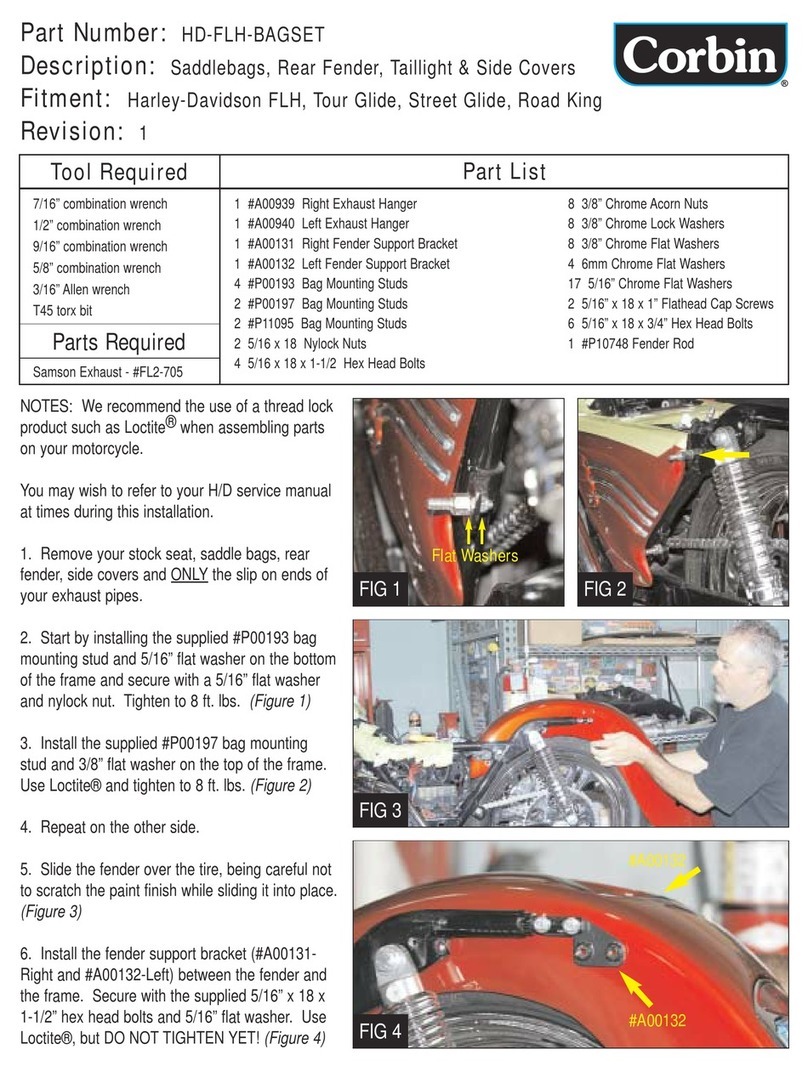
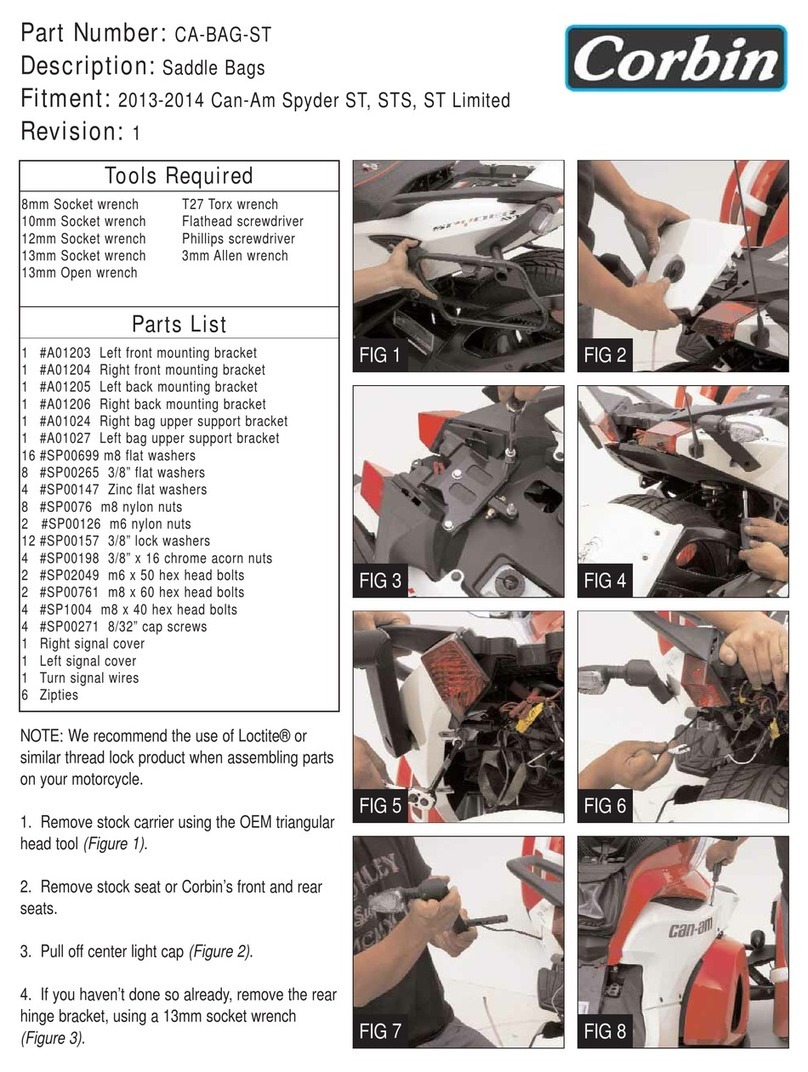
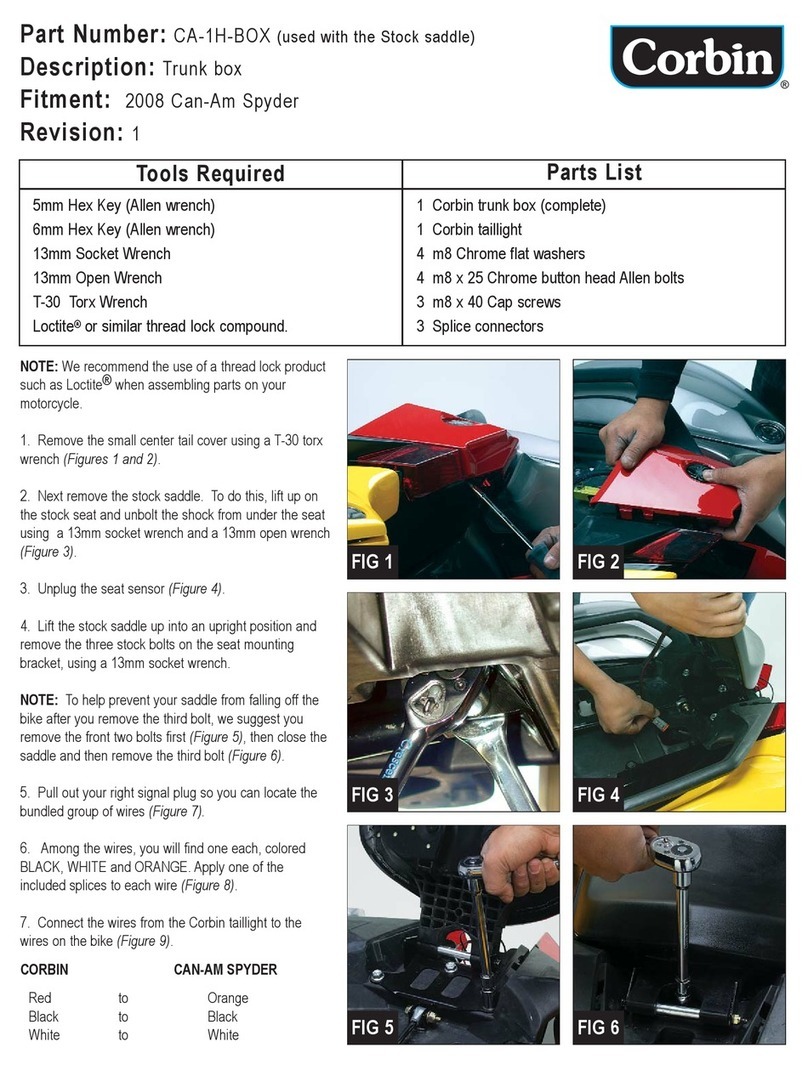
7. Next, install the supplied rear bottom mounting
bracket #P10451 to the lower part of the bags
using the supplied 8mm x 25Allen bolts and 8mm
flat washers (Figure 6). Tighten all bolts, including
the chrome acorn nuts inside the bags, to 8 ft.
lbs. and again, we recommend the use of
threadlock material.
8. Installation is now complete, so get ready and
go for a ride!
FIG 4
FIG 3
FIG 5
FIG 6
Questions? Give us a holler...
800-223-4332
tech@corbin.com
Side Cover
