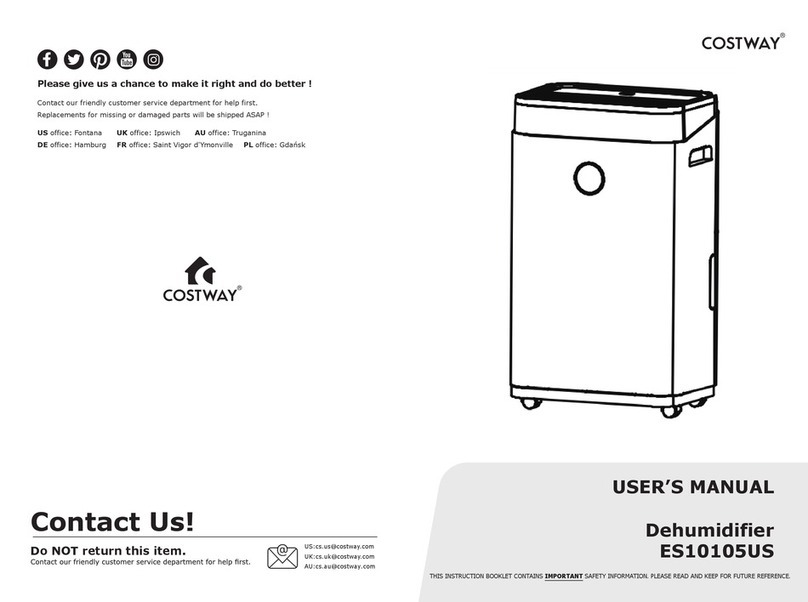
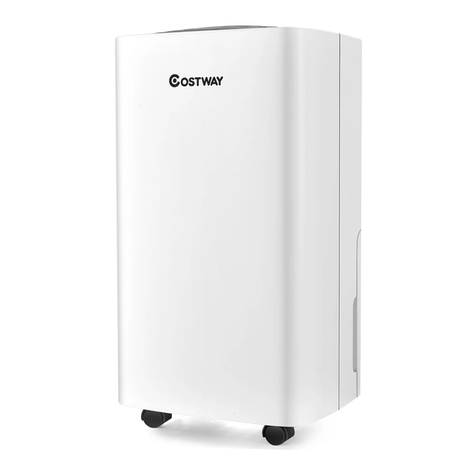
Costway ES10104US User manual

Please give us a chance to make it right and do better !
Contact our friendly customer service department for help first.
Replacements for missing or damaged parts will be shipped ASAP !
Contact Us!
Do NOT return this item.
Home Dehumidifier
ES10104US
USER’S MANUAL
THIS INSTRUCTION BOOKLET CONTAINS IMPORTANT SAFETY INFORMATION. PLEASE READ AND KEEP FOR FUTURE REFERENCE.
US office: Fontana UK office: Ipswich AU office: Truganina
DE office: Hamburg
FR office: Saint Vigor d'Ymonville
PL office: Gdańsk
US:cs.us@costway.com
UK:cs.uk@costway.com

Before You Start
Please read all instructions carefully.
Retain instructions for future reference.
Separate and count all parts and hardware.
Read through each step carefully and follow the proper order.
We recommend that, where possible, all items are assembled
near to the area in which they will be placed in use, to avoid
moving the product unnecessarily once assembled.
Always place the product on a flat, steady and stable surface.
Keep all small parts and packaging materials for this product
away from babies and children as they potentially pose a serious
choking hazard.
02 03
1. BEFORE YOU BEGIN
1.1 PRODUCT DESCRIPTION
The dehumidifier is used to remove excessive moisture from
the air. The resulting reduction in relative humidity protects
buildings and their contents from the adverse effects of
excess humidity.
2. FOR YOUR SAFETY
2.1 GENERAL PRECAUTION
Your safety is the most important thing we are
concerned about!
Turn off the
dehumidifier when
cleaning.
Do not operate with
wet hands.
Do not unplug while
the unit is operating.
Turn off the
dehumidifier when
cleaning.
Do not operate with
wet hands.
Do not unplug while
the unit is operating.
Always use a power
outlet that is
grounded.
Keep the air inlet
and outlet free of
obstacles.
Do not put objects
on the unit
Do not use an
extension cord or an
adapter plug.
Do not tilt or turn
over the unit.
Do not climb or sit
on the product.

04 05
Do not insert fingers
or other objects into
the air outlet.
Do not store in dusty
place, or expose
under corrosive
environment.
Replace the
assembly with the
manufacturer
approved
replacement parts.
1. Unpacking the appliance and checking for any damage or
scratches on the machine.
2. If tipped more than 45°, allow the unit to set upright for
at least 2 hours before starting up.
3. Check if the bucket is empty and re-install correctly
before plugging in the dehumidifier. Be sure the bucket full
indicator does not light up.
4. Press POWER to turn on the dehumidifier.
5. Press MODE repeatedly to choose Auto Sunny
(60%RH), Auto Rainy (40%RH), or Continuous Drying.
4. QUICK START GUIDE
Making dry and
comfortable
Smartly senses room humidity and
maintains your ideal levels.
3. WHERE TO USE
3.1 Installation
1.Place the unit on a firm, level
surface in an area with at least
7.8"(20cm) of free space
around it allowing for proper air
circulation.
2.Operate this unit at an
ambient temperature from 41℉
to 95℉(5°C to 35°C).
5.Do not operate the unit
beneath furniture or where the
air flow is restricted.
6.Do not operate or store the
unit in direct sunlight or rain.
3.Keep doors and windows close
for better energy saving.
4.Do not operate in close
proximity to walls, curtains, or
other objects that may block
inlet and outlet.
Take care to ensure
that children do not
play with the unit.
Service or repair
should be performed
by a qualified
technician.
Ensure the unit is far
away from fire,
inflammable, or
explosive objects.
7.8"
(20cm)
To dry clothes
quickly
Continuous dehumidifying to speed
the drying process.
Sleep well into
the night
Silence dehumidifying and dims the
lights when you sleep.

06 07
Blue
Steady On:
Flashing Blue:
Steady On:
Flashing Green:
Steady On:
Flashing Red:
Humidity levels below 40% relative humidity.
INDICATOR
DESCRIPTION
Defrosting is in progress.
Above 40% and below 60% relative humidity.
The air purifying function is individually turned on.
High humidity above 60% relative humidity.
Indicates the water tank is almost full.
Green
Red
6. Press SLEEP for silent operating with dim light before
going to bed.
7. Press TIMER repeatedly to set a 1-hour to 24-hour
delay OFF before you go out.
8. Press POWER again to turn the unit off.
A. The screen will display current relative
humidity (%) when the machine is turned on.
And display “一一” when the machine is off.
B. The screen will display following function:
1. Timer set; 2. Error code;
3. Long press HUM key to display Room
temperature (℉/℃);
C. The indicators will light up when the corresponding function is
turned on.
✔
Powerful moisture removal (Up to 12L/day dehumidification)
✔
Antibacterial Filter
✔
Continuous Drainage or 2L Water Tank
✔
Laundry Drying Function/ Child Lock / Auto-Defrost
✔
Touch Screen / Touch control buttons
✔
Humidity Monitor shows current air humidity.
✔
Auto mode automatically adjusts humidity levels.
✔
Effectively removes moisture, dust, and dust mites from the air.
✔
Low power consumption-energy efficiency.
✔
A-24 hour timer to set the time of operation.
✔
Quiet fan has two speed settings. (Noise:≤36dB(A))
✔
Sleep mode dims the control panel light when you sleep.
For more operational instructions, please read the
following pages.
5. PRODUCT OVERVIEW
6. HOW TO USE
6.1 CONTROL PANEL
POWER BREATHING LIGHT
Display:
FEATURES
+
+
Air outlet
Castor
Front view Back view
Air filter
Continuous
drainage
Water tank
Control panel
Front case

08 09
Power Button Press to switch the machine on or off.
Press to choose Sunny, Rainy and
Continuous Drying mode.
Press to choose fan speed High and Low.
Long press to turn child lock function on or off.
Adjusts the humidity set-point within the range
of 20%-95%.
Sets a time for the unit to automatically start
or stop.
Press to turn sleep mode on or off.
Lights up when child lock function is turned on.
Lights up when switch to High or Low speed.
Lights up when water tank is almost full.
Operation functions of Sunny, Rainy, and
Continuous drying.
Displays humidity value, Timer setting or
Temperature.
Mode Button
Fan Speed Button/
Safe Lock Button
Humidity Button
Timer Button
Sleep Button
Child Lock Light
Fan Speed Light
Bucket Full Light
Mode Light
Digital Display
6.3 SETTINGS6.2 FUNCTION KEYS AND INDICATORS
a. Dehumidification Mode Setting
b. Set Sleep Mode:
+
+
Press POWER key to turn on the unit after plug in.
The dehumidifier starts with sunny mode and air purifying
function.
Press MODE key repeatedly to switch the mode:
•Sunny mode: auto dehumidifying with 60%RH, High fan speed.
•Rainy mode: auto dehumidifying with 40%RH, high fan speed.
•Continuous mode: continuous dehumidifying
Press SLEEP key to turn on sleep function.
It will operate in silent mode with low fan speed and dims all the
lights.
Press any button to wake up the indicators.
Press SLEEP key again to exit the sleep mode.
c. Set Humidity (setting range: 20%-95%):
Press the HUM key to check the humidity set-point under
current mode.
Press the HUM key repeatedly to adjust humidity set-point.
Set appropriate humidity levels to create a comfortable
environment.
Note: The HUM key cannot be set in the continuous mode.
d. Set Fan Speed:
Press SPEED key to switch the speed between High speed and
Low speed.
Note: The fan speed cannot be set when the indicator is off in
sleep mode and defrosting progress.
e. Child Lock Function:
The child lock function is designed to prevent children from
playing unit.
To active: Long press the SPEED/LOCK key for 5 seconds to
disable all the buttons.
To unlock: Press and hold again to cancel the child lock.

6.4 DRAINAGE
There are two ways of removing collected water produced by the unit.
A. Manual draining: Empty water tank by manual.
B. Continuous draining: Use gravity to drain condensate water by
attaching a drain hose.
10 11
6.4.1 Emptying the water tank
Warning!!!
f. Overload Protection
g. Timer Setting(setting range: 1hour-24hours):
In the event of a power loss, to protect the compressor, there is
a 3-minute delay until the compressor restarting.
To turn off
(When power on)
Press Timer key
to turn on the
timer function
Press Timer
repeatedly to set the
delay OFF time.
h. Water Full Indicator:
The machine automatically shuts off once the water tank is full,
alerting the user through an indicator light and buzzing for 15
times. It reminds you to check:
• If the water tank is full, empty and re-install the water tank.
• If the water tank is not in position, the full indicator always on
and the unit is inoperative.
• Re-install the tank correctly, and the unit will auto operate as your
last setting.
i. Room Temperature Inspection
In addition to the humidity level, the digital display can also indicate
the current room temperature. Please check as follows:
j. Auto Defrost Function
At low room temperatures, frost may buildup at the evaporator,
reducing the airflow across it during dehumidifying.
The unit will automatically start defrosting and the POWER indicator
flashing.
When the room temperature is below 64.4℉/18℃or the humidity
sensor failures, the compressor stops for 10 minutes during the
automatic defrost function and the fan keeps running.
Press and hold the TIMER button for 5 seconds.
To turn on
(When power off)
Press Timer key
to turn on the
timer function
Press Timer
repeatedly to set the
delay ON time.
Cancel the timer Press Timer repeatedly until the screen
shows ‘00’
Note: when press POWER will also exit the
timer setting.
• Unplug the dehumidifier from its
power source.
• Pull on the water tank and simply slide
out of the body of the dehumidifier.
• Do not remove the float out of the
tank. Make sure that the float can move
freely and that it will actuate the level
switch when the tank is full.
• Clean the inside of the tank as well as
the outside.
Use only mild soap, water and soft cloth. Do not use any commercial
cleaning solvents.
Use only mild soap, water and soft cloth. Do not use any commercial
cleaning solvents.
• Allow the tank to air-dry completely
and slide it back into place within the
dehumidifier.
• After you have replaced the tank, plug
the unit back into its power source.

6.4.2. CONTINUOUS DRAINAGE
Condensate water can automatically flow into a bucket or drain by
gravity with a water hose.
12 13
• CLEANING THE AIR FILTER (every two weeks)
7. CLEANING AND CARE
8. TROUBLESHOOTING
• Set the unit in a horizontal
surface and stable position.
• Switch off the unit before
operating.
• Gently take out the water
tank from the dehumidifier.
• Securely and properly connect
the drain hose and make sure it is
not kinked and clear of
obstruction.
• Put back the water tank.
• Place the outlet of hose over a
drain or bucket and ensure that
water could freely flow out of the
unit.
• Do not submerge the end of
hose into water; otherwise it can
cause "Air Lock" in the hose.
To avoid water spillage:
• As the negative pressure of
condensate drain pan is large, tilt
the drain hose downward toward
the floor. It is appropriate that
the degree of inclination should
exceed 20 degrees.
• Straighten the hose to avoid a
trap existing in the hose.
The air filter is removable for easy cleaning. Do not operate the unit
without an air filter, or the evaporator may be contaminated. Do not
clean the appliance with any chemicals.
Pic1. Switch off the unit and
remove air filter.
Pic2. Rinse the air filter
under running water.
Pic3.
Re-install the
air filter.
Warning!!!
Do not touch the evaporator
surface with bare-hand, or it
could cause injury of your
fingers.
The unit
is not
operating.
Check the power
connection in securely.
Insert the power cord securely
into the wall outlet.
Empty the water tank and
re-install it correctly.
The range of operating
temperature is 41-95℉/5-35℃.
Check if the water level
indicator lights up?
Check the room
temperature.
Inner
Diameter
=9.5mm
When Please confirm Solution

14 15
9.1 STORAGE
9.2 DISPOSAL
WARNING!!!
Releasing refrigerant into atmosphere is
strictly forbidden!
9. STORAGE AND DISPOSAL
Long-term storage - If you will not be using the unit for an extended
period of time (more than a few weeks), it is best to clean the unit
and dry it out completely.
Please store the unit per the following steps.
1.Unplug the unit.
2.Empty the water tank and dry it with a cloth.
3.Clean the filter and let the filter dry completely in a shaded area.
4.Collect the power cord at the tank and re-install it.
5.Re-install the filter at its position.
6.Preserving the machine in ventilating, dry, non- corrosive gas and
safe place indoor.
7.The unit must be kept in an upright position when in storage.
Used electrical
appliances must be
collected separately and
recycled in an
environmentally sound
manner.
ATTENTION: The evaporator inside the machine has to be dried out
before the unit is packed to avoid component damage and molds.
Unplug the unit and place it in a dry open area for days to dry it out.
Another way to dry the unit is to set the humidity point more than
5% higher than the ambient humidity to force the fan to dry the
evaporator for a couple of hours.
There is little
formation of
condensate.
Water Leakage
Excessive
Noise
Emitting
hot
Error
Code
E2
CL
CH
LO
HI
Check the air filter for
dirt.
Clean the air filter as
necessary.
Overflow while moving
the unit.
Empty the water tank
before transport.
Check if the drain hose
is kinked or bent.
Check if the unit is
securely positioned.
Check if any loose,
vibrating parts.
Humidity sensor
dampened or failure.
To clean or replace the
humidity sensor.
Display when Room
temperature is below
41°F (5°C).
Normal. The
compressor stops, and
the fan keeps running.
Display when Room
temperature is above
95°F(35℃).
Normal. The
compressor stops, and
the fan keeps running.
Display when Room
relative humidity is
below 20%RH.
Normal. The
compressor stops, and
the fan keeps running.
Display when Room
relative humidity is
above 95%RH.
Normal. The
compressor and the
fan keep running.
Place the unit on horizontal
and firm ground.
Secure and tight the parts.
Noise sounds like water
flowing.
Noise comes from flowing
refrigerant. This is normal.
The air outlet is hotter
than room temperature
a bit.
This is normal. The
compressor produces heat
that has been removed by
the air exhausted.
Straighten the hose to
avoid a trap existing.
Check if the air duct is
blocked.
To clear the obstacle.
Set humidity level is higher
than current humidity value.
Set the humidity level below
current humidity value.
Check if the room
temperature is below
68℉/20℃.
This is normal. Low
humidity in low
temperature environment.
Table of contents
Other Costway Dehumidifier manuals

Costway
Costway ES10261US User manual

Costway
Costway ES10263DE-WH User manual

Costway
Costway ES10263US User manual

Costway
Costway ES10196US-BL User manual

Costway
Costway ES10111US-GR User manual

Costway
Costway ES10015US User manual

Costway
Costway ES10260US User manual

Costway
Costway ES10262DE User manual

Costway
Costway ES10014US User manual

Costway
Costway ES10105US User manual
Popular Dehumidifier manuals by other brands

Drieaz
Drieaz Evolution LGR owner's manual

thermastor
thermastor Quest 185 Cool Installation, operation and maintanance manual

Saeco
Saeco MIRAGE DEU 001 Installation and operation manual

Perfect Aire
Perfect Aire 2PFD22 owner's manual

HIdRos
HIdRos HMA/Z Series Technical manual

Master
Master DH 721 P User and Maintenance Book