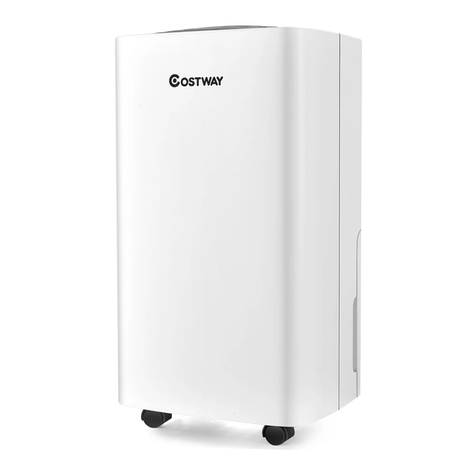
Costway ES10111US-GR User manual

ES10111US-GR
If you're having difficulty, our friendly
customer team is always here to help.
THIS INSTRUCTION BOOKLET CONTAINS IMPORTANT SAFETY INFORMATION. PLEASE READ AND KEEP FOR FUTURE REFERENCE.
Commercial Dehumidifier
Déshumidificateur Commercial
USA office: Fontana AUS office: Truganina
GBR office: Ipswich FRA office: Saint Vigor d'Ymonville
AUS:cs.au@costway.com
FRA:cs.f r @costway.com

Before You Start
Please read all instructions carefully.
Retain instructions for future reference.
Separate and count all parts and hardware.
Read through each step carefully and follow the proper order.
We recommend that, where possible, all items are assembled
near to the area in which they will be placed in use, to avoid
moving the product unnecessarily once assembled.
Always place the product on a flat, steady and stable surface.
Keep all small parts and packaging materials for this product
away from babies and children as they potentially pose a serious
choking hazard.
02 03
1.1 PRODUCT DESCRIPTION
This dehumidifier removes moisture of room, which is commonly
used in basement, warehouse, villa and many so on.
The environmentally friendly R32 is used as the refrigerant R32 has
no damaging influence on the ozone layer (ODP), a negligible
greenhouse effect (GWP) and is available worldwide. Because of its
efficient energy properties, the R32 is highly suitable as a coolant
for this application. Precautions must be taken into consideration
due to the coolant's flammability.
1.2 SYMBOLS FROM THE UNIT AND USER MANUAL
This unit uses a flammable refrigerant.
If refrigerant leaks and comes in contact with
fire or heating part, it will cause harmful gas
and there is risk of fire.
Read the USER MANUAL carefully before
operation.
Further information is available in the USER
MANUAL, SERVICE MANUAL, and the like.
Service personnel are required to carefully
read the USER MANUAL and SERVICE MANUAL
before operation.
BEFORE YOU BEGIN
WARNING

04 05
Your safety is the most important thing we concerned!
Please read this manual carefully and fully
understand before operating your appliance.
2.1 OPERATIONAL PRECAUTIONS
WARNING- to reduce the risk of fire, electric shock or injury to
persons or property:
If the supply cord is damaged, it must be replaced by the
manufacturer, or similarly qualified persons in order to avoid a
hazard.
The appliance shall be disconnected from its power source during
service.
Always operate the unit from a power source of equal voltage,
frequency and rating as indicated on the product identification plate.
Always use a power outlet that is grounded.
Unplug the power cord when cleaning or when not in use.
Do not operate it with wet hands. Prevent water from spilling onto
the unit.
Do not immerse or expose the unit to rain, moisture or any other
liquid.
Do not leave the unit running unattended. Do not tilt or turn over
the unit.
Do not unplug while the unit is operating.
Do not unplug by pulling on the power cord.
Do not use an extension cord or an adapter plug.
Do not put objects on the unit.
Do not climb or sit on the unit.
Do not insert fingers or other objects into the air outlet.
Do not touch the air inlet or the aluminum fins of the unit.
Do not operate the unit if it is dropped, damaged or showing signs
of product malfunction.
FOR YOUR SAFETY
WARNING
above and persons with reduced physical, sensory or mental
capabilities or lack of experience and knowledge if they have been
given supervision or instruction concerning use of the appliance in
a safe way and understand the hazards involved. Children shall not
play with the appliance. Cleaning and user maintenance shall not
be made by children without supervision.
designated refrigerant.
attempt to service!
untrained personnel to attempt to find the cause.
store, ventilate the room and contact the local fire department to
advise them that a propane leak has occurred.
service technician has arrived and that technician advises that it is
safe to return to the room.
should be used inside or in the vicinity of the units.
and non-sparking. Component parts shall only be replaced with
identical repair parts.
EXPLOSION, DEATH, INJURY AND PROPERTY DAMAGE.

06 07
2.2SAFETY PRECAUTIONS ON SERVICING
Please follow these warnings when to undertake the followings
when servicing an appliance with R32.
2.2.1 Checks to the area
Prior to beginning work on systems containing flammable
refrigerants, safety checks are necessary to ensure that the risk of
ignition is minimized. For repair to the refrigerating system, the
following precautions shall be complied with prior to conducting
work on the system.
2.2.2 Work procedure
Work shall be undertaken under a controlled procedure so as to
minimize the risk of a flammable gas or vapor being present while
the work is being performed.
2.2.3 General work area
All maintenance staff and others working in the local area shall be
instructed on the nature of work being carried out. Work in
confined spaces shall be avoided. The area around the work space
shall be sectioned off. Ensure that the conditions within the area
have been made safe by control of flammable material.
2.2.4 Checking for presence of refrigerant
The area shall be checked with an appropriate refrigerant detector
prior to and during work, to ensure the technician is aware of
potentially flammable atmospheres. Ensure that the leak detection
equipment being used is suitable for use with flammable
refrigerants, i.e. no sparking, adequately sealed or intrinsically
safe.
2.2.5 Presence of fire extinguisher
If any hot work is to be conducted on the refrigeration equipment
or any associated parts, appropriate fire extinguishing equipment
shall be available to hand. Have a dry powder or CO2 fire
extinguisher adjacent to the charging area.
Any person who is involved with working on or breaking
into a refrigerant circuit should hold a current valid
certificate from an industry-accredited assessment
authority, which authorizes their competence to handle
refrigerants safely in accordance with an industry,
recognized assessment specification.
Servicing shall only be performed as recommended by
the equipment manufacturer. Maintenance and repair
requiring the assistance of other skilled personnel shall
be carried out under the supervision of the person
competent in the use of flammable refrigerants.
WARNING
WARNING
Do not clean the appliance with any chemicals.
Ensure the unit is far away from fire, inflammable, or explosive
objects.
The unit shall be installed in accordance with national wiring
regulations.
Do not use means to accelerate the defrosting process or to
clean, other than those recommended by the manufacturer.
The appliance shall be stored in a room without continuously
operation sources (for example: open flames, an operating gas
appliance or an operating electric heater).
The appliance shall be stored so as to prevent mechanical
damage from occurring.
Do not piece or burn, even after use.
Be aware that refrigerants may not contain an odor.
Pipe-work shall be protected from physical damage and shall not
be installed in an unventilated space, if that space is smaller than 4
m²/43sq.ft.
Compliance with national gas regulations shall be observed.
Keep any required ventilation openings clear of obstruction.
The appliance shall be stored in a well-ventilated area where the
room size corresponds to the room area as specified for operation.

09
– Marking to the equipment continues to be visible and legible.
Markings and signs that are illegible shall be corrected;
– refrigeration pipe or components are installed in a position where
they are unlikely to be exposed to any substance which may
corrode refrigerant containing components, unless the components
are constructed of materials which are inherently resistant to being
corroded or are suitably protected against being so corroded.
2.2.9 Checks to electrical devices
Repair and maintenance to electrical components shall include
initial safety checks and component inspection procedures. If a
fault exists that could compromise safety, then no electrical supply
shall be connected to the circuit until it is satisfactorily dealt with.
If the fault cannot be corrected immediately but it is necessary to
continue operation, an adequate temporary solution shall be used.
This shall be reported to the owner of the equipment so all parties
are advised.
Initial safety checks shall include:
-those capacitors are discharged: this shall be done in a safe
manner to avoid possibility of sparking;
-that there no live electrical components and wiring are exposed
while charging, recovering or purging the system;
-that there is continuity of earth bonding.
WARNING!
Appliance shall be installed, operated and stored in a
room with a floor area larger than 4㎡/43sq.ft.
Do not install the unit in a place where inflammable
gas may leak.
NOTE! The manufacturer may provide other suitable
example or may provide additional information about
the refrigerant odor.
2.2.6 No ignition sources
No person carrying out work in relation to a refrigeration system
which involves exposing any pipe work that contains or has
contained flammable refrigerant shall use any sources of ignition in
such a manner that it may lead to the risk of fire or explosion. All
possible ignition sources, including cigarette smoking, should be
kept sufficiently far away from the site of installation, repairing,
removing and disposal, during which flammable refrigerant can
possibly be released to the surrounding space. Prior to work taking
place, the area around the equipment is to be surveyed to make
sure that there are no flammable hazards or ignition risks. “No
Smoking” signs shall be displayed.
2.2.7 Ventilated area
Ensure that the area is in the open or that it is adequately
ventilated before breaking into the system or conducting any hot
work. A degree of ventilation shall continue during the period that
the work is carried out. The ventilation should safely disperse any
released refrigerant and preferably expel it externally into the
atmosphere.
2.2.8 Checks to the refrigeration equipment
Where electrical components are being changed, they shall be fit
for the purpose and to the correct specification. At all times the
manufacturer’s maintenance and service guidelines shall be
followed. If in doubt, consult the manufacturer’s technical
department for assistance.
The following checks shall be applied to installations using
flammable refrigerants:
– The charge size is in accordance with the room size within which
the refrigerant containing parts are installed;
– The ventilation machinery and outlets are operating adequately
and are not obstructed;
– If an indirect refrigerating circuit is being used, the secondary
circuit shall be checked for the presence of refrigerant;

o
o
o
Voltage & Hertz
Rated Input Current
Model No. ES10111US-GR
AC115V / 60Hz
Maximum Design
Pressure
MAX. Input Current
Refrigerant Charge
Dehumidify Capacity
BCSC
Compressor Input
Fan Motor Power
R32/6.71oz
6.9A
15A
RLA:5.5A LRA:27A
0.100HP
High Side: 550psi
Low Side: 260psi
46Pints/Day @65 F, 60% RH
115Pints/Day @86 F, 80% RH
4.7A @65 F, 60% RH
. PRODUCT DRAWINGS
. SPECIFICATIONS
Front
Back
Control panel
Handle
Wheel
Drain Hose
Air Inlet
Water tank cover
Power Cord Wrap
Air Outlet
Built-in Handle
Support Frame
Radiator Grille

Main Body Wheel
. INSTALLATION
Continuous drainage
In extremely wet conditions, the tank may need frequent clearing. It
can be set up for continuous drainage by doing the following:
button to turn off the machine.
tank.
panel.
1. Open the front cover, remove the tank, and clear the water from
the tank.
2. Remove the plug and install the included drain pipe to the
connector, direct the pipe to the desired area before operate the
machine. See the pictures below.
.1 Handle and Support Frame Installation
.2 Drainage Installation
1 5
Handle Spacer
2 6
Stainless Steel Bolt Nut
3 7
Spacer Support Frame
4 8
1
2
3
3
4
45
5
6
6
7
7
8

3. Make sure the water tank and drain pipe are not blocked,
shut the front panel.
4. When you do not use continuous drainage and turn to
use water tank again, just use the plug to stop the water
outflow from the connector.
.1 Button Function
(1)
Press this button while on electric, screen light on, machine
automatically goes to continuous mode, display screen
shows environmental humidity, compressor on after the fan
run for 3 seconds; press this button again, compressor
stops, display screen shows “- -”, machine goes into
standby mode, the fan will run for another minute and stop.
(2)
Press this button while machine is on electric, until button
light goes on, press “MINUS” “ADD” to set the time to start
the machine, when the countdown is over, the fan and
compressor turn on.
Press this button while machine is running, until the button
light goes on, press “MINUS” “ADD” to set the time to stop
the machine, when the countdown is over, the fan and
compressor will shut off.
Press this button for 3 seconds to show current
temperature. After 10 seconds, the display will return to
show current humidity.
Drain Hose
• WARNING: Do not block the drainage hose. The end of
the drainage pipe should not be higher than the outlet
hole. If the drainage pipe end is higher than the outlet hole,
water will not drain properly and could damage
components of the unit.
. MACHINE SETUP AND OPERATION

.2 Operation
1) When the water tank is full, the water tank light goes on
red and alarm goes on after 5 seconds. Buzzer beeps 15
times and the compressor and fan shut off. After the water
tank is emptied, the machine will automatically switch to
the previous mode while the compressor will be in 3
minutes of self-protect. Alarm will stop in 3 seconds after
the water tank was emptied and put back, fan starts, and
compressor will start in 3 minutes.
2) Compressor will not need 3 minutes for self-protect if it
was the first time to start the machine, press “POWER” and
power off; power on, press “POWER”, compressor starts
immediately.
3) The system has auto memory. When all the mode setting
has been finished, if there is sudden power cut during
operation, or the power jack slips out, the system may
store the current status before the power is cut and enter
the operation mode before power cut automatically after
power is supplied.
.3 Defrost Function
1) The compressor and fan will shut off when the
environmental temperature goes below 41 °F or above
100.4°F.
2) Defrost requirement: Compressor running for 30
30.2°F, (last for 10 seconds), compressor stops, defrost
starts, fan continues, defrost light turns on, when the pipe
temperature goes to 41°F or the defrost last for 15
minutes, defrost stops.
Note: During defrost, light won’t be off until the defrosting is
over.
(3)
The humidity can be increased by increments of 5%RH
during normal mode. Hold this button for 1 second to
increase the humidity continuously.
(4)
The humidity can be decreased by increments of 5%RH
during normal mode. Hold this button for 1 second to
decrease the humidity continuously.
(5)
During continuous mode, humidity setting is unavailable.
Continuous mode light turns on and the screen will display
the current humidity. Press this button to switch to normal
mode where the humidity setting will be available.
Note:
1) The default humidity is 50%RH, to increase and decrease
as follow:
20%-25%--30%-35%-40%45%-50%-55%-60%-65%-70%
-75%-80%-85%-90%
2) Environmental humidity and machine set humidity will
decide the status of the compressor and fan as follow:
compressor and fan start running.
Environmental humidity<
compressor and fan stop running.
1

.1 Clean the machine with a soft wet cloth.
.2 Pull the louver on the front panel out to gain
access to the filter.
.3 Remove the filter mesh out of the unit.
.4 Use a clean rag to adsorb the surface dust on
the filter mesh. If the filter is extremely dirty, use tap water to
flush the filter. Fully dry the filter before putting it back into the air
inlet fence. A clean filter will increase the machine’s efficiency.
. MAINTENANCE. ERROR
1 1
(1)
“E1”: If the copper head sensor failure, it will show
“E1”. The system works in cycles of dehumidification for 20
minutes and defrosting for 15 minutes. Copper head
sensor should be replaced with a new one.
(2)
“E2”: If the humidity sensor got failure, it will show “E2”.
The humidity adjusting button will not work. The system
works in cycles of dehumidification for 15 minutes and
defrosting for 15 minutes. Failure humidity sensor should be
replaced with a new one.
(3)
“FL”: When the water tank is full, it will show “FL”.
The machine will make a buzzing sound and stop working.
Remove the water form the tank and installed properly.

Cautions: Switch off the unit and unplug it
immediately if anything abnormal happens. Then
contact a qualified personnel.
Do not dispose of electrical appliances as unsorted
municipal waste, use separate collection facilities.
Contact your local regulation for information regarding the
collection systems available.
8. MACHINE STORAGE
If you don’t use the unit for an extended period of
time, please store it per the following steps:
(1) Clean the filter mesh.
(2) ATTENTION: The evaporator inside the machine has to
be dried out before the unit is packed to avoid component
damage and molds. Unplug the unit and place it in a dry
open area for days to dry it out. Another way to dry the unit
is to set the humidity point more than 2% higher than the
ambient humidity to force the fan to dry the evaporator for
a couple of hours.
(3) Store the power cord pocket at the back of unit.
(4) Store in a clean, dry environment.
9. TROUBLE SHOOTING
Trouble Cause Solution
Machine
does not
run
Unit is not plugged in. Plug in the unit.
Machine
runs but
does not
dehumidify
When the humidity set
point is 2% higher than
ambient humidity.
Reset the humidity to a
lower set point, or power
off the machine if the
humidity has satisfied
you.
Room temperature under
41 degrees or above
degrees F.
To protect the machine,
use it only when ambient
temperature is between 5
and 38 degrees.
Reduce
dehumidifier
capacity
Filter mesh jammed. Clean the filter mesh
according to manual.
No air inlet Filter mesh or air-in
louver jammed.
Clean filter according to
instructions or clean the
louver blockage.
Air-in and/or Air-out
louvers jammed.
Clear the blockage from
Air-in and/or Air-out
louvers.
Loud
Operation
Machine situated on an
incline or decline slope.
Move to flat ground.
Filter mesh jammed. Clean filter mesh
according to instructions.

22
Avant de Commencer
Veuillez lire attentivement toutes les instructions.
Conservez les instructions pour vousyréférer ultérieurement.
Vérifiez toutes les pièces et les accessoires.
Lisez attentivement chaque étape et suivez l’ordre correct.
Nous recommandons que, dans la mesure du possible, tous les
produits soient assemblés à proximité de la zone où ils seront
utilisés, afin d’éviter tout déplacement inutile du produit une fois
assemblé.
Placez toujours le produit sur une surface plane et stable.
Conservez toutes les petites pièces de ce produit et les matériaux
d’emballage hors de portée des bébés et des enfants, car ils
pourraient présenter un risque d’étouffement.
23
1.1 DESCRIPTION DU PRODUIT
Ce déshumidificateur élimine l'humidité de la pièce, qui est
couramment utilisée dans les sous-sols, les entrepôts, les villas, etc.
Le R32 respectueux de l'environnement est utilisé car le réfrigérant
R32 n'a pas d'influence néfaste sur la couche d'ozone (ODP), un
effet de serre négligeable (GWP) et est disponible dans le monde
entier. En raison de ses propriétés énergétiques efficaces, le R32
convient parfaitement comme liquide de refroidissement pour cette
application. Des précautions doivent être prises en considération en
raison de l'inflammabilité du liquide de refroidissement.
1.2 SYMBOLES DE L'APPAREIL ET MANUEL DE L'UTILISATEUR
Cet appareil utilise un réfrigérant inflammable.
Si le réfrigérant fuit et entre en contact avec
le feu ou une pièce chauffante, cela
provoquera des gaz nocifs et il y a un risque
d'incendie.
Lisez attentivement le MANUEL DE
L'UTILISATEUR avant l'utilisation.
Plus d'informations sont disponibles dans le
MANUEL DE L'UTILISATEUR, le MANUEL
D'ENTRETIEN, etc.
Le personnel de service est tenu de lire
attentivement le MANUEL DE L'UTILISATEUR
et le MANUEL D'ENTRETIEN avant l'utilisation.
AVANT DE COMMENCER
Avertissement

24 25
Votre sécurité est la chose la plus importante qui nous préoccupe !
Veuillez lire attentivement ce manuel et bien
le comprendre avant d'utiliser votre appareil.
2.1 PRÉCAUTIONS OPÉRATIONNELLES
AVERTISSEMENT - Pour réduire les risques d'incendie,
d'électrocution ou de blessures aux personnes ou aux biens :
Si le cordon d'alimentation est endommagé, il doit être remplacé
par le fabricant ou par des personnes de qualification similaire afin
d'éviter tout danger.
L'appareil doit être débranché de sa source d'alimentation pendant
l'entretien.
Faites toujours fonctionner l'appareil à partir d'une source
d'alimentation de tension, fréquence et puissance égales, comme
indiqué sur la plaque d'identification du produit.
Utilisez toujours une prise de courant mise à la terre.
Débranchez le cordon d'alimentation lors du nettoyage ou lorsqu'il
n'est pas utilisé.
Ne l'utilisez pas avec les mains mouillées. Empêcher l'eau de se
renverser sur l'appareil.
Ne pas immerger ni exposer l'appareil à la pluie, à l'humidité ou à
tout autre liquide.
Ne laissez pas l'appareil fonctionner sans surveillance. Ne pas
incliner ni retourner l'appareil.
Ne pas débrancher pendant que l'appareil fonctionne.
Ne pas débrancher en tirant sur le cordon d'alimentation.
N'utilisez pas de rallonge ni d'adaptateur.
Ne posez pas d'objets sur l'appareil.
Ne grimpez pas et ne vous asseyez pas sur l'appareil.
N'utilisez pas l'appareil s'il est tombé, endommagé ou s'il présente
des signes de dysfonctionnement du produit.
Ne nettoyez pas l'appareil avec des produits chimiques.
inflammables ou explosifs.
POUR VOTRE SÉCURITÉ
AVERTISSEMENT
LES SUIVANTES DOIVENT TOUJOURS ÊTRE OBSERVÉES POUR LA
SÉCURITÉ:
et des personnes ayant des capacités physiques, sensorielles ou
mentales réduites ou un manque d'expérience et de connaissances
s'ils ont reçu une supervision ou des instructions concernant
l'utilisation de l'appareil en toute sécurité et comprennent les dangers
encourus. Les enfants ne doivent pas jouer avec l'appareil. Le
nettoyage et l'entretien par l'utilisateur ne doivent pas être effectués
par des enfants sans surveillance.
l'extérieur.
(propane) comme réfrigérant désigné.
tenter de réparer !
par les ventilateurs.
personnel non formé tenter de trouver la cause.
personnes du magasin, ventilez la pièce et contactez le service
d'incendie local pour les informer qu'une fuite de propane s'est
produite.
service qualifié n'est pas arrivé et que ce dernier vous a avisé qu'il
est sécuritaire de retourner dans la pièce.
possible ne doit être utilisée à l'intérieur ou à proximité des appareils.
anti-étincelles. Les pièces ne doivent être remplacées que par des
pièces de rechange identiques.
EXPLOSION, LA MORT, DES BLESSURES ET DES DOMMAGES
MATÉRIELS.

26 27
2.2 PRÉCAUTIONS DE SÉCURITÉ POUR L'ENTRETIEN
Veuillez suivre ces avertissements lorsque vous devez entreprendre
les actions suivantes lors de l'entretien d'un appareil avec R32.
2.2.1 Vérifications de la zone
Avant de commencer à travailler sur des systèmes contenant des
réfrigérants inflammables, des contrôles de sécurité sont
nécessaires pour s'assurer que le risque d'inflammation est
minimisé. Pour la réparation du système de réfrigération, les
précautions suivantes doivent être respectées avant d'effectuer des
travaux sur le système.
2.2.2 Procédure de travail
Les travaux doivent être entrepris selon une procédure contrôlée
afin de minimiser le risque qu'un gaz ou une vapeur inflammable
soit présent pendant l'exécution des travaux.
2.2.3 Zone de travail générale
Tout le personnel de maintenance et les autres personnes
travaillant dans la zone locale doivent être informés de la nature
des travaux en cours. Les travaux dans des espaces confinés
doivent être évités. La zone autour de l'espace de travail doit être
délimitée. Assurez-vous que les conditions dans la zone ont été
sécurisées par le contrôle des matériaux inflammables.
2.2.4 Vérification de la présence de réfrigérant
La zone doit être vérifiée avec un détecteur de réfrigérant
approprié avant et pendant le travail, pour s'assurer que le
technicien est conscient des atmosphères potentiellement
inflammables. Assurez-vous que l'équipement de détection de
fuites utilisé est adapté à une utilisation avec des réfrigérants
inflammables, c'est-à-dire qu'il ne produit pas d'étincelles, qu'il est
correctement scellé ou qu'il est intrinsèquement sûr.
2.2.5 Présence d'extincteur
Si des travaux à chaud doivent être effectués sur l'équipement de
réfrigération ou sur toute pièce associée, un équipement
d'extinction d'incendie approprié doit être disponible à portée de
main. Ayez un extincteur à poudre sèche ou à CO2 à côté de la
zone de chargement.
Toute personne impliquée dans des travaux ou des
effractions dans un circuit de réfrigérant doit
détenir un certificat en cours de validité délivré par
une autorité d'évaluation accréditée par l'industrie,
qui autorise sa compétence à manipuler les
réfrigérants en toute sécurité conformément à une
spécification d'évaluation reconnue par l'industrie.
L'entretien ne doit être effectué que selon les
recommandations du fabricant de l'équipement.
L'entretien et les réparations nécessitant l'assistance
d'autres personnes qualifiées doivent être effectués
sous la supervision de la personne compétente dans
l'utilisation des réfrigérants inflammables.
AVERTISSEMENT
AVERTISSEMENT
ou pour nettoyer, autres que ceux recommandés par le fabricant.
fonctionnement continu (par exemple : flammes nues, appareil à
gaz en fonctionnement ou chauffage électrique en fonctionnement).
mécanique.
et ne doit pas être installée dans un espace non ventilé, si cet
espace est inférieur à 4 m²/43 pieds carrés.
observée.
toute obstruction.
de la pièce correspond à la surface de la pièce spécifiée pour le
fonctionnement.

29
– Le marquage sur l'équipement reste visible et lisible. Les
marquages et panneaux illisibles doivent être corrigés ;
– Le tuyau ou les composants de réfrigération sont installés dans
substance susceptible de corroder les composants contenant du
réfrigérant, à moins que les composants ne soient construits avec
des matériaux qui sont intrinsèquement résistants à la corrosion ou
sont convenablement protégés contre une telle corrosion.
2.2.9 Vérifications des appareils électriques
La réparation et l'entretien des composants électriques doivent
inclure les contrôles de sécurité initiaux et les procédures
d'inspection des composants. S'il existe un défaut susceptible de
compromettre la sécurité, aucune alimentation électrique ne doit
être connectée au circuit jusqu'à ce qu'il soit traité de manière
satisfaisante. Si le défaut ne peut pas être corrigé immédiatement
mais qu'il est nécessaire de poursuivre le fonctionnement, une
solution temporaire adéquate doit être utilisée. Cela doit être
signalé au propriétaire de l'équipement afin que toutes les parties
en soient informées.
Les contrôles de sécurité initiaux doivent inclure :
- ces condensateurs sont déchargés : cela doit être fait de manière
sûre pour éviter la possibilité d'étincelles ;
sont exposés lors de la charge, de la récupération ou de la purge
du système ;
- qu'il y a continuité de la liaison à la terre.
L'appareil doit être installé, utilisé et stocké dans
une pièce dont la surface au sol est supérieure à
4 m²/43 pieds carrés.
gaz inflammables pourraient fuir.
Le fabricant peut fournir d'autres exemples
appropriés ou peut fournir des informations
supplémentaires sur l'odeur du réfrigérant.
2.2.6 Aucune source d'inflammation
Aucune personne effectuant des travaux en rapport avec un
système de réfrigération qui impliquent l'exposition de toute
tuyauterie contenant ou ayant contenu un réfrigérant inflammable
ne doit utiliser des sources d'inflammation de telle manière que
cela puisse entraîner un risque d'incendie ou d'explosion. Toutes les
sources d'inflammation possibles, y compris la cigarette, doivent
être maintenues suffisamment éloignées du site d'installation, de
réparation, de retrait et d'élimination, au cours desquelles du
réfrigérant inflammable peut éventuellement être libéré dans
l'espace environnant. Avant le début des travaux, la zone autour de
l'équipement doit être inspectée pour s'assurer qu'il n'y a pas de
risques d'inflammabilité ou d'inflammation. Des panneaux «
Interdiction de fumer » doivent être affichés.
2.2.7 Zone ventilée
Assurez-vous que la zone est à l'air libre ou qu'elle est
suffisamment ventilée avant d'entrer par effraction dans le système
ou d'effectuer tout travail à chaud. Un certain degré de ventilation
doit se poursuivre pendant la période d'exécution des travaux. La
ventilation doit disperser en toute sécurité tout réfrigérant libéré et
de préférence l'expulser vers l'extérieur dans l'atmosphère.
2.2.8 Vérifications de l'équipement de réfrigération
Lorsque des composants électriques sont changés, ils doivent être
adaptés à l'usage et aux spécifications correctes. À tout moment,
les directives d'entretien et de service du fabricant doivent être
suivies. En cas de doute, consultez le service technique du
fabricant pour obtenir de l'aide.
Les contrôles suivants doivent être appliqués aux installations
utilisant des fluides frigorigènes inflammables :
– La taille de la charge est conforme à la taille de la pièce dans
laquelle les pièces contenant du réfrigérant sont installées ;
– La machinerie et les bouches de ventilation fonctionnent
correctement et ne sont pas obstruées ;
– Si un circuit frigorifique indirect est utilisé, le circuit secondaire
doit être vérifié pour la présence de fluide frigorigène ; REMARQUE!
AVERTISSEMENT!
28

. SPÉCIFICATIONS
30 31
. DESSINS DU PRODUIT
Avant
Arrière
Panneau de commande
Poignée
Roue
Tuyau de drainage
Entrée d'air
Couvercle du
réservoir d'eau
Enrouleur de
cordon
d'alimentation
Sortie d'air
Poignée intégrée
Cadre de supportGrille de
radiateur
Pression de conception
maximale
Courant d'entrée nominal
Tension & Hertz
Courant d'entrée maximal
Charge de réfrigérant
Capacité de
déshumidification
BCSC
Entrée compresseur
Puissance du moteur
du ventilateur
Numéro de modèle ES10110US-GR
AC115V / 60Hz
R32/6,71 oz
6,9A
15A
RLA: 5,5A LRA: 27 A
0,100HP
4,7A @65 F, 60% RH
o
o
o
Côté haut : 550 psi
Côté bas : 260 psi
46 pintes/jour @65 F , 60% RH
115 pintes/jour @86 F , 80% RH

Corps principal Roue
. INSTALLATION
.1 Installation de la Poignée et du Cadre de Support
1 5
Poignée Entretoise
2 6
Boulon en acier inoxydable Écrou
3 7
Entretoise Cadre de support
4 8
1
2
3
3
4
45
5
6
6
7
7
8
32 33
Drainage continu
Dans des conditions extrêmement humides, le réservoir peut
nécessiter un nettoyage fréquent. Il peut être réglé pour un drainage
continu en procédant comme suit :
sur le bouton d'alimentation pour éteindre la machine.
accéder au réservoir d'eau.
horizontalement.
avant.
1. Ouvrez le couvercle avant, retirez le réservoir et videz l'eau du
réservoir.
2. Retirez le bouchon et installez le tuyau de drainage inclus sur le
connecteur, dirigez le tuyau vers la zone souhaitée avant d'utiliser
la machine. Voir les images ci-dessous.
.2 Installation de Drainage

3. Assurez-vous que le réservoir d'eau et le tuyau de
drainage ne sont pas bloqués, fermez le panneau avant.
4. Lorsque vous n'utilisez pas de drainage continu et
tournez pour utiliser à nouveau le réservoir d'eau, utilisez
simplement le bouchon pour arrêter la sortie d'eau du
connecteur.
Tuyau de drainage
• AVERTISSEMENT : Ne bloquez pas le tuyau de drainage.
L'extrémité du tuyau de drainage ne doit pas être plus
haute que le trou de sortie. Si l'extrémité du tuyau de
drainage est plus haute que le trou de sortie, l'eau ne
s'écoulera pas correctement et pourrait endommager les
composants de l'appareil.
34 35
.1 Fonction des Boutons
(1) POWER (ALIMENTATION)
Appuyez sur ce bouton pendant que la machine est sous
tension, la lumière de l'écran est allumée, la machine passe
automatiquement en mode continu, l'écran d'affichage
affiche l'humidité ambiante, le compresseur allumé après
que le ventilateur ait fonctionné pendant 3 secondes ;
appuyez à nouveau sur ce bouton, le compresseur s'arrête,
l'écran d'affichage affiche « - - », la machine passe en
mode veille, le ventilateur fonctionnera encore une minute
et s'arrêtera.
(2) TIMER (MINUTERIE)
Appuyez sur ce bouton pendant que la machine est sous
tension, jusqu'à ce que le voyant du bouton s'allume,
appuyez sur « MINUS » « ADD » pour régler l'heure de
démarrage de la machine, lorsque le compte à rebours est
terminé, le ventilateur et le compresseur s'allument.
Appuyez sur ce bouton pendant que la machine est en
marche, jusqu'à ce que le voyant du bouton s'allume,
appuyez sur « MINUS » « ADD » pour régler l'heure d'arrêt
de la machine, lorsque le compte à rebours est terminé, le
ventilateur et le compresseur s'éteindront.
Appuyez sur ce bouton pendant 3 secondes pour afficher la
température actuelle. Après 10 secondes, l'affichage
reviendra pour afficher l'humidité actuelle.
. CONFIGURATION ET FONCTIONNEMENT DE LA MACHINE

(3) ADD (AJOUTER)
L'humidité peut être augmentée par incréments de 5%
d'humidité relative en mode normal. Maintenez ce bouton
pendant 1 seconde pour augmenter l'humidité en continu.
(4) MINUS (MOINS)
L'humidité peut être diminuée par incréments de 5%
d'humidité relative en mode normal. Maintenez ce bouton
pendant 1 seconde pour diminuer l'humidité en continu.
(5) CONT
En mode continu, le réglage de l'humidité n'est pas
disponible. Le voyant du mode continu s'allume et l'écran
affiche l'humidité actuelle. Appuyez sur ce bouton pour
passer en mode normal où le réglage de l'humidité sera
disponible.
Remarque:
1) L'humidité par défaut est de 50% HR, pour augmenter et
diminuer comme suit :
20%-25%-30%-35%-40%-45%-50%-55%-60%-65%-70%
-75%-80%-85%-90%
2) L'humidité ambiante et l'humidité réglée sur la machine
détermineront l'état du compresseur et du ventilateur
comme suit :
le compresseur et le ventilateur commencent à fonctionner.
le compresseur et le ventilateur s'arrêtent de fonctionner.
36 37
.2 Fonctionnement
1) Lorsque le réservoir d'eau est plein, le voyant du
réservoir d'eau s'allume en rouge et l'alarme se déclenche
après 5 secondes. Le buzzer émet 15 bips et le
compresseur et le ventilateur s'arrêtent. Une fois le
réservoir d'eau vidé, la machine passera automatiquement
au mode précédent tandis que le compresseur sera en 3
minutes d'auto-protection. L'alarme s'arrêtera dans 3
secondes après que le réservoir d'eau ait été vidé et remis
en place, le ventilateur démarre et le compresseur démarre
dans 3 minutes.
2) Le compresseur n'aura pas besoin de 3 minutes pour
s'autoprotéger si c'était la première fois que la machine
était démarrée, appuyez sur « POWER » et éteignez ; sous
tension, appuyez sur « POWER », le compresseur démarre
immédiatement.
3) Le système a une mémoire automatique. Lorsque tous
les réglages de mode sont terminés, s'il y a une coupure de
courant soudaine pendant le fonctionnement, ou si la prise
d'alimentation glisse, le système peut stocker l'état actuel
avant la coupure de courant et entrer automatiquement en
mode de fonctionnement avant la coupure de courant après
la mise sous tension.
.3 Fonction de Dégivrage
1) Le compresseur et le ventilateur s'arrêtent lorsque la
température ambiante descend en dessous de 41 °F ou
au-dessus de 100,4 °F.
2) Exigence de dégivrage : Le compresseur fonctionne
pendant 30 minutes, le capteur de température détecte la
s'arrête, le dégivrage démarre, le ventilateur continue, le
voyant de dégivrage s'allume, lorsque la température du
tuyau atteint 41 °F ou que le dégivrage dure 15 minutes, le
dégivrage s'arrête.
Remarque : Pendant le dégivrage, le voyant ne s'éteint pas
tant que le dégivrage n'est pas terminé.

. ERREUR
(1)
« E1 » : Si le capteur de température tombe en panne, il
affichera « E1 ». Le système fonctionne en cycles de déshu-
midification pendant 0 minutes et de dégivrage pendant 15
minutes. Le capteur de température défectueux doit être
remplacé par un nouveau.
(2)
« E2 » : Si le capteur d'humidité tombe en panne, il
affichera « E2 ». Le bouton de réglage de l'humidité ne
fonctionnera pas. Le système fonctionne en cycles de
déshumidification pendant minutes et de dégivrage
pendant 15 minutes. Le capteur d'humidité défectueux doit
être remplacé par un nouveau.
(3)
« FL » : quand le réservoir d’eau est plein, il affichera « FL».
La machine fera un bruit de bourdonnement et cessera de
fonctionner.Enlevez la forme de l’eau du réservoir et installé
correctement.
38 39
.1 Nettoyez la machine avec un chiffon doux
et humide.
.2 Tirez le volet sur le panneau avant pour
accéder au filtre.
.3 Retirez la maille du filtre de l'appareil.
.4 Utilisez un chiffon propre pour absorber la
poussière de surface sur la maille du filtre. Si le
filtre est extrêmement sale, utilisez de l'eau du robinet pour rincer le
filtre. Séchez complètement le filtre avant de le remettre dans la
clôture d'entrée d'air. Un filtre propre augmentera l'efficacité de la
machine.
. ENTRETIEN
This manual suits for next models
1
Table of contents
Languages:
Other Costway Dehumidifier manuals

Costway
Costway ES10105US User manual

Costway
Costway ES10104US User manual

Costway
Costway ES10015US User manual

Costway
Costway ES10262DE User manual

Costway
Costway ES10014US User manual

Costway
Costway ES10260US User manual

Costway
Costway ES10263DE-WH User manual

Costway
Costway ES10263US User manual

Costway
Costway ES10196US-BL User manual

Costway
Costway ES10261US User manual