Cretors DIPLOMAT 20 User manual

DI20-32-M-A-E-O 2011.04.14
DI20-32-M-A-E-O 2011.04.14
1
BEGINNING SERIAL NO. 07093822
176 MITTEL DRIVE, WOOD DALE, IL 60191
DIGITAL DIPLOMAT 20 and 32 oz
POPCORN MACHINE OPERATION
MANUAL
120/208 - 240 Volt,
Single and Three Phase, 60 Hz
230 Volt,
Single Phase, 50 Hz
400 Volt, 3N~
Three Phase, 50 Hz
100/200 Volt,
Single Phase, 50 & 60 Hz
Included in this manual:
*One Pop Option
*Salt/Sugar Option
*Self Serve Option
*Ventless Hood Option
*Elevator Option
READ and UNDERSTAND these operating and safety
instructions before operating this popcorn machine!

DI20-32-M-A-E-O 2011.04.14
DI20-32-M-A-E-O 2011.04.14
2
BEGINNING SERIAL NO. 07093822
TABLE OF CONTENTS
I. Safety Alert Symbol . . . . . . . . . . . . . . . . . . . . . . . . . . . . . . . . . . . . . 3
II. Safety First . . . . . . . . . . . . . . . . . . . . . . . . . . . . . . . . . . . . . . . . . . . . . 3
III. Introduction. . . . . . . . . . . . . . . . . . . . . . . . . . . . . . . . . . . . . . . . . . . . 3
IV. Purpose of Manual . . . . . . . . . . . . . . . . . . . . . . . . . . . . . . . . . . . . . . 4
V. Product Identification. . . . . . . . . . . . . . . . . . . . . . . . . . . . . . . . . . . . 4
VI. Principles of Popcorn Machine Operation . . . . . . . . . . . . . . . . . . 4
VII. Control Switches. . . . . . . . . . . . . . . . . . . . . . . . . . . . . . . . . . . . . . . . 6
VIII. Operating Instructions . . . . . . . . . . . . . . . . . . . . . . . . . . . . . . . . . . . 6
IX. Sanitation Instructions . . . . . . . . . . . . . . . . . . . . . . . . . . . . . . . . . . . 8
a. Popping Kettle
b. Cabinet. . . . . . . . . . . . . . . . . . . . . . . . . . . . . . . . . . . . . . . . . . . . . 10
Appendix A –Elevator Option . . . . . . . . . . . . . . . . . . . . . . . . . . . . . 12
Appendix B –Self-Serve Option . . . . . . . . . . . . . . . . . . . . . . . . . . . . . 14

DI20-32-M-A-E-O 2011.04.14
DI20-32-M-A-E-O 2011.04.14
3
BEGINNING SERIAL NO. 07093822
I. SAFETY ALERT SYMBOL
The symbol shown is used to call your attention to instructions concerning your personal safety and
the safety of others. Watch for this symbol. It points out important safety precautions. It means
ATTENTION! Become Alert! Your personal safety is involved! Read the message that follows
and be alert to the risk of personal injury or death.
II. SAFETY FIRST
The information in this manual is essential for the safe installation and operation of
your Cretors popcorn machine. The manual must be read and understood before
installing, and operating the equipment, or equivalent training must be provided.
“The employer shall instruct each employee in the recognition and avoidance of
unsafe conditions, as well as, the regulations applicable to his work environment
and to control or eliminate any hazards or other exposure to illness or injury”.
Ref.: 29 CFR 1926.20 (b)(4)(a)(2)
It is understood that safety rules within individual companies vary. If a conflict
exists between the safety procedures contained in this manual and the rules of a
using company, the more stringent rule should take precedence.
The purpose of equipotential bonding studs, terminals and systems is to join
together the metalwork in a product, whether it needs to be grounded or not, so
every point is at the same potential/voltage. This bonding is not intended to
provide grounding (a separate low resistance ground-fault current path back to the
source).
III. INTRODUCTION
This manual is filled with time-saving and money-saving information regarding your Cretors
popcorn machine. There is nothing more important than the safety aids and warnings that are
throughout this document. The Safety Alert Symbol is used to identify topics of primary safety
concern wherever they appear. Furthermore, a separate section has been included which deals
exclusively with service and accident prevention.
If, after reviewing this manual, anything is unclear or technical problems are encountered, contact
the distributor from whom you purchased your machine for assistance. If there are any additional
questions, feel free to contact our Customer Service Department at the address and/or phone
number listed on the last page of this manual. Always have the model and serial number of your
machine available to assist in obtaining the correct information.

DI20-32-M-A-E-O 2011.04.14
DI20-32-M-A-E-O 2011.04.14
4
BEGINNING SERIAL NO. 07093822
IV. PURPOSE OF MANUAL
This instruction manual is intended to familiarize owners with the operation and safety
procedures associated with your Cretors popcorn machine.
It is important that this manual be kept available to operating personnel.
A person who has not read and understood all operating and safety instructions is
not qualified to operate the machine.
V. PRODUCT IDENTIFICATION
CRETORS POPCORN MACHINE DIPLOMAT MODELS: (SEE CONFIGURATOR SHEET)
DI20___-____-__
DI32___-____-__
VI. PRINCIPLES OF POPCORN MACHINE OPERATION
Theory and Observations of Popcorn Machine Operation
A. The efficient production of popcorn requires the presence of popcorn kernels, heat, and oil.
The purpose of the oil is to distribute the heat throughout kernels evenly and quickly. If the
heat is not distributed evenly and quickly, the kernels may burn instead of pop.
B. In order to pop corn in oil, the kettle, oil and parts near the heating elements are necessarily
and unavoidably heated to temperatures high enough to pop popcorn. The temperature is
controlled using a temperature control to maintain the kettle at an operating temperature of
approximately:
Contact with these surfaces will burn and scald you. Do not touch the kettle, oil or
parts in direct vicinity of the heating elements.
C. The kettle is provided with an agitator to assist in the quick and even distribution of heat
throughout the kernels.
The oil is heated to high temperatures in a kettle provided with electric heating
elements to reach a proper popping temperature. An operator is required in the
vicinity of the kettle only when handling corn or dumping popped corn from the
kettle. Neither of these operations requires direct contact with the kettle. Direct
contact with the hot oil, kettle, or heating elements could result in serious burns or
scalds. Keep away from the kettle whenever possible. Use the handle when dumping
the kettle, and use the provided cups when necessary to measure corn, oil and salt.
KETTLE
SALTED CORN
SUGAR CORN
20 OZ.
410-420º F(210-215º C)
375-385º F. (190-193º C)
32 OZ.
410-420º F(210-215º C)
375-385º F. (190-193º C)

DI20-32-M-A-E-O 2011.04.14
DI20-32-M-A-E-O 2011.04.14
5
BEGINNING SERIAL NO. 07093822
D. As the popcorn pops, it will push the lid open and discharge into the cabinet. When the corn
finishes popping, the corn remaining in the kettle can be removed by holding the kettle
handle in your right hand and rotating down in a clockwise direction to dump the kettle.
E. Your Diplomat model Cretors popcorn popper is equipped for a pump, which, when
properly adjusted, automatically delivers the proper amount of oil to the popping kettle.
F. A cornditioner is provided and consists of a blower, heating element, and thermostat. The
cornditioner circulates hot air through the corn stored in the popcorn case to keep the
product fresh and crisp.
G. A two-stage filter system traps odor and smoke produced by popping corn. When the
Ventless Hood Option replaces the two-stage filter system, the Ventless hood controls are
integrated into the popping circuit. As such the popper will not operate if the hood is not
functioning!
H. One Pop Option only allows the kettle to pop one batch of corn at a time and then shut
down. The One Pop Option makes it impossible to leave a kettle heat turned on.
I. With the One Pop Option, the kettle heat switch is turned on; however, the kettle will not
begin to heat until the One Pop button is pressed. When the One Pop button is pressed the
green indicator light will go on, the kettle will begin to heat, and the kettle heat indicator
light will turn on. The kettle will then heat until the temperature control opens at the end of
the popping cycle. When the temperature control opens at the end of the popping cycle the
kettle heat indicator light goes out and the heat turns off. The kettle will not begin to heat
again until the kettle has cooled and the One Pop button is pressed.
J. If the machine is equipped with an oil pump, and the pump switch is turned on, pressing the
One Pop button will begin the pumping cycle, as well as, the kettle heat cycle. (When
cleaning the kettle and oil is not wanted, turn off the oil switch and the oil pump will not
run.)
K. If the machine is equipped with the Salt/Sugar option, the operator moves the toggle switch
to either the salt or sugar position for desired corn type. The oil volume will be set to the
appropriate amount. In the salt position, the thermostat will turn off at the sugar
temperature but a timer will allow the heat to remain on until the corn has finished popping.
L. With the Digital Temperature Control, the operator can adjust the set point of the popping
cycle on the controller. There is no thermostat in side the kettle. Temperature of the kettle
will also be displayed. To adjust, see service manual.
M. If the machine is supplied with the Giles Ventless Hood, refer to the Giles instruction manual
for more details on the operation and components. UL / EPA testing requires that the
popcorn machine will not operate if the Giles hood is not fully functional.

DI20-32-M-A-E-O 2011.04.14
DI20-32-M-A-E-O 2011.04.14
6
BEGINNING SERIAL NO. 07093822
VII. CONTROL SWITCHES (Not all machines contain all of these switches.)
*KETTLE HEAT -Turns the kettle heat On/Off. (See Exhaust for Ventless Option)
AGITATOR -Turns the stirrer blade motor On/Off.
*EXHAUST -Turns exhaust blower On/Off.
*Ventless Hood option -The exhaust switch must be turned on for the kettle to heat.
CORNDITIONER -Turns the cornditioner blower and heat On/Off.
LIGHTS -Turns interior lights On/Off.
OIL -Provides power to the oil pump.
DELIVERY -Initiates the pump cycle.
FUSE/CIRCUIT BREAKER - Provides protection to all circuits, except the kettle.
ROTARY SWITCH -Turns power On/Off to all circuits.
ONE POP -Turns the kettle heat on and initiates pump cycle.
SALT/SUGAR -Sets the pump and kettle temperature to proper settings.
DIGITAL CONTROLLER -Displays and controls kettle temperature.
VIII. OPERATING INSTRUCTIONS
Do not attempt to operate your Cretors popcorn machine until you have read and
understood this manual. Failure to do so may result in serious injury or death.
Do not attempt to operate your Cretors popcorn machine unless the installation
instructions have been strictly adhered to. Failure to do so may result in serious
injury or death.
Operate your popcorn machine only if it is in good sanitary condition (See
SANITATION INSTRUCTIONS). Failure to do so may result in illness to your
customers.
Always turn the kettle heat switch off when not popping corn. Failure to do so will
cause residual remaining in the kettle oil to stain the kettle, possibly resulting in an
unsanitary condition. A hot kettle may also cause a “flash” fire if oil is added to a
kettle left unattended with the heat on, resulting in serious burns or death.
A. To operate your Cretors popcorn popping machine:
1. Fill the corn drawer with corn on floor models.
2. Fill the salt box and hang it on the inside edge of the corn drawer.
3. Connect and adjust the pump as explained in the installation instructions. Pre-heat the
popping oil until liquid, if necessary.
4. If equipped, move Salt/Sugar switch to desired mode.

DI20-32-M-A-E-O 2011.04.14
DI20-32-M-A-E-O 2011.04.14
7
BEGINNING SERIAL NO. 07093822
5. Fill the appropriate corn measure with corn and the salt measure with the salt, and empty
these into the kettle. When making sugar corn, add the correct amount of sugar, rather than
salt, with the measure for corn.
WARNING! Always add corn to the kettle before pressing the oil delivery button or
adding oil. Failure to do so may result in the oil being heated too rapidly resulting in
a fire.
Avoid contact with the kettle. Contact with a hot popping kettle may result in serious
burns or scalds.
6. Close the kettle lid by pulling the kettle cover knob down.
7. Turn on the agitator, the exhaust fan, and then turn on the kettle heat and press the oil
delivery button. For a ventless hood machine, the exhaust must be turned on and be
functional for the popper heat to function. When the exhaust switch is turned on, an audible
alarm will sound for a few seconds, clicking will be heard, and then the machine will be
operational. If the Giles hood will not run, the popping circuit will be disabled until the
problem is resolved.
8. If machine is supplied with the One Pop option, press the One Pop button to begin the
popping cycle and oil delivery.
WARNING! After the first popping the kettle is hot. Avoid contact with the kettle
when adding corn or salt. Failure to do so may result in serious burns or scalds.
Measuring cups have been provided to accurately measure the proper amounts of popcorn, salt and
oil. The correct amount for each popping is:
SALTED CORN
VOLUMETRIC MEASURE
Kettle Size
Corn
Oil
Salt
20 oz.
20 oz.
591 ml
6.5 oz.
192 ml
2 tsp.
10 ml
32 oz.
32 oz.
946 ml
10.5 oz.
310 ml
3 tsp.
15 ml
SUGAR CORN
VOLUMETRIC MEASURE
Kettle Size
Corn
Oil
Sugar
20 oz.
12 oz.
351 ml
4.25 oz.
122 ml
8.25 oz.
245 ml
32 oz.
19.5 oz.
577 ml
7.5 oz.
225 ml
15.25 oz.
451 ml
9. As the corn pops, it will push the lid open. When the lid has moved about one and one-half
inches, it will open completely, allowing the corn to discharge from the kettle. When the
corn finishes popping, dump the kettle by pulling the large black handle down as far as it
will go. (Popping is considered finished when there are about four seconds between pops).
When the pan is empty, return the handle to its upright position.

DI20-32-M-A-E-O 2011.04.14
DI20-32-M-A-E-O 2011.04.14
8
BEGINNING SERIAL NO. 07093822
10. Repeat steps 4-9 as desired, adding corn to the corn drawer and salt to the salt box as
necessary.
11. When the oil container is empty, replace with a new full container of oil. See Pump
Instruction manual.
NOTE:The ideal time for maximum volume (corn expansion) is between 2-3/4 to 3-1/2
minutes from the time the corn is placed into the kettle until the time it is dumped. Check
the popping time after several popping cycles. The pilot light should turn off approximately
10-20 seconds before the corn finishes popping. If this is not the case, please refer to the
“Troubleshooting” section in your Service Manual.
IX. SANITATION INSTRUCTIONS
Be certain the machine is turned off and power is unplugged before sanitizing this
machine unless a specific cleaning procedure requires power to the machine. Failure
to do so could result in injury or death.
Do not clean heated surfaces until they have been given sufficient time to cool. Failure
to do so may result in serious burns or scalds.
A. Popping Kettle
1. The Cretors kettle is designed to be cleaned in place. There is no need to remove the
kettle for cleaning.
Do not immerse an assembled kettle in water. This will damage the electrical
components and may cause short circuits resulting in electrical shock hazard if power
is applied.
2. Do not use steel wool or other similar abrasives to clean the nickel plated kettles, as they
will ruin the kettle by removing the nickel platting. Stainless steel kettles can be cleaned
aggressively.
3. Do not clean the kettle with power connected unless you are boiling the CKC cleaning
compound to clean the inside of the kettle. Follow instructions in step 6.
Do not attempt to clean a hot kettle. Failure to do so may result in serious burns or
scalds.
Do not throw ice into a hot kettle. Doing so can cause damage to the pan and
invalidate the warranty.
Avoid contact with the kettle when dumping popped corn. Failure to do so may
result in serious burns or scalds.

DI20-32-M-A-E-O 2011.04.14
DI20-32-M-A-E-O 2011.04.14
9
BEGINNING SERIAL NO. 07093822
4. The kettle either has a polished nickel finish or is a polished stainless steel finish and is
very easy to clean if oil is not allowed to burn. After the final popping, the best practice
is to wait until the oil just begins to solidify, then take a cotton towel or absorbent rag and
wipe the kettle. Once the oil is allowed to completely solidify, it can become more
difficult to remove. We recommend coconut oil for your Cretors popper; it will not stick
or burn as easily as other oils.
5. A thorough cleaning every week with CKC cleaning compound is recommended. This
will prevent the accumulation of carbon on the bottom and internal sides of the kettle.
When boiling the CKC cleaning compound in the kettle, do not fill the kettle with more
than ¾” high of water inside the kettle. If the kettle has been overheated or oils that tend
to carbonize are used the normal cleaning procedures may not suffice. Increase
frequency as needed.
Cretors has developed a cleaning kit for your Diplomat machine. The kit is sold separately under
P/N 10831. If you need more information, please feel free to contact your local distributor or call
Cretors at 1-800-228-1885.
6. Cretors Outside Kettle Cleaner COC should be used periodically to remove popping oil
that may become baked on to the outside of the kettle.
7. The kettle agitator assembly should be removed weekly for thorough cleaning. The
stirrer blade is disassembled by removing the spring pin that goes through the top of the
stirrer blade. Lift off the stirrer blade.
8. Clean all parts thoroughly, making sure to use CKC. Do not use any harsh abrasives or
cleaning materials.
9. In addition to CKC and COC Cretors has two very effective aerosol cleaners available.
Carbon OFF in the blue can is to be used to clean a cold kettle. The red can should be
used with a warm kettle. Read the directions on the cans.
10. Reassemble in reverse order, following the directions given.
B. Cabinet
1. Remove and empty the waste clean-out drawer daily or whenever it is full. Under heavy
use this may need to be done more often.
Failure to empty the drawer and to clean cabinet may result in a fire hazard due to
restricted airflow from the cornditioner.
2. The cabinet glass and cabinet base can be cleaned with any good grade glass or
household cleaner suitable for glass and plastic surfaces. The inside of the cabinet can be
cleaned with the same cleaner as the outside, if it is the type that has a cleaning agent to
cut the oil remaining from the popping operation, and it is acceptable for food contact
surfaces. Do not soak unit with water. Avoid wetting the inside of electrical enclosure.

DI20-32-M-A-E-O 2011.04.14
DI20-32-M-A-E-O 2011.04.14
10
BEGINNING SERIAL NO. 07093822
3. The doors can be cleaned with Cretors’ Plastic Polish. This product is specially
formulated to clean plastic doors. Do not use cleaners that have ammonia or alcohol.
The use of these cleaners will cause the doors to become brittle and crack.
4. Counter model Diplomats require the installation of 4” legs, which are included with this
unit. The use of the 4” legs is to conform with food sanitation regulations.
5. The popper case bottom of should be removed at least weekly to thoroughly clean the air
chamber beneath. When cleaning the 48”, 60” and 72” cabinets, empty the scraps in the
hot air well by removing the clean-out drawer from under the popper case bottom and
sliding it under the hot air well. Pull out the clean-out slide and the scrap will fall into
the scrap drawer. Dispose of the products found in the popper case bottom, and replace
the clean-out slide and the clean-out drawer.
6. Grease filters should be checked and cleaned weekly. They can be washed in a sink with
hot soapy water or can be run through a dishwasher. Charcoal should be replaced when
the holder is shaken and the charcoal is no longer free to move. Disposable filters should
be discarded and replaced once filters begin to become saturated but before grease starts
to drip.
7. Ventless hood filters need to be cleaned and replaced regularly, see manual for
recommended schedule and procedures. Care and caution needs to be taken when
cleaning filters as to not damage them, especially the electrostatic filter.
This appliance should not be cleaned with a water jet.

DI20-32-M-A-E-O 2011.04.14
DI20-32-M-A-E-O 2011.04.14
11
BEGINNING SERIAL NO. 07093822
This manual is filled with time-saving and money-saving information regarding your Cretors
popcorn popper. There is nothing, however, more important than the safety aids and warnings
found throughout this document.
If you have any questions regarding the operation or cleaning of your Cretors popcorn popper,
contact your local distributor. Should you have any difficulties or are unable to reach them, feel free
to contact the Customer Service Department at C. Cretors and Company.
Additional copies of this manual can be obtained from C. Cretors and Company at the address listed
below. Please provide the model and serial number when requesting additional copies of this
manual. There will be a nominal charge for additional copies.
Cretors guarantees this machine to be free of defects in parts, materials and workmanship for two
years. Please take this time to fill out the factory registration card and return it to the factory to
activate your warranty. If you have any questions concerning the Cretors’ warranty, please contact
your local distributor or the Customer Service Department at C. Cretors and Company.
C. CRETORS AND COMPANY
3243 N. CALIFORNIA AVENUE
CHICAGO, IL 60618
PHONE (773) 588-1690, (800) 228-1885, FAX (773) 588-2171
WEB SITE: http://www.cretors.com Email: postmaster@cretors.com

DI20-32-M-A-E-O 2011.04.14
DI20-32-M-A-E-O 2011.04.14
12
BEGINNING SERIAL NO. 07093822
Appendix A
Cretors’ elevator corn storage option
I THEORY AND OBSERVATIONS OF MACHINE OPERATION
The elevating corn storage option is designed to allow operators to easily adjust the level of
popped corn in the heated storage bin for easy access. The cabinet is provided with a
cornditioning system which circulates heated air to keep popcorn warm and crisp. The
handle on the outside of the unit is easily turned to raise or lower the poppercase bottom
height. This reduces corn breakage and eliminates the need for the operator to reach down
into the storage area when the level of popped corn is dropped. The handle may be replaced
by a switch if equipped with the motorized elevator option.
II CONTROL SWITCH
TOGGLE SWITCH -Raises and lowers the bin height (motorized model only)
III OPERATING INSTRUCTIONS
1. The height of the bin should be adjusted to the level to hold the amount of corn
popped in the cabinet to maximize the efficiency of the cornditioning system.
2. The bin level is lowered by pulling and holding out the knob handle while turning
the handle clockwise. It is raised by turning counter-clockwise. The bin level can be
“locked in position” by releasing the knob handle so that the pin will rest against the
underside of the frame. One revolution will raise or lower the bin level by
approximately 4 inches.
3. If equipped with the motorized option, the bin level is adjusted by pressing down on
the elevator switch to lower and up to raise.

DI20-32-M-A-E-O 2011.04.14
DI20-32-M-A-E-O 2011.04.14
13
BEGINNING SERIAL NO. 07093822
VI SANITATION AND MAINTENANCE INSTRUCTIONS
Emptying the Clean Out Drawer
Remove and empty the clean out drawer daily, or whenever it is full. Under heavy
use, this may need to be done more often. The clean out drawer is found under the
bin. Doors may or may not need to be removed to expose the cleanout drawer.
Cleaning Beneath the Popper Case Bottom
Clean the interior of the warming cabinet and beneath the popper case bottom, at
least once a week. This is done by lifting out the popper case by the handles off the
arms. Replace when finished. At least monthly, the divider should be removed by
lifting up and out and the rest of the bin can be cleaned. While the divider is
removed, the chain should be lightly lubricated with food grade grease. Replace
when finished. The bottom of the divider is located between two pins or a pin and
the shaft at the bottom of the warming cabinet.

DI20-32-M-A-E-O 2011.04.14
DI20-32-M-A-E-O 2011.04.14
14
BEGINNING SERIAL NO. 07093822
Appendix B
Diplomat Self Serve
I THEORY AND OBSERVATIONS OF MACHINE OPERATION
The Diplomat Self ServeCabinet is designed to allow customers to access popped corn and
topping for themselves. The cabinet provides popped corn and topping storage, and a
cornditioner circulates heated air to keep popcorn fresh. Popcorn is distributed through
chutes on the front of the unit when the slide gate is pulled open, oil topping is available
between the two popcorn delivery points. Oil is delivered with the push of a button.
II CONTROL SWITCHS
LIGHT SWITCH -Turns lights and sign(s) ON/OFF
CORNDITIONER SWITCH -Turns cabinet heat and blower ON/OFF
PUMP SWITCH -Turns topping pump and oil warmer ON/OFF
III OPERATING INSTRUCTIONS
4. This cabinet is designed to warm and dispense popcorn and oil topping. Do not use
warmer to heat or hold any other products.
5. Controls are located on the operator side of the machine above eye level.
6. The lighted sign and cabinet lights are turned ON/OFF by pressing the switch
marked “Lights.”
7. The cabinet heat and blower are turned ON/OFF by pressing the switch marked
“Cornditioner.”
8. The topping oil pump and oil heater are turned ON/OFF by pressing the switch
marked “Pump.”
Operate your warmer only under sanitary condition (SEE SANITATION
INSTRUCTIONS).
Installing the Oil Topping Bag
Use only liquid topping oil. Oil which is not in liquid form will clog the oil pump. If
other types of topping are to be used, the pump will need to be changed. Contact
your distributor or Cretors for more information.
1. If the topping bag is within a box, carefully remove it. Be sure to avoid puncturing
or cutting the bag. If the bag is broken, discard; the bag must not be torn or pierced.
2. Carefully place the oil topping bag into the heated butter shelf, avoiding damage to
the bag.

DI20-32-M-A-E-O 2011.04.14
DI20-32-M-A-E-O 2011.04.14
15
BEGINNING SERIAL NO. 07093822
If the bag is ever broken in the machine, be sure to clean up the spilled oil
immediately, to avoid contamination.
3. Remove the travel cap from the bag spout. The travel cap prevents dirt and dust
from coming into contact with the internal slider for sanitary hook-up.
4. Snap the locking plate of the connector over the bag spout. The tapered probe on the
connector is then pushed into the bag spout and locks into place. This bi-directional
locking action does two things: One, it eliminates any possibility of accidental
disconnect, giving the user a “foolproof” positive connection. Two, it opens the
channel, allowing product to flow.
5. When the bag is empty: Disengage the connector, snap the connector probe into the
out position, and remove it from the bag spout. This disconnects and reseals the
bag. All product contact surfaces are protected, ensuring a sanitary situation.
6. No disassembly of connector is required when switching from one oil topping bag to
another. Repeat steps 1 –4 to properly re-connect oil topping bag to pump.
*NOTE: Prior to each attachment of oil topping bag, ensure that the probe has not been
contaminated. If this has occurred, clean the connector as described in Sanitation
Instructions.
Filling the Cabinet
1. Slide open one side of the Plexiglas doors and fill the warmer with popcorn through
the back.
Do not fill the warmer with popcorn higher than the base of the doors; doing so may
put unnecessary strain on the auger motor, or cause jamming.
2. Close doors.
Operation
1. Be sure all switches are turned ON.
2. Dispense popcorn from the warmer by placing an open popcorn bag or box beneath
either popcorn chute on the front of the machine. Pull the spring-loaded slide out.
The auger will turn to dispense the popcorn. To close, slide the door gently back.
3. Oil topping is dispensed from the middle front of the warmer. Place the popcorn
bag or box beneath the spout and press the large dispense button.

DI20-32-M-A-E-O 2011.04.14
DI20-32-M-A-E-O 2011.04.14
16
BEGINNING SERIAL NO. 07093822
VI SANITATION INSTRUCTIONS
Be certain all switches on the machine are turned “OFF” and power is unplugged
before sanitizing this machine. Failure to do so could result in injury.
CAUTION: HOT. Do not clean appliances until they have been given sufficient time
to cool. Failure to do so may result in serious burns.
Emptying the Clean Out Drawers
Remove and empty the clean out drawers daily, or whenever they are full. Under
heavy use, this may need to be done more often.
Failure to empty the drawers may result in a fire hazard due to restricted airflow from
the cornditioner.
Cleaning the Cabinet
The cabinet should be cleaned with a damp cloth and any good grade glass or
household cleaner suitable for glass and plastic surfaces. A cleaning agent that is
acceptable for food contact surfaces is recommended. Do not soak unit with water.
Avoid wetting of inside of electrical enclosure.
1. Clean the interior and exterior of the cabinet.
2. Allow cabinet to dry fully.
Cleaning the Cabinet Doors
The doors can be cleaned with Cretors’ Plastic Polish. This product is specially
formulated to clean plastic doors. Do not use cleaners that have ammonia or alcohol.
The use of these cleaners will cause the doors to become brittle and crack.
1. Lift the Plexiglas doors from their tracks.
2. Clean the tracks and the doors.
Cleaning Beneath the Popper Case Bottom
Clean the interior of the warmer, beneath the popper case bottom, at least once a
week.

DI20-32-M-A-E-O 2011.04.14
DI20-32-M-A-E-O 2011.04.14
17
BEGINNING SERIAL NO. 07093822
Failure to clean beneath the popper case bottom may result in a fire hazard due to
restricted airflow from the cornditioner.
1. The auger is held in place by spring tension. One end has a sliding drive head and
the other has a hook. Remove each corn auger by compressing the auger coil and
removing the auger drive head from its seat at the rear of the warmer. Raise the
drive head end of the auger and disengage the hook above the discharge chute.
Clean each auger similar to cleaning the cabinet (see Cleaning the Cabinet).
2. Remove the two, popper case bottoms using the handle lifts at their sides. Clean
each bottom similar to cleaning the cabinet (see Cleaning the Cabinet).
3. The interior beneath the popper case bottom should be cleaned similar to the cabinet
(see Cleaning the Cabinet). Be sure to clear the blower vents of debris.
4. Return the popper case bottoms and augers to their previous positions.
Cleaning Oil Topping Connector
Once a week, the oil topping connector should be thoroughly cleaned.
1. Remove the probe body from the bag clamp by spreading the body clamp tabs,
sliding the clamp body tabs and the probe body out.
2. Remove from tubing.
3. Remove the probe spout adapter from the probe body by unscrewing the stem from
the probe body. Use a screwdriver to do this.
4. Remove the seal body and spring from the stem and nut assembly by unsnapping
seal body from the stem.
5. Clean all parts in accordance to NSF and local requirements (warm, soapy water,
and rinse). Do not use petroleum base cleaning agents or abrasive cleaners.
Damage to sealing surfaces may occur and jeopardize the sanitary integrity of the
connector.
6. Inspect the three “O” rings for damage or imbedded particles. Replace as required.
7. Reassemble by reversing steps 1 –4.
Flushing the Oil Delivery System
The oil topping delivery pump is a closed system and should remain aseptic. If you
believe your pump system to be contaminated, then you will need to clean the
system. Instructions for cleaning the connector are listed above. Instructions for
cleaning the pump are listed below.

DI20-32-M-A-E-O 2011.04.14
DI20-32-M-A-E-O 2011.04.14
18
BEGINNING SERIAL NO. 07093822
1. Remove the oil topping bag by disengaging the connector, snapping the connector
probe into the out position, and removing it from the bag spout. This disconnects
and reseals the bag.
2. Remove the connector from the oil tube.
3. Place the end of the tube into warm, soapy water in a pail.
4. Plug in the warmer and turn the pump switch to “ON.” Be sure the other switches
are set to “OFF.”
CAUTION: Do not spill water into the warmer. Doing so could result in
injury.
5. Cycle the pump sufficiently to flush system by pressing the mushroom dispense
button on the front of the warmer. Be sure to have a container to catch the water at
the discharge spout beneath the button.
6. Place the end of the oil tube into clean, warm water in a pail.
7. Cycle the pump long enough to completely rinse soap from the system.
8. Remove tube from the clean water, and cycle pump to clear lines.
Cleaning the Oil Topping Heater Shelf
Once every month (unless a spill has occurred), clean the heater shelf similar to the
cabinet (see Cleaning the Cabinet).
Sanitation of your popcorn machine and oil pump is imperative for production of an
appetizing product. Failure to follow proper sanitation procedures for food contact surfaces
or usage of contaminated ingredients (salt, oil, seasonings) could result in poor product
quality and may cause illness to your customers. Use pure ingredients, always emphasize
machine sanitation, and follow the sanitation procedures outlined in this manual to protect
the welfare of your customers.

DI20-32-M-A-E-S 2001.04.14
1
176 MITTEL DRIVE, WOOD DALE, IL 60191
DIGITAL DIPLOMAT 20 and 32 oz
POPCORN MACHINE SERVICE MANUAL
120/208 - 240 Volt,
Single and Three Phase, 60 Hz
230 Volt,
Single Phase, 50 Hz
400 Volt, 3N~,
Three Phase, 50 Hz
100/200 Volt,
Single Phase, 50 & 60 Hz
Included in this manual:
*One Pop Option
*Salt/Sugar Option
*Ventless Hood Option
READ and UNDERSTAND these servicing, and safety
instructions before servicing this popcorn machine

DI20/32-M-A/E-S
Created 11/17/2016 2:29 PM 2 BEGINNING SERIAL NUMBE 07093822
TABLE OF CONTENTS
I. Safety Alert Symbol . . . . . . . . . . . . . . . . . . . . . . . . . . . . . . . . 3
II. Safety First . . . . . . . . . . . . . . . . . . . . . . . . . . . . . . . . . . . . . . . . 3
III. Introduction . . . . . . . . . . . . . . . . . . . . . . . . . . . . . . . . . . . . . . . 3
IV. Specifications . . . . . . . . . . . . . . . . . . . . . . . . . . . . . . . . . . . . . . 5
A. Electrical Specifications
B. Size Specifications
V. Purpose of Manual . . . . . . . . . . . . . . . . . . . . . . . . . . . . . . . . . 6
VI. Installation Instructions . . . . . . . . . . . . . . . . . . . . . . . . . . . . . 6
A. Location
B. Power Supply
C. Connecting Machine to the Power Supply
D. Pump Installation
E. Counter Model Installation . . . . . . . . . . . . . . . . . . . . . . . 7
F. Ventless hood Model Installation . . . . . . . . . . . . . . . . . . 7
VII. Service Instructions . . . . . . . . . . . . . . . . . . . . . . . . . . . . . . . . . 7
A. Parts
B. Kettle Temperature Control
1. Temperature Control Operation
2. Digital Temperature Control Adjustment . . . . . . . . 8
3. Checking Temperature Control. . . . . . . . . . . . . . . . . 9
4. Salt Timer Adjustment
5. Salt/Sugar with One Pop Adjustment . . . . . . . . . . . 10
C. Kettle High Limit Temperature Control
D. Kettle Removal
E. Kettle Installation . . . . . . . . . . . . . . . . . . . . . . . . . . . . . . . . 11
F. Kettle Alignment
G. Kettle Return Spring Adjustment . . . . . . . . . . . . . . . . . . . 12
H. Replacing Damaged Oil Discharge Tube
I. Giles hood maintenance
VIII. Troubleshooting. . . . . . . . . . . . . . . . . . . . . . . . . . . . . . . . . . . . . 13
Other manuals for DIPLOMAT 20
1
This manual suits for next models
1
Table of contents
Other Cretors Kitchen Appliance manuals
Cretors
Cretors Profiteer series User manual
Cretors
Cretors CMD 100 User manual
Cretors
Cretors E1202 User manual
Cretors
Cretors MACH 5 M516 Series User manual
Cretors
Cretors DIGITAL DIPLOMAT 48 User manual
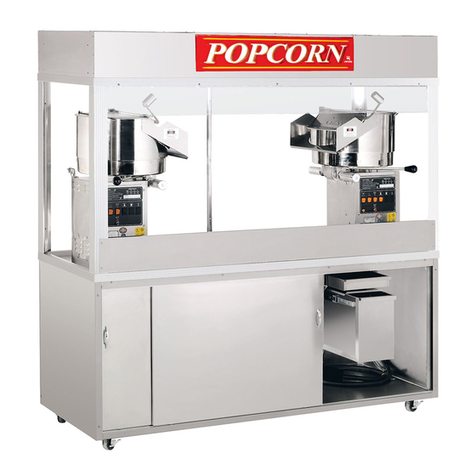
Cretors
Cretors PRESIDENT POPCORN MACHINE User manual
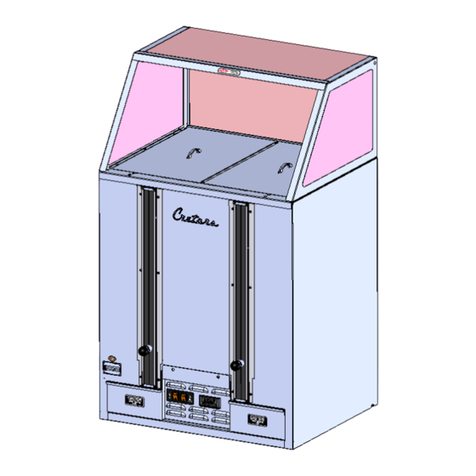
Cretors
Cretors CSW-ELV User manual
Cretors
Cretors MACH 5 M532 Series User manual
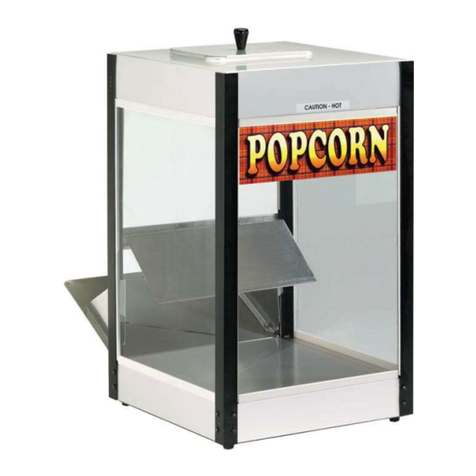
Cretors
Cretors E1200 User manual
Cretors
Cretors EN6A1 Series User manual
