manuals.online logo
Brands
  1. Home
  2. •
  3. Brands
  4. •
  5. CRU Dataport
  6. •
  7. Storage
  8. •
  9. CRU Dataport RTX Secure 410-QR User manual

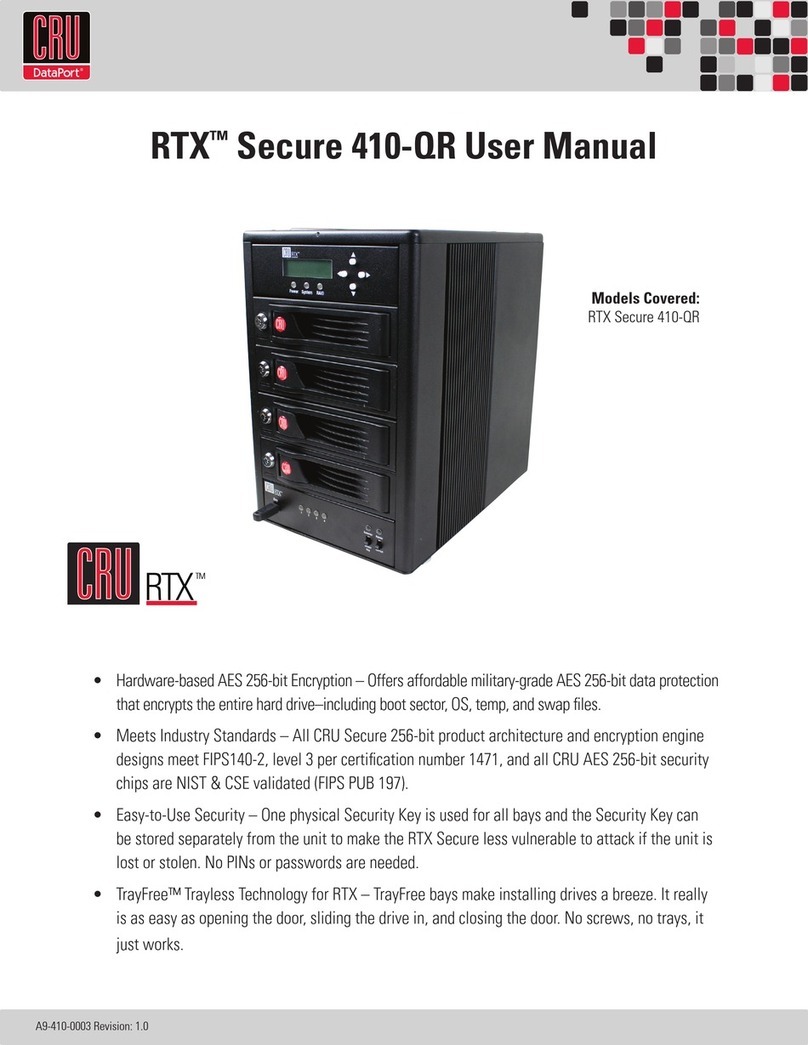
CRU Dataport RTX Secure 410-QR User manual

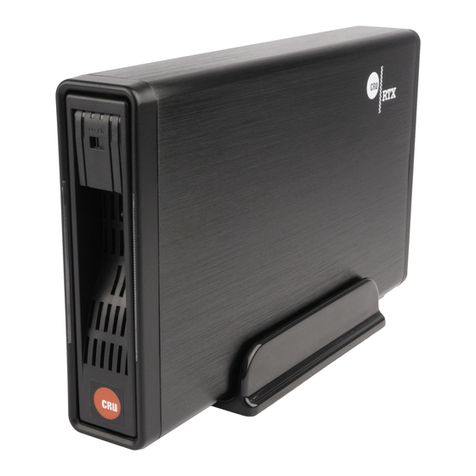
RTXTM Secure 410-QR
1. Installation Steps
1.1 Hard Drive Installation
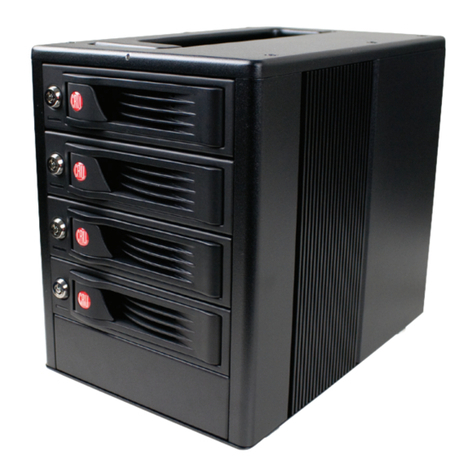
a. Pull the ejection handle on the TrayFree bay to open the bay door.
b. Insert a SATA hard drive into the bay. Make sure it is label-side up with the SATA
connection on the drive inserted first toward the rear of the enclosure.
c. Shut the bay door.
d. You can optionally secure each bay door by inserting an RTX Key into its key lock and
turning it 90 degrees clockwise. Doing so is not necessary to operate the RTX Secure.
Sticker Card
Use the stickers on the provided sticker card to label each drive if you plan to use Unique
Encrypted Mode (see Section 1.2). This will prevent the drives from getting mixed up when
they are removed from the bays.
1.2 Setting the Encryption Mode
The RTX Secure has three modes that determine how it handles Security Keys. The status
of the mode is determined at power up. After the unit has been successfully mounted by the
system, the Security Key may be removed and stored in a safe location. Changing the position
of the switches on the bottom of the RTX after the unit has successfully been mounted will
also not change the mode used at power up.
Product Warranty
CRU-DataPort (CRU) warrants this product to be free of significant defects in material and workmanship for a period of two years from the original date of purchase. CRU’s warranty
is nontransferable and is limited to the original purchaser.
Limitation of Liability
The warranties set forth in this agreement replace all other warranties. CRU expressly disclaims all other warranties, including but not limited to, the implied warranties of
merchantability and fitness for a particular purpose and non-infringement of third-party rights with respect to the documentation and hardware. No CRU dealer, agent, or employee
is authorized to make any modification, extension, or addition to this warranty. In no event will CRU or its suppliers be liable for any costs of procurement of substitute products or
services, lost profits, loss of information or data, computer malfunction, or any other special, indirect, consequential, or incidental damages arising in any way out of the sale of, use
of, or inability to use any CRU product or service, even if CRU has been advised of the possibility of such damages. In no case shall CRU’s liability exceed the actual money paid for
the products at issue. CRU reserves the right to make modifications and additions to this product without notice or taking on additional liability.
FCC Compliance Statement: “This device complies with Part 15 of the FCC rules. Operation is subject to the following two conditions: (1) This device may not cause harmful interfer-
ence, and (2) this device must accept any interference received, including interference that may cause undesired operation.”
This equipment has been tested and found to comply with the limits for a Class A digital device, pursuant to Part 15 of the FCC Rules. These limits are designed to provide reason-
able protection against harmful interference when the equipment is operated in a commercial environment. This equipment generates, uses, and can radiate radio frequency energy
and, if not installed and used in accordance with the instruction manual, may cause harmful interference to radio communications. Operation of this equipment in a residential area
is likely to cause harmful interference in which case the user will be required to correct the interference at this own expense.
In the event that you experience Radio Frequency Interference, you should take the following steps to resolve the problem:
1. Ensure that the case of your attached drive is grounded.
2. Use a data cable with RFI reducing ferrites on each end.
3. Use a power supply with an RFI reducing ferrite approximately 5 inches from the DC plug.
4. Reorient or relocate the receiving antenna
A9-410-0003-1 Rev. 1
TrayFree Shock Absorbing Bays Yes
Data Connectors One (1) USB2 connector
One (1) eSATA connector
Two (2) FireWire 800 connectors
Auto-Rebuild Yes (RAID 1, 3, 5, and 10 configurations only)
LED Indicators Power Indicator, System Indicator, RAID Indicator, Bay Power Indicator (one per bay),
Disk Activity Indicator (one per bay), Encryption Indicator (one per bay)
Controller Display LCD screen with backlight/control panel
Operating System Requirements Windows 7, Vista, or XP, Mac OS X, Linux distributions using Kernel version 2.4 or above
Operating Temperature 50 – 85° Fahrenheit (10 – 30° Celsius)
Operating Humidity 5% to 95%, non-condensing
Power Supply Input: 100-240VAC Output: 220 Watts
Compliance EMI Standard: FCC Part 15 Class A, CE
EMC Standard: EN55022, EN55024
FIPS: FIPS 140-2, FIPS PUB 197
External Case Material Aluminum alloy
Shipping Weight 23 pounds (without drives); 29 pounds (with drives)
Dimensions 6.97” x 10.63” x 14.57” (177mm x 270mm x 370mm)
Technical Support We don’t expect anything to go wrong with your CRU product. But if it does, Tech
Support is standing by and ready to help. Contact us at www.cru-dataport.com/sup-
port. We also offer phone support at (800) 260-9800 and (866) 744-8722.
Visit http://www.wiebetech.com/techsupport.php to download a copy of the complete User Manual.
Additional product information can also be found at www.cru-dataport.com.
RTXTM
FOR OFFICE OR COMMERCIAL USE
Technical Specifications, continued
2. RAID Configuration
You may skip this section if you purchased the RTX Secure pre-configured with drives.
The RTX Secure ships with RAID 5 as the default mode. To set up your drives as a RAID 5, simply
select the “RE-INIT” (reinitialize) option which briefly appears on the LCD menu screen when the
RTX is powered on.
If you wish to use a different RAID mode, download the complete User Manual at
www.cru-dataport.com/technical-support/product-manuals.php.
3. Using Volumes
After a new RAID is created, it must be formatted into a volume before it can be used with your
computer.
On Windows computers, use the Disk Management tool which you can find by right-clicking
on My Computer then selecting Manage. Select NTFS for the format type. After the volume is
formatted, an icon representing the drive volume will appear in My Computer. You can now use
the volume just like an internal hard drive.
On Macs, the easiest way to format the drives into a volume is to use Mac OS X’s Disk Utility. If
you plan to use the unit on both Macs and PCs, select “MS DOS File System” as the format type.
If you only plan to use the unit on Macs, then select “Mac OS Extended.” After the volume is
formatted, an icon representing the drive volume will appear (“mount”) on the desktop. You can
now use the volume just like an internal hard drive.
4. Technical Specifications
Unique Encrypted Mode
This is the most secure mode of operation. A Security Key is required to access data, and each
bay is loaded with its own unique 256-bit security value from the Security Key. These security
values are all stored in one Security Key. Flip the left switch on the bottom panel down to
“Unique” and the right switch down to “Encrypted.”
Common Encrypted Mode
This mode allows hard drives to be located in different boxes after the array is formatted.
A Security Key is required to access data. Each bay uses the same security value from the
Security Key. Flip the left switch on the bottom panel up to “Common” and the right switch
down to “Encrypted.” The Encryption Display Common Key LED will illuminate.
Bypass Mode
A Security Key is not required to access data. This option cannot be used with encrypted
hard drives. Flip the right switch on the bottom panel to “Bypass.” This option disables the
Common/Unique switch. The Encryption Display Bypass LED will illuminate and the drive bay
Encryption Active LEDs will remain off.
1.3 Operating Your RTX Secure
a. Choose one of the connection types and connect a cable from your computer to the
corresponding port on the RTX.
b. Connect the RTX Secure to a power outlet with the included power cord.
c. Install the hard drives into the RTX Secure (See Section 1.1) if you have not already done so.
d. Set the desired encryption mode. (See Section 1.2).
e. If the drives being used in the RTX Secure are encrypted or intended to be encrypted, then
insert the Security Key into the Mini-USB Security Key Port on the bottom of the RTX Secure.
f. Flip the power switch on the rear of the unit to turn on the RTX Secure.
g. When using the Unique or Common Encrypted Modes, wait for each LED along the
bottom panel of the RTX Secure to light green. These encryption status LEDs correspond
to one of the TrayFree Bays above them with the leftmost LED representing the top bay
and the rightmost LED representing the bottom bay. When all encryption status LEDs
that correspond to a bay with a drive inside are lit green, encryption is activated and the
Security Key may be removed and stored in a safe location.
When any hard drive is first used with the RTX Secure they will show up as blank, unallocated
drives and you’ll need to format the drives before you can use them in the enclosure. Note
that formatting a drive will erase all data on the drive, so be sure to back up
your data before installing the hard drives into this enclosure and beginning this
operation. See Section 4 for instructions on how to format the drive with Mac or Windows
operating systems.
NOTE: This will erase any existing data on the drives.
Product Name RTX Secure 410-QR
RAID Levels Supported RAID 0, 1, 3, 5, 10
Interface Types & Speeds • USB2: up to 480 Mbps
• eSATA: up to 3 Gbps
• FireWire 800: up to 800 Mbps
Compatibility 3.5-inch SATA (Serial-ATA) hard disk drives
TrayFree Technology Yes

Other manuals for RTX Secure 410-QR

1

Other CRU Dataport Storage manuals

CRU Dataport DataPort 10 User manual

CRU Dataport

CRU Dataport DataPort 10 User manual

CRU Dataport RTX Secure 410-QR User manual

CRU Dataport

CRU Dataport RTX Secure 410-QR User manual

CRU Dataport Data Express DX115 SAS/SATA 6G User manual

CRU Dataport

CRU Dataport Data Express DX115 SAS/SATA 6G User manual

CRU Dataport RTX400H-SV User manual

CRU Dataport

CRU Dataport RTX400H-SV User manual

CRU Dataport ToughTech Duo-QR User manual

CRU Dataport

CRU Dataport ToughTech Duo-QR User manual

CRU Dataport RTX100-3SJ User manual

CRU Dataport

CRU Dataport RTX100-3SJ User manual

CRU Dataport HotDock User manual

CRU Dataport

CRU Dataport HotDock User manual

CRU Dataport Dataport 25 SL User manual

CRU Dataport

CRU Dataport Dataport 25 SL User manual

CRU Dataport DataPort SecureDock AES 128 User manual

CRU Dataport

CRU Dataport DataPort SecureDock AES 128 User manual

CRU Dataport 2U DataCase User manual

CRU Dataport

CRU Dataport 2U DataCase User manual

CRU Dataport 25 User manual

CRU Dataport

CRU Dataport 25 User manual

CRU Dataport DataPort V User manual

CRU Dataport

CRU Dataport DataPort V User manual

CRU Dataport DataPort 25 Enhanced Carrier User manual

CRU Dataport

CRU Dataport DataPort 25 Enhanced Carrier User manual

CRU Dataport RTX 100-3Q User manual

CRU Dataport

CRU Dataport RTX 100-3Q User manual

CRU Dataport RTX Secure 410-3QR RTXS410-3QR User manual

CRU Dataport

CRU Dataport RTX Secure 410-3QR RTXS410-3QR User manual

CRU Dataport 25d User manual

CRU Dataport

CRU Dataport 25d User manual

CRU Dataport RTX410-3QJ User manual

CRU Dataport

CRU Dataport RTX410-3QJ User manual

CRU Dataport Data Express DX115 SAS/SATA 6G User manual

CRU Dataport

CRU Dataport Data Express DX115 SAS/SATA 6G User manual

CRU Dataport Dataport 25 SL User manual

CRU Dataport

CRU Dataport Dataport 25 SL User manual

CRU Dataport DX115-DC User manual

CRU Dataport

CRU Dataport DX115-DC User manual

CRU Dataport LP User manual

CRU Dataport

CRU Dataport LP User manual

Popular Storage manuals by other brands

HP dat72 5242 user guide

HP

HP dat72 5242 user guide

Sony HDPS-M1 operating instructions

Sony

Sony HDPS-M1 operating instructions

Excito BUBBA quick start guide

Excito

Excito BUBBA quick start guide

Hewlett Packard Enterprise ProLiant DL20 Gen10 Maintenance and service guide

Hewlett Packard Enterprise

Hewlett Packard Enterprise ProLiant DL20 Gen10 Maintenance and service guide

IBM 4146 T30 manual

IBM

IBM 4146 T30 manual

LaCie big disk quadra Brochure & specs

LaCie

LaCie big disk quadra Brochure & specs

foc.us Firestore FS-2 user guide

foc.us

foc.us Firestore FS-2 user guide

Digital Foci MCG-120 user guide

Digital Foci

Digital Foci MCG-120 user guide

morse 400A-72SS-124 Operator's manual

morse

morse 400A-72SS-124 Operator's manual

Seagate Elite 9 installation guide

Seagate

Seagate Elite 9 installation guide

MaxVision terapac User operation and maintenance

MaxVision

MaxVision terapac User operation and maintenance

Iomega px4-400d user guide

Iomega

Iomega px4-400d user guide

Western Digital My Book WDH1B10000 install guide

Western Digital

Western Digital My Book WDH1B10000 install guide

Quantum DXi6900 Field service manual

Quantum

Quantum DXi6900 Field service manual

Freecom ValueLoader DLT VS80 Installation and operation guide

Freecom

Freecom ValueLoader DLT VS80 Installation and operation guide

Supermicro Supero SC847DE16-R1K28LPB user manual

Supermicro

Supermicro Supero SC847DE16-R1K28LPB user manual

Western Digital WD1500HLFS - VelociRaptor 150 GB Hard Drive manual

Western Digital

Western Digital WD1500HLFS - VelociRaptor 150 GB Hard Drive manual

Freecom NETWORK STORAGE CENTER/NETWORK MEDIA CENTER user manual

Freecom

Freecom NETWORK STORAGE CENTER/NETWORK MEDIA CENTER user manual

manuals.online logo
manuals.online logoBrands
  • About & Mission
  • Contact us
  • Privacy Policy
  • Terms and Conditions

Copyright 2025 Manuals.Online. All Rights Reserved.