manuals.online logo
Brands
  1. Home
  2. •
  3. Brands
  4. •
  5. CRU
  6. •
  7. Enclosure
  8. •
  9. CRU DE100 Ultra 160 User manual

CRU DE100 Ultra 160 User manual

Rugged, Reliable, Mobile, SecureTM
1-800-260-9800 www.CRU-DataPort.com
DE100 Ultra 160 68-pin Install Guide
Removable SCSI Wide Ultra160 Drive Enclosure
Receiving Frame Motherboard
Factory-Installed Jumpers (J4): There are two (2) jumpers factory-in-
stalled on J4. One jumper is located on Pins 7 & 8, the other on Pins 9 & 10.
NOTE: Do not remove jumpers! (Remove only if attaching the 6103-
1020-0000 Isolator Board.)
Option Pin Connector (W1)
Remote Unit ID Selection: Pins 1-8 are provided for remote unit ID selec-
tion for the computer system or expansion chassis. Remote ID selection
requires that the unit ID select switch located inside the receiving frame be
set to “0”.
Remote Activity LED: Pins 9 & 10 provide power for a remote LED device
activity indicator.
Enable Termination Power Connector (W2): A jumper is installed at the
factory and enables termination power to/from the SCSI bus.
NOTE: Do not remove this jumper!
Note: The DE100 Ultra 160 may be shipped with an isolator/repeater
board factory-installed. If this is the case, your DE100 Ultra 160 will
look slightly different from figure above. Please refer to figure below
for receiving frame with isolator/repeater board attached (rear view).
The DE100 Ultra 160 Isolator/Repeater Board is an upgrade attach-
ment for the DE100 Ultra 160 receiving frame. This attachment pro-
vides both an enhanced, bus-isolating hot swap and repeater function.
Figure 1: Drive Installation Assembly
Figure 2: Drive Installation Assembly
Rugged, Reliable, Mobile, SecureTM
1-800-260-9800 www.CRU-DataPort.com
Typical 2MM Drive ID Pin Configuration
Figure below illustrates a typical SCSI ID select connection to a drive with 2mm
ID select pins. The wires on the wire harness connect to the positive pin (or
signal pins) on the disk drive. In some cases, the drive manufacturer will label
the signal pins as Pin 1, 3, 5, 7, (instead of 0, 1, 2, 3 as shown in figure below).
Also, in some cases, the even-numbered Pins 2, 4, 6 are used for Ground.
Attach the ID select cable to the drive using the 2mm connectors. Align the
“ID0” pin with the black wire. Attach the 1.25mm connector on the other
end of the ID select cable to the 1.25mm connector (J3B) provided on the
signal distribution board, located inside the carrier. Refer to the manufactur-
er’s documentation to disable termination on the drive.
Figure 3: Receiving Frame Motherboard (rear view)
Figure 4: Typical SCSI ID Select Connections (2mm Drive Pins)
Selecting the Unit ID Number: Use the alignment tool (provided) to select
the ID number of the disk drive.
NOTE: The lock on the Data Express receiving frame functions as a lock and a
DC power switch for the carrier unit. The lock MUST be engaged (turned coun-
terclockwise) in order to supply power to the carrier and installed drive unit.
Limited Product Warranty
CRU-DataPort (CRU) warrants the Data Express DE100 to be free of significant de-
fects in material and workmanship for a period of five years from the original date of
purchase. CRU’s warranty is nontransferable and is limited to the original purchaser.
Limitation of Liability
The warranties set forth in this agreement replace all other warranties. CRU expressly
disclaims all other warranties, including but not limited to, the implied warranties of
merchantability and fitness for a particular purpose and non-infringement of third-party
rights with respect to the documentation and hardware. No CRU dealer, agent or em-
ployee is authorized to make any modification, extension, or addition to this warranty.
In no event will CRU or its suppliers be liable for any costs of procurement of substitute
products or services, lost profits, loss of information or data, computer malfunction, or
any other special, indirect, consequential, or incidental damages arising in any way out
of the sale of, use of, or inability to use any CRU product or service, even if CRU has
been advised of the possibility of such damages. In no case shall CRU’s liability exceed
the actual money paid for the products at issue. CRU reserves the right to make modi-
fications and additions to this product without notice or taking on additional liability.
Certification
EMI Standard: FCC Part 15 Class B, CE
EMC Standard: EN55022, EN55024
FCC Certification
This device has been tested and found to comply with the limits for a Class B
digital device, pursuant to Part 15 of the FCC rules. Operation is subject to the
following two conditions:
1. This device may not cause harmful interference.
2. This device must accept any interference received; including interference that
may cause undesired operation.
Register your product at www.CRU-DataPort.com.
A7-100-0008 Rev. 1.1
Figure 5: Unit ID Select Switch Location
Other CRU Enclosure manuals

CRU DataPort 25 Dual Port SAS User manual

CRU

CRU DataPort 25 Dual Port SAS User manual

CRU RAX Secure 212-3QR User manual

CRU

CRU RAX Secure 212-3QR User manual

CRU DataPort 41 User manual

CRU

CRU DataPort 41 User manual

CRU RAX 3QJ Series User manual

CRU

CRU RAX 3QJ Series User manual

CRU RAX Secure 212-3QJ User manual

CRU

CRU RAX Secure 212-3QJ User manual

CRU Rhino Jr RJ400 User manual

CRU

CRU Rhino Jr RJ400 User manual

CRU RTX220-3QR User manual

CRU

CRU RTX220-3QR User manual

CRU DataPort DP10 User manual

CRU

CRU DataPort DP10 User manual

CRU QX310 v2 User manual

CRU

CRU QX310 v2 User manual

CRU Rhino Jr RJ33S User manual

CRU

CRU Rhino Jr RJ33S User manual

CRU RAX 215DC-3QJ User manual

CRU

CRU RAX 215DC-3QJ User manual

CRU RTX220-3SJ User manual

CRU

CRU RTX220-3SJ User manual

CRU ToughTech Duo C User manual

CRU

CRU ToughTech Duo C User manual

CRU DataPort 2 Bay User manual

CRU

CRU DataPort 2 Bay User manual

CRU DataPort DP27 User manual

CRU

CRU DataPort DP27 User manual

CRU RTX 1-Bay-3Q User manual

CRU

CRU RTX 1-Bay-3Q User manual

CRU Rhino Jr RJ34S User manual

CRU

CRU Rhino Jr RJ34S User manual

CRU RAX211-3QR User manual

CRU

CRU RAX211-3QR User manual

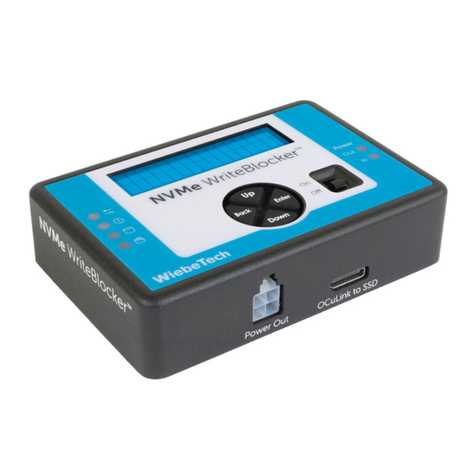
CRU NVMe WriteBlocker User manual

CRU

CRU NVMe WriteBlocker User manual

CRU MoveDock USB 3.0 User manual

CRU

CRU MoveDock USB 3.0 User manual

CRU Data Express QX310 User manual

CRU

CRU Data Express QX310 User manual

CRU Data Express 200i-SWU2 User manual

CRU

CRU Data Express 200i-SWU2 User manual

CRU DataPort DP25 SATA 6G User manual

CRU

CRU DataPort DP25 SATA 6G User manual

CRU DataPort 20 User manual

CRU

CRU DataPort 20 User manual

Popular Enclosure manuals by other brands

Tripp Lite U457-2M2-SATAG2 owner's manual

Tripp Lite

Tripp Lite U457-2M2-SATAG2 owner's manual

Dat Optic T1-US2DS01 installation guide

Dat Optic

Dat Optic T1-US2DS01 installation guide

Akasa A-NUC46-M1B user manual

Akasa

Akasa A-NUC46-M1B user manual

Kinedo KINESPACE R installation instructions

Kinedo

Kinedo KINESPACE R installation instructions

Niles RWE7C installation guide

Niles

Niles RWE7C installation guide

Pulsar AWO 220PU Assembly instructions

Pulsar

Pulsar AWO 220PU Assembly instructions

AFL OptiNID 500 installation instructions

AFL

AFL OptiNID 500 installation instructions

TOOQ TQE-2529B user manual

TOOQ

TOOQ TQE-2529B user manual

Sharkoon Rapid-Case 2.5" USB 3.1 Type C manual

Sharkoon

Sharkoon Rapid-Case 2.5" USB 3.1 Type C manual

AMX AXB-TC Dimensional drawing

AMX

AMX AXB-TC Dimensional drawing

Rockville RTB-A Series Wiring guide

Rockville

Rockville RTB-A Series Wiring guide

Rosewill SRM-01B-450 instruction manual

Rosewill

Rosewill SRM-01B-450 instruction manual

Dual ALB10 Installation & owner's manual

Dual

Dual ALB10 Installation & owner's manual

Xigmatek Gemini II Series quick start guide

Xigmatek

Xigmatek Gemini II Series quick start guide

Stahl 8102 Series operating instructions

Stahl

Stahl 8102 Series operating instructions

Sarotech NAS-20 Quick installation guide

Sarotech

Sarotech NAS-20 Quick installation guide

Pulsar Obudowa 28/TRP80/SATEL Assembly instructions

Pulsar

Pulsar Obudowa 28/TRP80/SATEL Assembly instructions

Weidmüller Klippon TB MH Assembly guidelines

Weidmüller

Weidmüller Klippon TB MH Assembly guidelines

manuals.online logo
manuals.online logoBrands
  • About & Mission
  • Contact us
  • Privacy Policy
  • Terms and Conditions

Copyright 2025 Manuals.Online. All Rights Reserved.