manuals.online logo
Brands
  1. Home
  2. •
  3. Brands
  4. •
  5. Crystal Mountain
  6. •
  7. Water Dispenser
  8. •
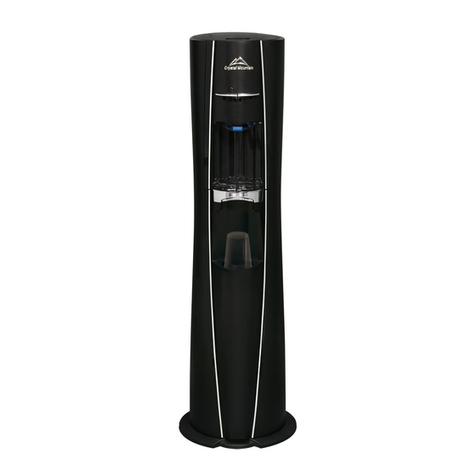
  9. Crystal Mountain Storm Cafe Configuration guide

Crystal Mountain Storm Cafe Configuration guide

Storm Café
Cleaning and Sanitization
尺寸:145x210mm=WxH
Notice
Never attempt to service or repair a water cooler while it is plugged into any power supply.
The information and/or procedures presented in the following demonstration(s) should be performed by
a trained water cooler service technician only (except daily cleaning of coffee pod holder and monthly
cleaning with detergent pod).
Prior to any service or repair of the water cooler, ensure that the water has been completely drained from
the system.
Scheduled cleaning and sanitizing are recommended to ensure the integrity of the drinking water. The
frequency of cleaning will vary depending on the conditions and environment.
Follow the steps outlined in this document for cleaning and sanitizing the water cooler.
Optimum Operating Temperatures 50°F - 90°F
Page 01
Daily cleaning of coffee pod holder
Figure 1 Figure 2 Figure 3
Cleaning tips to help maintain the Storm Café in clean and hygienic state
l Wash hands thoroughly with soap and water for at least 20 seconds and/or use an alcohol-
based hand sanitizer containing a minimum 60% alcohol prior to cleaning and sanitizing.
l Spray a clean cloth with an EPA registered / approved disinfectant. Wipe down all brewer
screens, touch buttons, the coffee pod holder and external surfaces to disinfect. Take care
to read the label and ensure that it will meet your needs.
l All surfaces should be cleaned prior to disinfection using a mild dish detergent and water.
CAUTION: DO NOT IMMERSE THE UNIT IN
WATER OR CLEAN USING PRESSURE WASHER.
The daily cleaning of coffee pod holder and monthly cleaning with detergent pod maybe
performed by the end user.
1. Using the top cover key (Figure 1), insert into the two holes (on the front, approximately 2 inches above
and to the right of hot water safety button). Push key inward to open top cover (Figure 2 & 3).
Page 02
3. Open the catch on each side, lift out the top coffee pod holder component (Figure 9, 10, 11). Wash both
components of the coffee pod holder with a food grade dish detergent for at least 1 minute. Dry using a
clean cloth or air dry (Figure 12).
Figure 9 Figure 10 Figure 11
2. Open the coffee pod holder lid (Figure 4). Remove the coffee cup holder (brown) (Figure 5) and discard
or machine wash (top rack only). Turn the red twist locks on each side to release and take out the bottom
part of coffee pod holder (Figure 6, 7, 8).
Figure 4 Figure 5 Figure 6
Figure 7 Figure 8
Figure 12
Page 03
D u r i n g t h e c l e a n i n g
and/or sanitizing process,
the Top Needle Gasket
may be removed. The Top
Needle Gasket must be
re-installed prior to use to
prevent personal injury or
equipment damage.
CAUTION!
PUSH
Food grade detergents for cooler cleaning and sanitization
Figure 16 Figure 17 Figure 18
Figure 14 Figure 15
4. Install the cleaned top coffee pod holder components in the cooler (Figure 13), closing the catch on each
side (Figure 14). Slide the bottom part of coffee pod holder into place (Figure 15), turning both red twist
locks to secure (Figure 16). Place a clean cup holder (brown) in the pod holder (Figure 17) and push
down to close the lid (Figure 18).
Figure 13
l Food grade dish detergent
l Other food grade cleaner
l EPA registered / approved disinfectant
Page 04
PUSH
Figure 19 Figure 20
Figure 22
Figure 21
Note: The detergent pod is a special cleaning agent used specifically for cleaning coffee pod-type machines.
A food grade detergent must be used.
1. With the coffee machine turned on and at temperature, open the coffee pod holder (Figure 19), insert the
detergent pod and close lid (Figure 20).
Monthly cleaning with detergent pod (not supplied)
2. Place a 12 oz or larger glass or similar container under the water outlet (Figure 21). Select the 12 oz
option and press the “Brew” button to start the cleaning cycle (Figure 22).
Upon completion of the cleaning cycle, clean the coffee pod holder using the “Daily Cleaning” procedures
in this document.
3.
4. Once the cleaned coffee pod holder is installed, press the 8, 10, or 12 oz option and press the “Brew”
button to flush hot water through the unit without inserting a coffee pod into the pod holder. Repeat five
times or until no detergent residue is detected.
Page 05
Figure 30
5. Take bottle out from the base (Caution: don't break the corrugated tube.). Remove the connector from
adaptor (Figure 30). A plug should be added to the end of the tube, to stop the water dripping on the
floor (Figure 31). Save the red plug for future use.
4. Lift door up (Figure 27), turn off the hot tank power switch (Figure 28) and unplug the water cooler
(Figure 29).
CAUTION: WATER IN HOT TANK IS VERY HOT AND CAN CAUSE SEVERE BURNS. ALLOW
SUFFICIENT TIME FOR THE HOT WATER TO COOL BEFORE DRAINING (1-2 HOURS).
Figure 27 Figure 28 Figure 29
Basic cleaning
3. Using clean cloth wipe raised drip tray support, and wash the drip tray grill and base using mild dish
detergent (Figure 24, 25, 26).
2. Remove raised drip tray assembly and disassemble it for cleaning (Figure 23).
1. Use sterile nitrile gloves or wash hands with soap and water for 20 seconds before and after handling
water contact parts.
Figure 23 Figure 24 Figure 25 Figure 26
Page 06
Figure 31
7. Squeeze the latch's end to open (Figure 35 & 36). Rotate the blue knobs to release the SmartFlo™
(Figure 37 & 38). Pull to remove the SmartFlo™ Water Cartridge and discard in recycling bin (Figure
39 & 40).
Figure 35 Figure 36 Figure 37
Figure 38 Figure 39 Figure 40
6. Using the top cover key (Figure 32), insert into the two holes (on the front, approximately 2 inches above
and to the right of hot water safety button). Push key inward to open top cover (Figure 33 & 34).
Figure 32 Figure 33 Figure 34
Page 07
9. It is recommended that the hot tank be descaled periodically (depending upon water quality and usage).
Only the use of food-safe descaling agents, compatible with 304 grade stainless steel is recommended.
The use of the descaling agents must be in accordance with the manufacturer's safety instructions and
recommendations and performed by properly trained personnel. Note: Ensure that the hot tank is empty
and that the drain, plug, cap and cover are securely in place (screw installation torque 4.5 kgf.cm)
(Figure 44). Using a funnel, add the descaling solution to the hot tank, filling up to the top of the inlet
(approx. 38.7oz/1100ml) (refer to Figure 45). In accordance with the manufacturer's instructions for the
solution, allow the solution time to descale, and then drain and dispose of the solution.
Figure 44 Figure 45
10. Wipe evaporator with a clean cloth (Figure 46).
Figure 46
Page 08
8. To drain the hot tank, use a #2 Phillips screwdriver, remove the drain cap cover on the rear of the cooler.
Using a flat blade screw driver or 1/2" socket, remove the drain cap and plug (Figure 41 & 42). Drain
water into a pail or container (at least 0.5 gal.) (Figure 43) and discard. Replace drain plug and cap,
attach drain cover (Screw installation torque 4.5 kgf.cm).
Figure 41 Figure 42 Figure 43
Figure 53 Figure 54
11. Use a stiff, non-metallic brush or vacuum attachment to clean the condenser and all accessible areas to
remove dirt, lint and debris. Use a clean damp cloth to wipe down condenser (Figure 47).
Figure 47
CAUTION: DO NOT CLEAN USING PRESSURE WASHER OR ANY DIRECT WATER CONTACT.
12. Lift door up to open. Brush, vacuum and wipe to clean the interior of condenser (Figure 48 & 49).
Figure 48 Figure 49
13. Install a new SmartFlo™ Water Cartridge. Install the connector and corrugated tube into the inlet
through cooler to bottom (Figure 50 & 51). Insert the reservoir into evaporator (Figure 52). Ensure the
SmartFlo™ is installed properly. Turn the two blue knobs to lock the SmartFlo™ in place (Figure 53 &
54).
Figure 50 Figure 51 Figure 52
Page 09
17. Lift the door to open. Turn the hot tank power switch ON. Push down to close the door.
CAUTION: TO PREVENT DAMAGE TO THE HOT TANK, DO NOT SWITCH ON IF HOT TANK IS EMPTY.
Figure 57
14. Close and lock the latch arm (Figure 55).
Figure 55
15. Remove the red plug from the blue tube of the Smartflo™ Water Cartridge and install onto the bottle
adaptor assembly (Figure 56). Save the red plug for future use.
Figure 56
16. Close the top cover and lower the door to close. Plug the cooler into the electrical outlet. Prime water
system (required during initial setup and after replacement of SmartFlo™ Water Cartridge). Depress
the , first, and then the water levers (separately, not at same time) to fill their respective tanks. Cold Hot
When water begins to flow from the faucet, the tank has been filled (approx. 1 minute per tank)
(Figure 57&58).
Page 10
Figure 58
TM
TM
DOC-C100188 Rev0720
Copyri g h t © 2 0 2 0 b y C r y s t a l M o u n t a i n
Manufactured under U.S. Patent No. 10,781,093 and other patents pending

Other manuals for Storm Cafe

1

Other Crystal Mountain Water Dispenser manuals

Crystal Mountain ASPEN User manual

Crystal Mountain

Crystal Mountain ASPEN User manual

Crystal Mountain CMFIWD001 User manual
Crystal Mountain

Crystal Mountain CMFIWD001 User manual

Crystal Mountain Standup Series User manual

Crystal Mountain

Crystal Mountain Standup Series User manual

Crystal Mountain Summit User manual

Crystal Mountain

Crystal Mountain Summit User manual

Crystal Mountain K2 User manual

Crystal Mountain

Crystal Mountain K2 User manual

Crystal Mountain Storm User manual

Crystal Mountain

Crystal Mountain Storm User manual

Crystal Mountain Mogul User manual

Crystal Mountain

Crystal Mountain Mogul User manual

Crystal Mountain Blizzard User manual

Crystal Mountain

Crystal Mountain Blizzard User manual

Crystal Mountain EVEREST User manual

Crystal Mountain

Crystal Mountain EVEREST User manual

Crystal Mountain EVEREST ELITE Series User manual

Crystal Mountain

Crystal Mountain EVEREST ELITE Series User manual

Crystal Mountain Crystal Pro Owner's manual

Crystal Mountain

Crystal Mountain Crystal Pro Owner's manual

Crystal Mountain Crystal Pro Instruction manual

Crystal Mountain

Crystal Mountain Crystal Pro Instruction manual

Crystal Mountain Mogul User manual

Crystal Mountain

Crystal Mountain Mogul User manual

Crystal Mountain K2 User manual

Crystal Mountain

Crystal Mountain K2 User manual

Crystal Mountain Mogul User manual

Crystal Mountain

Crystal Mountain Mogul User manual

Crystal Mountain Everest Elite User manual

Crystal Mountain

Crystal Mountain Everest Elite User manual

Crystal Mountain Avalanche User manual

Crystal Mountain

Crystal Mountain Avalanche User manual

Crystal Mountain Summit User manual

Crystal Mountain

Crystal Mountain Summit User manual

Crystal Mountain ASPEN User manual

Crystal Mountain

Crystal Mountain ASPEN User manual
Crystal Mountain STORM Bottom-Load User manual

Crystal Mountain

Crystal Mountain STORM Bottom-Load User manual

Crystal Mountain Everest POU Series User manual

Crystal Mountain

Crystal Mountain Everest POU Series User manual

Crystal Mountain Everest POU Series User manual

Crystal Mountain

Crystal Mountain Everest POU Series User manual

Crystal Mountain Storm User manual

Crystal Mountain

Crystal Mountain Storm User manual

Crystal Mountain Mogul User manual

Crystal Mountain

Crystal Mountain Mogul User manual
Popular Water Dispenser manuals by other brands

Follett Symphony 12CI400A-LI Installation, operation and service manual

Follett

Follett Symphony 12CI400A-LI Installation, operation and service manual

ClearStream 500DAST manual

ClearStream

ClearStream 500DAST manual

Whirlpool WHES20 Installation and operation manual

Whirlpool

Whirlpool WHES20 Installation and operation manual

North Star NSC30UD1 Installation operation & maintenance

North Star

North Star NSC30UD1 Installation operation & maintenance

Halsey Taylor HTVZDBL 1A owner's manual

Halsey Taylor

Halsey Taylor HTVZDBL 1A owner's manual

ClearChoice Premium Series Owner's manual and installation guide

ClearChoice

ClearChoice Premium Series Owner's manual and installation guide

Vertex PureWaterCooler PWC-400 Service manual

Vertex

Vertex PureWaterCooler PWC-400 Service manual

Elkay EZO Series Care & use manual

Elkay

Elkay EZO Series Care & use manual

Avanti WID260P instruction manual

Avanti

Avanti WID260P instruction manual

Elkay EDF20 Installation, care & use manual

Elkay

Elkay EDF20 Installation, care & use manual

Miura MS Series installation manual

Miura

Miura MS Series installation manual

Halsey Taylor HVRBLFR Series owner's manual

Halsey Taylor

Halsey Taylor HVRBLFR Series owner's manual

Harvia AUTODOSE Instructions for installation and use

Harvia

Harvia AUTODOSE Instructions for installation and use

Kenmore Elite IntelliSoft 625.384260 owner's manual

Kenmore

Kenmore Elite IntelliSoft 625.384260 owner's manual

Stakpure OmniaPure xstouch Blueline operating manual

Stakpure

Stakpure OmniaPure xstouch Blueline operating manual

NATURA NWSBU2 SER.4 Installation and maintenance guide

NATURA

NATURA NWSBU2 SER.4 Installation and maintenance guide

Proficient H2O Pro315 Next Gen TA HE Alternating manual

Proficient H2O

Proficient H2O Pro315 Next Gen TA HE Alternating manual

Hoshizaki ROX-20TA-U parts list

Hoshizaki

Hoshizaki ROX-20TA-U parts list

manuals.online logo
manuals.online logoBrands
  • About & Mission
  • Contact us
  • Privacy Policy
  • Terms and Conditions

Copyright 2025 Manuals.Online. All Rights Reserved.