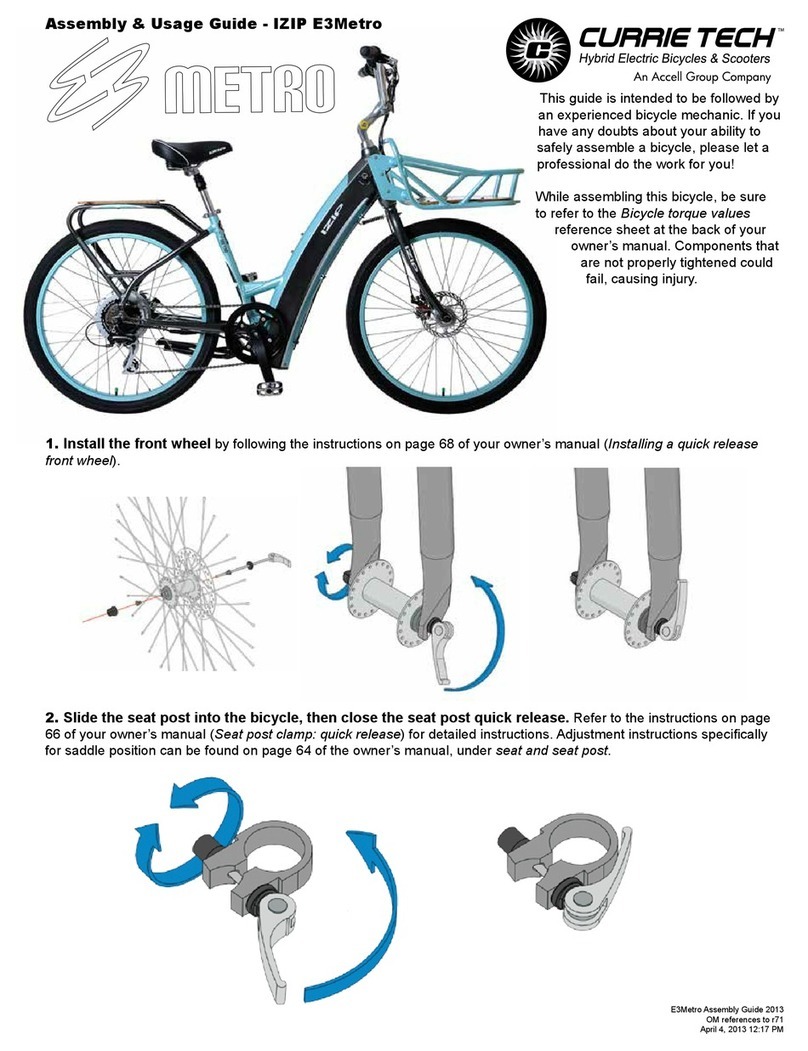
Currie tech IZIP User manual


IMPORTANT:
This manual contains important safety, performance and service information. Read it before
you take the first ride on your new bicycle, and keep it for reference.
This manual is designed to be read together with the separate user manual provided with
your electric bike’s drive system. Be sure to read all provided documents before your first ride.
Additional safety, performance and service information for specific components such as
suspension or pedals on your bicycle, or for accessories such as helmets or lights that you
purchase, may also be available. Make sure that your dealer has given you all the manufactur-
ers’ literature that was included with your bicycle or accessories. In case of a conflict between
the instructions in this manual and information provided by a component manufacturer, always
follow the component manufacturer’s instructions.
If you have any questions or do not understand something, take responsibility for your safety
and consult with your dealer or the bicycle’s manufacturer.
NOTE:
This manual is not intended as a comprehensive use, service, repair or maintenance manual.
Please see your dealer for all service, repairs or maintenance. Your dealer may also be able to refer
you to classes, clinics or books on bicycle use, service, repair or maintenance.

Contents
GENERAL WARNING. . . . . . . . . . . . . . . . . . . . . . . . . . . . . . . . . . . 1
Warning and caution statements . . . . . . . . . . . . . 1
A special note for parents . . . . . . . . . . . . . . . . . . . . . . . . . . . . . . . . 2
Section 1 First . . . . . . . . . . . . . . . . . . . . . . . . . . . . . . . . . . . . . . 4
Bike fit . . . . . . . . . . . . . . . . . . . . . . . . . . . 4
Safety first. . . . . . . . . . . . . . . . . . . . . . . . . 4
Mechanical safety check . . . . . . . . . . . . . . . . . 5
Nuts, bolts screws & other fasteners . . . . . . . . .5
Tires & Wheels . . . . . . . . . . . . . . . . . . . .6
Brakes . . . . . . . . . . . . . . . . . . . . . . . .6
Wheel retention system . . . . . . . . . . . . . . .6
Seatpost . . . . . . . . . . . . . . . . . . . . . . .6
Handlebar and saddle alignment. . . . . . . . . . . 7
Handlebar ends and grips . . . . . . . . . . . . . . 7
First ride. . . . . . . . . . . . . . . . . . . . . . . . . . 7
Section 2 Safety. . . . . . . . . . . . . . . . . . . . . . . . . . . . . . . . . . . . . 8
The basics. . . . . . . . . . . . . . . . . . . . . . . . . 8
Riding safety . . . . . . . . . . . . . . . . . . . . . . . 9
Off-road safety. . . . . . . . . . . . . . . . . . . . . . .10
Off-road respect . . . . . . . . . . . . . . . . . . 10
Off-road electric bicycles . . . . . . . . . . . . . . 11
Electric bike safety . . . . . . . . . . . . . . . . . . . .11
Wet weather riding . . . . . . . . . . . . . . . . . . . . 11
Night riding . . . . . . . . . . . . . . . . . . . . . . . .11
Vehicle racks . . . . . . . . . . . . . . . . . . . . . . .13
Extreme, stunt or competition riding. . . . . . . . . . . .13
Changing components & adding accessories. . . . . . .14
After an accident . . . . . . . . . . . . . . . . . . . . .15

Section 3 Fit. . . . . . . . . . . . . . . . . . . . . . . . . . . . . . . . . . . . . . . 18
Standover height . . . . . . . . . . . . . . . . . . . . .18
Diamond frame bicycles . . . . . . . . . . . . . . 18
Step-through frame bicycles . . . . . . . . . . . . 18
Saddle position . . . . . . . . . . . . . . . . . . . . . .19
Handlebar height and angle. . . . . . . . . . . . . . . .21
Control position adjustments . . . . . . . . . . . . . . .22
Brake reach . . . . . . . . . . . . . . . . . . . . . . . .22
Section 4 Tech . . . . . . . . . . . . . . . . . . . . . . . . . . . . . . . . . . . . . 24
Wheels . . . . . . . . . . . . . . . . . . . . . . . . . .24
Front Wheel Secondary Retention Devices . . . . 25
Wheels with cam action systems. . . . . . . . . . 25
Removing and Installing wheels . . . . . . . . . . 26
Seatpost cam action clamp . . . . . . . . . . . . . . . .29
Adjusting the seatpost cam action
mechanism . . . . . . . . . . . . . . . . . . . . . 30
Brakes. . . . . . . . . . . . . . . . . . . . . . . . . . .30
Brake controls and features . . . . . . . . . . . . 32
How brakes work . . . . . . . . . . . . . . . . . . 33
Shifting gears . . . . . . . . . . . . . . . . . . . . . . .33
How a derailleur drivetrain works. . . . . . . . . . 34
How an internal gear hub drivetrain works . . . . . 35
Pedals. . . . . . . . . . . . . . . . . . . . . . . . . . .36
Bicycle suspension . . . . . . . . . . . . . . . . . . . .37
Tires and tubes . . . . . . . . . . . . . . . . . . . . . .39
Tires . . . . . . . . . . . . . . . . . . . . . . . . 39
Tire Valves . . . . . . . . . . . . . . . . . . . . . 40

Section 5 Electric Bikes. . . . . . . . . . . . . . . . . . . . . . . . . . . . . . 42
Electric bike components . . . . . . . . . . . . . . . . .42
Motors . . . . . . . . . . . . . . . . . . . . . . . 42
Pedal-assist sensors . . . . . . . . . . . . . . . . 43
Throttles . . . . . . . . . . . . . . . . . . . . . . 43
Brakes . . . . . . . . . . . . . . . . . . . . . . . 43
Battery capacity gauges . . . . . . . . . . . . . . 43
Battery care & safety . . . . . . . . . . . . . . . . . . .44
What to do when you receive your
new battery. . . . . . . . . . . . . . . . . . . . . 44
General use and FAQ . . . . . . . . . . . . . . . 45
Charging . . . . . . . . . . . . . . . . . . . . . . 45
Storage . . . . . . . . . . . . . . . . . . . . . . . 46
Transport . . . . . . . . . . . . . . . . . . . . . . 47
Disposal . . . . . . . . . . . . . . . . . . . . . . 47
Safety. . . . . . . . . . . . . . . . . . . . . . . . 47
Riding an electric bike. . . . . . . . . . . . . . . . . . .48
Safety. . . . . . . . . . . . . . . . . . . . . . . . 48
Legality . . . . . . . . . . . . . . . . . . . . . . . 48
Range . . . . . . . . . . . . . . . . . . . . . . . 49
Hills. . . . . . . . . . . . . . . . . . . . . . . . . 49
Weather conditions . . . . . . . . . . . . . . . . . 49
Riding an off-road electric bicycle . . . . . . . . . 50
Riding a high-speed electric bicycle . . . . . . . . 50
Riding a center-drive bike . . . . . . . . . . . . . 50
Electric bike care . . . . . . . . . . . . . . . . . . . . .51
Electric bike service . . . . . . . . . . . . . . . . . . . .52
Section 6 Service. . . . . . . . . . . . . . . . . . . . . . . . . . . . . . . . . . . 54
Service intervals. . . . . . . . . . . . . . . . . . . . . .55
If your bicycle sustains an impact . . . . . . . . . . . . .57
Appx. A Intended use of your electric bicycle . . . . . . . . . . . . 58
High-Performance Road . . . . . . . . . . . . . . . . .59
Condition 1 . . . . . . . . . . . . . . . . . . . . . 59
General Purpose Riding. . . . . . . . . . . . . . . . . .59
Condition 2 . . . . . . . . . . . . . . . . . . . . . 59
Cross-Country, Marathon, Hardtails. . . . . . . . . . . .60
Condition 3 . . . . . . . . . . . . . . . . . . . . . 60
All Mountain . . . . . . . . . . . . . . . . . . . . . . . .61
Condition 4 . . . . . . . . . . . . . . . . . . . . . 61
Gravity, Freeride, and Downhill . . . . . . . . . . . . . .62
Condition 5 . . . . . . . . . . . . . . . . . . . . . 62

Appx. B The lifespan of your bike and its components . . . . . 64
Nothing lasts forever, including your bike . . . . . . . . .64
Perspective . . . . . . . . . . . . . . . . . . . . . . . .64
Understanding metals . . . . . . . . . . . . . . . 65
Understanding components . . . . . . . . . . . . 68
Appx. C Fastener Torque Specifications . . . . . . . . . . . . . . . . 70
Headset, Handlebar, Seat area. . . . . . . . . . . 70
Crankset, Bottom Bracket, Pedal area . . . . . . . 70
Derailleur, Shift lever area . . . . . . . . . . . . . 70
Rack area. . . . . . . . . . . . . . . . . . . . . . 71
Wheel area . . . . . . . . . . . . . . . . . . . . . 71
Brakes . . . . . . . . . . . . . . . . . . . . . . . 71
Appx. D High Power HP0180WL3 Battery Charger . . . . . . . 72
Charging a battery. . . . . . . . . . . . . . . . . . . . .72
After charging... . . . . . . . . . . . . . . . . . . 72
Charge indicator LED. . . . . . . . . . . . . . . . 72
Troubleshooting . . . . . . . . . . . . . . . . . . . . . .73

1
Currie Tech Technical and Customer Service: +1 800-377-4532
3. General Warning.indd Last Modified June 23, 2014 5:13 PM
GENERAL WARNING
Likeany sport, bicyclinginvolves riskof injury anddamage. Bychoosing to ridea bicy-
cle, you assume the responsibility for that risk, so you need to know — and to practice
— the rules of safe and responsible riding and of proper use and maintenance. Proper
use and maintenance of your bicycle reduces risk of injury.
Your bicycle is designed for use by persons 16 years old and above. Riders must
have the physical coordination, reaction time and mental capability to ride and manage
traffic, road conditions, sudden situations and also respect the laws governing bicycle
use where they ride, regardless of age.
If you have an impairment or disability such as a visual impairment, hearing impair-
ment, physical impairment, cognitive/language impairment, or a seizure disorder, con-
sult your physician before riding any bicycle.
Warning and caution statements
ThisManual containsmany“Warnings”and “Cautions”concerning theconsequences
offailure tomaintainor inspectyour bicycleandof failureto followsafe cycling practices.
The combination of the safety alert symbol and the word WARNING indicates a
potentiallyhazardoussituation which,ifnotavoided,could resultinserious injuryordeath.
The combination of the safety alert symbol and the word CAUTION indicates a
potentially hazardous situation which, if not avoided, may result in minor or moderate
injury, or is an alert against unsafe practices.
Theword CAUTION usedwithout thesafetyalert symbolindicates asituation which,if
notavoided, couldresult inseriousdamage tothe bicycleor thevoidingof yourwarranty.
Many of the Warnings and Cautions say “you may lose control and fall”. Because
any fall can result in serious injury or even death, we do not always repeat the warning
of possible injury or death.
Because it is impossible to anticipate every situation or condition which can occur
whileriding, thisManual makesnorepresentationaboutthesafeuse ofthe bicycleunder
all conditions. There are risks associated with the use of any bicycle which cannot be
predicted or avoided, and which are the sole responsibility of the rider.
You should save this manual, along with any other documents that were included
with your bicycle, for future reference. However, all content in this manual is subject to
change or withdrawal without notice. Visit www.CurrieTech.com to download the latest
version.CurrieTechmakes every effortto ensuretheaccuracy ofits documentationand
assumesnoresponsibility orliabilityfor anyerrorsorinaccuraciesthatmayappearherein.

2
A special note for parents
As a parent or guardian, you are responsible for the activities and safety of your child,
and that includes making sure that the bicycle is properly fitted to the child; that it is
in good repair and safe operating condition; that you and your child have learned and
understand the safe operation of the bicycle; and that you and your child have learned,
understandand obey notonly theapplicable local motorvehicle, bicycleandtraffic laws,
but also the common sense rules of safe and responsible bicycling. As a parent, you
should read this manual, as well as review its warnings and the bicycle’s functions and
operating procedures with your child, before letting your child ride the bicycle.
Make sure that your child always wears an approved bicycle helmet when rid-
ing; but also make sure that your child understands that a bicycle helmet is for
bicycling only, and must be removed when not riding.Ahelmet must not be worn
while playing, in play areas, on playground equipment, while climbing trees, or
at any time while not riding a bicycle. Failure to follow this warning could result
in serious injury or death.
Your electric bicycle is for use by persons 16 years old and older, only. Do not let
a child younger than 16 years old ride the bicycle.

3
EBCC Technical and Customer Service: +1 800-377-4532
3. General Warning.indd Last Modified June 23, 2014 5:13 PM

4First Bike fit
Section 1:
First
NOTE:Westronglyurge youto readthis
Manual in its entirety before your first ride.
At the very least, read and make sure that
you understand each point in this section,
andrefer tothe citedsections onany issue
which you don’t completely understand.
Please note that not all bicycles have all
of the features described in this Manual.
Ask your dealer to point out the features
of your bicycle.
Your bicycle comes with additional man-
uals and documents provided by the
manufacturers of the bicycle’s drive sys-
tem and other components. You should
read each of them before riding your
bike for the first time.
Bike fit
Isyourbike therightsize?Tocheck, see
“Standover height” on page 18. If your
bicycle is too large or too small for you,
you may lose control and fall. If your
new bike is not the right size, ask your
dealer to exchange it before you ride it.
Is the saddle at the right height? To
check, see “Saddle position” on page
19. If you adjust your saddle height,
follow the Minimum Insertion instruc-
tions in “Saddle position” on page 19.
Are saddle and seatpost securely
clamped? A correctly tightened saddle
will allow no saddle movement in any
direction.See“Saddleposition”on page
19.
Arethe stemandhandlebarsatthe right
height for you? If not, see “Handlebar
height and angle” on page 21.
Canyoucomfortablyoperatethebrakes?
If not, you may be able to adjust their
angle and reach. See “Control position
adjustments” on page 22 and “Brake
reach” on page 22.
Doyou fully understandhow to operate
your new bicycle? If not, before your
first ride, have your dealer explain any
functions or features which you do not
understand.
Safety first
Alwayswear an approvedhelmet when
riding your bike, and follow the helmet
manufacturer’s instructions for fit, use
and care.
Do you have all the other required
and recommended safety equipment?
Proper attire such as helmets, bright
clothing, protective glasses, and sturdy
shoes are recommended even where
not demanded by law. See the section
discussing “Safety” on page 8. It’s
yourresponsibility tofamiliarizeyourself
withthelawsoftheareaswhere youride,
and to comply with all applicable laws.
Do you know how to correctly secure
your front and rear wheels? Check
“Wheels” on page 24 to make sure.
Ridingwithanimproperlysecuredwheel
cancause the wheelto wobbleordisen-


5
EBCC Technical and Customer Service: +1 800-377-4532
4. First.indd Last Modified June 23, 2014 5:19 PM
First
Mechanical safety check
gagefromthebicycle,and causeserious
injury or death.
If your bike has toeclips and straps or
clipless (“step-in”) pedals, make sure
you know how they work (see “Pedals”
on page 36). These pedals require
special techniques and skills. Follow
the pedal manufacturer’s instructions
for use, adjustment and care.
Do you have “toe overlap”? On smaller
framed bicycles your toe or toeclip may
be able to contact the front wheel when
a pedal is all the way forward and the
wheelis turned.Read“Pedals” onpage
36 to check whether you have toeclip
overlap.
Does your bike have suspension? If so,
check “Bicycle suspension” on page
37. Suspension can change the way
a bicycle performs. Follow the suspen-
sionmanufacturer’sinstructions foruse,
adjustment and care.
Because electric bicycles are so differ-
ent from regular bikes, additional steps
are needed to ride them safely. Please
be sure to read “Riding an electric bike”
on page 48.
Mechanical safety check
Routinely check the condition of your
bicycle before every ride.
Nuts, bolts screws & other
fasteners
Becausemanufacturers use awide vari-
ety of fastener sizes and shapes made in
a variety of materials, often differing by
model and component, the correct tighten-
ing force or torque cannot be generalized.
To make sure that the many fasteners on
yourbicycleare correctlytightened,referto
“Fastener Torque Specifications” on page
70 of this manual or to the torque speci-
ficationsin theinstructions providedby the
manufacturerofthe componentinquestion.
Correctly tightening a fastener requires a
calibrated torque wrench. A professional
bicycle mechanic with a torque wrench
shouldtorque thefasteners onyoubicycle.
If you choose to work on your own bicycle,
you must use a torque wrench and the cor-
rect tightening torque specifications from
the bicycle or component manufacturer
or from your dealer. If you need to make
an adjustment at home or in the field, we
urge you to exercise care, and to have the
fasteners you worked on checked by your
dealer as soon as possible.
Correct tightening force on fasteners –
nuts, bolts, screws– on your bicycle is
important. Too little force, and the fas-
tener may not hold securely. Too much
force, and the fastener can strip threads,
stretch, deform or break. Either way,
incorrect tightening force can result in
component failure,which cancause you
to lose control and fall.
Makesure nothingis loose.Lift thefront
wheel off the ground by two or three
inches,then let itbounce onthe ground.
Anythingsound, feelorlook loose?Do a
visualand tactileinspectionof thewhole
bike.Any loose parts or accessories? If
so, secure them. If you’re not sure, ask
someone with experience to check.

6First Mechanical safety check
Tires & Wheels
Make sure tires are correctly inflated
(see “Tires” on page 39). Check by
putting one hand on the saddle, one
on the intersection of the handlebars
andstem, thenbouncing yourweighton
the bike while looking at tire deflection.
Comparewhat youseewithhowit looks
when you know the tires are correctly
inflated; and adjust if necessary.
Tires in good shape? Spin each wheel
slowlyand look forcuts in thetreadand
sidewall.Replace damagedtires before
riding the bike.
Wheels true? Spin each wheel and
check for brake clearance and side-to-
side wobble. If a wheel wobbles side to
sideeven slightly, orrubs againstor hits
the brake pads, take the bike to a quali-
fied bike shop to have the wheel trued.
Wheels must be true for rim brakes to
work effectively. Wheel truing is a skill
which requires special tools and expe-
rience. Do not attempt to true a wheel
unless you have the knowledge, expe-
rience and tools needed to do the job
correctly.
Wheel rims clean and undamaged?
Make sure the rims are clean and
undamaged at the tire bead and, if you
have rim brakes, along the braking sur-
face. Check to make sure that any rim
wear indicator marking is not visible at
any point on the wheel rim.
Bicycle wheel rims are subject to wear.
Ask your dealer about wheel rim wear.
Some wheel rims have a rim wear indi-
cator whichbecomes visibleas the rim’s
braking surfacewears.Avisible rimwear
indicator on the side of the wheel rim
is an indication that the wheel rim has
reached its maximum usable life. Riding
a wheel that is at the end of its usable
life can result in wheel failure, which
can cause you to lose control and fall.
Brakes
Check the brakes for proper operation
(see “Brakes” on page 30). Squeeze
thebrake levers.Arethe brakequick-re-
leasesclosed?Allcontrolcables seated
and securely engaged? If you have rim
brakes, do the brake pads contact the
wheel rim squarely and make full con-
tact with the rim? Do the brakes begin
to engage within an inch of brake lever
movement? Can you apply full braking
force at the levers without having them
touchthe handlebar?If not,your brakes
need adjustment. Do not ride the bike
untilthe brakesareproperlyadjustedby
a professional bicycle mechanic.
Wheel retention system
Make sure the front and rear wheels
are correctly secured. See “Wheels” on
page 24.
Seatpost
Ifyour seatposthas anover-center cam
action fastener for easy height adjust-
ment, check that it is properly adjusted
and in the locked position. See “Seat-
post cam action clamp” on page 29.

7
EBCC Technical and Customer Service: +1 800-377-4532
4. First.indd Last Modified June 23, 2014 5:19 PM
First
First ride
Handlebar and saddle
alignment
Make sure the saddle and handlebar
stem are parallel to the bike’s center
line and clamped tight enough so that
you can’t twist them out of alignment.
See “Saddle position” on page 19
and “Handlebar height and angle” on
page 21.
Handlebar ends and grips
Make sure the handlebar grips are
secureandingoodcondition.Ifnot,have
your dealer replace them. Make sure
the handlebar ends and extensions are
plugged. If not, have your dealer plug
them before you ride. If the handlebars
have bar end extensions, make sure
they are clamped tight enough so you
can’t twist them.
Loose or damaged handlebar grips or
extensions cancause you tolose control
and fall. Unplugged handlebars or exten-
sions can cut you and cause serious
injury in an otherwise minor accident.
VERY IMPORTANT SAFETY NOTE:
Please alsoread and becomethoroughly
familiar with the important information
on the lifespan of your bicycle and its
components on page 64.
First ride
When you buckle on your helmet and
go for your first familiarization ride on your
new bicycle, be sure to pick a controlled
environment,awayfromcars,othercyclists,
obstaclesorotherhazards. Ridetobecome
familiarwith the controls,features and per-
formance of your new bike.
Familiarize yourself with the braking
action of the bike (see “Brakes” on page
30). Test the brakes at slow speed, put-
ting your weight toward the rear and gen-
tly applying the brakes, rear brake first.
Sudden or excessive application of the
front brake could pitch you over the han-
dlebars.Applyingbrakestoo hardcanlock
up a wheel, which could cause you to lose
control and fall. Skidding is an example of
what can happen when a wheel locks up.
If your bicycle has toeclips or clipless
pedals, practice getting in and out of the
pedals. See the paragraph about toeclips
on page 5 and the paragraph about
clipless pedals on page 37.
If your bike has suspension, familiarize
yourselfwithhow thesuspensionresponds
tobrake applicationandrider weightshifts.
See the paragraph about suspension on
page 5 and “Bicycle suspension” on
page 37.
Practice shifting the gears (see “Shift-
ing gears” on page 33). Remember to
nevermove theshifter whilepedalingback-
ward, nor pedal backwards immediately
after having moved the shifter. This could
jam the chain and cause serious damage
to the bicycle.
Checkout the handlingand response of
the bike; and check the comfort.
If you have any questions, or if you feel
anythingaboutthebikeisnotasitshouldbe,
consult your dealer before you ride again.

8Safety The basics
Section 2:
Safety
The basics
The area in which you ride may require
specificsafetydevices. It isyourrespon-
sibility to familiarize yourself with the
laws of the area where you ride and to
comply with all applicable laws, includ-
ing properlyequipping yourself andyour
bike as the law requires.
Observe all local bicycle laws and regu-
lations. Observe regulations about bicy-
cle lighting, licensing of bicycles, riding
on sidewalks, laws regulating bike path
and trail use, helmet laws, child carrier
laws, special bicycle traffic laws. It’s
your responsibility to know and obey
the laws.
Always wear a cycling helmet which
meets the latest certification standards
andisappropriate forthetype
ofridingyoudo.Alwaysfollow
the helmet manufacturer’s
instructions for fit, use and
careofyour helmet.Mostseri-
ous bicycle injuries involve
head injuries which might
havebeen avoided ifthe riderhadworn
an appropriate helmet.
Failure to wear a helmet when riding
may result in serious injury or death.
Be sure to read the Electric Bikes sec-
tion on page 42 for important safety
information related to electric bikes.
AlwaysdotheMechanicalSafety Check
“Mechanical safety check” on page 5
before you get on a bike.
Be thoroughly familiar with the controls
ofyourbicycle:brakes(“Brakes”on page
30); pedals (“Pedals” on page 36);
shifting (“Shifting gears” on page 33
Becareful to keepbody parts andother
objects away from the sharp teeth of
chainrings, the moving chain, the turn-
ingpedals andcranks, andthe spinning
wheels of your bicycle.
Always wear:
•
Shoesthatwillstayonyourfeetand will
grip the pedals. Make sure that shoe
lacescannot getinto movingparts, and
never ride barefoot or in sandals.
•
Bright, visible clothing that is not so
loose that it can be tangled in the bicy-
cleor snagged byobjects attheside of
the road or trail
• Protective eyewear, to protect against
airborne dirt, dust and bugs — tinted
when the sun is bright, clear when it’s
not
Don’t jump with your bike. Jumping a
bike, particularly a BMX or mountain
bike,can befun; but itcan puthuge and
unpredictable stress on the bicycle and
fig. 2-1

9
EBCC Technical and Customer Service: +1 800-377-4532
5. Safety.indd Last Modified June 23, 2014 5:18 PM
Safety
Riding safety
its components. Riders who insist on
jumpingtheir bikesrisk seriousdamage,
totheirbicycles aswellastothemselves.
Before you attempt to jump, do stunt
riding or race with your bike, read and
understand “Extreme, stunt or compe-
tition riding” on page 13.
Ride at a speed appropriate for condi-
tions. Higher speed means higher risk.
Riding safety
Obey allRules oftheRoad andall local
traffic laws.
You are sharing the road or the path
with others — motorists, pedestrians
and other cyclists. Respect their rights.
Ride defensively. Always assume that
others do not see you.
Look ahead, and be ready to avoid:
•
Vehicles slowing or turning, entering
the road or your lane ahead of you, or
coming up behind you
• Parked car doors opening
• Pedestrians stepping out
• Children or pets playing near the road
•
Potholes,sewer grating,railroadtracks,
expansion joints, road or sidewalk con-
struction,debris andother obstructions
that could cause you to swerve into
traffic, catch your wheel or cause you
to have an accident
•
The many other hazards and distrac-
tions which can occur on a bicycle ride
Ridein designated bikelanes, ondesig-
natedbike pathsor ascloseto theedge
of the road as possible, in the direction
oftraffic flow orasdirected bylocalgov-
erning laws.
Stop at stop signs and traffic lights;
slow down and look both ways at street
intersections. Remember that a bicycle
always loses in a collision with a motor
vehicle, so be prepared to yield even if
you have the right of way.
Use approved hand signals for turning
and stopping.
Neverridewithheadphones.Theymask
traffic sounds and emergency vehicle
sirens, distract you from concentrating
onwhat’sgoingonaround you,andtheir
wires can tangle in the moving parts of
the bicycle, causing you to lose control.
Never carry a passenger, unless it is a
smallchild wearingan approvedhelmet
andsecuredin acorrectlymounted child
carrier or a child-carrying trailer.
Check the drive system manufactur-
er’s manual, or other system manual
included with your bike, for warnings
regarding trailer usage. When towing a
trailer, do not exceed 20 miles per hour.
Never carry anything which obstructs
your vision or your complete control
of the bicycle, or which could become
entangled in the moving parts of the
bicycle.
Never hitch a ride by holding on to
another vehicle.
Don’t do stunts, wheelies or jumps. If
youintend todo stunts,wheelies, jumps
or go racing with your bike despite our
advice not to, read “Extreme, stunt or

10 Safety Off-road safety
competition riding” on page 13 now.
Think carefully about your skills before
deciding to take the large risks that go
with this kind of riding.
Don’tweave throughtrafficor makeany
moves that may surprise people with
whom you are sharing the road.
Observe and yield the right of way.
Never ride your bicycle while under the
influence of alcohol or drugs.
If possible, avoid riding in bad weather,
whenvisibilityisobscured,at dawn,dusk
or in the dark, or when extremely tired.
Each of these conditions increases the
risk of accident.
Off-road safety
Werecommendthat childrennot rideon
roughterrain unlesstheyare accompanied
by an adult.
The variable conditions and hazards
of off-road riding require close atten-
tion and specific skills. Start slowly on
easier terrain and build up your skills. If
yourbikehassuspension,theincreased
speed you may develop also increases
yourriskof losingcontroland falling.Get
to know how to handle your bike safely
before trying increased speed or more
difficult terrain.
Wearsafety gearappropriatetothekind
of riding you plan to do.
Don’t ride alone in remote areas. Even
when riding with others, make sure that
someoneknowswhere you’regoingand
when you expect to be back.
Always take along some kind of identifi-
cation,so thatpeopleknowwhoyou are
in case of an accident; and take along
some cash for food, a cool drink or an
emergency phone call.
Yield right of way to pedestrians and
animals. Ride in a way that does not
frighten or endanger them, and give
them enough room so that their unex-
pected moves don’t endanger you.
Signal with voice or bell when passing.
Don’t block the trail. Move your bike off
to the side of the trail if you stop.
Walk your bike up and down access
ramps.
Be prepared. If something goes wrong
while you’re riding off-road, help may
not be close.
Before you attempt to jump, do stunt
riding or race with your bike, read and
understand “Extreme, stunt or compe-
tition riding” on page 13.
Off-road respect
Obeythelocallawsregulatingwhereand
how you can ride off-road, and respect pri-
vate property. You may be sharing the trail
with others — hikers, equestrians, other
cyclists. Respect their rights. Stay on the
designatedtrail.Don’tcontributeto erosion
byridinginmud orwithunnecessarysliding.
Don’tdisturbtheecosystemby cuttingyour
own trail or shortcut through vegetation or
streams.Itis yourresponsibilitytominimize
your impact on the environment. Leave
thingsas youfound them;and alwaystake
out everything you brought in.

11
EBCC Technical and Customer Service: +1 800-377-4532
5. Safety.indd Last Modified June 23, 2014 5:18 PM
Safety
Electric bike safety
Off-road electric bicycles
Ridersofoff-roadelectricbikesmusttake
additionalprecautions,andfollowadditional
rules of trail etiquette.
Maintain a minimum of 10 feet behind
the bike in front of you.
Do not use electric assist on level and
downhill grades if people are visible on
the trail.
Do not use electric assist if small chil-
dren or pets are within 100 feet.
Be aware that your extra speed, and
the extra weight of your bike mean you
mustbe morecareful,especially around
other trail users.
Electric bike safety
Because electric bicycles are so differ-
ent from regular bikes, additional steps
are needed to ride them safely. Please be
sure to read “Riding an electric bike” on
page 48.
Wet weather riding
Wet weather impairs traction, braking
and visibility, both for the bicyclist and
for other vehicles sharing the road.
The risk of an accident is dramatically
increased in wet conditions.
Underwetconditions,thestoppingpower
of your brakes (as well as the brakes of
other vehicles sharing the road) is dra-
matically reduced and your tires don’t grip
nearly as well. This makes it harder to con-
trol speed and easier to lose control. To
make sure that you can slow down and
stop safely in wet conditions, ride more
slowly and apply your brakes earlier and
more gradually than you would under nor-
mal, dry conditions. See also “Brakes” on
page 30
Wet weather may lessen the grip of the
rider’s feet on the pedals. If your feet
slip off the pedals, it could lead to a fall.
Night riding
Riding a bicycle at night is much more
dangerous than riding during the day. A
bicyclist is very difficult for motorists and
pedestrians to see. Therefore, children
should never ride at dawn, at dusk or at
night. Adults who chose to accept the
greatly increased risk of riding at dawn, at
duskoratnight needtotakeextracareboth
ridingand choosingspecializedequipment
which helps reduce that risk. Consult your
dealerabout nightridingsafety equipment.
Reflectors are not a substitute for
required lights. Riding at dawn, at dusk,
at night or at other times of poor visibil-
ity without an adequate bicycle lighting
system and without reflectors is dan-
gerous and may result in serious injury
or death.
Bicycle reflectors are designed to pick
up and reflect car lights and street lights
in a way that may help you to be seen and
recognized as a moving bicyclist.

12 Safety Night riding
Check reflectors and their mounting
brackets regularly to make sure that
they are clean, straight, unbroken
and securely mounted. Have your
dealer replace damaged reflectors and
straighten or tighten any that are bent
or loose.
The mounting brackets of front and rear
reflectors are often designed as brake
straddle cable safety catches which pre-
vent the straddle cable from catching on
the tire tread if the cable jumps out of its
yoke or breaks.
Donotremovethe front or rear reflectors
or reflector brackets from your bicycle.
They are an integral part of the bicycle’s
safety system.
Removing the reflectors reduces your
visibility to others using the roadway.
Being struck by other vehicles may
result in serious injury or death.
The reflector brackets may protect you
from a brake straddle cable catching on
the tire in the event of brake cable fail-
ure. If a brake straddle cable catches on
the tire, it can cause the wheel to stop
suddenly, causing you to lose control
and fall.
Ifyou choose toride under conditionsof
poor visibility, check and be sure you com-
plywithall locallawsaboutnightriding,and
take the following strongly recommended
additional precautions:
Purchaseandinstallbatteryorgenerator
poweredhead andtaillights whichmeet
allregulatory requirements andprovide
adequate visibility.
Wear light colored, reflective clothing
and accessories, such as a reflective
vest,reflectivearmand legbands,reflec-
tivestripesonyourhelmet,flashinglights
attached to your body and/or your bicy-
cle...anyreflectivedevice orlightsource
thatmoveswill helpyougettheattention
of approaching motorists, pedestrians
and other traffic.
Makesure yourclothingor anythingyou
maybe carryingonthe bicycledoes not
obstruct a reflector or light.
Makesure thatyour bicycleis equipped
with correctly positioned and securely
mounted reflectors.
Whileriding atdawn, atdusk oratnight:
• Ride slowly.
•
Avoid dark areas and areas of heavy
or fast-moving traffic.
• Avoid road hazards.
• If possible, ride on familiar routes.
If riding in traffic:
•
Bepredictable. Ridesothatdriverscan
see you and predict your movements.
• Be alert. Ride defensively and expect
the unexpected.
•
If you plan to ride in traffic often, ask
yourdealerabout traffic safety classes
or a good book on bicycle traffic safety

13
EBCC Technical and Customer Service: +1 800-377-4532
5. Safety.indd Last Modified June 23, 2014 5:18 PM
Safety
Vehicle racks
Vehicle racks
Misuse of vehicle racks could result in
a potentially hazardous situation which,
if not avoided, could result in serious
injury or death. Be sure to read and fol-
low the instructions provided by the
rack’s manufacturer for more complete
safety information.
Misuse of vehicle racks could result
in damage to your bicycle, vehicle, or
other property.
Especially when dealing with electric
bikes, caution must be used when mount-
ing a bicycle on a vehicle rack.
Be aware that your electric bike is con-
siderably heavier than a normal bicy-
cle. Check the instructions provided by
the manufacturer of your vehicle rack
for information on maximum carrying
capacity.
If you cannot comfortably lift your bicy-
cle onto a vehicle rack by yourself, you
should request assistance. Never try to
lift an electric bike onto a roof-mounted
vehicle rack without assistance.
Whenmounting your electricbicycle on
a vehicle rack, always remove the bat-
teryfirst.Abatteryinstalled ona bicycle
that is mounted on a vehicle may be
damaged by water intrusion, suffer an
impact to the battery housing, or even
fall off the bike and become a projectile.
Extreme, stunt or
competition riding
Whether you call it Aggro, Hucking,
Freeride, North Shore, Downhill, Jump-
ing, Stunt Riding, Racing or something
else, if you engage in this sort of extreme,
aggressiveriding youwill gethurt,and you
voluntarilyassume agreatly increasedrisk
of injury or death.
Not all bicycles are designed for these
types of riding, and those that are may not
be suitable for all types of aggressive rid-
ing.Check withyour dealeror thebicycle’s
manufacturer about the suitability of your
bicycle before engaging in extreme riding.
Whenridingfast downhill,you canreach
speeds achieved by motorcycles, and
therefore face similar hazards and risks.
Have your bicycle and equipment care-
fullyinspected byaqualifiedmechanic and
be sure it is in perfect condition. Consult
withexpert riders, area sitepersonnel and
raceofficials on conditionsand equipment
advisableat thesite whereyou planto ride.
Wear appropriate safety gear, including
an approved full face helmet, full finger
gloves,andbodyarmor.Ultimately,itisyour
responsibility to have proper equipment
and to be familiar with course conditions.

14 Safety Changing components & adding accessories
Althoughmanycatalogs,advertisements
and articlesabout bicycling depictriders
engaged in extreme riding, this activity
is extremely dangerous, increases your
risk of injury or death, and increases the
severity of any injury. Remember that
the action depicted is being performed
by professionals with many years of
training and experience. Know your lim-
its and always wear a helmet and other
appropriate safety gear. Even with state-
of-the-art protective safety gear, you
could beseriously injuredor killed when
jumping, stunt riding, riding downhill at
speed or in competition.
Bicycles and bicycle parts have limita-
tions with regard to strength and integ-
rity, and this type of riding can exceed
those limitations.
Werecommendagainst thistypeofriding
because of the increased risks; but if you
choose to take the risk, at least:
Take lessons from a competent instruc-
tor first.
Start with easy learning exercises and
slowly develop your skills before trying
more difficult or dangerous riding.
Use only designated areas for stunts,
jumping, racing or fast downhill riding.
Wearafullface helmet,safetypadsand
other safety gear.
Understand and recognize that the
stresses imposed on your bike by this
kind of activity may break or damage
partsofthebicycle andvoidthewarranty.
Take your bicycle to your dealer if any-
thing breaks or bends. Do not ride your
bicycle when any part is damaged.
If you ride downhill at speed, do stunt
riding or ride in competition, know the lim-
its of your skill and experience. Ultimately,
avoiding injury is your responsibility.
Changing components &
adding accessories
Therearemany components andacces-
sories available to enhance the comfort,
performanceand appearance ofyour bicy-
cle. However, if you change components
or add accessories, you do so at your own
risk. The bicycle’s manufacturer may not
have tested that component or accessory
forcompatibility,reliabilityor safetyonyour
bicycle. Before installing any component
or accessory, including a different size tire,
make sure that it is compatible with your
bicycle by checking with your dealer. Be
sure to read, understand and follow the
instructions that accompany the products
you purchase for your bicycle. See also
“Intended use of your electric bicycle” on
page 58 and “The lifespan of your bike
and its components” on page 64.
Failure to confirm compatibility, prop-
erly install, operate and maintain any
component or accessory can result in
serious injury or death.
Other manuals for IZIP
2
This manual suits for next models
1
Table of contents
Other Currie tech Bicycle manuals

Currie tech
Currie tech IZIP VIA URBANO User manual

Currie tech
Currie tech eZip Trailz User manual

Currie tech
Currie tech Peak User manual

Currie tech
Currie tech IZIP User manual

Currie tech
Currie tech eZip Trailz User manual

Currie tech
Currie tech eZip TRICRUISER User manual

Currie tech
Currie tech eFlow E3Nitro User manual

Currie tech
Currie tech E3 Path+ User manual

Currie tech
Currie tech IZIP E3Metro Parts list manual

Currie tech
Currie tech IZIP User manual