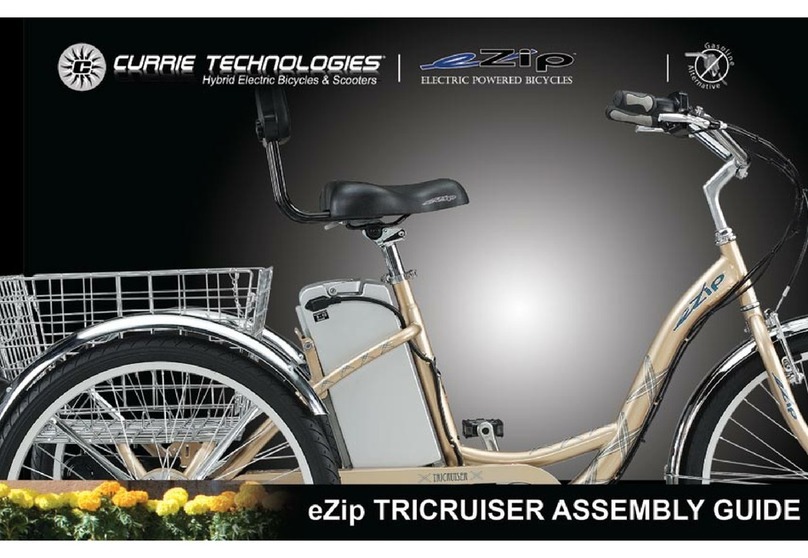
Currie tech IZIP User manual

ASSEMBLY GUIDE:
Izip & Ezip Electric Bicycles with
Rack-Top Mounted Batteries (“RTMB Bicycles”)
Please Refer to your Owner’s Manual for Detailed Setup Instructions
Technical & Customer Service: 1-800-377-4532

Helpful Tools:Included in your parts box:
• Scissors
• Bicyclegrease
• Phillips-headscrewdriver
• Allenwrenches:4,5,&6mm
• Open-endwrenches:9,10,14,15,&17mm
oradjustablecrescentwrench
• Needle-nosepliers
• Pedals
• Quickreleaseskewer
• Reectors(ifnotalreadyinstalled)
• Stem
• Toolkit(4+5mmcomboAllenwrench,
13+15mmcomboopen-endwrench)
• Touch-uppaint
Assembly will take 1 - 2 hours
Note:Whenworkingonyourbicycleasinstructedbythisguide,pleaserefertothetorquevalueschartinyourowner’smanualfordetailedtorque
requirements.Under-orover-tightenedcomponentsmayloosenorbreak,causingafall.
Stepsinthisguidethatcallfortheuseofbicyclegreasedosointheinterestofkeepingyourbicycleinworkingconditionforaslongaspossible.Grease
isnotabsolutelyvitaltotheassemblyofthisproduct,butfailuretoapplyitasdirectedcouldcausepartstoseizeovertimeandirreparablydamagethe
frameorcomponents.
Becausebicyclepartstendtobegreasy,itisrecommendedthatyoulaydownatarporsheettoprotectyouroorifassemblingthebikeindoors.
Itisbesttoremovetheprotectivepackagingduringtheassemblyprocessonlyasneeded,leavingsomeintacttoprotectthebikeduringassembly.
Duringassemblyitmaybehelpfultoreferencethephotosonthecoverofthisguideandonthebicycleboxifyouareunsureofanysteps.
Pleasetakethetimetoreadthebatterycareandstoragesectionofyourmanualforusefulinformationonprolongingthelifeofyourbattery.
Assembly Tools Unpacking and Preparation
Handlebars and Stem
1. Carefully remove the bicycle from the box. Youshouldhaveafriend
helpyouwiththis,asthebikeisheavy.Ifyouarealone,youcanlaytheboxon
itssideandgentlyslidethebikeout.
Seat Tube
Top Tube
Down Tube
Chainstay Seatstay
Head tube
3. Cut the zip-ties holding the front wheel to the bike frame.Setthe
wheelasidefornow.
4. Rotate the fork so the brake faces away from the frame,thenrestthebike
upright on its rear wheel and fork,asshowninphotoA.Whenrotatingthefork,be
surethecablesruninfrontoftheframeanddonotwraparoundtheforkorheadtube.
5.Find the stem in the parts box (photoC).Remove the protective
caps from the stem and head tube,theninsert the stem into the bike’s
head tube facingawayfromtheframe.Remove the faceplatebyremoving
thetwoorfourfaceplatebolts(dependingonmodel)showninphotoD.
2. At this point you can begin charging your
battery. Thechargerisinasmallwhitebox,usually
rubber-bandedtotherackorunderneaththebike.
Recommend charge time is 4-6 hours. Plug the
chargerrstintothewalloutlet,thenintotheporton
thebattery(photoB).
A solid red or blinking green light on the charger
(dependingonmodel)indicatesthebatteryischarging
properly.Asolidgreenlightindicatesthatthecharger
hasenteredtricklechargemode,andyourbatteryisat
least80%full.Formaximumrange,pleasechargefor
thefullrecommendedtimeperiod(4-6hours).
Fork
A
B
Pleaserecycle
packagingmaterials! Currie TechnologiesTechnical and Customer Service 1-800-377-4532
Protective cap
(remove and discard)
Faceplate
CWedge bolt
(top of stem)

6.Cut the zip-ties securing the handlebar to the bike frame,arrangethebrakeand
shiftercablessotheyruninfrontofthebicycle,thenclamp the handlebars to the stem
usingthefaceplateasshowninphotoE.Thebarsshouldberotatedtoacomfortablegripping
positionwithcomfortableaccesstothebrakelevers,andcenteredaroundthestem.Besureto
tighten the faceplate bolts evenlysothetopandbottomgapsareequal.
Faceplate Bolts
Head tube
D
Equal faceplate
gaps & bolt
tightness
7.Align the stem so it is facing forward in relation to the fork (photoF),then tighten
the wedge bolt securely.Besurethattheforkisrotatedwiththebrakesfacingforward,and
thatnocablesaretangledaroundit!Refertothephotosonthecoverofthismanualforproper
cablerouting.It is extremely important that you properly tighten the wedge bolt.Leaving
thisbolttooloosecanresultinthehandlebarsturningawayfromthewheel,causingacrash.
8.Ifnotalreadyinstalled,attach the square white reector to the handlebar using
aPhillips-headscrewdriver.
Wedge Bolt
Throttle
Shifter
Brakes face
forward!
(Top View)
Stem in line
with fork
Currie TechnologiesTechnical and Customer Service 1-800-377-4532
E
F
9.Apply grease to the inside of the seat tube,theninsert the
seatpostandclose the quick release tightly (Photo G).Itwillhelpduring
thenextstepsifyoulowerthesaddletobeaboutlevelwiththehandlebars;it
canbeadjustedtoacomfortableheightbeforeyourrstride.
Refertotheappendixtothisguideformoreinformationontheuseand
adjustmentofquickreleaselevers.It is vital to your safety that you
understand and properly secure this lever!
Swing QR
Closed
Seatpost
Currie TechnologiesTechnical and Customer Service 1-800-377-4532
G
H
10.Release the front brakebypullingbacktherubberboot,squeezing
thebrakearmstogether,thenremovingthenoodlefromitsholder(Photo
H).Thiswillallowyoutoinstallthefrontwheel.Youwillneedtoreattachthe
brakebyreversingthissteponcethefrontwheelisinstalled.
Brake Noodle
Boot
11.Flip the bike oversothatitrestsonitshandlebarsandsaddle.Be
carefulnottodamagethethrottleorbrakelevers.
Removetheplastic
dropoutprotectorfrom
theendofthefork. I

Front Wheel
12. Remove the tension adjusting nut and one spring from the quick release skewer (photoM),takingcarenottoloseeitherofthesmall
springs.Push the skewer through the front hub, then replace the spring and end nut.Leavethenutloosefornow,abouttwoturnsin.Install
the wheel into the fork,asshowninphotoN.
Securely close the quick release.Refertotheappendixofthisdocumentformoreinformationontheuseandadjustmentofquickreleaselevers.It is
vital to your safety that you understand and properly secure this lever!
Tension
adjusting
nut
SpringSpring Skewer
MN
Currie TechnologiesTechnical and Customer Service 1-800-377-4532
Pedals
13. Find the pedals in your parts box. Grease the threadsandthread
them securely into the crank arms using a 15mm open-end wrench
(PhotoO).Notethatthepedalshaveoppositethreaddirectionsandmustgo
onaspecicsideofthebicycle.Thepedalmeantforthedrive-side(thesideof
thebicyclewiththechainandgears)hasastandardthread,whichistightened
clockwise. The non-drive-side pedal has a reverse, non-standard thread. It
mustbeturnedcounter-clockwisetobescrewedin.
Thepedalsaremarked‘R’and‘L’for“Right”and“Left,”howevertheycanalso
beidentiedbytheirthreads,asshowningureP.
14.Turn the bike right-side-up, using the kickstand to keep it upright.
Close the front brakebyreversingstep10(photoH),pullingthebrakenoodle
backintoitsholder.Ifthecablefeelstight,checkthecablingtomakesureitis
properlyorganizedinfrontofthebiketoallowenoughslacktore-closethebrake.
15.Adjust your front and rear brakes. Your brakes may not be fully
adjustedfromthefactory;refertoyourowner’smanualfordetailedinstructions
on brake adjustment or consult a professional bike mechanic if you are not
comfortablemakingtheseadjustmentsyourself.Do not attempt to ride your
bicycle without properly adjusting the brakes!
16.Adjust your shifters and derailleurs, referring to the owner’s
manualforfullinstructions.Riding your bicycle without properly adjusting
the drivetrain can cause irreparable damage!Consultaprofessionalbike
mechanicifyouarenotcomfortablemakingtheseadjustmentsyourself.
Tighten
O
P
Currie TechnologiesTechnical and Customer Service 1-800-377-4532

Installation:
Yourbicyclecomeswitha24voltLithium-battery.Toinstallthebattery,simplyslide it into the rear rack,
asshowninphotoQ.
Thistypeofbatterydoesnothavea‘memory’,andridingonapartialchargewillnotharmthebatteryin
anyway.Rechargetimeforthisbatteryis4-6hourstoreachafullcharge.
Locking:
Alockisintegratedintothebatterypacktokeepitinplacewhileriding.Itisrecommendedthatthebattery
packbelockedwheneveryouareridinginordertomaintainastrongconnection.After sliding a battery pack into place, lock it with one of the
included keys (usuallyinthepartsboxorrubber-bandedtotherack),makingsurethelockcylinderfullyengagesintotherack.Allkeysincludedwith
yourbicycleareidentical.
Currie TechnologiesTechnical and Customer Service 1-800-377-4532
Q
S
Operation
OnVia Rapidobicycles,theelectricassistfunctionsarecontrolledusingthehandlebar-mountedcontrol
pad below the throttle (Photo S). The red ON/OFF toggle button is used to turn the system on or off,
indicatedbytheglowinglightsonthethrottle.ThegreenPAS/TAGtogglebuttonisusedtoswitchbetween
‘PAS’(PedalAssist)and‘TAG’(TwistandGo)modes.Settingthebuttontothe‘out’positionsetsthebike
toTAGmode;the‘in’positionsetsthebiketoPASmode.
OnEco Ridebicycles,thePAS/TAGbuttonisattachedtothethrottle,butitactsexactlythesameasthat
oftheViaRapido.TheEcoRidedoesnothaveahandlebar-mountedpowerswitch;theswitchislocated
ontherackbetweentheseatpostandthebattery.(PhotoT)
PAS (Pedal Assist)
Inthismode,thetwist-throttleisonlyactivewhenthepedalsareinforwardmotion.Amagnet
ringonthebottombracketspindlerotateswhenthepedalsareturned.Asensorpicksupthis
rotationandactivatesthethrottlewhennecessary.Afterafewsecondsofpedalinginthis
mode,themotorwillautomaticallyspinupto50%powertoprovideadditionalassistance.
TAG (Twist and Go)
InTAGmode,thetwist-throttleisalwaysactive.Thepedalsensorisdisabledinthismode,
andthemotorwillnotactivateunlessthethrottleisturned.
Battery Before your rst ride...
• Remove all remaining packaging on the bike.
• Check the operation of your front and rear brakesbypushingthebikeforwardandoperatingthebrakelevers.
• Check the tightness of all nuts and bolts,especiallythestemboltsandtheboltssecuringthebrakeleversandshifterstothehandlebars.
• Make sure the stem’s wedge bolt is tight.Checkthatitistightenedproperlybystandingoverthefrontwheel,holdingitwithyourthighs,then
tryingtoturnthehandlebars.Ifthehandlebarscanbeturnedindependentlyofthewheel,thewedgeboltmustbetightenedfurther.
• Make sure your front wheel is secure in the frame.Refertotheappendixtothisguidediscussingquickreleaseleversfordetailed
instructionsonusingquickreleases.
• Make sure your tires are lled to the pressure recommended on the sidewall. Over-or under-inatedtirescanblowofftherimandcause
afall.Werecommendusingabicyclepumpwithpressuregauge.
• Test power:leanthebikeonitskickstand,raisingtherearwheelofftheground.Whenthebikeispoweredon(indicatedbythethrottlelights)
youcantestsystempowerbytwistingthethrottleinTAGmodeandwatchingtherearwheel.Refertothetroubleshootingchartonthispagefor
assistanceifthebikewillnotpoweron.
Bike won’t turn on (no lights on
throttle)
Batterynotseatedproperlyagainstrackterminals
NeedtopresshandlebarON/OFFswitch
Batterynotcharged
Throttle lights work, but motor
will not run
BikemaybeinPedalAssistmode.Pressthegreenbuttonnextto
thethrottletochangetoTwist-and-Gomode.
Brakes rub when riding Re-adjustbrakes,referringtoowner’smanual
Gears/chain make clicking or
grinding noises while riding
Re-adjustdrivetrain,referringtoowner’smanual
Can someone help me with...? CalltheCurrieTechnologiestechnicalandcustomerservice
departmentat1-800-377-4532
Refer to owner’s manual for detailed troubleshooting chart
Currie TechnologiesTechnical and Customer Service 1-800-377-4532
TEco Ride power
switch

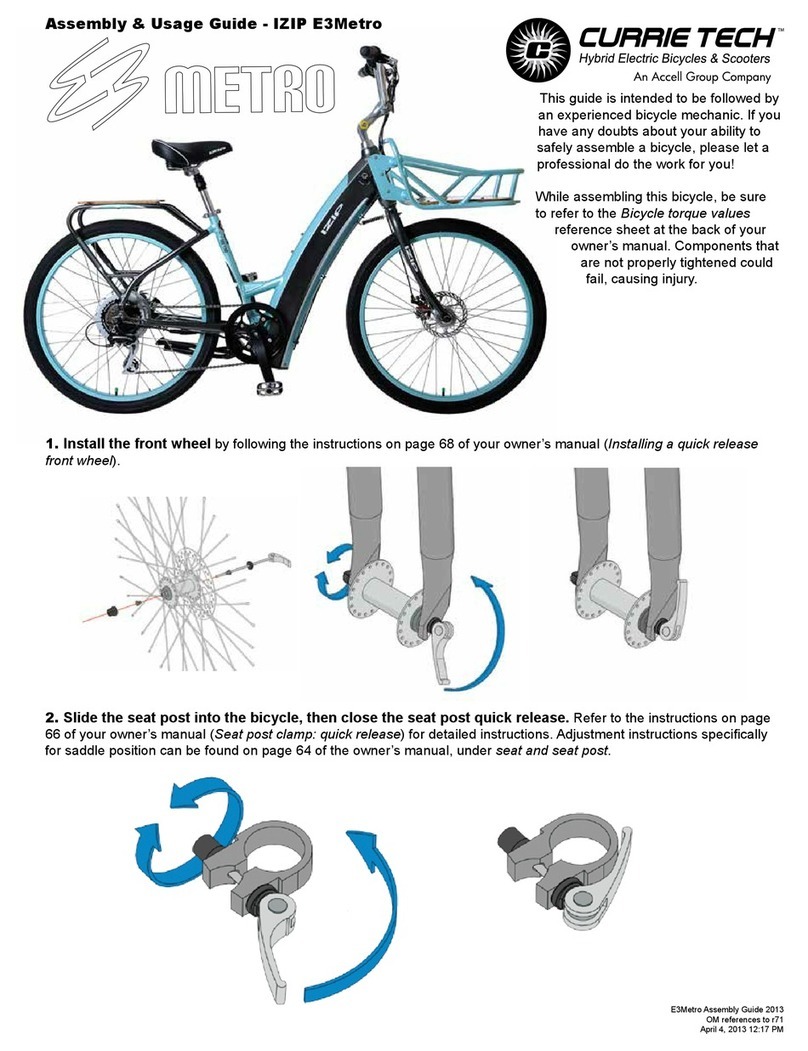
ManyIzipandEzipbicyclemodelsusequickrelease(QR)leverstofacilitatecommontaskssuchasfrontwheelremovalandseatheightadjustment.
Whenproperlyadjusted,quickreleaseleversarebothsafeandconvenient,butyoumustunderstandandapplythecorrecttechniquetoadjustthem
properlybeforeridingyourbicycletopreventseriousinjuryordeathfromafall.
Quickreleaseleversuseacamactiontoclampthewheelorothercomponentsinplace.Becauseoftheiradjustablenature,itiscriticalthatyou
understandhowtheywork,howtousethemproperly,andhowmuchforceyouneedtoapplytosecurethem.
Warning: Thefullforceofthecamactionisneededtoclampthewheelsecurely.Holdingthenutwithonehandandturningtheleverlikeawingnutis
NOTasafeoreffectivewaytocloseaquickreleaseandwillnotclampthewheelorothercomponentssafely.
QUICK RELEASE USAGE
Ridingwithanimproperlyadjustedwheelquickreleasecanallowthewheeltowobbleorfalloffthebicycle,whichcancauseseriousinjuryordeath.
Therefore,itisessentialthatyou:
1.Askyourdealeroralocalbikeshoptohelpyoumakesureyouknowhowtoinstallandremoveyourwheelssafely.
2.Understandandapplythecorrecttechniqueforclampingyourwheelinplacewithaquickrelease.
3.Eachtime,beforeyouridethebike,checkthatthewheelissecurelyclamped.
Installing a quick release front wheel
Inaquickreleasesystem,thewheelhubisclampedinplacebytheforceofthequickreleasecampushingagainstonedropoutandpullingthetension
adjustingnut,bywayoftheskewer,againsttheotherdropout.Theamountofclampingforceiscontrolledbythetensionadjustingnut.Turningthe
tensionadjustingnutclockwisewhilekeepingthecamleverfromrotatingincreasesclampingforce;turningitcounterclockwisewhilekeepingthecam
leverfromrotatingreducesclampingforce.Lessthanhalfaturnofthetensionadjustingnutcanmakethedifferencebetweensafeclampingforceand
unsafeclampingforce.
Appendix: Quick Release Levers
Currie TechnologiesTechnical and Customer Service 1-800-377-4532
1. Removethetensionadjustingnutandoneofthesmallsprings,thenslidethequickreleaseskewerthroughthehub.Ifyourbicyclehasadisc
brake,inserttheskewerstartingonthesidewiththebrakerotor.Replacethespringandtensionadjustingnut(ga).
2. Ifyourbicyclehasrimbrakes,disengagethemtoincreasetheclearancebetweenthetireandbrakepads.
3. Installthewheelintothedropouts,makingsurethequickreleaseleverisontheleftsideofthebicycle.
4. HoldingthequickreleaseleverintheOPENpositionwithonehand,tightenthetensionadjustingnutwithyourotherhanduntilitisngertight
againsttheforkdropout.
5. Whilepushingthewheelrmlytothetopoftheslotsintheforkdropouts,andatthesametimecenteringthewheelriminthefork,movethequick-
releaseleverupwardsandswingitintotheCLOSEDposition(gb&c)Thelevershouldnowbeparalleltotheforkbladeandcurvedtowardthe
wheel.Toapplyenoughclampingforce,youshouldhavetowrapyourngersaroundtheforkbladeforleverage,andthelevershouldleaveaclear
imprintinthepalmofyourhand.
WARNING: Securely clamping the wheel takes considerable force. If you can fully close the quick release without wrapping your ngers
around the fork blade for leverage, and the lever does not leave a clear imprint in the palm of your hand, the tension is insufcient. Open
the lever; turn the tension adjusting nut clockwise a quarter turn; then try again.
6. Ifthelevercannotbepushedallthewaytoapositionparalleltotheforkblade,returnthelevertotheOPENposition.Thenturnthetension
adjustingnutcounterclockwiseone-quarterturnandtrytighteningtheleveragain.
7. Re-engagethebraketorestorecorrectbrakepad-to-rimclearance;spinthewheeltomakesurethatitiscenteredintheframeandclearsthebrake
pads;thensqueezethebrakeleverandmakesurethatthebrakesareoperatingcorrectly.
closed
c
Springs
a
Tension
adjusting nut
b
open
Currie TechnologiesTechnical and Customer Service 1-800-377-4532

Adjusting a quick release seatpost clamp
Inaseatpostquickreleasesystem,theseatpostisclampedinplacebytheforceofthequick
releasecampushingagainstonesideoftheclampandpullingthetensionadjustingnut,
bywayoftheskewer,againsttheother.Theamountofclampingforceiscontrolledbythe
tensionadjustingnut.Turningthetensionadjustingnutclockwisewhilekeepingthecamlever
fromrotatingincreasesclampingforce;turningitcounterclockwisewhilekeepingthecam
leverfromrotatingreducesclampingforce.Lessthanhalfaturnofthetensionadjustingnut
canmakethedifferencebetweensafeclampingforceandunsafeclampingforce.
WiththequickreleaseclampintheOPENposition,inserttheseatpost,withsaddle1.
attached,intothebicycle’sseattube.
SwingthequickreleaseleverintotheCLOSEDposition.2.
Grabthesaddlewithbothhandsandattempttorotateit(andthusrotatetheseatpostin3.
theseattube).
Ifyouareabletoforcetheseatpostoutofalignmentwiththeframe,theseatpostclamp4.
needstobeadjusted.HoldingthequickreleaseleverintheOPENpositionwithone
hand,tightenthetensionadjustingnutwithyourotherhandabout1/2turnclockwise.
AttempttoswingtheleverintotheCLOSEDposition.Ifthelevercannotbepushedall5.
thewaytotheCLOSEDposition(gureb),returnthelevertotheOPENposition,then
turnthetensionadjustingnutcounterclockwiseone-quarterturnandtrytighteningthe
leveragain.Repeatsteps3,4&5untilproperquickreleasetensionisachieved.
Tension adjusting
nut
open
Closed
Notes:

Notes: Notes:

9453OwensmouthAve,Chatsworth,CA91311
Phone:+1800.377.4532Fax:+1818.734.8199
www.currietech.com
Ezip Ecoride
Diamond Frame
Other manuals for IZIP
2
This manual suits for next models
1
Table of contents
Other Currie tech Bicycle manuals

Currie tech
Currie tech IZIP E3Metro Parts list manual

Currie tech
Currie tech eZip Trailz User manual

Currie tech
Currie tech E3 Path+ User manual

Currie tech
Currie tech eZip TRICRUISER User manual

Currie tech
Currie tech IZIP User manual

Currie tech
Currie tech IZIP VIA URBANO User manual

Currie tech
Currie tech eFlow E3Nitro User manual

Currie tech
Currie tech IZIP User manual

Currie tech
Currie tech eZip Trailz User manual

Currie tech
Currie tech IZIP EXPRESS User manual