Cyklos CFM 700 User manual

Operating Manual
Issue no. 3
No. of pages 11
Paper Folding Machine
CFM 700
Warning
This document including the attachments is exclusive intellectual property of Cyklos Choltice (producer
cooperative). Any other use (copying, distribution or sale) is possible only with approval of the chairman of
the cooperative.
Effective from serial no.:
14061171

- 1 -
Contents
1) Machine Description .........................................................................................2
2) Parameters.........................................................................................................2
Warnings............................................................................................................................ 3
Installation and Operation Information................................................................................ 4
3) Operating Mode.................................................................................................4
3.1 Reading of display........................................................................................................ 5
4) Types of Folding, Adjustment of the Stops, Adjustment of the perforating
wheels, Creasing.......................................................................................................7
Types of Folding................................................................................................................. 7
Perforation, Creasing ......................................................................................................... 8
5) Adjustment of the Delivery Wheels................................................................10
6) Troubleshooting..............................................................................................11
7) Dismounting covers........................................................................................11
8) Machine Disposal............................................................................................11

- 2 -
1) Machine Description
17
10
13
8
2
1
7
6
15
11
3
5
12
4
14
1 - Reset button
2 - Start/stop, speed regulation knob
3 - Tiltable table
4 - Feeding table
5 - Locking lever of tiltable table
6 - Display unit
7 - Delivery table
8 - X stop
9 - Y stop
10 - Stop setting scale
11 - Side guides
12 - Side guides skew regulation
13 - Stop slider
14 - Feeding wheel
15 - Table of paper folds
16 - Socket with electric switch
17 - Half-fold switch
18 - Locking bolt of the side guide
19 - Table for straight perforation
20 - Table thrust regulation
21 - Perforating wheel
22 - Cover of perforation unit
23 - Stripper
24 - Table of delivery modes
25 - Delivery wheels
26 - Stop wheel
27 - Bush
28 - Creasing wheel
29 – Support collar
19
16
9
20
18
13
26

- 3 -
2) Parameters
a) Folding speed - 70 - 120 sheets/min ± 15 %(A4)
b) Types of folding - standard letter
concertina
single
double parallel
brochure
half concertina
cross-fold
c) Straight perforation, creasing - 80 - 120 g/m2– all folds
- 160 g/m2– all folds without
double parallel
d) Sheet size - (SRA3), A3, (B4), A4, (B5), A5
e) Input capacity - 200 sheets (80 g/m2)
f) Machine dimensions - Working position: l = 1130 mm
w = 460 mm
h = 480 mm
Transport position:l = 660 mm
w = 560 mm
h = 450 mm
g) Paper grammage - 80 - 160 g/m²
h) Machine weight - 28 kg
i) Voltage / frequency - 230 V / 50 Hz
j) Power input - 50 W
k) Sound pressure - 69.9 dB
Warnings
a) Only sheets of the size listed in the parameters can be folded in the folding
machine.
b) It is forbidden to fold foils, sheet metal or other similar materials.
c) The machine can be only used in enclosed spaces (e.g. offices, shops).
d) It is forbidden to use the machine outdoors.
e) It is forbidden to use the machine when the electric cord is damaged.
f) It is forbidden to use the machine if it makes strange sounds.

- 4 -
Installation and Operation Information
a) It is forbidden to plug the machine into other voltage than indicated on
producer’s identification plate.
b) Read all instructions before using the machine.
c) It is forbidden for children to operate the machine.
d) It is forbidden to put fingers or hands into the machine when the electric cord
is plugged in.
e) When the machine is jammed, it is necessary to unplug the machine first and
then troubleshoot.
f) When replacing a faulty fuse, it is forbidden to use a different type or different
capacity fuse.
3)
Operating Mode
•Tilt the tiltable table 3down.
•Set the side guides 11 approximately for the width of the paper, then load
required amount of paper on the tiltable table. Push the side guides close to
paper and lock with the bolts 18.
•By releasing the locking lever of the tiltable table 5, the block of paper is lifted
up to the feeding wheels 14.
•When the electric switch 16 is on and the X, Y stops and paper on the table
are in the correct position, there is 0displayed on the display unit 6. In case of
incorrect position of stop X, E-1 appears on the display. In case of incorrect
position of stop Y, E-2 appears on the display. If there is no paper on the
feeding table, letter Pis displayed continuously and the machine cannot be
started up. If the paper jams inside the machine, the motor turns off
automatically and letters blc (block) appears on display. In such case it is
necessary to remove blocked paper and restart the machine. There are two
ways how to do so: 1. turn off and on the machine by the main switch, or 2.
hold the RESET button until the blc sign disappears. If everything is ok, there
is a 0on the display and the machine is ready to be started again.
Go to chapter 3.1 Reading of display for more information.
•Pushing the "start/stop" button 2starts to feed paper automatically and to fold
it on to the delivery table.
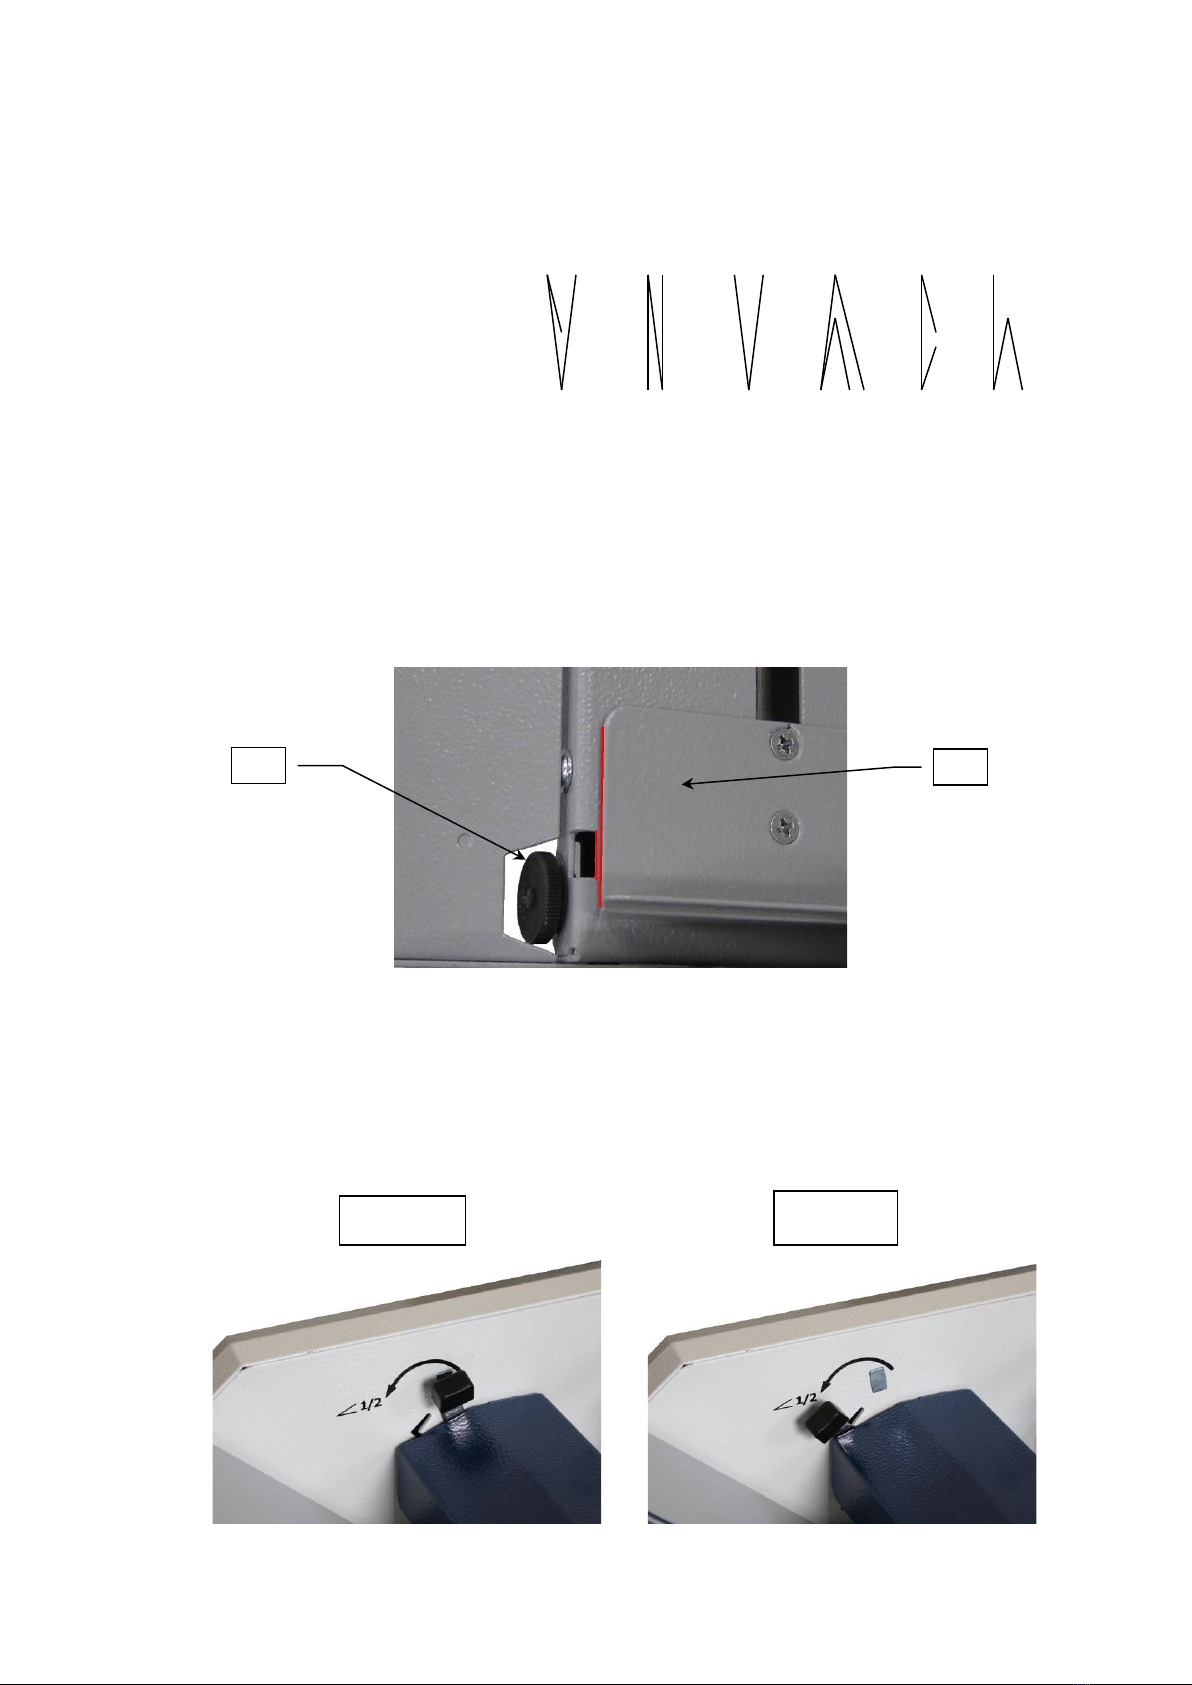
•If the feeding is not regular, set the tiltable table thrust using the regulation 20
(lower paper grammage needs less thrust, higher paper grammage needs
more thrust).
•The speed knob 2regulates the folding speed. When the machine is in
operation, paper must be continuously taken away from the delivery table to
prevent overflow.
•When the last paper is folded, the machine turns off automatically. If the last
paper remains in the machine, hold the button 2 and let the cycle finish.

- 5 -
3.1 Reading of display
Symbol "P" appears, if there is a missing
Symbol "blc" appears if rollers are blocked
paper on the feeding table.
and the motor is overloaded.
Symbols "E-1" (E-2) appears if stop X (Y) is missing or inserted incorrectly.
Diagnostics
Initial screen of diagnostics.
Appears when RESET button is being held for more than 3 secs.
3 dots on display are shining if:
1) There is no paper loaded on feeding table.
2) Sensor of the paper is not blocked (no paper inside machine).
3) Sensor of motor is blocked by screen placed on
driving pulley.
Left dot shows correct function of sensor, which defines revolutions
of motor. Slowly move the pulley. If everything is ok,
left dot stops shining always when sensor is not blocked by screen.
Middle dot shows correct function of sensor of counter.
To find out if sensor of counter works correctly, outshine it by
piece of paper. If everything ok, the middle dot stops shining.
Once the paper has been removed, the dot starts shining again.
Sensor is placed under the blue cover in the middle between left
and middle feeding table.

- 6 -
Right dot shows correct function of sensor of feeding table.
To find out if the sensor works correctly, we push the metal pin
of the switch. If the switch is ok, right dot stops shining.
Once released, the dot starts shining again.

- 7 -
4) Types of Folding, Adjustment of the Stops, Adjustment
of the perforating wheels, Creasing
Types of Folding
To get the required folding of paper, the stop slider 13 for X, Y stops must be
set into the position according to the table of paper folds 15 and relevant type
of paper. The position of stop slider must be adjusted for different paper
grammage by turning the stop wheel 26 to the corresponding side according to
the mm scale. It is also necessary to adjust the side folding accuracy by
skewing the side guides 11 using the control wheel 12. The initial position of
the side guides must be set so that the front edge of the side guide 11 is
parallel to the edge of the tiltable table opening. See the picture.
When setting the slider of the Y stop, it is necessary to remove this stop.
Removal of stops will turn the machine off automatically for the safety reasons.
For the folding marked "1/2" the half-fold switch 17 must be set into the
operating position according to the arrow. See the picture. Set the switch using
both hands.
11
12
On
Off

- 8 -
Perforation, Creasing
To set the perforating wheels 21 or creasing wheel 28, it is necessary to
unplug the machine. The cover of perforation unit 22 must be dismounted, the
delivery wheels holder removed, the screws in the hubs of the strippers 23
loosened by the allen key and the strippers tilted away. Possibly, the whole
axle with the strippers can be removed.
All the screws in the hubs of the wheels that need to be adjusted must be
loosened. The wheels should be loose on the shafts. When adjusted, the
position of the wheels must be locked by tightening the screws (be careful with
the creasing wheel and tighten it gently as it is plastic!) and the strippers must
be set back into the operating position near the perforating wheels. The cover
of the perforation unit must be mounted back!
23
29
28
22
24
25
21

- 9 -
If only folding is required, the perforating (creasing) wheels must be set out of
the operating position or removed completely. When the perforating wheels or
the creasing wheel are removed, it is necessary to take out the shaft of the
perforation unit. The shaft can be removed by holding the bush 27 and pulling
it through the spring into the extreme position. Then the whole shaft can be
moved back together with the bush, which must be still held in the extreme
position, and taken out of the machine. See the picture.
For the machine to work correctly, it is necessary to always place the guide
pulleys 28 on the shafts correctly!
If only straight perforation or creasing is required, it is necessary to set the
switch 17 to the half-fold position, remove the stop 9and insert the table for
continuous perforation in place of the stop. Also, the delivery wheels 25 must
be removed to let the paper pass freely.
Perforating
wheels
Creasing
wheels
27
Position of
the stripper

- 10 -
Removal of the delivery wheels for the straight perforation.
5) Adjustment of the Delivery Wheels
Move the delivery wheels 25 into the required position according to the table of
delivery modes 24 (see an example in the picture). For the C/2 fold for all the
paper grammages it is necessary to remove the delivery wheels from the axle!
Example: The delivery wheels position for 1/2 fold of the A4 sheet size.

- 11 -
6) Troubleshooting
Paper jam:
Sign blc appears on display, the engine is off. Unplug the machine from
electric supply. Remove both stops (X and Y), possibly also remove the cover
of perforating wheels and take out the jammed paper. Once the paper has
been released, we put the covers and stops back. After turning on, there is a 0
on the screen and the machine is ready to work again. If the paper has been
removed without removing the stops and cover (without unplugging), it is
necessary to restart the machine by either RESET button (hold until blc
disappears) or turn off and on again the machine by the main switch.
E-1 appears on display – wrong position of paper stop X (8)
E-2 appears on display – wrong position of paper stop Y (9)
P displayed continuously – paper missing on feeding table
More information in chapter 3.1 Reading of display
7) Dismounting covers
Covers can be only dismounted by a trained technician when the machine is
unplugged.
8) Machine Disposal
When the lifetime period is over, it is forbidden to dispose of the machine into
the common waste. The machine must be disassembled and metallic, non-
metallic, plastic, rubber and electronic parts sorted. These parts are disposed
of in the relevant points of recycling. Some parts of the machine can contain
dangerous substances that are harmful to the environment and health.
Table of contents
Other Cyklos Paper Folding Machine manuals