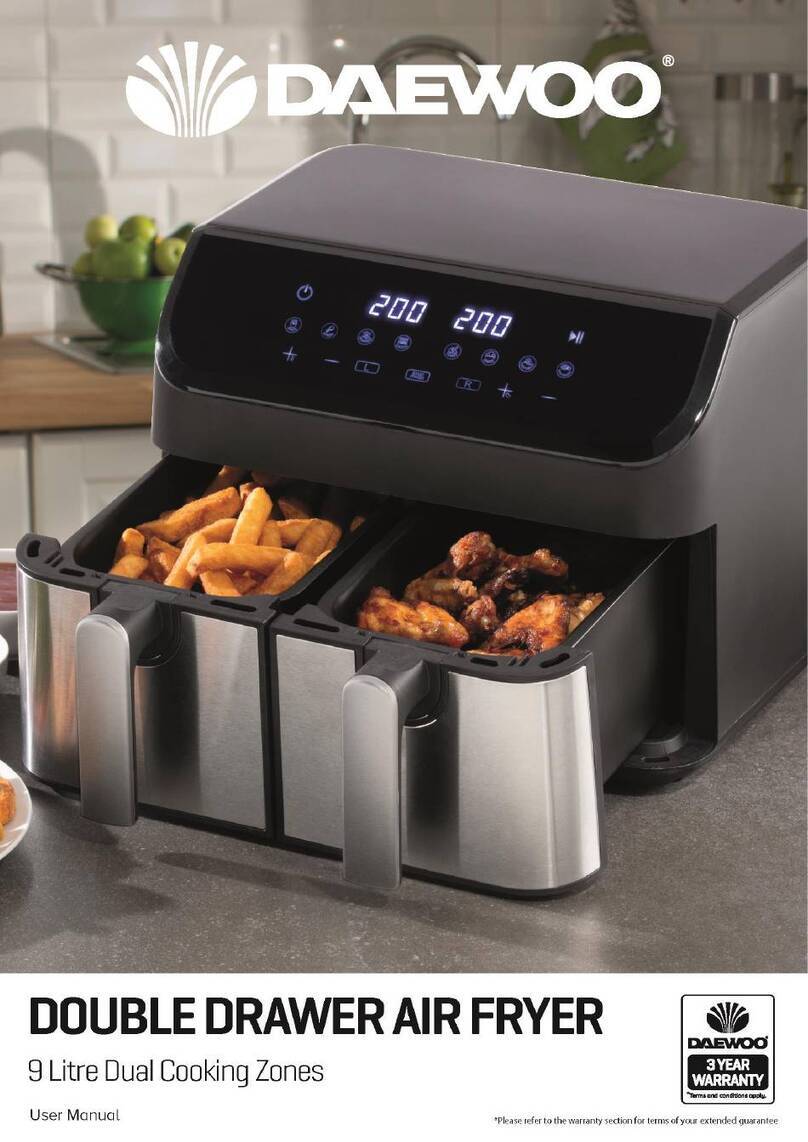
Daewoo DK2FRYER User manual

1
DK2FRYER
DUAL BASKET AIR HEALTH FRYER
USER MANUAL
EN
GEBRUIKERSHANDLEIDING
NL
16
GEBRAUCHSANWEISUNG
DE
31
FR
MODE D’EMPLOI
46
EN
2

2
IMPORTANT SAFEGUARDS
HOUSEHOLD USE ONLY. READ ALL INSTRUCTIONS.
When using electrical appliance, basic safety precautions should always be
followed, including the following:
Read this user manual carefully, before you use the appliance, and keep it safely for future
reference.
WARNINGS
- Never immerse the housing, which contains electrical components and the heating elements,
in water nor rinse it under the tap.
- Do not let any water or other liquid enter the appliance – to prevent electric shock.
- Always put the ingredients to be fried in the basket, to prevent it from coming into contact with
the heating elements.
- Do not cover the air inlet and the air exhaust openings while the appliance is operating.
- Do not fill the frying tray with oil as this may cause a fire hazard.
- Never touch the inside of the appliance while it is operating.
- Check whether the voltage indicated on the appliance corresponds to the local mains voltage
in your country before you connect the appliance.
- Do not use the appliance if the plug, the power cord or the appliance itself is damaged.
- If the power cord is damaged, you must have it replaced at a service center authorized by
similarly qualified persons in order to avoid a hazard.
- This appliance is not suitable for children or for people who are either physically or mentally
handicapped or who lack experience and knowledge. Should you want anyone else to use the
appliance, that person should be properly guided on its use.
- Keep the appliance and its mains cord out of the reach of children when the appliance is
switched on or is cooling down.
- Keep the mains cord away from hot surfaces.
- Do not plug in the appliance or operate the control panel with wet hands.
- Only connect the appliance to an earthed wall socket. Always make sure that the plug is
inserted into the wall socket properly.
- Never connect this appliance to an external timer switch.
- Do not place the appliance on or near combustible materials such as a tablecloth or curtains.
- Do not place the appliance against a wall or against other appliances. Leave at least 10cm free
space at the back and sides and 10cm free space above the appliance. Do not place anything
on top of the appliance.
- Do not use the appliance for any purpose other than described in this manual.
- Do not let the appliance operate unattended.
- During hot air frying, hot steam is released through the air exhaust openings. Keep your hands
and face at a safe distance from the steam and from the air exhaust openings. Also be careful
of hot steam and hot air when you remove the frying tray from the appliance.
- The surface below the appliance may become hot during use.
EN

3
- Immediately unplug the appliance if you see dark smoke coming out of the appliance.
Wait for the smoke emission to stop before you remove the frying tray from the appliance.
Caution
- Place the appliance on a horizontal, level and stable surface.
- This appliance is intended for normal household use only. It is not intended for use in
environments such as staff kitchens, offices, farms or other work environments. Nor is it
intended to be used by clients in hotels or other similar environments.
- If the appliance is used improperly or if it is not used according to the instructions in the user
manual, the warranty becomes invalid and seller refuses any liability for any damage that may
be caused.
- Always unplug the appliance after use.
- Let the appliance cool down for approx. 30 minutes before you handle or clean it.
- Remove burnt remnants
Indicates to read and review instructions to understand operation and use of product.
Indicates the presence of a hazard that can cause personal injury, death or substantial
property damage if the warning included with this symbol is ignored.
Take care to avoid contact with hot surface. Always use hand protection to avoid burns.
For indoor and household use only.
SAVE THESE INSTRUCTIONS
EN

4
GETTING TO KNOW YOUR DUAL AIR FRYER
A & D: Non-Stick crisper plates
B & E: Cooking Baskets
C & F: Basket handle
G: Top cover
H: Control panel
I: Vent windows
J: Power cord
A) Zone 1
B) Temperature plus/minus
C) Timer/temperature
D) Timer plus/minus
E) Zone 2
F) Preheat
G) Pause
H) French fries
I) Meat
J) Drumsticks
K) Steak
L) Cake
M) Smart Finish
N) Match Cook
O) Shrimp
P) Fish
Q) Pizza
R) Vegetables
S) Hot dog
T) Chops
U) Start/Stop
EN

5
Before first use
1. Remove all packing material.
2. Remove any stickers or labels from the appliance – other than the rating label.
3. Wash the baskets and crisper plates in hot water with soap, then rinse and dry
thoroughly. The crisper plates and baskets are the ONLY dishwasher-safe parts.
Do not clean the main unit in the dishwasher.
4. Wipe the inside and outside of the appliance with a moist cloth.
Preparing for use
1. Place the appliance on a stable, horizontal and level surface that is also heat resistant.
2. Place the basket in the frying tray properly.
Do not fill the frying tray with oil or any other liquid.
Do not put anything on top of the appliance. This disrupts the airflow and affects the
air-frying result.
Using the appliance
1. Power on
Plug in, there is a beep sound. Light up. 1 seconds will be back to standby mode: all light
will be off except .
2. Menu selection/Temperature/Time
1). Plug in, it is at the standby mode. Press , Then press and select a cooking
function, to get started you should always choose a cooking program first. You can adjust
the time and temperature freely by using Time +/- and Temperature +/- button. You can also
press any function icon to cook different food.
2). After finish function, press and select cooking function. you can adjust the time
and temperature freely by using Time +/- and Temperature +/- button. You can also press
any function icon to cook different food.
3). After finish above program then press and the unit will start to work. Every function
has its own default time and temperature (as shown in the table). You can adjust the time
and temperature freely by using Time +/- and Temperature +/- button.
EN

6
The temperature control range is 50-200°C, every click on the + / - temperature will increase
or reduce 10°C. At 200°C, press the "+", will loop back to a temperature of 50°C, press the
"-" at 50°C temperature will cycle back to 200°C. In the process of temperature control,
temperature digital display will flicker on the screen (not flashing during working), after
flickering 3 times, the temperature has been done of setting;
The adjusting time range is 1 to 60 mins. every click on the + / - time will increase or reduce
1 min. At 60 min if you press "+", the time will cycle back to 01 min., At 01 min, if you press
"-", the temperature will cycle back to 60 min. In the process of time control, time digital
display will flicker on the screen (not flashing during working), after flickering 3 times, the
time has been done of setting.
3. Start, pause/stop
After select function, set the right time and right temperature, press , the start to
flicker, after the beep sound, machine start to work.
During the machine working, press , after beep sound, machine stop working,
stop flickering. during the machine working, press , after beep sound, machine stop
working, and the machine goes back to standby mode.
Noted:
(1). During working, you can take frying tray out, stop working, and you can check cooking
result or add more food, machine continue to work on the program if pull in the frying tray.
(2). Power cut or unplug during working, machine stop working, all light off, machine
continue to work on the program when power on or plug in again.
3, during work, six red lights for heating element. When red six red lights flicker on by one, it
means heating element is working, when the temperature reach setting temperature,
heating element stop working, and six red lights don’t flicker.
4. End of program
Heating element stop working when working time is done, show 00 min, motor continues to
work, buzzer warning. motor continues to work 1 min, cooling machine, then machine enter
the standby mode.
EN

7
Smart Finish
Cooking 2 foods using 2 different functions, temps or cook times?
Set each zone and use SMART SET to have both zones finish at the same time.
Step1: Program Zone 1
Place food in basket, press and select a cooking function
Step2: Program Zone 2
Place food in basket, Press and select a cooking function
Step3: Begin cooking
Select Smart Finish, press to begin cooking
The lights of the cooking functions you choose will continue flickering while cooking.
Match Cook
Cooking the same food in each zone?
Set Zone 1 and use MATCH COOK to automatically match settings to zone 2.
Step1: program Zone 1
Place food in basket, Press and select a cooking function
Step2: Begin cooking
Select MATCH COOK, press to begin cooking.
The lights of the cooking functions you choose will continue flickering while cooking.
EN

8
Menu Table
program logistics
menu
Default
time(min)
Default temperature
(°C )
Function
Pre-heat
3
180
French Fries
15
200
Meat
12
200
Drumsticks
20
200
Steak
12
180
Cake
25
160
Shrimp
8
180
Fish
10
180
Pizza
20
180
Vegetable
10
160
Hot dog
12
180
Chops
25
200
Caution: Do not touch the pan during and about 30mins after use, as it gets very hot.
Only hold the pan by the handle.
EN

9
Note: Keep in mind that these settings are only for reference. As ingredients differ in origin,
size, shape as well as brand, we cannot guarantee the best settings for your ingredients.
Operation Step
1. Put the mains plug in an earthed wall socket.
2. Put the ingredients into the basket and put basket in frying tray
3. put the frying tray in the right position. Choose function from menu and press
START/PAUSE to start cooking.
4. Screen display will show temperature and time. Temperature is the setting temperature
and time is remaining working time the function selected should start flicker.
5. Some ingredients require shaking halfway through the preparation time (see section
'Settings' in this chapter). To shake the ingredients, pull the frying tray out of the appliance
by the handle and shake it. Then slide the frying tray back into the air fryer.
Caution: Do not press the basket release button during shaking.
6. When you hear the timer bell, the set preparation time has elapsed. Pull the pan out of
the appliance and place it on a heat-resistant surface.
7. Check if the ingredients are ready.
If the ingredients are not ready yet, simply slide the frying tray back into the appliance and
cook it extra minutes
Tip: To reduce the weight, you can remove the basket from the pan and shake the basket
only. To do so, pull the pan out of the appliance, place it on a heat-resistant surface and
press the basket release button.
8. To remove small ingredients, press the basket release button and lift the basket out of the
frying tray.
Do not turn the basket upside down with the frying tray still attached to it, as any excess
oil that has collected on the bottom of the frying tray will spill out and leak onto the
ingredients.
After hot air frying, the frying tray and the ingredients are hot. Depending on the type
of ingredients in the air fryer, steam may escape form the frying tray.
9. Empty the basket into a bowl or onto a plate.
Tip: To remove large or fragile ingredients, use a pair of tongs to lift the ingredients out of
the basket.
10. When a batch of ingredients is ready, the air fryer is instantly ready for preparing another
batch.
Note: When using the Health Fryer for the first time, a slight smoke or odour may
be emitted. This is normal and will soon subside. Ensure that there is sufficient
ventilation around the Health Fryer.
EN

10
Settings
Except the preset menu, you also can use this air fryer to make other foods by setting the
time and temperature. This table below helps you to select the basic settings for the
ingredients you want to prepare.
Note: Keep in mind that these settings are only for reference. As ingredients differ in origin,
size, shape as well as brand, we cannot guarantee the best setting for your ingredients.
Because the Rapid Air Technology instantly reheats the air inside the appliance, pulling the
frying tray briefly out of the appliance during hot air frying barely disturbs process.
Tips:
- Smaller ingredients usually require a slightly shorter preparation time than larger
ingredients.
- A larger amount of ingredients only requires a slightly longer preparation time; a smaller
amount of ingredients only requires a slightly shorter preparation time.
- Shaking smaller ingredients halfway through the preparation time optimized the end result
and can help prevent unevenly fried ingredients.
- You can coat fresh potatoes with a little oil for a crispy result. Fry your ingredients in the air
fryer within a few minutes after you have added the oil.
- Do not prepare extremely greasy ingredients such as sausages in the air fryer.
- Snacks that can be prepared in an oven can also be prepared in the air fryer.
- The optimal amount for preparing crispy fries is 500 grams.
- Use pre-made dough to prepare filled snacks quickly and easily. Pre-made dough also
requires a shorter preparation time than home-made dough.
- You can also use the air fryer to reheat ingredients by setting the temperature to 150°C
and the timer to about 10 minutes.
EN

11
Time
(min.)
Temperature
(°C)
Shake
Extra information
Potatoes & fries
Thin frozen fries
12-16
200
Shake
Thick frozen fries
12-20
200
Shake
Home-made fries
(8x8mm)
18-25
180
Shake
add1/2 tbsp of oil
Home-made potato
wedges
18-22
180
Shake
add1/2 tbsp of oil
Home-made
potato cubes
12-18
200
Shake
add1/2 tbsp of oil
Rösti
15-18
180
Potato gratin
18-22
180
Meat & Poultry
Steak
8-12
180
Pork chops
10-14
180
Hamburger
7-14
180
Sausage roll
13-15
200
Drumsticks
18-22
180
Chicken breast
10-15
180
Snacks
Spring rolls
8-10
200
Shake
Use oven-ready
Frozen chicken
Nuggets
6-10
200
Shake
Use oven-ready
Frozen fish
fingers
6-10
200
Use oven-ready
Frozen Bread-
crumbed cheese
snacks
10
200
Use oven-ready
Stuffed
vegetables
10
160
Use oven-ready
Note: Add 3 minutes to the preparation time before you start frying if the appliance is cold.
EN

12
Cleaning
Clean the appliance after every use.
The frying tray, basket and the inside of the appliance have a non-stick coating. Do not use
metal kitchen utensils or abrasive cleaning materials to clean them, as this may damage the
non-stick coating.
1. Remove the mains plug from the wall socket and let the appliance cool down.
Note: Remove the frying tray to let the air fryer cool down more quickly.
2. Wipe the outside of the appliance with a moist cloth.
3. Clean the frying tray and basket with hot water, some washing liquid soap and a non-
abrasive sponge.
You can use a washing liquid to remove any remaining dirt.
Note: The frying tray and basket are dishwasher-proof.
Tip: If dirt is stuck to the basket, or at the bottom of the frying tray, fill the frying tray with hot
water and with some washing liquid soap. Put the basket in the frying tray and let the frying
tray and the basket soak for approximately 10 minutes.
1. Clean the inside of the appliance with hot water and a non-abrasive sponge.
2. Clean the heating element with a cleaning brush to remove any food residues.
Storage
1. Unplug the appliance and let it cool down.
2. Make sure all parts are clean and dry.
Disposal of old electrical appliances
The European directive 2002/96/EC on Waste Electrical and Electronic
Equipment (WEEE), requires that old household electrical appliances
must not be disposed of in the normal unsorted municipal waste stream.
Old appliances must be collected separately in order to optimize the
recovery and recycling of the materials they contain, and reduce the
impact on human health and the environment.
The crossed out “wheeled bin” symbol on the product reminds you of your obligation, that
when you dispose of the appliance, it must be separately collected.
Consumers should contact their local authority or retailer for information concerning the
correct disposal of their old appliance.
EN

13
Troubleshooting
Problem
Possible cause
Solution
The air fryer
does not work
The appliance is not
plugged into the mains.
Put the mains plug in an earthed
wall socket.
You have not set the timer.
Turn the timer knob to the required
Preparation time to switch on the
appliance.
The ingredients
fried with the
air fryer are not
done.
The amount of the
ingredients in the basket is
too much.
Put smaller batches of ingredients
in the basket. Smaller batches
are fried more evenly.
The set temperature is too
low.
Turn the temperature control knob
to the required temperature setting
(see section 'Settings').
The preparation time is too
short.
Turn the timer knob to the
required preparation time
(see section 'Settings').
The ingredients
are fried unevenly
in the air fryer.
Certain types of the
ingredients need to be
shaken halfway through the
preparation time.
Ingredients that lie on top of or
across each other (e.g. fries) need
to be shaken halfway through the
preparation time (see section
'Settings').
Fried snacks are not
crispy when they
come out of the air
fryer
You used a type of snacks
meant to be prepared in a
traditional deep fryer.
Use oven snacks or lightly brush
some oil onto the snacks for a
crispier result.
I cannot slide the
pan into the
appliance properly.
There is too much food in
the basket.
Do not fill the basket beyond the
Max amount indicated in the table
on the earlier page.
The basket is not placed in
the pan correctly.
Push the basket down into the pan
until you hear a click.
White smoke comes
out of the appliance
You are preparing greasy
ingredients.
Pay attention that the temperature
is well-controlled to be under 180℃,
when you fry greasy ingredients in
the air fryer.
EN

14
Problem
Possible cause
Solution
The pan still contains
greasy residues from
previous use.
White smoke is caused by grease
heating up in the pan. Make sure
you clean the pan properly after
each use.
Fresh potato fries
are fried unevenly
in the air fryer.
You did not soak the potato
sticks properly before you
fried them.
Soak the potato sticks in a bowl of
water for at least 30 minutes; take
them out and dry them with kitchen
paper.
You did not use the right
potato type.
Use fresh potatoes and make sure
they stay firm during frying.
Fresh potato fries
are not crispy
when they come
out of the air fryer.
The crispiness of the fries
depends on the amount of oil
and water in the fries.
Make sure you dry the potato sticks
properly before you coat them with oil.
Cut the potato into thinner sticks for
a crispier result.
Add slightly more oil for a crispier
result.
EN

15
Specifications
- 1400-1600W
- Temperature: 50 - 200℃
- 60 minute timer
- Full digital touch control display
- Smart finish function – finish cooking the food in both baskets,
which requires different cooking times, at the same time
- Match cook function - a quick-set function to match the settings of
both baskets
- Cool touch body
- Auto power off function
- Power: 220V–240 V~; 50/60 Hz; Class 1
EN

16
BELANGRIJKE VOORZORGSMAATREGELEN
ALLEEN VOOR HUISHOUDELIJK GEBRUIK. LEES ALLE
INSTRUCTIES
Bij gebruik van elektrische apparatuur moeten met het oog op de veiligheid altijd
bepaalde voorzorgsmaatregelen worden opgevolgd, zoals:
Lees deze handleiding eerst zorgvuldig door voordat u van het apparaat gebruikmaakt en
bewaar hem zodat u deze later nog eens kunt raadplegen.
WAARSCHUWINGEN
- Dompel de behuizing nooit in water onder en spoel hem ook niet af onder de kraan, want er
zitten elektronische onderdelen en verwarmingselementen in.
- Laat geen water of een andere vloeistof in het apparaat komen – om een elektrische schok te
voorkomen.
- Doe de ingrediënten die gefrituurd moeten worden altijd in de mand, om te voorkomen dat ze
direct in aanraking komen met de verwarmingselementen.
- Dek de in- en uitlaatopeningen voor de lucht niet af terwijl het apparaat in werking is.
- Breng geen olie aan op de bakplaat, want dan kan brand ontstaan.
- Raak het apparaat nooit aan de binnenzijde aan terwijl dat in werking is.
- Controleer voordat u de stekker in het stopcontact steekt of de spanning die op het apparaat
staat aangegeven, wel dezelfde is als de spanning van het lichtnet in het land waar u het
apparaat gebruikt.
- Maak geen gebruik van het apparaat als de stekker, het snoer of het apparaat zelf beschadigd
is.
- Als het snoer beschadigd is, moet u dit om ongelukken te voorkomen bij een officieel erkende
reparateur laten maken door iemand die daarvoor gekwalificeerd is.
- Dit apparaat is niet geschikt voor kinderen of voor mensen die fysiek of mentaal een
achterstand hebben of die hiervoor niet over voldoende ervaring en kennis beschikken. Als u
iemand anders van het apparaat gebruik wilt laten maken, moet die wel goed worden
geïnstrueerd.
- Houd het apparaat en het netsnoer buiten bereik van kinderen als het apparaat is
ingeschakeld of nog staat af te koelen.
- Houd het netsnoer uit de buurt van hete oppervlakken.
- Steek de stekker niet in het apparaat en blijf ook van het bedieningspaneel af als u nog natte
handen hebt.
- Doe de stekker van het apparaat alleen in een geaard stopcontact. Kijk altijd of de stekker wel
goed in het stopcontact zit.
- Koppel dit apparaat nooit aan een externe schakelklok.
- Plaats het apparaat nooit op of bij brandbare materialen, zoals een tafelkleed of gordijnen.
- Zet het apparaat niet pal tegen de muur of tegen andere apparaten aan. Laat aan de achterzijde
en boven het apparaat een ruimte vrij van ten minste 10 cm. Zet nooit iets bovenop het apparaat
zelf.
NL

17
- Gebruik het apparaat niet voor iets anders dan zoals beschreven in deze handleiding.
- Laat het apparaat niet werken zonder dat er iemand bij is.
- Tijdens het frituren met hete lucht komt er hete stoom uit de openingen van de luchtuitlaat.
Zorg dat u met uw handen en gezicht op veilige afstand van de stoom en van de
uitlaatopeningen blijft. Wees ook nog bedacht op de hete stoom en hete lucht als u het blad
met het gefrituurde erop uit het apparaat trekt.
- Het gebied onder het apparaat kan zolang dat in gebruik is ook warm worden.
- Trek zodra u donkere rook uit het apparaat ziet komen onmiddellijk de stekker eruit. Wacht tot
er geen rook meer uitkomt en haal dan pas het blad met het gefrituurde uit het apparaat.
Voorzichtig
- Plaats het apparaat op een horizontale, vlakke en stabiele ondergrond.
- Dit apparaat is uitsluitend bedoeld voor huishoudelijk gebruik. Het is niet bedoeld voor in
bijvoorbeeld een kantine, een kantoor, een boerderij of een andere bedrijfsomgeving. Ook is
het niet bedoeld om te worden gebruikt door gasten in een hotel of een soortgelijke omgeving.
- Wanneer het apparaat gebruikt wordt voor iets of op een manier waar het niet voor bedoeld is,
of wanneer het niet bediend wordt volgens de instructies in de gebruikshandleiding, vervalt de
garantie en houdt de verkoper zich niet aansprakelijk voor hier eventueel uit voortvloeiende
schade.
- Trek na gebruik van het apparaat altijd de stekker eruit.
- Laat het apparaat altijd ongeveer 30 minuten afkoelen voordat u het aanraakt of schoonmaakt.
- Verkoolde voedselresten moet u weghalen
Geeft aan dat u de aanwijzingen moet lezen en raadplegen om te begrijpen hoe u het
apparaat kunt gebruiken en moet laten werken.
Geeft aan dat er een gevaar is dat letsel, fatale verwondingen of ernstige
schade aan eigendommen kan veroorzaken als de met dit symbool aangegeven
waarschuwing wordt genegeerd.
Zorg dat u niet in aanraking komt met het hete oppervlak. Doe altijd iets om uw handen
om brandwonden te voorkomen.
Alleen voor huishoudelijk gebruik binnenshuis.
BEWAAR DEZE INSTRUCTIES
NL

18
LEER UW DUAL AIR FRYER KENNEN
A & D: Anti-aanbakplaten
B & E: Frituurmanden
C & F: Mandgreep
G: Afdekplaat
H: Bedieningspaneel
I: Ventilatiegaten
J: Netsnoer
A) Zone 1
B) Temperatuur plus/min
C) Timer/temperatuur
D) Timer plus/min
E) Zone 2
F) Voorverwarmen
G) Pauzeren
H) Patat
I) Vlees
J) Kippenbouten
K) Steak
L) Cake
M) Slim afmaken
N) Match Cook
O) Garnalen
P) Vis
Q) Pizza
R) Groenten
S) Hot dog
T) Koteletten
U) Start/Stop
NL

19
Voor het eerste gebruik
1. Neem al het verpakkingsmateriaal weg.
2. Verwijder alle stickers of etiketten van het apparaat, behalve het informatielabel.
3. Spoel de manden en bakplaten eerst goed af in warm water met zeep, wrijf ze eerst
droog en laat ze dan verder helemaal drogen. De manden en bakplaten zijn ook de
ENIGE onderdelen die veilig in de vaatwasmachine kunnen. Stop het apparaat zelf nooit
in de vaatwasmachine.
4. Veeg het apparaat van binnen en van buiten schoon met een vochtige doek.
Klaarzetten voor gebruik
3. Plaats het apparaat op een horizontale, vlakke en stabiele ondergrond die ook
hittebestendig is.
4. Zet de mand netjes op de frituurplaat.
Vul de frituurplaat niet met olie of een andere vloeistof.
Zet nooit iets bovenop het apparaat zelf. Daardoor raakt de luchtstroom verstoord, en
dat werkt nadelig uit op het resultaat van het frituren.
Gebruik van het apparaat
2. Schakel het apparaat in
Als u de stekker erin doet hoort u een piep. Het lampje gaat aan. Dat brandt één seconde
en gaat dan weer op stand-by: het lampje gaat uit, met uitzondering van .
2. Menukeuze/Temperatuur/Tijd
1). Als u de stekker erin doet, staat het apparaat op stand-by. Druk op , druk dan op
en kies een bereidingswijze, aan het begin moet u altijd eerst een programma kiezen. U
kunt de tijd en de temperatuur geheel zoals u wenst instellen met de knoppen Time +/- en
Temperature +/- . Voor een ander soort maaltijd kunt u ook een van de toetsen met een
symbool erop indrukken.
2). Als u de eerste functie hebt gekozen, druk dan op voor de bereiding. U kunt de
NL

20
tijd en de temperatuur geheel zoals u wenst instellen met de knoppen Time +/- en
Temperature +/-. Voor een ander soort maaltijd kunt u ook een van de toetsen met een
symbool erop indrukken.
3). Als u het eerste programma hebt gekozen, druk dan op en het apparaat begint te
werken. Voor elke functie zijn er een vast tijdsverloop en een bijbehorende temperatuur
(zoals aangegeven in de tabel). U kunt de tijd en de temperatuur geheel zoals u wenst
instellen met de knoppen Time +/- en Temperature +/- .
Het instelbare temperatuurbereik loopt van 50-200 °C, waarbij elke keer dat u klikt op + / -
de temperatuur met 10 °C omhoog of omlaag gaat. Als de temperatuur op 200° C staat en u
drukt op "+" dan loopt de temperatuur terug naar 50° C, en drukt u op "-" bij een temperatuur
van 50° C dan gaat de temperatuur terug naar 200° C. Tijdens het regelen van de
temperatuur wordt deze digitaal knipperend weergegeven op het scherm, en als dit dan zo'n
drie keer geknipperd heeft, is de temperatuur ingesteld (als het apparaat eenmaal in
werking is, houdt het knipperen op);
Het instelbare bereik voor de tijd loopt van 1 tot 60 minuten. bij elke keer dat u klikt op + / -
gaat de tijd met 1 minuut verder of terug. Als u bij 60 minuten drukt op "+", gaat de tijd terug
naar 01 minuten. En bij 01 minuten gaat de tijd als u op " - " drukt de tijd weer naar 60
minuten. Tijdens het instellen van de tijd wordt deze digitaal knipperend weergegeven op
het scherm, en als dit dan zo'n drie keer geknipperd heeft, is de tijd ingesteld (als het
apparaat eenmaal in werking is, houdt het knipperen op).
3. Starten, pauzeren/stoppen
Stel na het selecteren van de functie die juiste tijd en temperatuur in, druk dan op , de
begint dan te knipperen, waarop het apparaat na de piep begint te werken.
Druk terwijl het apparaat aan het werk is op , waarop het apparaat na de piep stopt met
werken,
de display knippert niet meer. Druk terwijl het apparaat aan het werk is op , waarop
het apparaat na de piep stopt met werken en het apparaat gaat terug in de stand-by.
Opgelet:
(1). Terwijl het apparaat aan het werk is kunt u de bakplaat eruit halen. Het apparaat stopt
dan, zodat u het resultaat van de bereiding kunt controleren of er nog wat etenswaar aan
kunt toevoegen. Zodra u de bakplaat er dan weer in terugduwt, zal het apparaat weer
verdergaan met het programma.
(2). Als er een stroomstoring is terwijl het apparaat in werking is, of de stekker raakt los, dan
komt het apparaat tot stilstand en alle lampjes gaan uit. Zodra de stroomstoring is
NL
Table of contents
Languages:
Other Daewoo Fryer manuals

Daewoo
Daewoo SDA1553 User manual

Daewoo
Daewoo SDA2616 User manual

Daewoo
Daewoo SDA2518 User manual

Daewoo
Daewoo SDA2609 User manual

Daewoo
Daewoo SDA1032 User manual

Daewoo
Daewoo SDA1551 User manual

Daewoo
Daewoo SDA2314 User manual

Daewoo
Daewoo ACTUATE SDA2622 User manual

Daewoo
Daewoo SDA1551 User manual

Daewoo
Daewoo HEA1032 User manual

Daewoo
Daewoo SDA1032 User manual

Daewoo
Daewoo SDA1601 User manual

Daewoo
Daewoo SDA2310 User manual

Daewoo
Daewoo SDA2310 User manual

Daewoo
Daewoo SDA2324 User manual

Daewoo
Daewoo SDA1032 User manual

Daewoo
Daewoo DHFRYER User manual

Daewoo
Daewoo SDA1861 User manual

Daewoo
Daewoo SDA2310 User manual

Daewoo
Daewoo SDA1804 User manual