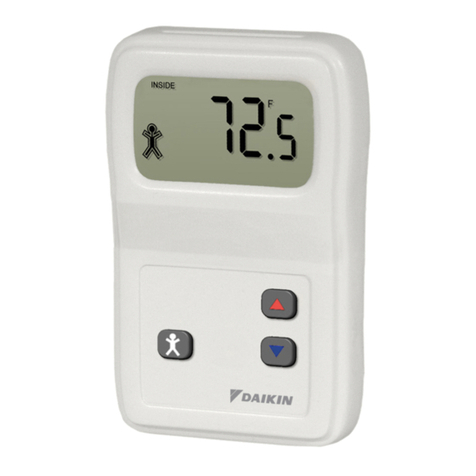
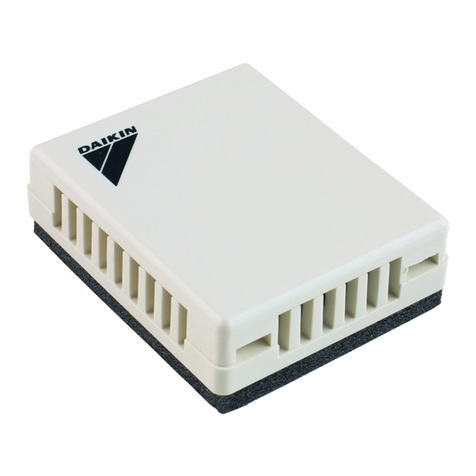
Daikin 2508032 User manual

Operations Manual OM 1039-1
Group: Controls
Part Number: OM 1039
Date: January 2011
BACnet®VAV Actuator
Room Sensor
Models 2508032
Table of Contents
Introduction...............................2
Revision History ...........................2
Reference Documents . . . . . . . . . . . . . . . . . . . . . .2
Limited Warranty ..........................2
Notice ..................................2
General Information .......................2
Hazard Identication Messages ..............2
Operation.................................3
Operation Modes ..........................3
Normal Mode.............................3
Occupied Mode ...........................3
Setpoint Adjustment Mode ..................3
Passkey Mode............................3
Settings .................................4
Laptop Pass-thru Mode.....................5
Set-up of Displayed Temperature Units.........5

OM 1039-1 • VAV ACTUATOR ROOM SENSOR 2 www.DaikinApplied.com
IntroductIon
IntroductIon
Revision History
Publication Date Release Notes
OM 1039 March 2010 Initial Release
OM 1039-1 January 2011 Claried BACnet
VAV Actuator
as the VAV box
controller
Reference Documents
Publication Company Title Source
IM 1040 Daikin Applied
Start-up
procedures
for the
BACnet VAV
actuator
www.
DaikinApplied.
com
IM 1093 Daikin Applied
Single
Duct VAV
Terminal Box
installation
manual
www.
DaikinApplied.
com
Limited Warranty
Consult your local Daikin representative for warranty details. To
nd your local Daikin representative, go to www.DaikinApplied.
com.
Notice
Copyright © 2010 Daikin Applied, Minneapolis MN. All rights
reserved throughout the world. Daikin Applied reserves the
right to change any information contained herein without prior
notice. The user is responsible for determining whether this
software is appropriate for his or her application.
® ™ The following are tradenames or registered trademarks of
their respective companies: BACnet from the American Society
of Heating, Refrigerating and Air-Conditioning Engineers,
Inc.; Windows from Microsoft Corporation; D-Net, Daikin and
MicroTech III from Daikin Applied.
General Information
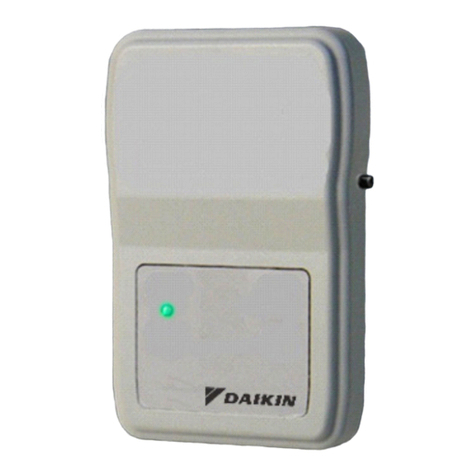
This document relates to the set up and operation of the
Daikin 2508032 Room Temperature Sensor. It explains the
various operating modes available and describes procedure for
programming the display, according to user preferences.
Table 1: Accessories
Description Product Number
25-foot (7.6 m) cable with connections 2508041
50-foot (15.2 m) cable with connections 2508042
100-foot (30.5 m) cable with connections 2508043
Replacement Housing Base 2508044
Passkey 2508045
Hazard Identication Messages
CAUTION
Cautions indicate potentially hazardous situations, which can
result in personal injury or equipment damage if not avoided.
WARNING
Warnings indicate potentially hazardous situations, which can
result in property damage, severe personal injury, or death if
not avoided.
DANGER
Dangers indicate a hazardous situation which will result in
death or serious injury if not avoided.
NOTICE
Notices give important information concerning a process,
procedure, special handling or equipment attributes.
DANGER
Electric shock hazard. Can cause personal injury or
equipment damage.
This equipment must be properly grounded. Connections and
service to the MicroTech III Chiller Unit Controller must be
performed only by personnel knowledgeable in the operation
of the equipment being controlled.
CAUTION
Static sensitive components. Can cause equipment damage.
Discharge any static electrical charge by touching the bare
metal inside the control panel before performing any service
work. Never unplug cables, circuit board terminal blocks, or
power plugs while power is applied to the panel.
NOTICE
This equipment generates, uses and can radiate radio
frequency energy and, if not installed and used in accordance
with this instruction manual, may cause interference to radio
communications. It has been tested and found to comply with
the limits for a Class A digital device, pursuant to part 15 of the
FCC rules. These limits are designed to provide reasonable
protection against harmful interference when the equipment
is operated in a commercial environment. Operation of this
equipment in a residential area is likely to cause harmful
interference in which case the user will be required to correct
the interference at his or her own expense. Daikin Applied
disclaims any liability resulting from any interference or
for the correction thereof.
operatIon
www.DaikinApplied.com 3 OM 1039-1 • VAV ACTUATOR ROOM SENSOR
operatIon
Operation Modes
Figure 1: Operation Mode Diagram
Normal Mode
In Normal Mode, the display is updated with temperature,
humidity and occupied status (all where applicable) on a set
time cycle.
The display shows temperature in the desired units (as set by
the jumper on the PCA). Depending on the model, the humidity
will be displayed as well. When both of these variables need
to be displayed (temperature, relative humidity) the display will
cycle through the required values at a rate of one change every
three to ve seconds.
Occupied Mode
If the BACnet VAV Actuator is currently in Unoccupied Mode
(Figure 2), pressing the override button (Figure 3) results in
the display showing the word OCCUPIED and the request is
sent to the actuator to override the unoccupied mode. If the
BACnet VAV Actuator does not get overridden and stays in the
unoccupied mode, the display on the sensor reverts back to
the unoccupied symbol as soon as possible.
If the BACnet VAV Actuator is currently in occupied mode,
pressing the override button ashes the word OCCUPIED and
does nothing else. This functionality is intended solely to let the
user know that the button press was recognized.
Figure 2: Unoccupied Icon
Figure 3: Occupied Icon
Setpoint Adjustment Mode
The temperature setpoint is adjusted by using the plus and
minus buttons. The resulting changes in setpoint are shown on
the display in 1.0°F or 0.5°C increments.
The setpoint adjustment will be displayed, and will stay on the
screen for three seconds. If, during those three seconds, a
setpoint button is pressed again, the setpoint will be adjusted
accordingly and be displayed, and the three-second countdown
will restart. If there is no user input for more than three
seconds, the room unit will return to the Normal Mode.
Figure 4: Setpoint Icons
Passkey Mode
Insert the passkey into the sensor HMI (Human-Machine
Interface) port to set up all of the user functionality identied in
Settings. For each parameter, use the following sequence:
• Press the occupancy override button to edit the
parameter
• Press the plus/minus buttons to scroll through the various
options available for each parameter to display the
desired option
• Press the occupancy override button again to move to the
next user adjustable parameter
• When nished, remove the passkey from the HMI port
carefully. User setting changes will be saved when the
passkey is removed
Figure 5: Inserting the Passkey
Mode Passkey
Normal
Laptop
Unoccupied Mode
Occupied Mode
User Settings
View/Change
Set Point
Occupancy
Override
Occupied Mode
Unoccupied Mode
Occupied Mode
Unoccupied Mode
HMI PORT
PASSKEY

OM 1039-1 • VAV ACTUATOR ROOM SENSOR 4 www.DaikinApplied.com
operatIon
Settings
Set Pt Disp – determines how the user views the temperature
setpoint adjustment. The default setting is NUMERIC,
displayed in degrees. The user selects between a NUMERIC
and a GRAPHIC setpoint display.
Set Pt Min – determines the minimum temperature setpoint
value. The default setting is 55°F or 12.5°C. The user selects
the minimum setpoint the room unit should request. The
setpoint limit is ultimately dened in the controller. If the
setpoint is displayed graphically as a sliding bar, this sets the
right end of the slider bar. The limits are 55°F to the Set Pt Max
value. The adjustment step size is 1°F or 0.5°C.
Set Pt Max – determines the maximum temperature setpoint
value. The default setting is 95°F or 35°C. The user selects the
maximum setpoint the sensor should request. The setpoint limit
is ultimately dened in the controller. If the setpoint is displayed
graphically as a sliding bar, this sets the right end of the slider
bar. The limits are SET PT Max to 95°F. The adjustment step is
1°F or 0.5°C.
Disp. Temp? – determines whether the temperature value
should be displayed. The default value is YES.
Disp. RH? – determines whether the humidity value should be
displayed. The default value is YES, if the device is a humidity
room unit. (This option is conditional based on the presence
of humidity measurement capability and only offered with
QFA3x80.F types.)
Disp. Occ? – determines whether the occupancy status should
be displayed. The default value is YES, if the device offers
occupancy override capability.
NOTE: This does not enable/disable the Occupancy override
button functionality, just the display of the occupancy
status.
T Cal – allows the user to eld calibrate the temperature
display and output through a bias adjustment. The default
value is +0°F. Adjustments may be made between -5°F and
+5°F, in 0.5°F increments.
RH Cal – allows the user to eld calibrate the humidity display
and output through a bias adjustment. The default value is
+0%. Adjustments may be made between -5% and +5%, in
0.5% increments
Brightness – allows the user to adjust the display brightness.
Allowable values are 1, 2, 3, 4, 5, 6, 7, 8, 9 and 10, with 1
being the dimmest and 10 being the brightest. The default
setting is 5.
Scr. Saver – allows the user to activate/deactivate the display
screen saver. Available options are: NONE, OFF and FADING.
The default value is NONE. If set to NONE, the dispaly
operates at the programmed brightness level without any
interruption.
OFF – The display will turn OFF after 30 seconds. Any button
press will wake it up (without doing anything else), and then
the device will operate in Normal Mode for 30 seconds until the
display turns OFF again.
FADING – Within 30 second of no operator interaction, the
entire display will fade to a display brightness of 1. The display
will operate at this brightness until the user presses a button. At
that time the programmed display brightness will be restored.
Factory Defaults – allows the user to reset all parameters to
factory defaults. Available options for this parameter are YES
or NO.

operatIon
www.DaikinApplied.com 5 OM 1039-1 • VAV ACTUATOR ROOM SENSOR
Laptop Pass-thru Mode
To communicate with the BACnet VAV Actuator using
Datamate Base, Datamate Advanced, or Microsoft Windows™
Controller Interface Software (WCIS), connect a PC-compatible
cable (see Table 1 on page 2) from a laptop to the
sensor HMI port at the bottom of the room unit. This puts the
room unit in laptop mode, which deactivates all buttons and
shows LAPTOP on the display. In this mode the controller
communicates with the laptop only. The room unit does not
update measured values to the controller while in this mode.
The room unit returns to the Normal Mode once the cable is
disconnected.
Table 2: Error Messages
Message Meaning
No TEC
No communication with BACnet VAV Actuator. This error will
be displayed on the lower right (icon) section of the display,
and the upper portion of the display should continue to
display temperature and humidity values.
NOTE: This error will appear whenever BACnet VAV Actuator
subpoints are not available or the actuator (or its subpoints)
are not responding to commands.
No Sensor
No temperature or humidity sensor detected on the PCA.
This error will be displayed until the error is corrected. This
message might also display if the wrong controller-to-room
unit-cable is used or if the replacement sensor element is
incorrectly installed on the PCA.
00x
Room unit rmware revision. This is visible upon power-up
for a few seconds until communication is established with the
BACnet VAV Actuator.
Set-up of Displayed Temperature Units
The factory default for displayed temperature units is °F. To
change the display to °C mode, snip the wire jumper on the
back of the PCB (the visible side when the unit is taken off the
wall).
Figure 6: Jumper Location
F C

OM 1039-1 (03/10) ©2010 Daikin Applied | (800) 432–1342 | www.DaikinApplied.com
Daikin Applied Training and Development
Now that you have made an investment in modern, efcient Daikin equipment, its care should be a high
priority. For training information on all Daikin HVAC products, please visit us at www.DaikinApplied.com
and click on Training, or call 540-248-9646 and ask for the Training Department.
Warranty
All Daikin equipment is sold pursuant to its standard terms and conditions of sale, including Limited
Product Warranty. Consult your local Daikin Applied representative for warranty details. To nd your
local Daikin Applied representative, go to www.DaikinApplied.com.
Aftermarket Services
To nd your local parts ofce, visit www.DaikinApplied.com or call 800-37PARTS (800-377-2787).
To nd your local service ofce, visit www.DaikinApplied.com or call 800-432-1342.
This document contains the most current product information as of this printing. For the most up-to-date
product information, please go to www.DaikinApplied.com.
Products manufactured in an ISO Certied Facility.
Table of contents
Other Daikin Accessories manuals

Daikin
Daikin DPS User manual

Daikin
Daikin KRCS01-8B User manual

Daikin
Daikin DFC Series User manual

Daikin
Daikin 910129095 Owner's manual

Daikin
Daikin FWTSKA Owner's manual

Daikin
Daikin DWSC - Vintage C User manual

Daikin
Daikin DP3G Series User manual

Daikin
Daikin FWHSK User manual

Daikin
Daikin homecontrols EKRSENDI1BA User guide

Daikin
Daikin DFG Series User manual