DataLocker Sentry K350 User manual

DataLocker Sentry K350 Encrypted USB Flash Drive - v1.51/6.6.0 - User Guide
User Guide Sentry K350
FIPS 140-2 level 3 Certified
Encrypted USB Flash Drive
© 2022 DataLocker Inc. All rights reserved.

DataLocker Sentry K350 Encrypted USB Flash Drive - v1.51/6.5.0 - User Guide
Table of Contents
At A Glance 5
Introduction 5
General operation of the encryption 5
Updating Your Device 5
About the K350 5
Getting Started 6
1. Press the power button for 3 seconds 6
2. Create and confirm your password, follow the screen instructions 6
3. Connect and start working 7
General Usage Best Practices - Password, Battery, IP67 7
K350 features and configurations 8
Connect Selection Menu 8
Connect Selection Menu Overview 8
Accessing the Configuration Menu 9
Login Role Selection 9
Configuration Menu Overview 9
Change Password 10
Set User 10
Step-by-step Process to Set User 10
Step by step process for USER configuration 10
Access User data as an Admin 11
Assist a user that forgot their password 11
SafeConsole 11
Self Destruct 11
Brute-Force Self-Destruct Sequence 12
Zeroize Drive 13
Strong Password 13
Password Length 13
Auto-Lock Time 14
Read-Only Mode 14
SilentKill Code 14
Generating a SilentKill Code 15
Registering Your K350 to SafeConsole 15
Using a SafeConsole Managed Device 16
Unlocking in SafeConsole Mode 16
Locking Your Managed K350 17
Manually Locking your K350 17
Setting your K350 to Automatically Lock 17
Standalone Logins 18
Requesting Standalone Logins 18
Using Standalone Logins 19
Password Reset 19
Unlocking In Read-Only Mode 20
Changing the Unlock Message 20
© 2022 DataLocker Inc. All rights reserved. support.datalocker.com 2

DataLocker Sentry K350 Encrypted USB Flash Drive - v1.51/6.5.0 - User Guide
Scanning your Device for Malware 20
Restoring or Deleting a Quarantined File 21
Using ZoneBuilder 21
Reformat Using DataLocker Control Panel 22
Sanitize 22
Device Information 23
Before Unlocking 23
After Unlocking 23
Formatting Your K350 24
Selecting the Correct File System 24
Formatting Your K350 on Windows 24
Formatting Your K350 on macOS 26
Linux Compatibility and Configuration 28
Product Specifications 29
Getting Help 29
Document Version 30
Notices 31
Disclaimer 31
Patents 31
FCC Information 31
© 2022 DataLocker Inc. All rights reserved. support.datalocker.com 3

DataLocker Sentry K350 Encrypted USB Flash Drive - v1.51/6.5.0 - User Guide
At A Glance
Introduction
Congratulations on your purchase of the DataLocker Sentry K350 hardware encrypted USB flash drive.
Although the K350 designed with user friendliness at its core, it is recommended that you review this
guide to ensure that you become fully acquainted with your K350 and make the most of all of its features.
General operation of the encryption
Your K350 utilizes a hardware encryption engine to encrypt and decrypt data that you store on the device.
When your device powered on, you will authenticate with the onboard system using your password to
enable the encryption and then plug into the host and use your data. When you lock, power off or
disconnect your device, the data is stored in an encrypted state.
Updating Your Device
Updated software and documentation are freely available for download at our website:
●Latest device updates - http://datalocker.com/device-updates
●Documentation and support - https://support.datalocker.com
About the K350
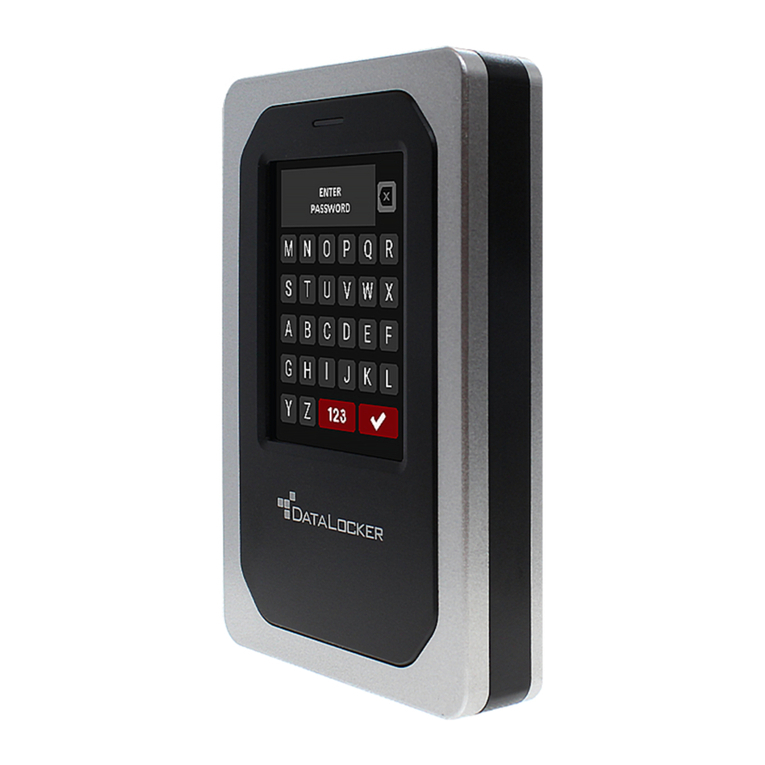
The K350 is a password protected, FIPS 140-2 Level 3 certified, encrypted USB drive featuring a screen
that streamlines setup and operation. If the K350 is centrally managed, additional layers of organizational
control strengthen the portable storage security posture further. Meet the strictest requirements and work
with ease anywhere there is USB mass storage. The K350 is the slim and strong addition to DataLocker’s
complete portfolio of securely managed solutions, plus it’s backed by a limited 3-year warranty.
© 2022 DataLocker Inc. All rights reserved. support.datalocker.com 4

DataLocker Sentry K350 Encrypted USB Flash Drive - v1.51/6.5.0 - User Guide
Getting Started
1. Press the power button for 3 seconds
2. Create and confirm your password, follow the screen instructions
Press quickly on the number button to navigate all characters available on the button. Pick a proper
password Note: Linear and repetitive passwords are not supported and passwords must contain a
MINIMUM of 8 characters. It is recommended that you use a combination of letters, numbers and special
characters for your password.
Some examples of invalid passwords are:
‘78901234’, ‘43210987’, ’12345678’, ‘1111111’
© 2022 DataLocker Inc. All rights reserved. support.datalocker.com 5

DataLocker Sentry K350 Encrypted USB Flash Drive - v1.51/6.5.0 - User Guide
3. Connect and start working
Select MENU to access all settings, such as enabling a user login. A white background with black text on
a selection denotes the current selection.
To start working with your data in a regular way confirm CONNECT selection and plug the drive into the
host USB port as shown on the screen.
The encryption is automatic. The K350 locks when it is unplugged from the host.
General Usage Best Practices - Password, Battery, IP67
Use a strong password, keep it to yourself and be sure to remember it. Remote password resets can be
enabled if the device is managed by SafeConsole. If the device is not managed, but there is both a Admin
and User role active, the Admin can assist the User to reset their password (while retaining the stored
data).
Only connect the K350 to USB ports. The K350 draws the correct amount of current (50mA) from the USB
port to charge the integrated Lithium-Ion battery even while in use. If the battery within the device is low,
charge it by plugging it into a USB port for 30 minutes before using the drive. If the device is left unused
for several months the battery will drain slowly. K350 can also be unlocked using solely the power from
the USB-port, should there be an unlikely, unexpected, battery issue.
The K350 is IP67-rated but must be completely dry before connecting to a computer.
© 2022 DataLocker Inc. All rights reserved. support.datalocker.com 6

DataLocker Sentry K350 Encrypted USB Flash Drive - v1.51/6.5.0 - User Guide
K350 features and configurations
Connect Selection Menu
After unlock the Connect Selection Menu is displayed.
Connect Selection Menu Overview
CONNECT - Connect to the host computer (selected in the above example)
READ-ONLY - Connect the device storage as read-only to the host.
BOOT MODE - Boot an installed operating system from the device storage.
MENU - Access the Configration Menu
When the device is managed by SafeConsole the following two options may appear.
SAFECONSOLE - See the section Unlocking in SafeConsole Mode
STANDALONE - If the SafeConsole administrator allows it, the user can utilize Standalone Logins
temporarily when unlocking on systems that do not allow the management system control.
© 2022 DataLocker Inc. All rights reserved. support.datalocker.com 7

DataLocker Sentry K350 Encrypted USB Flash Drive - v1.51/6.5.0 - User Guide
Accessing the Configuration Menu
In the Connect Selection you will select and confirm MENU to get to the Configuration Menu.
Login Role Selection
The contents of the Configuration Menu will depend on the role of the current login, the following roles
may be available:
ADMIN - The role allows full configuration control on the device, see Configuration Menu Overview.
USER - The User menu is available after creating a user in the administrator menu.
In the example below part of the Admin Configuration Menu options are displayed.
Configuration Menu Overview
Menu Option
Details
Available for Login
Change
Password
Change current login password.
USER/ADMIN
Set User
Configure a user profile for use on your
K350.
ADMIN
SafeConsole
Used to Enable SafeConsole
functionality for your K350.
ADMIN
Self Destruct
Used to configure self-destruct counters
and methods.
ADMIN
Zeroize Drive
Zeroize the device.
ADMIN
Strong Password
Enable various options for increasing
password strength
ADMIN
Password Length
Set the acceptable minimum password
length.
ADMIN
Auto-lock Time
Modify length of time before your device
auto-locks.
USER ADMIN
Read-Only Mode
Enable or disable forced read-only
mode.
ADMIN
Keypad
Preference
Set letters to appear first on password
entry.
ADMIN
© 2022 DataLocker Inc. All rights reserved. support.datalocker.com 8

DataLocker Sentry K350 Encrypted USB Flash Drive - v1.51/6.5.0 - User Guide
Change Password
Available for Login USER/ADMIN
This option allows the to change the current password.
1. From the configuration menu, select and confirm Change Password.
2. Enter the new Password and confirm with the Enter-button.
3. Re-enter the password, confirm with the Enter-button.
4. Upon successful completion, the device goes back to the configuration menu.
Set User
Available for ADMIN
This allows the administrator to either Enable or Disable a user role. When a user is created your K350 will
show a login selection screen upon the next power up. If User is selected upon login, your K350 will force
the user to create a user unlock password. The user will use this password to unlock the device. The K350
user has a limited feature set compared to the administrator, see Configuration Menu Overview.
NOTE: The User profile is not available if SafeConsole is enabled for your K350.
Step-by-step Process to Set User
1. From the configuration menu, select and confirm Set User.
2. Select Enable and confirm with the Enter-button. In the example disable is selected.
3. Confirm with the Enter-button. Upon successful completion, the device goes back to the
configuration menu.
Step by step process for USER configuration
1. Power on K350.
2. Confirm login User (the default selection when the Set User is enabled) with the Enter-button when
prompted to select login mode.
3. Press Enter-button to proceed from the “Please create your password” screen.
4. Enter the new Password and confirm with the Enter-button.
5. Re-enter the password to confirm with the Enter-button.
© 2022 DataLocker Inc. All rights reserved. support.datalocker.com 9

DataLocker Sentry K350 Encrypted USB Flash Drive - v1.51/6.5.0 - User Guide
6. Select and confirm Connect.
Access User data as an Admin
1. Power on.
2. Select Admin role, confirm selection with Enter, unlock with the admin password.
3. Connect. User data is accessible on the private partition.
Assist a user that forgot their password
The scalable method for remote password resets with an audit trail is available when managing K350
with SafeConsole. If the K350 is not centrally managed and a User role is activated, the following
procedure can be used.
1. User forgets password.
2. Power off/on. Select Admin role, unlock with admin password.
3. Enter Configuration Menu and select Set User, select and confirm Disable. Power off/on.
4. Select Admin role, unlock again with Admin password.
5. Enter Configuration Menu and select Set User, select and confirm Enable. Power off/on.
6. Select User role, enter and confirm the new User password. Connect to confirm and access your
data.
SafeConsole
Available for ADMIN
This option enables SafeConsole management for your K350. SafeConsole is a central management
console used to optionally manage K350 devices. Managed K350s require a Connection Token upon
initialization. The SafeConsole Connection Token is obtained by the System administrator through the
Quick Connect Guide, located inside of the SafeConsole user interface. SafeConsole requires a device
license for activation. License sold separately.
Users without access to a Management Server, please contact sales: sales@datalocker.com SafeConsole
offers several key features including audit logging, anti-malware services (license sold separately), remote
password reset, and more!
Enabling SafeConsole
1. From the configration menu, Select SafeConsole, confirm with Enter.
2. Select Enable, confirm with Enter. The device goes back to the configuration menu.
3. Power off/on.
4. See Registering your K350 to SafeConsole to complete registration.
Self Destruct
Available for ADMIN
The self destruct action helps prevent brute force attacks by triggering when an individual inputs an
incorrect password too many times.
This feature allows the administrator to set a threshold of incorrect password attempts for the K350
before the Self Destruct occurs. The administrator can also configure the self destruct to destroy the data,
encryption keys, and settings OR destroy the device (and data) when the defined number of allowed
© 2022 DataLocker Inc. All rights reserved. support.datalocker.com 10

DataLocker Sentry K350 Encrypted USB Flash Drive - v1.51/6.5.0 - User Guide
password attempts is reached. The default number of allowed password attempts is 10 and can be
increased up to 50 but not lower than 10. When enabling the feature, there are two types of self destruct
options to select. Please refer to the below table for more details.
NOTE: Incorrect password attempts from both users and administrators are calculated cumulatively
towards the incorrect password attempts self destruct counter. The counter will reset upon correct
password attempt.
A. Destroy Device - Your device is killed completely and all device data, encryption keys, passwords are
destroyed and cannot be recovered. The device CANNOT be initialized again, the destruction is
permanent.
B. Destroy Data (default selection) - Your device is wiped completely and all device data, encryption keys,
passwords are destroyed and cannot be recovered. The device needs to go through the initialization
process again.
Deleted asset
B.Destroy Data (default)
A.Destroy Device
Administrator Password
Deleted
Deleted and K350 cannot be used anymore
User Password
Deleted and Disabled
Deleted and K350 cannot be used anymore
SilentKill Code
Deleted
Deleted and K350 cannot be used anymore
Configuration by
administrator (menus)
Self Destruction Instruction
Kept
Deleted and K350 cannot be used anymore
1. In the Configuration menu select Self Destruct, confirm with Enter.
2. Select CHANGE or CANCEL to change the maximum allowed incorrect password entries, the default
is 10.
3. Confirm with Enter.
4. Enter the number of attempts you want, between 10-50. Confirm with Enter.
5. Select the destruction target, DATA or DEVICE, confirm with Enter.
6. The device goes back to the Configuration Menu after confirmation.
Brute-Force Self-Destruct Sequence
The message “Incorrect Password”, along with the current incorrect password count, will scroll across the
screen each time an incorrect password attempt is made. Press Enter to display device information or
press any other button to return to the password entry screen.
After each 5 consecutive incorrect password attempts, the device will power off. Pressing the Power
button will allow the user to continue entering passwords.
Provided a limit of attempts that is set to 10, after 7 and 8 consecutive incorrect password attempts, the
message “Brute Force detected! All data will be deleted.” will scroll across the screen. After the 9th
attempt, the message “Self Destruct will begin with next failed login” will scroll across the screen.
Once the 10th consecutive incorrect password attempt has been made, the device will display “Hack
detected. All data has been deleted.” The device will then power off by pressing any button. At this stage
either the data and/or device has been destructed. If the data is the target you must now follow the
getting started process as shown in the Getting Started and the formatting your K350 section of this
manual.
© 2022 DataLocker Inc. All rights reserved. support.datalocker.com 11

DataLocker Sentry K350 Encrypted USB Flash Drive - v1.51/6.5.0 - User Guide
Zeroize Drive
Available for ADMIN
This feature allows the administrator to zeroize the drive. Performing this action deletes all the data,
removes the user and administrator passwords. The Data Encryption Key (DEK) will also be wiped and
regenerated.
Zeroize will remove the configuration set by the administrator.
How to Zeroize your K350
1. In the Configuration menu select Zeroize Drive, confirm with Enter. When your device asks for
“Zeroize Drive” select Yes, confirm with Enter. Selecting No will cancel the Zeroize process.
2. select Yes, confirm with Enter. Selecting No will cancel the Zeroize process.
3. When your K350 shows the “Confirm Delete all drive data?” prompt, select Yes, confirm with Enter.
Selecting Cancel will cancel the Zeroize process.
4. Upon successfully completing the Zeroize process, you will see “Please initialize and reformat the
drive”, confirm with Enter to continue.
You must now follow the getting started process as shown in the Getting Started and the formatting your
K350 section of this manual.
Strong Password
Available for ADMIN
This feature allows the device administrator to enable the password requirement to be stronger than the
default for both ADMIN and USER. When enabled the passwords must have at least one letter, one
number and one special character.
1. In the Configuration Menu select/confirm Strong Password.
2. Select Enable or Disable, confirm with Enter. The device goes back to the Configuration Menu after
the confirmation.
Password Length
Available for ADMIN
The device administrator can use this feature to set the minimum required password length. It can be set
between the minimum of 8 to a maximum of 64. Tapping Default will reset the counter to “8”.
1. In the Configuration Menu select/confirm Password Length.
2. Select Change or Cancel, confirm with Enter.
3. Enter the new minimum password length number, between 8 and 64. Confirm with Enter, the device
goes back to the Configuration menu after the confirmation.
© 2022 DataLocker Inc. All rights reserved. support.datalocker.com 12

DataLocker Sentry K350 Encrypted USB Flash Drive - v1.51/6.5.0 - User Guide
Auto-Lock Time
Available for ADMIN/USER
This feature is disabled by default but can be enabled by the administrator and the user. Auto-lock will
disconnect the drive once it is idle (i.e.zero activity) for the configured amount of time. The amount of
idle time required to time out the device is configurable from 10 to 720 minutes.
To enable auto-lock, follow these steps:
1. Select Auto-Lock Time from the configuration menu, confirm with Enter-button.
2. Confirm Enable-selection with Enter-button
3. Enter the desired number of minutes the device can remain unlocked and idle, confirm with
Enter-button. The device goes back to the Configuration menu after the confirmation.
Read-Only Mode
Available for ADMIN
Administrators can select the Read-Only Mode to globally enforce the K350 to always unlock in read-only
mode. Enabling this option will also enforce read-only access for the User profile (if the user profile is
enabled). Once the Read-Only Mode is enabled, data can only be read from the K350 and no data can be
written or modified.
To enable Read-Only Mode, follow these steps:
1. Select Read-Only Mode feature from the configuration menu, confirm with Enter.
2. Confirm Enable-selection with Enter-button. The device goes back to the Configuration menu after
the confirmation.
The administrator and the user can each set Read-Only Mode for a single login by selecting/confirming
Read-Only Mode in the Connect Selection Menu after entering their password. The Read-Only Mode in the
Configuration Menu will enforce this functionality for every login.
SilentKill Code
Available for ADMIN
A SilentKill code can be set up by the K350 administrator. This code can be entered during the login
process instead of the password. When this code is entered, the device will follow the configured Self
Destruct process. A brief description of each Self Destruct process can be found below. Please review
the Self Destruct portion of this guide for more information.
If Destroy Data is configured, the encryption keys, password(s), and any data on the device is deleted. The
SilentKill code then becomes the K350 administrator password.
The device must be reformatted after this process is completed.
If Destroy Device is configured, your K350 will be rendered inoperable after the SilentKill code is used
during login.
© 2022 DataLocker Inc. All rights reserved. support.datalocker.com 13

DataLocker Sentry K350 Encrypted USB Flash Drive - v1.51/6.5.0 - User Guide
Generating a SilentKill Code
1. Enter the administrator password and navigate to the Configuration menu. See Accessing the
Configuration Menu
2. Select the Change Password option and press the Enter-Button for 5 seconds and then release.
NOTE: Upon release, the device will display a message.
“SILENT KILL CODE THIS CODE IS USED TO IMMEDIATELY INITIATE THE SELF DESTRUCT PROCESS”.
3. Press the Enter-Button.
4. Set a Silent Kill Code by entering a desired password.
5. Confirm the code by re-entering the password.
6. The device returns to the configuration menu upon completion.
Registering Your K350 to SafeConsole
Before registering your drive to SafeConsole, make sure SafeConsole is enabled on your K350. For more
information, see Enabling SafeConsole. The registration process will begin by allowing the device to
communicate with the SafeConsole server. The steps needed to register a K350 to SafeConsole will
depend on the policies that your SafeConsole administrator is enforcing. Not all options will be shown.
A SafeConsole Connection Token will be needed. The SafeConsole Connection Token is obtained by the
SafeConsole administrator through the Quick Connect Guide and is usually sent via email.
Users without access to a Management Server, please contact sales:
sales@datalocker.com / +1(913)310-9088
1. Power on and unlock. Select Connect. Your K350 will show a “Waiting…” prompt.
2. On your computer, double-click the “Unlocker” CD drive under “Devices and Drives”. This partition
only exists if you have allowed SafeConsole to be enabled.
3. Upon launch, the “Device Setup” page should appear.
© 2022 DataLocker Inc. All rights reserved. support.datalocker.com 14

DataLocker Sentry K350 Encrypted USB Flash Drive - v1.51/6.5.0 - User Guide
4. Enter the SafeConsole Connection Token provided by your SafeConsole administrator and confirm
the EULA. Click Activate.
5. Your device will connect to the SafeConsole server.
6. Optionally Enabled Policies - These policies may or may not be enabled by your SafeConsole
administrator. They will appear during device registration if they have been enabled.
●Confirm Ownership of the device: Enter the Windows username and password that is associated
with the login credentials of the computer the device is plugged into.
●Custom Device Information: Required information about you or your device. The required fields
will vary.
●Unique User Token: This token is directly associated with the end user’s account and will be
provided by the SafeConsole administrator usually via email.
●Administrator Registration Approval: The SafeConsole administrator may require their approval to
proceed with device registration.
7. Select your desired file system from the “Format” prompt. Click Continue. See Selecting the Correct
File System.
8. After formatting, your device will show the “Control Panel”. See Using a SafeConsole Managed
Device for more information.
The “Unlocker” client will generate a Password Recovery Code after your next device unlock. It is
recommended that your device be disconnected and reconnected to ensure your Password Recovery
Code is saved to the SafeConsole.
Using a SafeConsole Managed Device
Unlocking in SafeConsole Mode
Once the K350 is registered to SafeConsole, the Secure Volume can be accessed by following the steps
below:
1. Log into your K350. Your K350 will show a “Waiting…” prompt.
2. Select the option Unlocker.exe inside of the Unlocker partition that can be found in File Explorer.
© 2022 DataLocker Inc. All rights reserved. support.datalocker.com 15

DataLocker Sentry K350 Encrypted USB Flash Drive - v1.51/6.5.0 - User Guide
3. Click the Unlock button shown on the DataLocker Control Panel.
4. The Secure Volume will be mounted to a separate drive letter on your workstation. The Secure
Volume can also be accessed by clicking the Folder Icon in the DataLocker Control Panel.
Locking Your Managed K350
Lock your device when you are not using it to prevent unwanted access to your secure files on the drive.
You can manually lock the device or you can set the device to automatically lock after a specified period
of inactivity.
If a file or application is open when the device tries to auto-lock, it will not force the application or file to
close.
Manually Locking your K350
1. Click Lock in the bottom left-hand corner of the DataLocker Control Panel to safely lock your device.
You can also use the keyboard shortcut: CTRL + L (Windows only), or right click the DataLocker Icon
in the system tray and click Lock Device.
2. Unplug K350.
Managed devices will automatically lock during use if an administrator remotely disables the device. You
will not be able to unlock the device until the SafeConsole administrator re-enables the device.
Setting your K350 to Automatically Lock
You can configure the device to automatically lock using the K350 onboard menu (See Auto-Lock Time)
or by using the Control Panel. If enforced by your SafeConsole administrator, you may be unable to modify
this feature. Follow the below steps to configure this automatic lock using the Control Panel.
Changing this setting in the Control Panel will be reflected on the K350 onboard menu and vice versa.
1. Unlock your device and click Settings on the menu bar in the DataLocker Control Panel.
2. Click Preferences in the left sidebar.
3. Click the Checkbox for auto-locking the device and set the time-out to one of the following time
intervals: 5, 15, 30, 60, 120, or 180 minutes.
© 2022 DataLocker Inc. All rights reserved. support.datalocker.com 16

DataLocker Sentry K350 Encrypted USB Flash Drive - v1.51/6.5.0 - User Guide
Standalone Logins
Requesting Standalone Logins
Standalone mode allows the Secure Volume of the K350 to be accessed by any computer that has
support for removable storage without running the Windows Unlocker application. Standalone mode is
controlled by a policy that is set by your SafeConsole administrator. If this mode is not available, please
contact them to enable this feature. SafeConsole administrators will define the maximum allowed times
your K350 can be unlocked in Standalone mode before the device needs to be returned to a Windows
computer to check-in.
To request Standalone logins, perform the following steps on a workstation that has a valid connection to
the SafeConsole server:
1. Unlock K350 and select Connect, confirm with Enter-button. Your K350 will show a “Waiting…”
prompt.
2. Select the option Unlocker.exe inside of the Unlocker partition that can be found in File Explorer.
3. Click the Unlock button shown on the DataLocker Control Panel.
4. On the K350 Control Panel, click the -icon to open up settings.
5. Select the Standalone tab.
6. Select the reason for the request or enter a custom reason. This information will be sent to the
SafeConsole administrator.
7. Click the Request button. You will receive the maximum number allowed.
The Request automatically checkbox can optionally be enabled by your SafeConsole administrator. When
checked, the Control Panel will automatically request the maximum allowed Standalone logins after
unlocking on a Windows workstation with a valid connection to SafeConsole.
© 2022 DataLocker Inc. All rights reserved. support.datalocker.com 17

DataLocker Sentry K350 Encrypted USB Flash Drive - v1.51/6.5.0 - User Guide
Using Standalone Logins
On the next unlock of your K350, you can select Standalone after you input your password to unlock in
Standalone mode. When in Standalone mode, the Unlocker partition will not be mounted to the host
computer and the DataLocker Control Panel will not need to be executed.
1. Power on.
2. Select Standalone at the “Login Mode” prompt, confirm with Enter-button.
3. Confirm with Enter-button when you are prompted with the number of remaining Standalone logins.
4. Select Connect, confirm with Enter-button to utilize the secure partition.
This will decrease the Currently Available count of Standalone logins by one.
To continue to use your K350 in the normal SafeConsole mode, select SafeConsole in step 2.
The Currently Available number of Standalone logins will be reset to zero if a SafeConsole administrator
remotely disables or factory resets your K350. Currently available will also be set back to zero after a
password reset or when the device is blocked by GeoFence.
Password Reset
If your K350 cannot be unlocked due to a forgotten password, a recovery password can be sent by your
SafeConsole administrator.
1. Power on K350 and input the recovery password.
2. Once the password is entered, the K350 will prompt to change the password.
© 2022 DataLocker Inc. All rights reserved. support.datalocker.com 18

DataLocker Sentry K350 Encrypted USB Flash Drive - v1.51/6.5.0 - User Guide
3. The password should be changed to something secure. For more information see Getting Started
Each password recovery code can only be used once. Your K350 must be unlocked in SafeConsole Mode
with a valid connection to SafeConsole before a new password recovery code can be generated. Failure to
do so could cause loss of access to the device and the data on it if the password is forgotten again.
Unlocking In Read-Only Mode
You can unlock your device in a read-only state so that files cannot be altered on your secure drive. For
example, when using an untrusted or unknown computer, unlocking your device in Read-Only Mode will
prevent any malware on that computer from infecting your device or modifying your files. Managed
devices can be forced to unlock in a read-only state by an administrator.
When working in this mode, the DataLocker Control Panel will display the text Read-Only Mode. In this
mode, you cannot perform any operations that involve modifying files on the device. For example, you
cannot reformat the device, restore applications or edit the Applications List, or edit files on the drive.
To unlock your device in Read-Only Mode through the Control Panel:
1. Unlock K350 and select Connect, confirm with Enter-button. Run the Unlocker.exe.
2. Check the Read-Only Checkbox below the Unlock button.
3. Click Unlock. The DataLocker Control Panel will appear with the text Read-Only Mode at the bottom.
To unlock the device in Read-Only Mode from the device:
1. Unlock K350.
2. In the connection selection menu select/confirm READ-ONLY MODE.
Unlocking in “Read-Only Mode” from the connection menu also works in Standalone mode.
Changing the Unlock Message
The Unlock Message is custom text that displays in the Control Panel when you unlock the device. This
feature allows you to customize the message that displays. For example, adding classification labels can
help identify which documents can be saved to the device due to company policy. Your SafeConsole
administrator can set a pre-defined message or prevent the K350 user from changing this message.
To change the Unlock Message:
1. In the DataLocker Control Panel, click Settings on the menu bar.
2. Click Preferences in the left sidebar.
3. Type the message text in the Unlock Message field. The text must fit in the space provided
(approximately 7 lines and 200 characters).
Scanning your Device for Malware
If enabled by your SafeConsole administrator, the Malware Scanner is a self-cleaning technology that
detects and quarantines malware on your device. Powered by the McAfee® anti-virus and anti-malware
signature database, and constantly updated to combat the latest malware threats, the scanner first
checks for the latest updates, scans your device, then reports and cleans any malware that is found.
© 2022 DataLocker Inc. All rights reserved. support.datalocker.com 19

DataLocker Sentry K350 Encrypted USB Flash Drive - v1.51/6.5.0 - User Guide
Your system administrator may require the anti-malware definition to be updated before the device can be
unlocked. In this event, the full anti-malware definition will need to be downloaded to a temporary folder
on the local computer before the password can be entered. This can increase the time it takes to unlock
the device based on the host computer’s networking connection and the size of malware updates needed.
Some things to know about scanning your device:
•The scanner runs automatically when you unlock your device.
•It scans all onboard files (compressed and uncompressed).
•It will report and delete any detected malware.
• (Optional) If your SafeConsole has enabled quarantine, it may quarantine any malware it finds. See
Restoring or Deleting a Quarantined File for more information.
•The scanner will automatically update itself before each scan to protect you from the latest malware
threats.
•An update requires an internet connection. Ensure a minimum of 135 MB of free space on the device
to accommodate the downloaded malware signature files.
•Your first update may take a long time to download, depending on your internet connection.
•The date of the last update is displayed in the Control Panel.
•If the scanner becomes too far out of date, it will need to download a large file to bring it back
up-to-date.
Restoring or Deleting a Quarantined File
If your SafeConsole administrator has enabled quarantine, you will have the option of restoring or deleting
detected malware. This process helps when McAfee® detects a valid document as malware.
NOTE: Depending on the size of infected files, quarantine may not be available. If the file cannot be
quarantined it will be deleted and will not be able to be restored using the following process.
If a file is detected as infected a warning dialog will be shown with the option to lock the drive at that
time. Quarantined files remain on the device in an encrypted state to prevent further execution.
To view quarantined files:
1. Unlock your device and click Settings in the DataLocker Control Panel.
2. Click Quarantine on the left sidebar.
Selecting a file from the list will display additional details including, Threat Name, Threat Type,
anti-malware definition version, and the date of quarantine. After the file is selected files can either be
Restored or Deleted.
Restored files will be exempt from automatic scanning while the device is currently unlocked. The file will
be scanned during the next unlock or if a manual scan is selected from the Anti-Malware tab. If the
anti-malware definitions still determine that the file is infected it will quarantine the file once again.
Deleted files will be permanently deleted.
Using ZoneBuilder
If enabled by your SafeConsole administrator, ZoneBuilder is a SafeConsole feature used to create a
Trusted Zone of computers. It can be used to restrict device access to computers within the Trusted
Zone.
© 2022 DataLocker Inc. All rights reserved. support.datalocker.com 20
Other manuals for Sentry K350
1
Other DataLocker Storage manuals
DataLocker
DataLocker H300 User manual
DataLocker
DataLocker DL3 User manual

DataLocker
DataLocker DL3 User manual
DataLocker
DataLocker H100 User manual
DataLocker
DataLocker IronKey EMS H350 Enterprise User manual
DataLocker
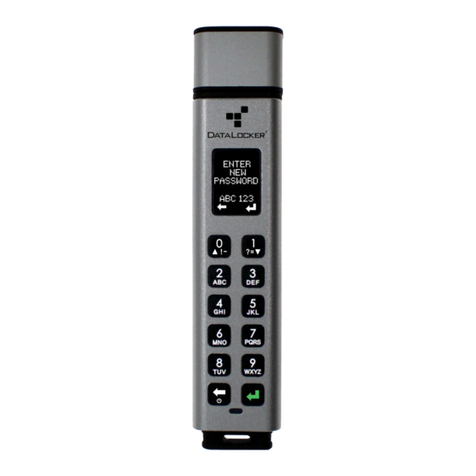
DataLocker Sentry K350 User manual
DataLocker
DataLocker Sentry K300 Quick reference guide
DataLocker
DataLocker Sentry ONE Standard User manual
DataLocker
DataLocker Sentry K300 User manual

DataLocker
DataLocker DL3 User manual


