DEC Digital PC 3500 User guide

DIGITAL PC 3500/5510
System Reference
Part Number: ER-G2BWW-UA. B01
Digital Equipment Corporation

February 1998
The information in this document is subject to change without notice and should not
be construed as a commitment by Digital Equipment Corporation.
Digital Equipment Corporation assumes no responsibility for any errors that might
appear in this document.
The software described in this document is furnished under a license and may be
used or copied only in accordance with the terms of such license. No responsibility is
assumed for the use or reliability of software or equipment that is not supplied by
Digital Equipment Corporation or its affiliated companies.
Restricted Rights: Use, duplication, or disclosure by the U.S. Government is subject
to restrictions as set forth in subparagraph (c) (1) (ii) of the Rights in Technical Data
and Computer Software clause at DFARS 252.227-7013.
DIGITAL PC 3500/5510 System Reference
CopyrightDigital Equipment Corporation.
All Rights Reserved.
AMD and Magic Packet are trademarks of Advanced Micro Devices, Inc.
DEC, DIGITAL PC, and the DIGITAL logo are registered trademarks of Digital
Equipment Corporation.
Intel, Pentium Pro and Pentium II are registered trademarks of Intel Corporation.
Microsoft, Windows 95, and Windows NT are registered trademarks of Microsoft
Corporation.
Novell and NetWare are U.S. registered trademarks of Novell Inc.
OS/2 and PS/2 are registered trademarks of International Business Machines
Corporation.
SCO UNIX is a trademark of The Santa Cruz Operation, Inc.
All other trademarks and registered trademarks are the property of their respective
holders.

FCC Notice
This equipment has been tested and found to comply with the limits for a Class B
digital device, pursuant to Part 15 of the FCC rules. These limits are designed to
provide reasonable protection against harmful interference in a residential installation.
Any changes or modifications made to this equipment may void the user's authority
to operate this equipment.
This equipment generates, uses, and can radiate radio frequency energy and, if not
installed and used in accordance with the instructions, may cause harmful
interference to radio communications. However, there is no guarantee that
interference will not occur in a particular installation. If this equipment does cause
harmful interference to radio or television reception, which can be determined by
turning the equipment off and on, the user is encouraged to try to correct the
interference by one or more of the following measures:
• Reorient or relocate the receiving antenna
• Increase the separation between the equipment and receiver
• Connect the equipment into an outlet on a circuit different from that to which
the receiver is connected
• Consult the dealer or an experienced radio/TV technician for help
The user may find the following booklet prepared by the Federal Communications
Commission helpful: How to Identify and Resolve Radio-TV Interference Problems.
This booklet is available from the U.S. Government Printing Office, Washington,
D.C., 20402. Stock No. 004-00398-5.
All external cables connecting to this basic unit need to be shielded. For cables
connecting to option boards, see the option manual or installation instructions.
Canadian DOC Notice
This digital apparatus does not exceed the Class B limits for radio noise emissions
set out in the radio interference regulations of the Canadian Department of
Communications.

VCCI Notice
This equipment is in the 2nd Class category (information equipment to be used in a
residential area or an adjacent area thereto) and conforms to the standards set by
the Voluntary Control Council For Interference by Data Processing Equipment and
Electronic Office Machines aimed at preventing radio interference in such residential
area.
When used near a radio or TV receiver, it may become the cause of radio
interference.
Read the instructions for correct handling.
German Ergonomic Notice
This equipment meets or exceeds the ergonomic requirements of ZH1/618 and is
certified to bear the GS mark by TUV Rheinland of Germany.
Safety Requirements
This equipment meets or exceeds requirements for safety in the U.S. (UL 1950),
Canada (CSA C22.2 No. 950), and Europe (EN 60950/IEC 950) with Nordic
requirements.
WARNING: There is a danger of battery explosion if a lithium
battery is incorrectly replaced. To prevent damage to your
computer, be sure the + side faces up when installing a new
battery. Also, be sure you replace the battery with either a
DIGITAL (P/N 12-41474-05), Toshiba (P/N CR2032), or
equivalent 3 V dc lithium battery.
Depending on your locality, your computer’s battery might be
considered hazardous waste. Make sure you follow any state or
local statute to properly dispose of the old battery.

ADVARSEL: Der er fare for, at et lithiumbatteri eksploderer,
hvis det udskiftes ukorrekt. Undgå, at beskadige din computer -
HUSK, at + siden skal vende opad, når du installerer et nyt
batteri. Du skal udskifte batteriet med enten et DIGITAL
(delnummer 12-41474-05), Toshiba (delnummer CR2032), eller
tilsvarende 3 V jævnstrøms lithiumbatteri.
Afhængig af dit lokalområde, er det muligt, at din computers
batteri betragtes som farligt affald. Husk, at følge evt. miljølove og
lokale bestemmelser, når du kasserer det gamle batteri.
VAROITUS: Litiumpatterit voivat räjähtää, jos ne asennetaan
väärin. Estääksesi tietokoneesi vaurioitumisen varmista, että
patteria asentaessasi sen positiivinen (+) puoli on ylöspäin.
Tarkista myös, että käyttämäsi uusi patteri on joko DIGITAL (osa
no. 12-41474-05), Toshiba (osa no. CR2032) tai vastaavanlainen
3 voltin tasavirtalitiumpatteri.
Asuinpaikastasi riippuen tietokoneesi patteria voidaan pitää
ongelmajätteenä. Pidä huoli, että hävität vanhan patterin
voimassa olevien lakien ja asetusten mukaisesti.
VARNING! Det kan förekomma en batteriexplosion om ett litium-
jonbatteri byts ut på felaktigt sätt. Förhindra att datorn skadas
genom att se till att plussidan (+) är uppåtvänd när du sätter i ett
nytt batteri. Det gamla batteriet får endast bytas ut mot ett
DIGITAL-batteri (artikelnummer 12-41454-05), ett Toshiba-batteri
(artikelnummer CR2032) eller ett motsvarande litiumbatteri på 3
volt likström.
Datorbatterier anses vara miljöfarligt avfall i många länder. Du
måste följa alla lokala bestämmelser när du avyttrar ett gammalt
batteri.

Laser Safety Notices
All CD-ROM drives included in DIGITAL computers are classified as Class 1 laser
products and comply with safety standards as set by U.S. government and applicable
European agencies.
No hazardous radiation is emitted from this CD-ROM drive; the laser beam is
completely enclosed in the CD-ROM subassembly during all customer operation and
maintenance. In the event that repair or service of the CD-ROM subassembly is
required, only authorized DIGITAL service personnel should perform such repairs.
Energy Star Compliant
Your DIGITAL PC 3500/5510 computer (low profile model only) is ENERGY STAR
compliant when used with Windows 95. DIGITAL advises that you do not use the
enable Power Management features with operating systems that do not allow for
power management, such as SCO UNIX, Windows NT, or OS/2.
To ensure that your entire computer system remains ENERGY STAR compliant, you
must use an ENERGY STAR compliant monitor, that is, a monitor that supports the
DPMS protocol.

i
Contents
Preface
Introduction..................................................................................................... ix
Related Material.............................................................................................. ix
Latest Product Information and Updates.......................................................... x
DIGITAL PC 3500/5510 Computers................................................................. x
Features................................................................................................... xi
Chassis Versions...................................................................................... xi
Audience......................................................................................................... xiv
Organization.................................................................................................... xiv
Conventions.................................................................................................... xv
Special Notices................................................................................................ xvi
1
Beyond Quick Setup
Introduction..................................................................................................... 1-1
Front Panel Controls and Indicators................................................................. 1-2
Rear Panel Connectors and Voltage Select Switch .......................................... 1-4
Typical CD-ROM Front Panel (not available on all models) .............................. 1-6
Removing your Computer’s Outside Cover ...................................................... 1-8
SecureBOX (DIGITAL PC 5510 Only)....................................................... 1-10
Replacing your Computer’s Outside Cover....................................................... 1-12
Chassis Lockdown........................................................................................... 1-14
Attaching the Hasp (Low Profile Computers)............................................. 1-15
Attaching the Hasp (Short Tower Computers)........................................... 1-16
Connecting Speakers (DIGITAL PC 5510 Only)............................................... 1-17
Connecting Headphones (DIGITAL PC 5510 Only).......................................... 1-19
Connecting a Microphone (DIGITAL PC 5510 Only)......................................... 1-20
Connecting a Local Printer............................................................................... 1-22

Contents
ii
Connecting a Universal Serial Bus (USB) Device............................................. 1-24
Your Computer’s Windows Enhanced Keyboard.............................................. 1-26
Creating a Comfortable Working Environment ................................................. 1-27
2
Using the BIOS Setup Utility
What is the BIOS Setup Utility?....................................................................... 2-1
Accessing the BIOS Setup Utility.............................................................. 2-2
Helpful Hints............................................................................................. 2-3
Changing Your Computer’s Configuration........................................................ 2-5
Changing Time and Date................................................................................. 2-5
Setting Up Security.......................................................................................... 2-5
Setting Supervisor and User Passwords ................................................... 2-6
Enabling Password On Boot..................................................................... 2-7
Eliminating User and Supervisor Passwords ............................................. 2-8
Protecting Against Boot Sector Viruses..................................................... 2-8
SecureBIOS ...................................................................................... 2-9
Other Security Options............................................................................. 2-10
Remote Network Wake-up (DIGITAL PC 5510 Only) ....................................... 2-11
Setting Power Management Options................................................................ 2-12
Setting up Power Management................................................................. 2-12
Configuring for New Disk Drives ...................................................................... 2-14
Diskette Drive Configuration ..................................................................... 2-14
Hard Disk Drive Configuration................................................................... 2-15
Autotyping a Hard Disk ...................................................................... 2-15
Manually Defining a Hard Disk ........................................................... 2-16
Changing the Boot Priority............................................................................... 2-17
Changing the Hard Drive Sequence................................................................. 2-18
Speeding up the Boot Process......................................................................... 2-19
Resetting Keyboard Features.......................................................................... 2-20
Changing the Keyboard Features.............................................................. 2-21
Flash Utility ..................................................................................................... 2-22

Contents
iii
3
Inside Your Computer
Introduction..................................................................................................... 3-1
Improving Computer Performance................................................................... 3-2
Preparing Your Computer for Expansion.......................................................... 3-2
Your Computer’s Components and Connectors ............................................... 3-2
Computer Components ................................................................................... 3-2
Main Logic Board Components........................................................................ 3-4
Rear Panel Connectors ................................................................................... 3-6
Main Logic Board Connectors.......................................................................... 3-8
Low Profile Backplane Components and Connectors ....................................... 3-9
Short Tower Backplane Components and Connectors ..................................... 3-11
Audio Card Connectors (DIGITAL PC 5510 Only)............................................ 3-13
Network Adapter Card Connector.................................................................... 3-15
Installing the Card..................................................................................... 3-15
Removing the Main Logic Board...................................................................... 3-17
Replacing the Main Logic Board ...................................................................... 3-18
Replacing the Lithium Battery.......................................................................... 3-20
Installing a Higher Performance Processor ...................................................... 3-22
Installing a Voltage Regulator Module (VRM)................................................... 3-25
4
Main Logic Board Expansion
Introduction..................................................................................................... 4-1
Installing Additional Computer Memory............................................................ 4-1
Memory Configurations............................................................................. 4-4
Installing a DIMM...................................................................................... 4-5
Installing Video Memory .................................................................................. 4-7
5
Adding Expansion Boards
Introduction..................................................................................................... 5-1
Expansion Slots (Low Profile Computers)........................................................ 5-2
Expansion Slots (Short Tower Computers) ...................................................... 5-4
Installing Expansion Boards............................................................................. 5-6

Contents
iv
Installing an AGP Graphics Accelerator Card................................................... 5-10
Removing Expansion Boards........................................................................... 5-14
6
Adding Mass Storage Devices
Introduction..................................................................................................... 6-1
Installing Mass Storage Devices (Low Profile Computers)................................ 6-4
Installing a 3½-Inch Device (Low Profile Computers)................................. 6-6
Installing a 5¼-Inch Device (Low Profile Computers)................................. 6-9
Connecting Diskette and IDE Devices (Low Profile Computers) ....................... 6-11
Installing Mass Storage Devices (Short Tower Computers).............................. 6-15
Removing the Front Bezel (Short Tower Computers) ................................ 6-17
Installing a 3½-Inch Device (Short Tower Computers)............................... 6-19
Installing a 5¼-Inch Device (Short Tower Computers)............................... 6-21
Installing an Internal 3½-Inch Device (Short Tower Computers) ................ 6-23
Connecting Diskette and IDE Devices (Short Tower Computers)...................... 6-26
Adding SCSI Devices ...................................................................................... 6-29
A
Technical Specifications
Introduction..................................................................................................... A-1
Computer Specifications.................................................................................. A-1
Features................................................................................................... A-2
Performance Specifications ...................................................................... A-2
Computer Dimensions (Low Profile).......................................................... A-3
Computer Dimensions (Short Tower)........................................................ A-3
Shipping/Packaging Dimensions............................................................... A-3
Environmental Specifications.................................................................... A-4
Environmental Monitoring ......................................................................... A-4
Operating Temperature...................................................................... A-4
Processor Voltage ............................................................................. A-4
Product Materials and Recycling...................................................................... A-5
Computer Recycling........................................................................................ A-6
ISA Expansion Slots........................................................................................ A-6
PCI Local Bus Expansion Slots........................................................................ A-6
Low Profile System Input Power Requirements................................................ A-7

Contents
v
Short Tower System Input Power Requirements.............................................. A-7
Power Supply Requirements............................................................................ A-7
Current Requirements..................................................................................... A-8
Low Profile (145 W).................................................................................. A-8
Short Tower (200 W)................................................................................ A-8
Power Cord Requirements............................................................................... A-9
Main Logic Board Switch Settings.................................................................... A-10
Processor Clock Speed Switch Settings........................................................... A-11
If You Forget Your Password........................................................................... A-13
B
Device Mapping
Introduction..................................................................................................... B-1
Full Range Processor Memory Address Map................................................... B-2
I/O Address Map............................................................................................. B-3
Computer Interrupt Levels............................................................................... B-5
DMA Channel Assignment............................................................................... B-6
C
Video Output Information
Introduction..................................................................................................... C-1
Video Resolution Modes.................................................................................. C-2
G
Glossary.......................................................................................................... GL-1
Figures
Typical
Low Profile
Computer................................................................ xii
Typical
Short Tower
Computer .............................................................. xiii
1-1. Front Panel Controls and Indicators....................................................... 1-3
1-2. Rear Panel Connectors and Voltage Select Switch ................................ 1-5
1-3. Typical CD-ROM Front Panel ................................................................ 1-7
1-4. Removing the Outside Cover................................................................. 1-9
1-5. SecureBOX Microswitch Location (DIGITAL PC 5510 Only)................... 1-11
1-6. Replacing the Outside Cover................................................................. 1-13

Contents
vi
1-7. Attaching the Hasp (Low Profile Computers).......................................... 1-15
1-8. Attaching the Hasp (Short Tower Computers)........................................ 1-16
1-9. Connecting Speakers (Low Profile Computers)...................................... 1-17
1-10. Connecting Speakers (Short Tower Computers).................................... 1-18
1-11. Connecting Headphones ....................................................................... 1-19
1-12. Connecting a Microphone...................................................................... 1-21
1-13. Connecting a Local Printer..................................................................... 1-23
1-14. Connecting a USB Device...................................................................... 1-25
1-15. Windows Enhanced Keyboard ............................................................... 1-26
1-16. Creating a Comfortable Working Environment........................................ 1-29
3-1. Computer Components ......................................................................... 3-3
3-2. Main Logic Board Components.............................................................. 3-5
3-3. Rear Panel Connectors ......................................................................... 3-7
3-4. Main Logic Board Connectors................................................................ 3-8
3-5. Low Profile Backplane Components and Connectors ............................. 3-10
3-6. Short Tower Backplane Components and Connectors ........................... 3-12
3-7. Audio Adapter Card Connectors............................................................ 3-14
3-8. Network Adapter Card Orientation and Installation................................. 3-16
3-9. Removing the Main Logic Board............................................................ 3-19
3-10. Replacing the Battery............................................................................ 3-21
3-11. Removing the Installed Processor.......................................................... 3-23
3-12. Installing a New Processor .................................................................... 3-24
3-13. Installing a VRM.................................................................................... 3-26
4-1. DIMM Socket Locations......................................................................... 4-3
4-2. Installing a DIMM .................................................................................. 4-6
4-3. Video Memory Installation ..................................................................... 4-8
5-1. Expansion Board Slots (Low Profile Computers).................................... 5-3
5-2. Expansion Board Slots (Short Tower Computers).................................. 5-5
5-3. Removing a Metal Filler Plate................................................................ 5-7
5-4. Installing an Expansion Board................................................................ 5-9
5-5. Removing a Metal Filler Plate (AGP Card)............................................. 5-11
5-6. Installing an AGP Card.......................................................................... 5-13
6-1. Storage Device Bay Locations (Low Profile Computers)......................... 6-5
6-2. Installing Drive Rail and 3½-Inch Device Brackets (Low Profile
Computers)......................................................................................... 6-7
6-3. Installing a 3½-Inch Device (Low Profile Computers) ............................. 6-8
6-4. Installing a 5¼-Inch Device (Low Profile Computers) ............................. 6-10
6-5. Diskette Drive Data Cable Connections (Low Profile Computers) ........... 6-12
6-6. IDE Drive Data Cable Connections (Low Profile Computers).................. 6-14

Contents
vii
6-7. Storage Device Bay Locations (Short Tower Computers)....................... 6-16
6-8. Removing the Front Bezel..................................................................... 6-18
6-9. Installing a 3½-Inch Device (Short Tower Computers)............................ 6-20
6-10. Installing 5¼-Inch Device (Short Tower Computers)............................... 6-22
6-11. Accessing the Internal 3½-Inch Device Bay (Short Tower Computers)... 6-24
6-12. Attaching a 3½-Inch Device to the Internal 3½-inch
Device Bay (Short Tower Computers)................................................. 6-25
6-13. Diskette Device Data Cable Connections (Short Tower Computers)....... 6-27
6-14. IDE Device Data Cable Connections (Short Tower Computers).............. 6-28
6-15. SCSI Device Data Cable Connections (Short Tower Computers) ........... 6-32
A-1. Main Logic Board Switch Locations........................................................ A-12

ix
Preface P
Introduction
This guide describes how to operate, configure, and upgrade DIGITAL PC
3500/5510 computers. The information presented will help to familiarize you with all
aspects of your computer and provide a reference tool for questions you might have
in the future.
Related Material
A
Quick Setup
guide is available as a supplement to this
System Reference
guide.
This guide describes how to initially setup your computer.
A
DIGITAL PC Systems Solutions
manual is available to help you troubleshoot your
computer should it fail to operate after initial setup or after installing optional devices.
A
System Software
manual provides information on the operating system, utilities,
and device drivers that came with your computer. Your computer also came with a
CD-ROM disk that can be used to restore your system software. Refer to the CD-
INFO.TXT file on the CD-ROM disk for installation and configuration information.

Preface
x
A
Warranty and Service Information
booklet is supplied with your computer. This
booklet provides warranty information and a listing of phone numbers for technical
support.
README files come with the factory installed software and on the supplied CD-ROM
disk. This information can help you setup, configure, and operate your computer.
DIGITAL recommends that you read this information first.
Windows 95 or Windows NT Workstation documentation is provided as an on-line
help file and in printed form.
Latest Product Information and Updates
You can access product information and download the latest BIOS, device drivers,
and software updates using the Internet at:
http://www.windows.digital.com
DIGITAL PC 3500/5510 Computers
A variety of DIGITAL PC 3500/5510 computers, using two chassis variations, are
discussed in this guide. The following sections provide brief descriptions of your
computer’s features and each chassis version.

Preface
xi
Features
• Available in both the low profile and short tower configurations
• Supports PentiumII processor with MMX Slot 1 configurations
• 512 KB level 2 cache
• Up to 384 MB of computer memory using 128 MB DIMMs (via three DIMM
sockets)
• Integrated Matrox 3D graphics controller with 2 MB of SGRAM (upgradeable
to 6 MB) or a Diamond AGP 4 MB graphics card (upgradeable to 8 MB)
• Integrated 16-bit stereo-quality audio (not available on all models)
• Integrated DIGITAL 21143 10/100Base-TX PCI Ethernet controller (not
available on all models)
Chassis Versions
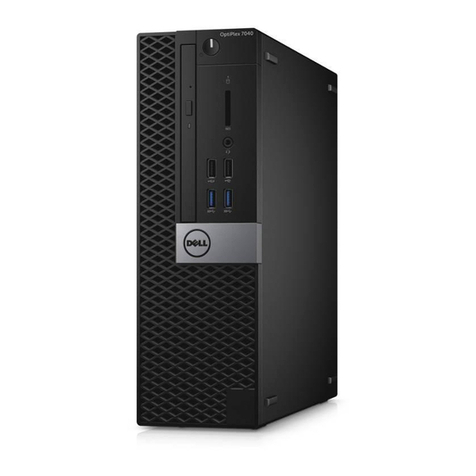
Two chassis versions are available for DIGITAL PC 3500/5510 computers: the low
profile and the short tower as shown in the following two figures. Note that your
monitor, keyboard, and mouse might look different.

Preface
xii
Typical
Low Profile
Computer

Preface
xiii
DEC00746
DEC00746-2
Typical
Short Tower
Computer

Preface
xiv
Audience
This guide is written specifically for anyone responsible for configuring and expanding
a DIGITAL PC 3500/5510 computer.
Organization
This guide contains the following:
• Chapter 1:
Beyond Quick Setup
— This chapter describes your computer’s
front and rear panel components, indicators, and connectors. This chapter
also explains how to physically secure your computer to a desk or table,
connect optional external devices (such as headphones, microphone,
printer, etc.), use your computer’s Windows 95 keyboard, and create a
comfortable working environment.
• Chapter 2:
Using the BIOS Setup Utility
—This chapter provides task-based
information on how to configure your computer using the BIOS Setup utility.
• Chapter 3:
Inside Your Computer
—This chapter provides internal computer
component descriptions and locations as well as how to remove the main
logic board, replace the battery, and upgrade to a higher-performance
processor.
• Chapter 4:
Main Logic Board Expansion
—This chapter explains how to
install additional computer memory and video memory.
• Chapter 5:
Adding Expansion Boards
—This chapter explains how to install
AGP, ISA, and PCI expansion boards.
• Chapter 6:
Adding Mass Storage Devices
—This chapter explains how to
install and connect optional mass storage devices.
• Appendix A:
Technical Specifications
—This appendix lists vital computer
operating and performance specifications. Also included is information
about your computer’s jumper and switch settings.

Preface
xv
• Appendix B:
Device Mapping
—This appendix contains tables listing the
main logic board's memory map, I/O address map, interrupt map, and DMA
map.
• Appendix C:
Video Output Information
—This appendix describes the video
modes supported by your computer’s video circuitry.
Conventions
Convention
Example Description
Quick Setup
Italics are typically used for titles, comments, and references
to other sections of this document or other documents.
c:\windows>
SCU.BAT
Monospaced text indicates information that your computer or
software displays. For example, a directory path or error
message.
Monospaced text can also indicate a command that you need
to enter to run an application or utility.
[Enter] Square brackets surrounding text represents a keyboard key.
[Ctrl]+[Alt]+[Del] A plus sign indicates that the keys shown should be pressed
at the same time.
This manual suits for next models
1
Table of contents
Other DEC Desktop manuals
DEC
DEC VAXmate User manual

DEC
DEC DECpc LPx User manual

DEC
DEC DECstation 316+ User manual
DEC
DEC 3000 800 User manual

DEC
DEC DECstation 5000 Model 100 Series Manual
DEC
DEC StorageWorks TZ8x7 Series Quick guide
DEC
DEC MicroVAX 3100 User manual

DEC
DEC DECpc 433 User manual
DEC
DEC MicroVAX 3100 40 Guide

DEC
DEC Personal DECstation 5000 Manual
DEC
DEC 3000 500 User manual

DEC
DEC Personal DECstation 5000 User manual
DEC
DEC 2000 Quick start guide
DEC
DEC MicroVAX 3100 85 Guide

DEC
DEC VT220 User manual
DEC
DEC 3000 Model 600S User manual
DEC
DEC a-Series Assembly instructions

DEC
DEC VT125 User manual
DEC
DEC 500 - Notebook PC User manual
DEC
DEC MicroVax II 630QB User manual
